Thanks for the updates! I check this thread everyday..enjoy watching the rebuild!No sense rushing it, take your time and do it right. If you cut corners, there is always the chance of it biting you on the butt later.
You are using an out of date browser. It may not display this or other websites correctly.
You should upgrade or use an alternative browser.
You should upgrade or use an alternative browser.
Hydra Mac 8A (Gehl 2500) restoration... or "Oh No... What have I done?"
- Thread starter vinito
- Start date
vinito
Well-known member
- Joined
- Nov 19, 2015
- Messages
- 199
Thanks Brad. It's good to know folks out there have that much interest. And by the way, here's the specific paint information you asked about.Thanks for the updates! I check this thread everyday..enjoy watching the rebuild!
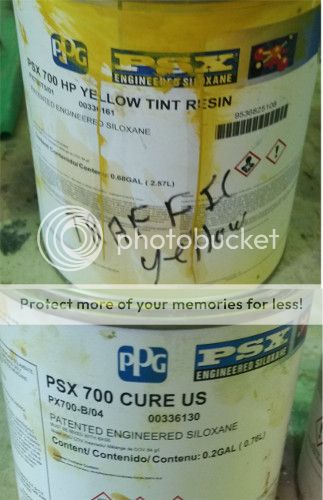
The paint is PPG brand PSX700. It is not nearly as bad (lethal) as some two-part paints out there, but still pretty nasty to inhale. All safety methods recommended should be considered and followed. Outdoors with a respirator might be OK, but if it says to use a space suit with clean, positive pressure breathing air supply, I wouldn't ignore that too lightly.
The two parts:
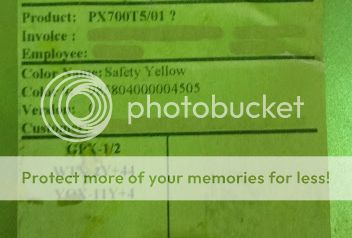
My color mix numbers:
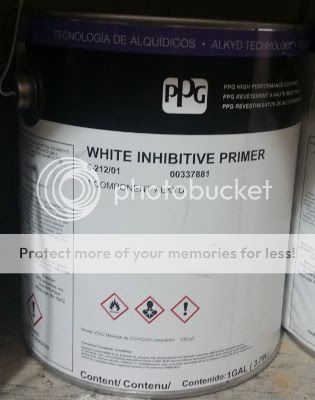
The primer used is pretty good stuff, but not as special and I don't understand why. This stuff makes up for any rust that may still exist apparently. Seems like you'd want that to be as tough as the paint, but I won't argue. In case it's easier to source, Sherwin Williams sells some great alkyd enamels and primer which would also be a good choice for a simpler application. I've used them on machine tools before and it is no slouch either while being less toxic and easier to deal with. Of course we're moving somewhat closer to Tractor Supply and Rustoleum paints, but the SW alkyds are better. You have to order them from their industrial division so I'm not sure how flexible picking colors is going that route. Anyway, here's a pic of the primer:
I'm getting ready to go work on the hydrostats for a bit. Still have to inspect and measure shafts to make sure seal surfaces aren't grooved & leaky. I've sporadically looked them over briefly before and I think they're OK, but today that will be made definitive (or not depending). Also, the control levers were floppy so I'm making new ones so they'll be tight. At this point there is no excuse for cheaping out and leaving any play anywhere in the controls. Might as well find out what it was like when the thing was new.
vinito
Well-known member
- Joined
- Nov 19, 2015
- Messages
- 199
Got a bit done on the hydrostats today. I re-discovered that I need to order a few little pins before I can put them together. While those are being shipped, I can continue on what's left to install the drive, which is only to paint the gearbox case and finish the control levers - not much.Thanks Brad. It's good to know folks out there have that much interest. And by the way, here's the specific paint information you asked about.
The paint is PPG brand PSX700. It is not nearly as bad (lethal) as some two-part paints out there, but still pretty nasty to inhale. All safety methods recommended should be considered and followed. Outdoors with a respirator might be OK, but if it says to use a space suit with clean, positive pressure breathing air supply, I wouldn't ignore that too lightly.
The two parts:
My color mix numbers:
The primer used is pretty good stuff, but not as special and I don't understand why. This stuff makes up for any rust that may still exist apparently. Seems like you'd want that to be as tough as the paint, but I won't argue. In case it's easier to source, Sherwin Williams sells some great alkyd enamels and primer which would also be a good choice for a simpler application. I've used them on machine tools before and it is no slouch either while being less toxic and easier to deal with. Of course we're moving somewhat closer to Tractor Supply and Rustoleum paints, but the SW alkyds are better. You have to order them from their industrial division so I'm not sure how flexible picking colors is going that route. Anyway, here's a pic of the primer:
I'm getting ready to go work on the hydrostats for a bit. Still have to inspect and measure shafts to make sure seal surfaces aren't grooved & leaky. I've sporadically looked them over briefly before and I think they're OK, but today that will be made definitive (or not depending). Also, the control levers were floppy so I'm making new ones so they'll be tight. At this point there is no excuse for cheaping out and leaving any play anywhere in the controls. Might as well find out what it was like when the thing was new.
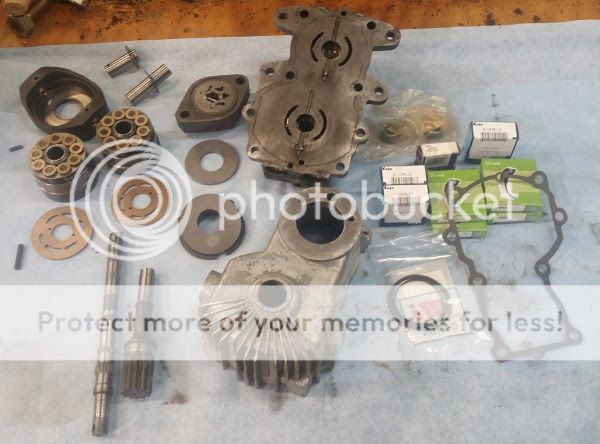
So here's what I'm looking at. Sealing surfaces are stoned flat, shaft seal areas are polished and measured to make sure the size didn't reduce much (less than a half thou is what I got - good). All rust cleaned off and everything rinsed well with solvent, air blast dried off, aerosol oil sprayed on as protective lube, then set in ziploc bags to keep it clean until needed. Until I get the new pins I'll hold off assembling anything because it shouldn't take too long once started since everything is prepped.
Here's the parts minus check & relief valves, and probably other things I can't remember right now:
So regarding paint, you've seen the machine painted above. I'm trying to decide on my secondary color other than black, which will be used here and there as well. Gehl often used a red back in the day and it doesn't look bad. I kind of like it. So I am going to use a red, but having a littke trouble deciding. Anybody want to offer an opinion? Below is an image of the two reds I've narrowed it down to next to the yellow on the machine. These are scans of actual painted samples.

I kind of like the darker one on the left just for something a little different until I hold it up close to the machine, then the brighter one looks slightly better, then I stand back and I like the first one and I keep going back & forth like that. Probably doesn't matter really, but since I'm picking a color you have to wrestle and argue with yourself don't ya?
vinito
Well-known member
- Joined
- Nov 19, 2015
- Messages
- 199
By the way, the red will go on parts such as cylinders, the gear boxes and chain covers inside the cab, wheels, parts of the canopy & roll bar, etc.Got a bit done on the hydrostats today. I re-discovered that I need to order a few little pins before I can put them together. While those are being shipped, I can continue on what's left to install the drive, which is only to paint the gearbox case and finish the control levers - not much.
So here's what I'm looking at. Sealing surfaces are stoned flat, shaft seal areas are polished and measured to make sure the size didn't reduce much (less than a half thou is what I got - good). All rust cleaned off and everything rinsed well with solvent, air blast dried off, aerosol oil sprayed on as protective lube, then set in ziploc bags to keep it clean until needed. Until I get the new pins I'll hold off assembling anything because it shouldn't take too long once started since everything is prepped.
Here's the parts minus check & relief valves, and probably other things I can't remember right now:
So regarding paint, you've seen the machine painted above. I'm trying to decide on my secondary color other than black, which will be used here and there as well. Gehl often used a red back in the day and it doesn't look bad. I kind of like it. So I am going to use a red, but having a littke trouble deciding. Anybody want to offer an opinion? Below is an image of the two reds I've narrowed it down to next to the yellow on the machine. These are scans of actual painted samples.
I kind of like the darker one on the left just for something a little different until I hold it up close to the machine, then the brighter one looks slightly better, then I stand back and I like the first one and I keep going back & forth like that. Probably doesn't matter really, but since I'm picking a color you have to wrestle and argue with yourself don't ya?
Thanks for the details on the paint! As far as using the red- tough choice but my first instinct is the red on the right.Got a bit done on the hydrostats today. I re-discovered that I need to order a few little pins before I can put them together. While those are being shipped, I can continue on what's left to install the drive, which is only to paint the gearbox case and finish the control levers - not much.
So here's what I'm looking at. Sealing surfaces are stoned flat, shaft seal areas are polished and measured to make sure the size didn't reduce much (less than a half thou is what I got - good). All rust cleaned off and everything rinsed well with solvent, air blast dried off, aerosol oil sprayed on as protective lube, then set in ziploc bags to keep it clean until needed. Until I get the new pins I'll hold off assembling anything because it shouldn't take too long once started since everything is prepped.
Here's the parts minus check & relief valves, and probably other things I can't remember right now:
So regarding paint, you've seen the machine painted above. I'm trying to decide on my secondary color other than black, which will be used here and there as well. Gehl often used a red back in the day and it doesn't look bad. I kind of like it. So I am going to use a red, but having a littke trouble deciding. Anybody want to offer an opinion? Below is an image of the two reds I've narrowed it down to next to the yellow on the machine. These are scans of actual painted samples.
I kind of like the darker one on the left just for something a little different until I hold it up close to the machine, then the brighter one looks slightly better, then I stand back and I like the first one and I keep going back & forth like that. Probably doesn't matter really, but since I'm picking a color you have to wrestle and argue with yourself don't ya?
vinito
Well-known member
- Joined
- Nov 19, 2015
- Messages
- 199
Holy Crap !! Something went faster than I expected.Thanks for the details on the paint! As far as using the red- tough choice but my first instinct is the red on the right.
I figured I wouldn't get the chance to put the second hydrostat together until tomorrow or Sunday, but I already got it today! It flew together compared to the first one. This is so cool for two reasons 1) It was one of the first things I took apart... what was it?.. five years ago? February at least, so it's quite a long time on the brain, and 2) now I can install them in the machine so I can finalize the alignment of the motor and alternator and figure out if I'll need to build a riser or not. Building a riser and redoing the alternator mount are the last two "projects" which have to get figured out and done before I can start actually putting it back together.
Regarding the red paint, I think you're right Brad. The dark red is just a little too dark. Having to paint a few things as I go from here is another thing which will slow progress, but only a little.
One thing I'm planning to do once there's enough installed is to re-engineer the hose routings. The original design is functional enough but I remember when I first got it that I saw at least a handful of routings that could have been done neater and better for being out of the way and making things easier to get to. I have a bunch of plumbing fittings in boxes so I think I'll put short nipples in all the ends (it's mostly 3/8" and a couple 1/2" NPT) and put some old leaky garden hose to use by cutting lengths and trial & error it out. That would be a solid way to do & redo over half a day until it's right, draw a cartoon, maybe take some photos, measure and order the new replacements.
vinito
Well-known member
- Joined
- Nov 19, 2015
- Messages
- 199
I picked up a coupe cans of paint today in an effort to find a decent match to my machine now. Rustoleum "Deere Yellow" is just bright yellow as are a couple others. But Ace Hardware has a "Stops Rust" line of spray cans and their Deere Yellow is pretty close. It's not close enough to touch up and not show, but it's close enough to paint smaller parts and you have to look for it to see the difference.Holy Crap !! Something went faster than I expected.
I figured I wouldn't get the chance to put the second hydrostat together until tomorrow or Sunday, but I already got it today! It flew together compared to the first one. This is so cool for two reasons 1) It was one of the first things I took apart... what was it?.. five years ago? February at least, so it's quite a long time on the brain, and 2) now I can install them in the machine so I can finalize the alignment of the motor and alternator and figure out if I'll need to build a riser or not. Building a riser and redoing the alternator mount are the last two "projects" which have to get figured out and done before I can start actually putting it back together.
Regarding the red paint, I think you're right Brad. The dark red is just a little too dark. Having to paint a few things as I go from here is another thing which will slow progress, but only a little.
One thing I'm planning to do once there's enough installed is to re-engineer the hose routings. The original design is functional enough but I remember when I first got it that I saw at least a handful of routings that could have been done neater and better for being out of the way and making things easier to get to. I have a bunch of plumbing fittings in boxes so I think I'll put short nipples in all the ends (it's mostly 3/8" and a couple 1/2" NPT) and put some old leaky garden hose to use by cutting lengths and trial & error it out. That would be a solid way to do & redo over half a day until it's right, draw a cartoon, maybe take some photos, measure and order the new replacements.
Pic is the gear boxes painted with the Ace Hardware "Deere Yellow" paint and in front is a cross bar with the PSX they used to paint my machine with. As you can see, the reflections change the color at different angles of light and the two yellows are close enough to get by. This means I can paint brackets and stuff as needed and they will look OK on the machine.
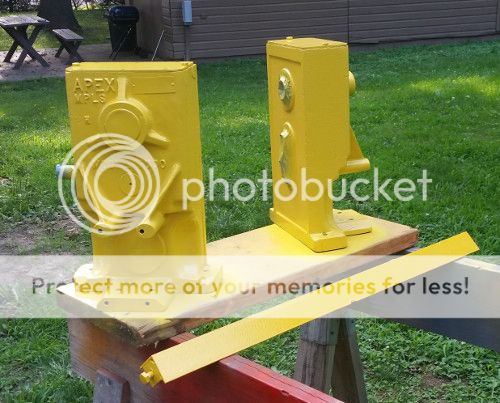
Has a little more of a "gold" look to it in the shade, but I think it will pass for good enough for what it's for.
And oh yea!... The gear boxes are painted and ready to go in with the hydrostats once dry. I keep making slow progress.
Slow and steady, getting there bit at a time. I just hope it works spot on when you first start it up. You haven't left anything to chanceI picked up a coupe cans of paint today in an effort to find a decent match to my machine now. Rustoleum "Deere Yellow" is just bright yellow as are a couple others. But Ace Hardware has a "Stops Rust" line of spray cans and their Deere Yellow is pretty close. It's not close enough to touch up and not show, but it's close enough to paint smaller parts and you have to look for it to see the difference.
Pic is the gear boxes painted with the Ace Hardware "Deere Yellow" paint and in front is a cross bar with the PSX they used to paint my machine with. As you can see, the reflections change the color at different angles of light and the two yellows are close enough to get by. This means I can paint brackets and stuff as needed and they will look OK on the machine.
Has a little more of a "gold" look to it in the shade, but I think it will pass for good enough for what it's for.
And oh yea!... The gear boxes are painted and ready to go in with the hydrostats once dry. I keep making slow progress.
vinito
Well-known member
- Joined
- Nov 19, 2015
- Messages
- 199
Is a nibble smaller than a bit? If so, that's what I'm getting done lately. More family stuff been coming up.Slow and steady, getting there bit at a time. I just hope it works spot on when you first start it up. You haven't left anything to chance
Also, today I was working on the machine and I got interrupted by a guy calling me back about a Craigslist ad I inquired about. long story short, I now have a big window air conditioner installed in the garage. What a relief !! When the guy called, I my clothes were soaked for the second time today (changed into dry stuff once already) so having some AC to take the edge off is so welcome. I got it cheap but it appears to work fine. I almost cried when I walked in there after it was on for a while and it was actually cooler in the shop than it was outside, which was miserably hot & muggy.
So not much of an update yet, but I had to yell it from the rooftops about the AC. The tanks have been thoroughly cleaned out and the covers & fuel sender and new filler hose installed. That allowed me to set the engine roughly in place so I can start shifting things around and figure out placement. I know, broken record. But I'm getting closer... by nibbles. I think I'll install the axles and get some tires on it just so I can roll it around easier. No reason why I shouldn't be able to do that as nothing there interferes with anything. It would really start to look like something again too with it setting on the tires.
Any step forward, no matter how many nibbles, is still a step forward.Is a nibble smaller than a bit? If so, that's what I'm getting done lately. More family stuff been coming up.
Also, today I was working on the machine and I got interrupted by a guy calling me back about a Craigslist ad I inquired about. long story short, I now have a big window air conditioner installed in the garage. What a relief !! When the guy called, I my clothes were soaked for the second time today (changed into dry stuff once already) so having some AC to take the edge off is so welcome. I got it cheap but it appears to work fine. I almost cried when I walked in there after it was on for a while and it was actually cooler in the shop than it was outside, which was miserably hot & muggy.
So not much of an update yet, but I had to yell it from the rooftops about the AC. The tanks have been thoroughly cleaned out and the covers & fuel sender and new filler hose installed. That allowed me to set the engine roughly in place so I can start shifting things around and figure out placement. I know, broken record. But I'm getting closer... by nibbles. I think I'll install the axles and get some tires on it just so I can roll it around easier. No reason why I shouldn't be able to do that as nothing there interferes with anything. It would really start to look like something again too with it setting on the tires.
You big sook! that's what summer is all about, heat and humidy so bad that the air is almost solid, making each breath a struggle. AC sure is nice, the problem is when you go in the cool and dry area, you find any excuse possible to not leave to deal with the elements. We have some pretty good AC at the office, i find every possible excuse to sit in it and soak up the cool air before going out the back into the heat......
Years back when i was younger and dumber, or am i dumber now? anyway, i'd use the few weeks a year i had off from work over christmas which is our summer, stripping and rebuilding a bobcat. The hottest time of the year, you'd be a ball of sweat all day long, the only thing that kept me going was that i had a task to do.
My dad was always there lending me a helping hand, so it did make the work that much easier
vinito
Well-known member
- Joined
- Nov 19, 2015
- Messages
- 199
I finally got some time to touch on the machine again today. Currently working on painting smaller parts before installing. I'd kind of like to put the axles & wheels back on so I can roll it around easier, so I painted the housings & ends of the axles today. Looks like vines growing in the garage today, with parts ripening up nicely:Any step forward, no matter how many nibbles, is still a step forward.
You big sook! that's what summer is all about, heat and humidy so bad that the air is almost solid, making each breath a struggle. AC sure is nice, the problem is when you go in the cool and dry area, you find any excuse possible to not leave to deal with the elements. We have some pretty good AC at the office, i find every possible excuse to sit in it and soak up the cool air before going out the back into the heat......
Years back when i was younger and dumber, or am i dumber now? anyway, i'd use the few weeks a year i had off from work over christmas which is our summer, stripping and rebuilding a bobcat. The hottest time of the year, you'd be a ball of sweat all day long, the only thing that kept me going was that i had a task to do.
My dad was always there lending me a helping hand, so it did make the work that much easierHe took card of the jobs i really didn't want to do, like scraping out all the goo that built up over the years and talking to the right people for the off the shelf parts that were needed at the best possible price.
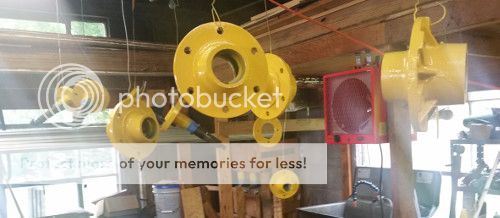
I tried something different that turned out great. I'm just using Rustoleum enamel (farm supply implement enamel will work well too). I bought some yellow, blue, red & black so I could mix it myself and match the color of the other paint. It might be a just slightly non-perfect match, but it turned out pretty darned close which is plenty good. What I ended up with was mostly yellow of course, just a touch of red and another touch of blue. It might not seem like blue would be there looking at it, but after mixing in a little red and holding the sample up to the original, that side-by-side comparison was really pretty easy to see that adding blue would bring it closer.I didn't need the black, but it's handy to have when matching because often it's used to acheive the right hue.
So that's the lesson for today. If you want to match color, don't be afraid and just jump in and give it a shot. Compare the colors side by side at various angles to the light and you should be able to see that some color or another is needed to make a closer match. It should go without saying that only dry paint should be compared as wet paint always changes color (usually if not always darkens) as it dries, but you can kind of "rough it out" to get close and let it dry before fine-tuning.
Another tip is this stuff:
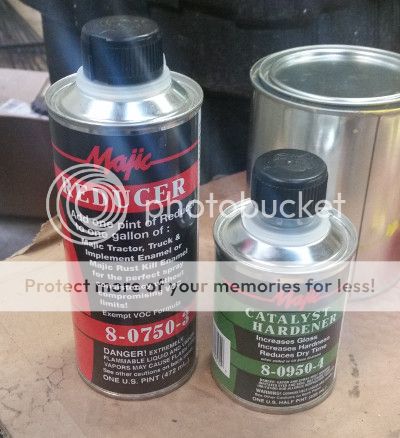
I picked them up from our local Tractor Supply store but you can get it online too. The reducer isn't special really and anything you wish to thin enamels with will be fine, but it was convenient so I used it. The hardener is verry nice though. Unmolested Rustoleum stays tacky for a very long time. I tested the hardener last night and today the paint on the part was not tacky whatsoever and ready to use. It might not make it "totally cured" in one day, but it is a crap-ton better than the Rustoleum is on its own, so I highly recommend it.
And by the way, I bought a gun from Harbor Freight to do this stuff and it works pretty well. It's a small detail gun so the pattern is small, but that's perfect for the little parts I'm doing right now. For a whole machine the small pattern would be frustratingly slow. This gun is a nice bridge between an airbrush and a full-blown spray rig, and it's dirt cheap ($13 USD) (link)
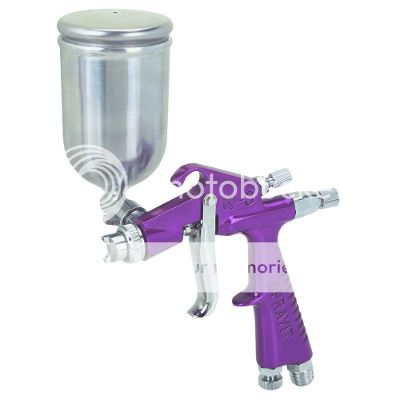
So that's it. I'll be painting a few more parts today and soon I'll be doing that "put stuff together" thing I keep talking about.
vinito
Well-known member
- Joined
- Nov 19, 2015
- Messages
- 199
Here's why I mixed my own paint. I went out the other day and bought a handful of yellow spray cans I thought might work. The one I talked about previously I thought would be OK but when I slipped it in, the difference was pretty obvious. In a way, color is a nitpicky, insignificant thing except that you do notice it and it comes off a little hacky, and after all the work I've been doing I'd rather it be as good as possible within reason.I finally got some time to touch on the machine again today. Currently working on painting smaller parts before installing. I'd kind of like to put the axles & wheels back on so I can roll it around easier, so I painted the housings & ends of the axles today. Looks like vines growing in the garage today, with parts ripening up nicely:
I tried something different that turned out great. I'm just using Rustoleum enamel (farm supply implement enamel will work well too). I bought some yellow, blue, red & black so I could mix it myself and match the color of the other paint. It might be a just slightly non-perfect match, but it turned out pretty darned close which is plenty good. What I ended up with was mostly yellow of course, just a touch of red and another touch of blue. It might not seem like blue would be there looking at it, but after mixing in a little red and holding the sample up to the original, that side-by-side comparison was really pretty easy to see that adding blue would bring it closer.I didn't need the black, but it's handy to have when matching because often it's used to acheive the right hue.
So that's the lesson for today. If you want to match color, don't be afraid and just jump in and give it a shot. Compare the colors side by side at various angles to the light and you should be able to see that some color or another is needed to make a closer match. It should go without saying that only dry paint should be compared as wet paint always changes color (usually if not always darkens) as it dries, but you can kind of "rough it out" to get close and let it dry before fine-tuning.
Another tip is this stuff:
I picked them up from our local Tractor Supply store but you can get it online too. The reducer isn't special really and anything you wish to thin enamels with will be fine, but it was convenient so I used it. The hardener is verry nice though. Unmolested Rustoleum stays tacky for a very long time. I tested the hardener last night and today the paint on the part was not tacky whatsoever and ready to use. It might not make it "totally cured" in one day, but it is a crap-ton better than the Rustoleum is on its own, so I highly recommend it.
And by the way, I bought a gun from Harbor Freight to do this stuff and it works pretty well. It's a small detail gun so the pattern is small, but that's perfect for the little parts I'm doing right now. For a whole machine the small pattern would be frustratingly slow. This gun is a nice bridge between an airbrush and a full-blown spray rig, and it's dirt cheap ($13 USD) (link)
So that's it. I'll be painting a few more parts today and soon I'll be doing that "put stuff together" thing I keep talking about.
So here's a pic of the three colors to show what I'm talking about. Lighting makes a big difference and the real comparison is when it's all in the same snapshot, but the montage does look fairly close to reality. What bugged me is the yellow on the left is quite a bit "whiter" than the machine. "It just don't go". My own mix (the axle housing on the right) is much closer.
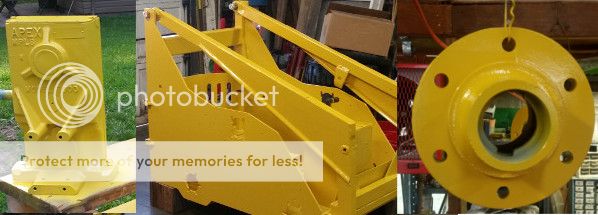
By the way, if anybody gets a wild hair and decides to get that or any other Harbor Freight spray gun, it is imperative that before you ever use it, take it all apart and clean their gunky white lube or sealant or whatever it is off first. It's sticky and hard to clean off so I don't know what it's even there for. I cleaned mine off because it was recommended in reviews, and without doing that first I am certain it wouldn't have functioned very well at all. But now it really works a treat.
In the picture, the one on the left does look a fair bit lighter.Here's why I mixed my own paint. I went out the other day and bought a handful of yellow spray cans I thought might work. The one I talked about previously I thought would be OK but when I slipped it in, the difference was pretty obvious. In a way, color is a nitpicky, insignificant thing except that you do notice it and it comes off a little hacky, and after all the work I've been doing I'd rather it be as good as possible within reason.
So here's a pic of the three colors to show what I'm talking about. Lighting makes a big difference and the real comparison is when it's all in the same snapshot, but the montage does look fairly close to reality. What bugged me is the yellow on the left is quite a bit "whiter" than the machine. "It just don't go". My own mix (the axle housing on the right) is much closer.
By the way, if anybody gets a wild hair and decides to get that or any other Harbor Freight spray gun, it is imperative that before you ever use it, take it all apart and clean their gunky white lube or sealant or whatever it is off first. It's sticky and hard to clean off so I don't know what it's even there for. I cleaned mine off because it was recommended in reviews, and without doing that first I am certain it wouldn't have functioned very well at all. But now it really works a treat.
It's a spray gun, there really should be no lube on it to possibly contaminate the paint it's spraying. I wonder why they would put it on in the first place....
vinito
Well-known member
- Joined
- Nov 19, 2015
- Messages
- 199
Yea, and that photo was outdoors which warmed up the color some. Sitting in the machine, it looked even whiter.In the picture, the one on the left does look a fair bit lighter.
It's a spray gun, there really should be no lube on it to possibly contaminate the paint it's spraying. I wonder why they would put it on in the first place....
That HF spray gun was slathered up good inside with the white gunk. The only thing I can think of for a reason is to survive the salt water on the way over, but there are several things much better suited for that. The trigger felt gummy out of the box and once cleaned it was nice & smooth. Import goofiness.
I started in on the bolts & other hardware to install the axles today - parts cleaner & wire brush. 120 some pieces, so I quickly became curious how much just buying new hardware would be. Less than an hour's pay, so off I went and just bought new stuff. Added benefit is now I won't have to chase threads on top of no more hand cramps from cleaning all that trivial stuff up.
Also been laying fiberglass patches on the chain cover panels. They were beat up and cracked pretty bad, but it's simple body work and doesn't have to be "car quality". I always dread body work because I've done very little and I'm extremely slow at it. I've been putting it off and putting it off as being a pain-in-the-ass job, but flipped and decided to get it over with instead because it's a pain-in-the-ass job. It's all about perspective sometimes I guess.
Well I keep getting closer. Even though it's taking forever, if I keep working on it that means I'll eventually have it running again, right? Kind of a rabbit hole.
vinito
Well-known member
- Joined
- Nov 19, 2015
- Messages
- 199
Aaargh!Yea, and that photo was outdoors which warmed up the color some. Sitting in the machine, it looked even whiter.
That HF spray gun was slathered up good inside with the white gunk. The only thing I can think of for a reason is to survive the salt water on the way over, but there are several things much better suited for that. The trigger felt gummy out of the box and once cleaned it was nice & smooth. Import goofiness.
I started in on the bolts & other hardware to install the axles today - parts cleaner & wire brush. 120 some pieces, so I quickly became curious how much just buying new hardware would be. Less than an hour's pay, so off I went and just bought new stuff. Added benefit is now I won't have to chase threads on top of no more hand cramps from cleaning all that trivial stuff up.
Also been laying fiberglass patches on the chain cover panels. They were beat up and cracked pretty bad, but it's simple body work and doesn't have to be "car quality". I always dread body work because I've done very little and I'm extremely slow at it. I've been putting it off and putting it off as being a pain-in-the-ass job, but flipped and decided to get it over with instead because it's a pain-in-the-ass job. It's all about perspective sometimes I guess.
Well I keep getting closer. Even though it's taking forever, if I keep working on it that means I'll eventually have it running again, right? Kind of a rabbit hole.
At least there's a lot of weekend left. I lose part of today since I just got a call to help run family errands... again. Happens every single day and always right in the middle of the "free" part of the day and always at the last minute. But that's not the frustrating thing.
I was working on it for just a little while today and discovered several things that don't line up right and require machining some spacers and such to make right. Just didn't count on that. Then I realized that the solitary thing I thought I could get by without rebuilding does in fact need it, so have to order more bearings and o-rings and do that before I get too far. Then I went and bought the bolts I needed to install the new engine riser but the holes for the engine mount are smaller than specified, so have to go back and get different hardware along with a half dozen other pieces that weren't right the first time. I could add a few more new negative discoveries but you get the idea. I'm either going to start throwing things, crying, or walking away for a couple days but none of those seem like constructive answers, so I'll probably just continue to beat my head against this dang thing and see if something good happens instead. Of course even that has to wait until after I get done doing favors which seem easy enough that several other people could have been called on before me, but oh well.
Long story longer, it suddenly became obvious that there are still a ton of things to do toward getting this dang thing back together correctly. I guess I'm just sick of it and would prefer to spend my time on other things that also need doing badly.
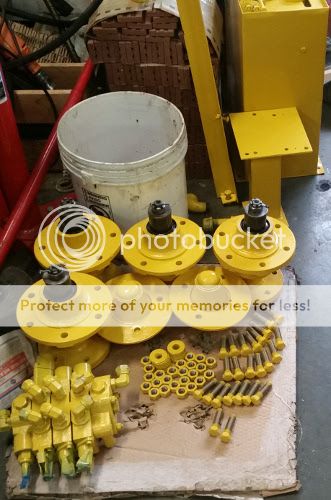
So now that I've sighed heavily, here's a picture from a few days ago of several painted bits. Been painting a bunch of small stuff in preparation for assembly and at least I'm making progress there. Quite a few other things painted since this photo but no picture taken.
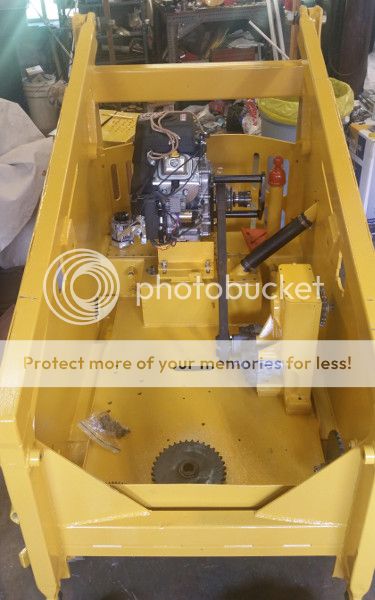
And here's a quick, fuzzy, underexposed one of the tub with the engine loosely bolted in on the new riser. At least that appears to have been made properly and should work out fine:
Note the decent color match of the gearbox with a coat of my own mix on it. At least that's working out.
Don't get too upset with the set backs you are having, you'll get through it.Aaargh!
At least there's a lot of weekend left. I lose part of today since I just got a call to help run family errands... again. Happens every single day and always right in the middle of the "free" part of the day and always at the last minute. But that's not the frustrating thing.
I was working on it for just a little while today and discovered several things that don't line up right and require machining some spacers and such to make right. Just didn't count on that. Then I realized that the solitary thing I thought I could get by without rebuilding does in fact need it, so have to order more bearings and o-rings and do that before I get too far. Then I went and bought the bolts I needed to install the new engine riser but the holes for the engine mount are smaller than specified, so have to go back and get different hardware along with a half dozen other pieces that weren't right the first time. I could add a few more new negative discoveries but you get the idea. I'm either going to start throwing things, crying, or walking away for a couple days but none of those seem like constructive answers, so I'll probably just continue to beat my head against this dang thing and see if something good happens instead. Of course even that has to wait until after I get done doing favors which seem easy enough that several other people could have been called on before me, but oh well.
Long story longer, it suddenly became obvious that there are still a ton of things to do toward getting this dang thing back together correctly. I guess I'm just sick of it and would prefer to spend my time on other things that also need doing badly.
So now that I've sighed heavily, here's a picture from a few days ago of several painted bits. Been painting a bunch of small stuff in preparation for assembly and at least I'm making progress there. Quite a few other things painted since this photo but no picture taken.
And here's a quick, fuzzy, underexposed one of the tub with the engine loosely bolted in on the new riser. At least that appears to have been made properly and should work out fine:
Note the decent color match of the gearbox with a coat of my own mix on it. At least that's working out.
I know the feeling of having your free time eaten up doing other things. I make plans, but when you get into it, other things come up or the plans you made just refuse to work as they should. I just keep going round in circles, making little to no progress.
The times i may progress is when i'm trying to go to sleep and my brain is working away, preventing me from getting much needed sleep....
vinito
Well-known member
- Joined
- Nov 19, 2015
- Messages
- 199
OK. I hauled the gearboxes into the shop and took them apart today so I could order bearings, seals & o-rings. They'll be in tomorrow, so that's good.Don't get too upset with the set backs you are having, you'll get through it.
I know the feeling of having your free time eaten up doing other things. I make plans, but when you get into it, other things come up or the plans you made just refuse to work as they should. I just keep going round in circles, making little to no progress.
The times i may progress is when i'm trying to go to sleep and my brain is working away, preventing me from getting much needed sleep....
Measured all the axle-to-cotter pin distances and figured out the spacers needed so I can get those made and installed. Over the years stuff has been done I guess and all four were slightly different, so I got that done too and I think I'll put the axles in permanently tonight. Woohoo!
Also measured to figure out the alternator bracket change and didn't figure I'd do much on that today, but I'm almost finished with that too. Less than an hour's work remaining and the alternator ought to be good to go as well. Woot!
The chain covers are all patched up and painted, so they are finished too. Yaaay!
The wheels are going to be painted red so I thought I'd start prepping them for that tonight and if I get far enough with it, then I'll lay on a first coat of that. For whatever reason I have been avoiding this and I know that doesn't make any sense. But I know it won't take all that long and will be good to have those completed too, if for no other reason that I can install them and roll it around and it will just look cool sitting on tires.
So tonight it's axles and wheels. Still lots of small odd & ends - the lost seems to just keep going and going. But I'm trying to check them off. I'm tempted to say it's getting closer, but every time I think that I realize another big chunk o' somethin' else it needs.
Things are looking good! Hope you stay motivated enough to finish and post right up to the end... I will be blasting and spraying mine this fall..As much as I'd like to do a full on resto on my 4625SX..I am afraid it would be way too much to take on. I admire your dedication to,this project!OK. I hauled the gearboxes into the shop and took them apart today so I could order bearings, seals & o-rings. They'll be in tomorrow, so that's good.
Measured all the axle-to-cotter pin distances and figured out the spacers needed so I can get those made and installed. Over the years stuff has been done I guess and all four were slightly different, so I got that done too and I think I'll put the axles in permanently tonight. Woohoo!
Also measured to figure out the alternator bracket change and didn't figure I'd do much on that today, but I'm almost finished with that too. Less than an hour's work remaining and the alternator ought to be good to go as well. Woot!
The chain covers are all patched up and painted, so they are finished too. Yaaay!
The wheels are going to be painted red so I thought I'd start prepping them for that tonight and if I get far enough with it, then I'll lay on a first coat of that. For whatever reason I have been avoiding this and I know that doesn't make any sense. But I know it won't take all that long and will be good to have those completed too, if for no other reason that I can install them and roll it around and it will just look cool sitting on tires.
So tonight it's axles and wheels. Still lots of small odd & ends - the lost seems to just keep going and going. But I'm trying to check them off. I'm tempted to say it's getting closer, but every time I think that I realize another big chunk o' somethin' else it needs.
Having the wheels back on makes it look like you are so much further, also the fact you can roll it around is a great help (not that it's easy to turn).Things are looking good! Hope you stay motivated enough to finish and post right up to the end... I will be blasting and spraying mine this fall..As much as I'd like to do a full on resto on my 4625SX..I am afraid it would be way too much to take on. I admire your dedication to,this project!
Thankfully all the machines i have had in pieces for painting were just gigsaws to put back together, no need to fabricate things. The more bits you get back in the more excited you get. THen when you get to the end, you hope it's all correct at startup.
vinito
Well-known member
- Joined
- Nov 19, 2015
- Messages
- 199
Wheels-on does look pretty cool. I punted the paint down the road though figuring it won't take long to do, I can do one at a time if I wish, and shortens the path to a functioning machine. So wheels are white, but installed and rolling. It's inspiring.Having the wheels back on makes it look like you are so much further, also the fact you can roll it around is a great help (not that it's easy to turn).
Thankfully all the machines i have had in pieces for painting were just gigsaws to put back together, no need to fabricate things. The more bits you get back in the more excited you get. THen when you get to the end, you hope it's all correct at startup.
Today I finished the alternator mount. I'll post a picture once I get one. This means I can now install the motor, alternator and hydraulic pump permanently. More permanent assembly!!
Gear box rebuild kits arrived today so I hope to have those finished tomorrow. If so, then they can also be installed though I'll have to leave it a little wiggly so once the hydrostats are installed I can line up the shafts right, which might take a little shifting of the gearboxes.
"THen when you get to the end, you hope it's all correct at startup." ... yea well I'm kind of counting on it not being right on that day just because of the way things have been going. But I've also been trying to be super diligent and pay attention so whatever may be wrong is likely to be fairly minor. I'd like to be optimistic about everything working right off the top, and I guess I am a little bit, but there sure is a lot of things that need to be right. I can say that one thing I hope to have right from the start is simply to have no leaks. That would be fantastic. I may have just jinxed myself there though, hehe.
Similar threads
- Replies
- 3
- Views
- 412
- Replies
- 0
- Views
- 254
