Hydra Mac 8A (Gehl 2500) restoration... or "Oh No... What have I done?"

Help Support SkidSteer Forum:

OP
OP
vinito

vinito

Well-known member
Joined
Nov 19, 2015
Messages
199
Wheels-on does look pretty cool. I punted the paint down the road though figuring it won't take long to do, I can do one at a time if I wish, and shortens the path to a functioning machine. So wheels are white, but installed and rolling. It's inspiring.
Today I finished the alternator mount. I'll post a picture once I get one. This means I can now install the motor, alternator and hydraulic pump permanently. More permanent assembly!!
Gear box rebuild kits arrived today so I hope to have those finished tomorrow. If so, then they can also be installed though I'll have to leave it a little wiggly so once the hydrostats are installed I can line up the shafts right, which might take a little shifting of the gearboxes.
"THen when you get to the end, you hope it's all correct at startup." ... yea well I'm kind of counting on it not being right on that day just because of the way things have been going. But I've also been trying to be super diligent and pay attention so whatever may be wrong is likely to be fairly minor. I'd like to be optimistic about everything working right off the top, and I guess I am a little bit, but there sure is a lot of things that need to be right. I can say that one thing I hope to have right from the start is simply to have no leaks. That would be fantastic. I may have just jinxed myself there though, hehe.
By the way, when I start this thing up the first time, it will be blocked up so the tires are off the ground. Seems safer and prudent in case something goes goofy.
Well I have a couple pics. First is the bracket installed without the alternator blocking the view of how it's made. Starting from scratch I probably would have designed it different, but I had a few parts already and was able to just alter and shift them around a little to make it work.
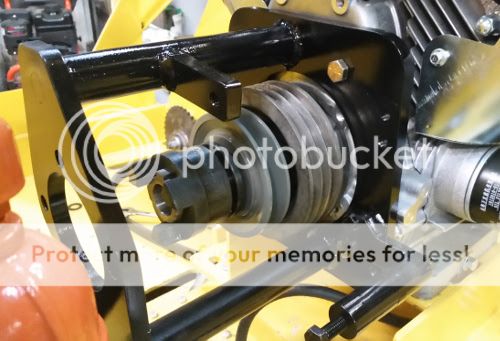
 photo bk no.jpg
Here is the alternator installed. I tried to wiggle it around and I tell ya, it's solid as a rock.
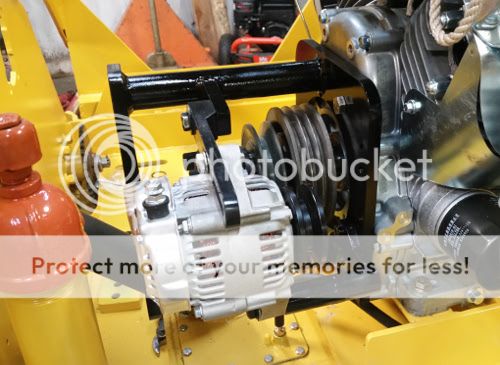
 photo bk alt.jpg
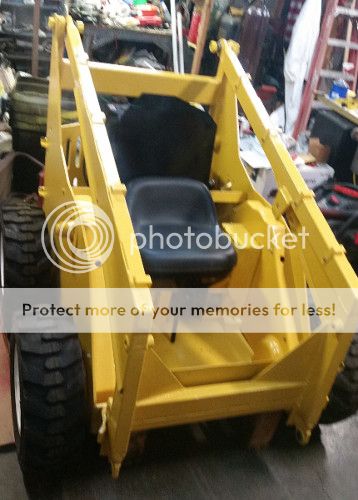
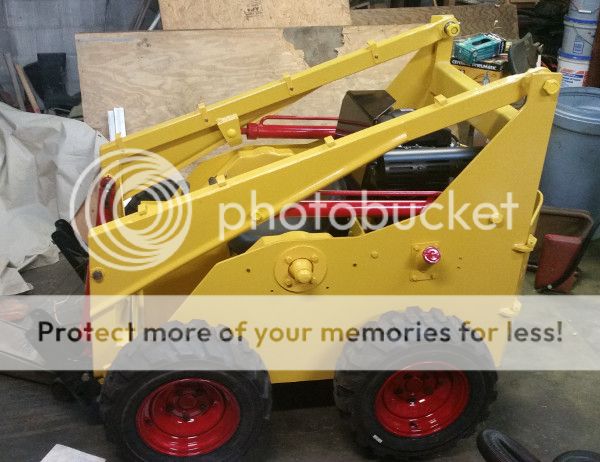
And just for fun, here's a peek at the machine with the wheels on. Holy cow! It's kinda starting to look like a machine - or a dune buggy er sumthin' anyway.
 
OP
OP
vinito

vinito

Well-known member
Joined
Nov 19, 2015
Messages
199
By the way, when I start this thing up the first time, it will be blocked up so the tires are off the ground. Seems safer and prudent in case something goes goofy.
Well I have a couple pics. First is the bracket installed without the alternator blocking the view of how it's made. Starting from scratch I probably would have designed it different, but I had a few parts already and was able to just alter and shift them around a little to make it work.

Here is the alternator installed. I tried to wiggle it around and I tell ya, it's solid as a rock.

And just for fun, here's a peek at the machine with the wheels on. Holy cow! It's kinda starting to look like a machine - or a dune buggy er sumthin' anyway.
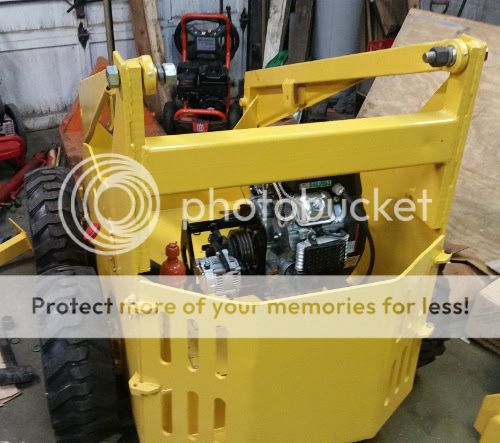
Oops, here's the pic.
 photo tr on.jpg
 
OP
OP
vinito

vinito

Well-known member
Joined
Nov 19, 2015
Messages
199
Oops, here's the pic.
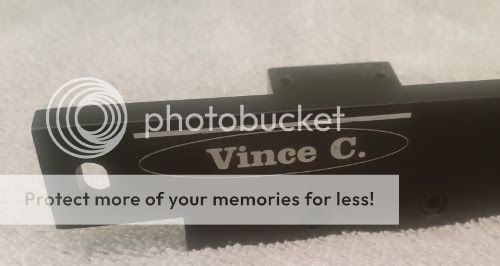
Some progress to report but I have a pleasant little detour this weekend. I took a chance and bought a cheap Chinese laser engraver/cutter this week and I'm playing with it a little today. They have come down below $300 on eBay for a 40W Co2 machine and as such, they have become extremely popular. Some folks have bad experiences with them but there are a ton of retrofits and upgrades you can do to them for small $$ too, so I figured even if it was problematic, I could make it work eventually. I've built a couple small CNC machines and a 3D printer before so I'm schooled up on that stuff if need be. But out of the box, this one appears to be fairly good already !! Only tried cutting through paper and a little engraving on various materials, so not much of a hard test yet. But one really cool thing (I think) to do with these is engraving anodized aluminum. It leaves crisp, white marks so on dark colors it just looks great.
 photo alum1.jpg
That was just a first attempt experiment on some scrap anodized I had in a box.
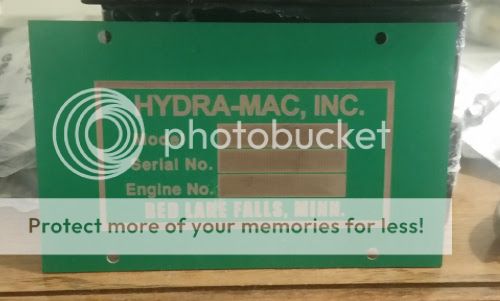
I did this on a PCB scrap I had which has a green mask on it. It worked similar. So as you can see, I'll be able to make a clean new ID tag for the machine! The original is beat up, gouged and ripped but I was able to scan and redo it. I obviously wouldn't worry about it if I didn't have the stuff already for other reasons, but I think this will be a nice little touch for the machine. I'll show the "real" new tag once it's done.
 photo TagPcb.jpg
Kinda fun.
 

Tazza

Moderator
Staff member
Joined
Dec 7, 2004
Messages
16,834
Some progress to report but I have a pleasant little detour this weekend. I took a chance and bought a cheap Chinese laser engraver/cutter this week and I'm playing with it a little today. They have come down below $300 on eBay for a 40W Co2 machine and as such, they have become extremely popular. Some folks have bad experiences with them but there are a ton of retrofits and upgrades you can do to them for small $$ too, so I figured even if it was problematic, I could make it work eventually. I've built a couple small CNC machines and a 3D printer before so I'm schooled up on that stuff if need be. But out of the box, this one appears to be fairly good already !! Only tried cutting through paper and a little engraving on various materials, so not much of a hard test yet. But one really cool thing (I think) to do with these is engraving anodized aluminum. It leaves crisp, white marks so on dark colors it just looks great.

That was just a first attempt experiment on some scrap anodized I had in a box.
I did this on a PCB scrap I had which has a green mask on it. It worked similar. So as you can see, I'll be able to make a clean new ID tag for the machine! The original is beat up, gouged and ripped but I was able to scan and redo it. I obviously wouldn't worry about it if I didn't have the stuff already for other reasons, but I think this will be a nice little touch for the machine. I'll show the "real" new tag once it's done.

Kinda fun.
Oh, i do like the laser engraver, i may need to have a look at ebay to see more details :)
 
OP
OP
vinito

vinito

Well-known member
Joined
Nov 19, 2015
Messages
199
Oh, i do like the laser engraver, i may need to have a look at ebay to see more details :)
Yea the engraver is a pretty cool toy. It's cheap quality and there are wrinkles, but lots of info about them on the interwebs. I did a fair bit of research before pulling the trigger and I keep learning about more options and such. If you want some conversation about it I could offer what I know, but it should be private or at least on a different heading. I'm really new and green to it but I can probably give you a couple stories anyway.
I returned attention to the skidsteer yesterday. Today I've got both gear boxes (final drives?) rebuilt with new bearings & rubber. I had to machine two new seal rings (steel collar which slides over the shaft and the lip seal is in contact with) and adapted them to accept a little internal o-ring to help insure no leaking. Other than that and cutting new rubber gaskets for the lids, it was just replacing with bought bearings, seals & o-rings... and a lot of cleaning. I'm glad I rebuilt them as they were still gucky inside and they would both certainly have leaked which would have sucked. Also, the bearings on one of the shafts was in pretty bad shape so I'm glad to replace all of them.
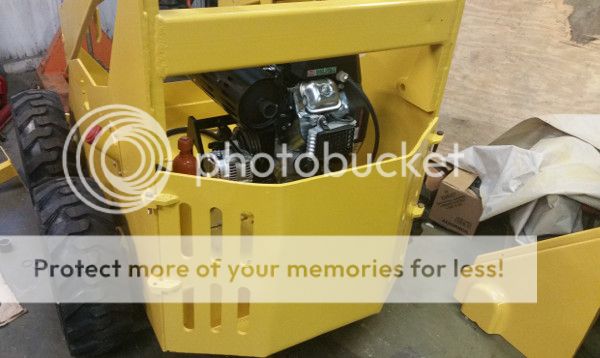
And finally got the muffler flipped around. The stock muffler on the Harbor Freight V-twin Predator pointed the wrong way for this machine, and probably most others too I would guess. Too bad they don't make it able to be flipped, which would be a fairly trivial design change. I had to clamp the flanges to a plate to hold them in position, cut the pipes and two strap clamps, flip the muffler and weld the pipes back on (with some couple collars I machines), make two new strap clamps and re-paint it with high-heat black. Pain in the a$$ job but it's done now. I can probably leave it as-is and it will certainly function fine, but I might add a tailpipe extension someday.
Here it is. Looks pretty underwhelming for as much hassle as it was. Kinda looks just like a Predator engine except the muffler points to the right instead of the left. Woop-tee-doo. Glad it's done though.
 photo muff.jpg
 

Tazza

Moderator
Staff member
Joined
Dec 7, 2004
Messages
16,834
Yea the engraver is a pretty cool toy. It's cheap quality and there are wrinkles, but lots of info about them on the interwebs. I did a fair bit of research before pulling the trigger and I keep learning about more options and such. If you want some conversation about it I could offer what I know, but it should be private or at least on a different heading. I'm really new and green to it but I can probably give you a couple stories anyway.
I returned attention to the skidsteer yesterday. Today I've got both gear boxes (final drives?) rebuilt with new bearings & rubber. I had to machine two new seal rings (steel collar which slides over the shaft and the lip seal is in contact with) and adapted them to accept a little internal o-ring to help insure no leaking. Other than that and cutting new rubber gaskets for the lids, it was just replacing with bought bearings, seals & o-rings... and a lot of cleaning. I'm glad I rebuilt them as they were still gucky inside and they would both certainly have leaked which would have sucked. Also, the bearings on one of the shafts was in pretty bad shape so I'm glad to replace all of them.
And finally got the muffler flipped around. The stock muffler on the Harbor Freight V-twin Predator pointed the wrong way for this machine, and probably most others too I would guess. Too bad they don't make it able to be flipped, which would be a fairly trivial design change. I had to clamp the flanges to a plate to hold them in position, cut the pipes and two strap clamps, flip the muffler and weld the pipes back on (with some couple collars I machines), make two new strap clamps and re-paint it with high-heat black. Pain in the a$$ job but it's done now. I can probably leave it as-is and it will certainly function fine, but I might add a tailpipe extension someday.
Here it is. Looks pretty underwhelming for as much hassle as it was. Kinda looks just like a Predator engine except the muffler points to the right instead of the left. Woop-tee-doo. Glad it's done though.
Good thing you did the gear boxes, best not to leave anything to chance and leak later requiring it to be pulled again.
Looks good, nice and shiny!
 
OP
OP
vinito

vinito

Well-known member
Joined
Nov 19, 2015
Messages
199
Good thing you did the gear boxes, best not to leave anything to chance and leak later requiring it to be pulled again.
Looks good, nice and shiny!
I've been working on it whenever I find a minute. I'm starting to see the light at the end of the tunnel !! But I've caused myself a little problem. Everything is so dang clean and shiny now that an old rusty bolt sticks out like a sore thumb, so I feel the need to clean and paint all of them which is taking a bit of time with the waiting to dry and all. But I think it's worth it.
Here's the last batch of stuff I've painted. It's everywhere.
 photo Paint5.jpg
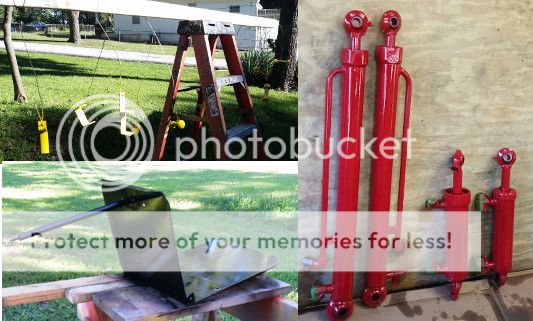
So I'm down to the last few steps guys. The cylinders can be installed now. I have to take the hydrostats back off and haul them to work so I can check the charge pump pressure & adjust as necessary. That's not a big deal - it's pretty easy to slip them back out at this point. Then I can install them for permanent. Once they are in I can put the valve in, and once that's in I can measure carefully and figure out a good routing for the new hoses. I need a seat but I've picked out the one I'm getting and it's just a matter of ordering it with the hoses.
There's a little wiring to deal with. Hook up the alternator and lengthen some of the start switch wires and such.
So is that about it? I'm not there yet, but I feel like I'm getting to the point where I can fill up the tanks and start it up soon.
 photo tub2.jpg
 

Tazza

Moderator
Staff member
Joined
Dec 7, 2004
Messages
16,834
I've been working on it whenever I find a minute. I'm starting to see the light at the end of the tunnel !! But I've caused myself a little problem. Everything is so dang clean and shiny now that an old rusty bolt sticks out like a sore thumb, so I feel the need to clean and paint all of them which is taking a bit of time with the waiting to dry and all. But I think it's worth it.
Here's the last batch of stuff I've painted. It's everywhere.

So I'm down to the last few steps guys. The cylinders can be installed now. I have to take the hydrostats back off and haul them to work so I can check the charge pump pressure & adjust as necessary. That's not a big deal - it's pretty easy to slip them back out at this point. Then I can install them for permanent. Once they are in I can put the valve in, and once that's in I can measure carefully and figure out a good routing for the new hoses. I need a seat but I've picked out the one I'm getting and it's just a matter of ordering it with the hoses.
There's a little wiring to deal with. Hook up the alternator and lengthen some of the start switch wires and such.
So is that about it? I'm not there yet, but I feel like I'm getting to the point where I can fill up the tanks and start it up soon.
Bolts sure do slow things down, the part i don't like is the fact you scratch paint off when you install them too :( But what can you do, short of getting new or plating the old ones?
 
OP
OP
vinito

vinito

Well-known member
Joined
Nov 19, 2015
Messages
199
Bolts sure do slow things down, the part i don't like is the fact you scratch paint off when you install them too :( But what can you do, short of getting new or plating the old ones?
I've been tied up for a couple weeks straight. Family in the hospital, but back out and doing OK. This happens a lot for me.
So I still haven't had the chance to set the charge pump pressure on the hydrostats yet, but I got a couple other things done and installed. Still a few bolts to work out & paint, but they are all on the "outside" of the machine and easy to reach, so I can paint those later on a whim if I don't get it done before I can get it running. Kinda chomping at the bit to finish the charge pump pressure thing because that's the last fiddly little bit to deal with and keeping me from just assembling. Tomorrow is a holiday and I'm pretty sure I'll be able to take care of that, but then again stuff always seems to come up so I'll believe it once I'm actually done with it.
In the meantime, here are a couple pics to satisfy the curious:
 photo redw1.jpg
 photo redw2.jpg
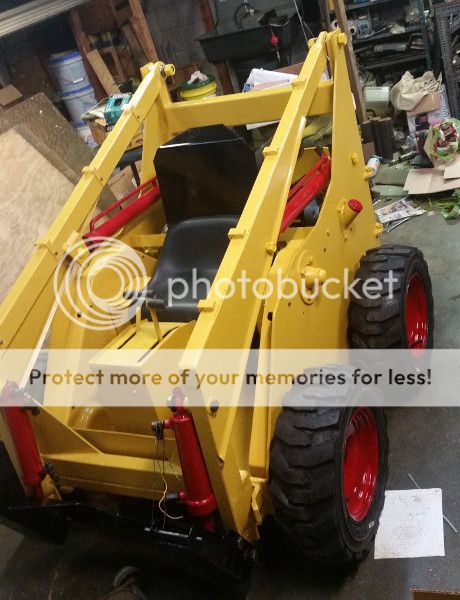
Yea I finally did paint the wheels after all.
Boy, that garage sure has become a mess.... again.
 

Tazza

Moderator
Staff member
Joined
Dec 7, 2004
Messages
16,834
I've been tied up for a couple weeks straight. Family in the hospital, but back out and doing OK. This happens a lot for me.
So I still haven't had the chance to set the charge pump pressure on the hydrostats yet, but I got a couple other things done and installed. Still a few bolts to work out & paint, but they are all on the "outside" of the machine and easy to reach, so I can paint those later on a whim if I don't get it done before I can get it running. Kinda chomping at the bit to finish the charge pump pressure thing because that's the last fiddly little bit to deal with and keeping me from just assembling. Tomorrow is a holiday and I'm pretty sure I'll be able to take care of that, but then again stuff always seems to come up so I'll believe it once I'm actually done with it.
In the meantime, here are a couple pics to satisfy the curious:


Yea I finally did paint the wheels after all.
Boy, that garage sure has become a mess.... again.
Het it running already! i want to see how it all turned out :)
So very close now, looks great.
How are you going to adjust the charge pressure? you need to get it going then adjust a screw? On the machines i have fiddled with, it was all done with shims. Factory set, normally you don't need to change a thing.
 
OP
OP
vinito

vinito

Well-known member
Joined
Nov 19, 2015
Messages
199
Het it running already! i want to see how it all turned out :)
So very close now, looks great.
How are you going to adjust the charge pressure? you need to get it going then adjust a screw? On the machines i have fiddled with, it was all done with shims. Factory set, normally you don't need to change a thing.
Yea me too. I can't possibly relate how much I just want this thing to be done and running. It's no longer a matter of the fun I'll have using it as much as I just want it to be over now.
But you are correct, I am getting very close.
Regarding the charge pump pressure, technically I'm starting by just checking them. But I had to re-machine the seat on one of them to fix erosion and the other one has been tampered with as it had some plastic "shims" hacked into it, presumably by some previous owner to compensate for something. So though I'm hoping I don't have to alter things much, I anticipate having to fiddle with both of them. Anyways, I have the specs for what the pressure is supposed to be at the proper port - there's a handy plug right there to connect the gauge. What I will be doing is clamping it to the table of a big drill press (5hp motor) via some angle iron extending off to the side, feeding fluid via a hose from the bucket and letting it flow through and back into the bucket underneath it all. I'll be driving the shaft via a simple rod thing clamped in the drill chuck. This allows both easy access to the valve in the likely event I need to remove it to add shims or whatever, as well as avoid getting fluid all over the (so far) clean floor of the machine. Basically it's just a simple setup and much easier to deal with in case I have to take the valve in & out several times to set the pressure right.
I'll take a picture.
 
OP
OP
vinito

vinito

Well-known member
Joined
Nov 19, 2015
Messages
199
Yea me too. I can't possibly relate how much I just want this thing to be done and running. It's no longer a matter of the fun I'll have using it as much as I just want it to be over now.
But you are correct, I am getting very close.
Regarding the charge pump pressure, technically I'm starting by just checking them. But I had to re-machine the seat on one of them to fix erosion and the other one has been tampered with as it had some plastic "shims" hacked into it, presumably by some previous owner to compensate for something. So though I'm hoping I don't have to alter things much, I anticipate having to fiddle with both of them. Anyways, I have the specs for what the pressure is supposed to be at the proper port - there's a handy plug right there to connect the gauge. What I will be doing is clamping it to the table of a big drill press (5hp motor) via some angle iron extending off to the side, feeding fluid via a hose from the bucket and letting it flow through and back into the bucket underneath it all. I'll be driving the shaft via a simple rod thing clamped in the drill chuck. This allows both easy access to the valve in the likely event I need to remove it to add shims or whatever, as well as avoid getting fluid all over the (so far) clean floor of the machine. Basically it's just a simple setup and much easier to deal with in case I have to take the valve in & out several times to set the pressure right.
I'll take a picture.
I wasn't clear, but yes, to adjust I'll have to add shims to increase pressure or possibly make new springs depending on how that goes. I am set up to make springs and have stock of various wire gauges to pick from. It's not difficult to make good springs if you have a lathe. In fact, here's a neat and entertaining video on how to make them in case you want to see how it can be done without specialized equipment:
https://www.youtube.com/watch?v=jAawhg6JtyY
The author has made several funny and informative videos and the spring one kinda does a parody of "How It's Made", including the goofy puns.
 

Tazza

Moderator
Staff member
Joined
Dec 7, 2004
Messages
16,834
I wasn't clear, but yes, to adjust I'll have to add shims to increase pressure or possibly make new springs depending on how that goes. I am set up to make springs and have stock of various wire gauges to pick from. It's not difficult to make good springs if you have a lathe. In fact, here's a neat and entertaining video on how to make them in case you want to see how it can be done without specialized equipment:
https://www.youtube.com/watch?v=jAawhg6JtyY
The author has made several funny and informative videos and the spring one kinda does a parody of "How It's Made", including the goofy puns.
Now it makes sense as to why you need to check/adjust the pressure. You have thought it through very well.
Now, to watch the spring video!
 
OP
OP
vinito

vinito

Well-known member
Joined
Nov 19, 2015
Messages
199
Now it makes sense as to why you need to check/adjust the pressure. You have thought it through very well.
Now, to watch the spring video!
Wow! I finallllllly got the hydrostats done. And to think this all started because I just wanted to fix the hydrostats in the first place. Then comes today and it's about the last thing I finished in the effort to rebuild the whole dang machine.
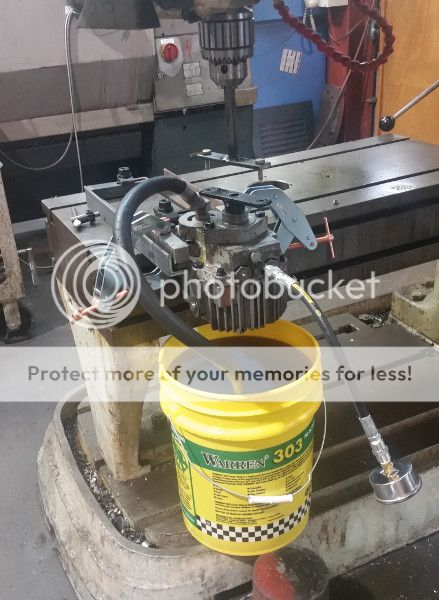
Here's a pic of the setup:
 photo 20160907_154354.jpg
Fluid fed into the hydro via the hose, which is easy to prime set up this way. I'm not sure how easy that's going to be in the machine and I don't have any great ideas to do that, but I'll try to figure something out. But I digress. The fluid just comes out the output shaft area which in the machine will flow into the gearbox to lube it then flow back to the tank. With this setup it just runs out and dripa back into the bucket o' juice. You can see the gauge sticking out there and the charge pump relief valve is the hex head just above and left of where the gauge hose is screwed into the hydro, so dead easy to access. You can see the little T-shaped thing I made to chuck in the drill press to spin the input shafts, but not yet bolted to the hydro. The setup was simple and it worked really well. All you need to copy my method is a 2 ton drill press to run the show
emotion-1.gif

I had to add shims in both and they are set to about 100lb (about all I could get) and the specs wanted between 70 and 150 lbs., so that's OK. I didn't need to make any springs. Also, I apparently had assembled one incorrectly and had to flip it around to function properly with the appropriate input shaft rotation. I don't know what happened there as I was pretty careful putting things together, and if I had to do it today before using this setup I still would have put it together the same way, but whatever. It seems to work well. I'm glad to discover and fix this before it went into the machine.
One thing I noticed is that they are extremely quiet even at full speed compared to what it was before, but of course there was zero load on it so that is probably not going to be so different once it's actually pushing the machine around. We'll see.
Well that's about it for today. Woohoo! though.
 

Tazza

Moderator
Staff member
Joined
Dec 7, 2004
Messages
16,834
Wow! I finallllllly got the hydrostats done. And to think this all started because I just wanted to fix the hydrostats in the first place. Then comes today and it's about the last thing I finished in the effort to rebuild the whole dang machine.
Here's a pic of the setup:

Fluid fed into the hydro via the hose, which is easy to prime set up this way. I'm not sure how easy that's going to be in the machine and I don't have any great ideas to do that, but I'll try to figure something out. But I digress. The fluid just comes out the output shaft area which in the machine will flow into the gearbox to lube it then flow back to the tank. With this setup it just runs out and dripa back into the bucket o' juice. You can see the gauge sticking out there and the charge pump relief valve is the hex head just above and left of where the gauge hose is screwed into the hydro, so dead easy to access. You can see the little T-shaped thing I made to chuck in the drill press to spin the input shafts, but not yet bolted to the hydro. The setup was simple and it worked really well. All you need to copy my method is a 2 ton drill press to run the show
I had to add shims in both and they are set to about 100lb (about all I could get) and the specs wanted between 70 and 150 lbs., so that's OK. I didn't need to make any springs. Also, I apparently had assembled one incorrectly and had to flip it around to function properly with the appropriate input shaft rotation. I don't know what happened there as I was pretty careful putting things together, and if I had to do it today before using this setup I still would have put it together the same way, but whatever. It seems to work well. I'm glad to discover and fix this before it went into the machine.
One thing I noticed is that they are extremely quiet even at full speed compared to what it was before, but of course there was zero load on it so that is probably not going to be so different once it's actually pushing the machine around. We'll see.
Well that's about it for today. Woohoo! though.
I like the testing setup.
As for priming, i don't know how your pumps are coupled together, but in the past on a dry machine i filled it with oil and got a helper to operate the hydraulics via the pedals while i retract and extend the cylinders. This will pull oil in from the tank and into the pumps. It may not get all the way inside the rams, but it gets the pumps lubricated. With the tests you did on your pumps, they will be well oiled, so i see no issues with startup.
 
OP
OP
vinito

vinito

Well-known member
Joined
Nov 19, 2015
Messages
199
I like the testing setup.
As for priming, i don't know how your pumps are coupled together, but in the past on a dry machine i filled it with oil and got a helper to operate the hydraulics via the pedals while i retract and extend the cylinders. This will pull oil in from the tank and into the pumps. It may not get all the way inside the rams, but it gets the pumps lubricated. With the tests you did on your pumps, they will be well oiled, so i see no issues with startup.
Just a quick and boring update.
I got the hydrostats installed (for real) which allowed me to install the valve stack on its tower (for real). This meant I could measure for all the hydraulic hoses so I did that and got them ordered last night, so I'm hoping they'll be here by the end of the week. I ordered them from Discount Hydraulic Hose (.com) and I've heard decent reviews about them. I hope I heard right.
Soooo... the few days wait for the hoses is ample time to get the wiring connected up. Not much to do there really and should be easy. There's a local place which sells reconditioned batteries with 2yr warranty for about $35 so I think I might as well put a "new" battery in there as well. If this all pans out, and it should, then I'm pretty sure the little Gehl will finally be running this weekend. Once the hoses are in, it's just a matter of filling the hydraulic & gas tanks and taking her for a spin.
At long last.
 

Tazza

Moderator
Staff member
Joined
Dec 7, 2004
Messages
16,834
Just a quick and boring update.
I got the hydrostats installed (for real) which allowed me to install the valve stack on its tower (for real). This meant I could measure for all the hydraulic hoses so I did that and got them ordered last night, so I'm hoping they'll be here by the end of the week. I ordered them from Discount Hydraulic Hose (.com) and I've heard decent reviews about them. I hope I heard right.
Soooo... the few days wait for the hoses is ample time to get the wiring connected up. Not much to do there really and should be easy. There's a local place which sells reconditioned batteries with 2yr warranty for about $35 so I think I might as well put a "new" battery in there as well. If this all pans out, and it should, then I'm pretty sure the little Gehl will finally be running this weekend. Once the hoses are in, it's just a matter of filling the hydraulic & gas tanks and taking her for a spin.
At long last.
At long last indeed! Let's hope it starts up without a hitch. Do your best to prime the pumps and what not before you turn the key, other than that, you sound pretty well set.
 
OP
OP
vinito

vinito

Well-known member
Joined
Nov 19, 2015
Messages
199
At long last indeed! Let's hope it starts up without a hitch. Do your best to prime the pumps and what not before you turn the key, other than that, you sound pretty well set.
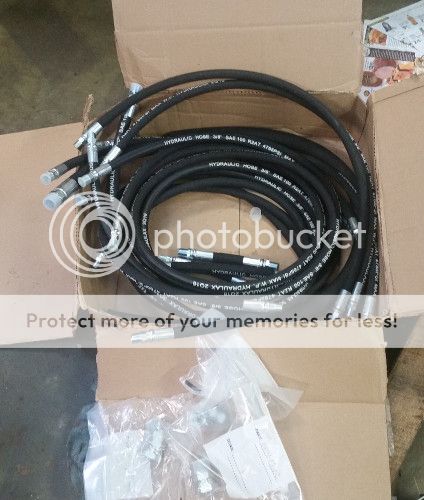
Here's what $400 of hoses looks like:
 photo hoses.jpg
Won't have a chance to start until tomorrow, but that's alright. I did get the "new" battery and created yet another wrinkle for myself, but it's pretty minor and won't prevent me from getting this thing running this weekend. The wrinkle is that the original location of the battery is on the floor underneath and behind the seat. It fits there OK and everything but of course if you need to access it, you have to remove the seat. Plus when inevitably washing the floor out, the battery is in the way catching dirt and trapping it. Turns out there's a nice little niche at the back of the machine on top of the hydraulic tank where this battery fits fine. So eventually I'll make a nice little tray for it. Besides now having to make a tray for it, the wrinkle is that I originally routed one or two of these new hoses through the hole the battery will now fill, but I think I can re-route them just a bit without changing anything else. If not, I'll just set the battery on the floor for now and change it around sometime later.
It's always somethin'. But this time I'm plowing forward anyway and it won't be but the smallest pause. This machine will be running by tomorrow night, he!! or high water.
Barring disaster, the next post should contain a link to a short video of the machine moving under its own power, or maybe of it doing a backflip or something. Don't know about you folks, but it will be entertaining for me.
 
OP
OP
vinito

vinito

Well-known member
Joined
Nov 19, 2015
Messages
199
Here's what $400 of hoses looks like:

Won't have a chance to start until tomorrow, but that's alright. I did get the "new" battery and created yet another wrinkle for myself, but it's pretty minor and won't prevent me from getting this thing running this weekend. The wrinkle is that the original location of the battery is on the floor underneath and behind the seat. It fits there OK and everything but of course if you need to access it, you have to remove the seat. Plus when inevitably washing the floor out, the battery is in the way catching dirt and trapping it. Turns out there's a nice little niche at the back of the machine on top of the hydraulic tank where this battery fits fine. So eventually I'll make a nice little tray for it. Besides now having to make a tray for it, the wrinkle is that I originally routed one or two of these new hoses through the hole the battery will now fill, but I think I can re-route them just a bit without changing anything else. If not, I'll just set the battery on the floor for now and change it around sometime later.
It's always somethin'. But this time I'm plowing forward anyway and it won't be but the smallest pause. This machine will be running by tomorrow night, he!! or high water.
Barring disaster, the next post should contain a link to a short video of the machine moving under its own power, or maybe of it doing a backflip or something. Don't know about you folks, but it will be entertaining for me.
A couple days ago I couldn't really think of anything that could keep me from having this thing running this weekend. Well yesterday I found out.
It's all put back together and I could have fired it up if it weren't from two fittings breaking on assembly. It's the female swivel NPT collars. I was tightening them up and these two wouldn't get snug, then I realized that the crimped neck had cracked and thus trashed. At least this is a dead simple thing to fix if I just had the part in hand. I should be able to find replacements locally on Monday, but I figured out I could get some hardware store plumbing fittings to cobble it together temporarily to run it today, so I may do that.
It's looking pretty good otherwise. There are a few clamps and the battery tray I'll make eventually to tidy it up nice, but that doesn't have to be done for it to run OK. I did turn it over briefly just to make sure the wiring was right and that went fine.
Sorry no video yet. Whatever can happen will happen, especially with this damnedable machine.
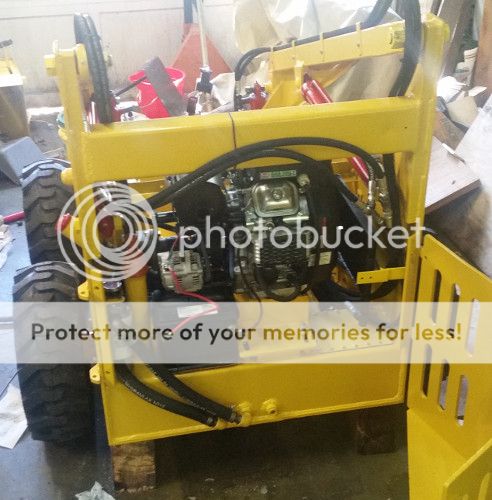
But here's a look into the back with the battery tucked nicely into its new location:
 photo Battry.jpg

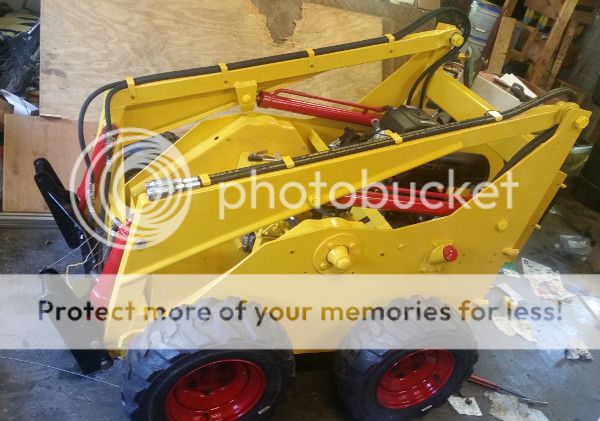
And here's one as it sits right now. All dressed up and no place to go, i.e. two bad hydraulic connections waiting to be replaced:
 photo Almost.jpg
 

Tazza

Moderator
Staff member
Joined
Dec 7, 2004
Messages
16,834
A couple days ago I couldn't really think of anything that could keep me from having this thing running this weekend. Well yesterday I found out.
It's all put back together and I could have fired it up if it weren't from two fittings breaking on assembly. It's the female swivel NPT collars. I was tightening them up and these two wouldn't get snug, then I realized that the crimped neck had cracked and thus trashed. At least this is a dead simple thing to fix if I just had the part in hand. I should be able to find replacements locally on Monday, but I figured out I could get some hardware store plumbing fittings to cobble it together temporarily to run it today, so I may do that.
It's looking pretty good otherwise. There are a few clamps and the battery tray I'll make eventually to tidy it up nice, but that doesn't have to be done for it to run OK. I did turn it over briefly just to make sure the wiring was right and that went fine.
Sorry no video yet. Whatever can happen will happen, especially with this damnedable machine.
But here's a look into the back with the battery tucked nicely into its new location:


And here's one as it sits right now. All dressed up and no place to go, i.e. two bad hydraulic connections waiting to be replaced:
Sadly $400 worth of hoses doesn't get you very far does it? Glad most of it was sorted out easily enough.
Well, we're all waiting for the back flips :)
 

Latest posts

Top