Hydra Mac 8A (Gehl 2500) restoration... or "Oh No... What have I done?"

Help Support SkidSteer Forum:

OP
OP
vinito

vinito

Well-known member
Joined
Nov 19, 2015
Messages
199
Started pm the shaft adapter for the new Predator repower today. Have to cut keyways and it will be done.
Saw raw material:

Faced to length, then drill pilot:

Drilled, then ream to 1":

Finish it up. Done except for keyways (ran out of time this afternoon. Going to see Joe Walsh & Bad Co. tonight). Stock on left, with adapter fitted on right:

This is all so the original 1-7/16" stuff will fit on the 1" Predator shaft. It's cheaper (free) than buying new pulley bushings and coupler halves, and was necessary anyway since the shaft has to be longer to accomodate the additional alternator pulley.
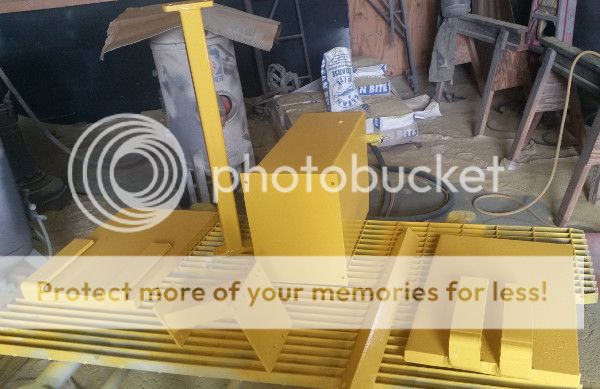
I'm having a great day today. I learned that the painting is complete. Just have to let it sit and cure for a few days (7 is ideal I guess) and I can bring it home and start assembling. Oh yea.
 photo paint.jpg
A few of the "middle-sized" parts.
 photo paintparts.jpg
And there are a half-dozen un-pictured smaller parts drying out in another room.
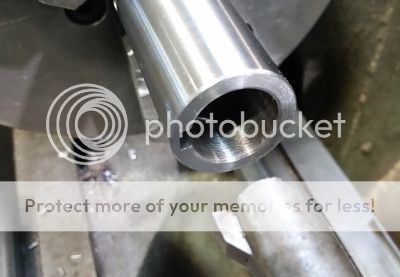
Also finished the shaft adapter. After cutting the inner key:
 photo ikey.jpg
The finished pic looks like the one in the previous post except keyways are cut.
Got home and had a UPS package. It's the sprockets, chain and new alternator pulley assembly. So now I can mock up the stuff that mounts to the shaft and finalize the lengths. I made the adapter to the length I calculated before because it can easily be shortened if need be, which I think is likely. And that also means I can move ahead with the pump and alternator brackets so I can get that over with.
This is very cool. While the paint is curing over the next few days, I'll quit being lazy about the hydrostats and get them buttoned up. With those done, I should be able to start putting some major systems back into the machine.
If anybody were near, I'd ask them to pinch me in case I was dreaming. It's been such a drawn-out stretch of time to finally get to this point, I was kind of starting to just believe I'd never be here.
So whadda ya think of the color?
 

Brad460

Member
Joined
Mar 13, 2016
Messages
12
I'm having a great day today. I learned that the painting is complete. Just have to let it sit and cure for a few days (7 is ideal I guess) and I can bring it home and start assembling. Oh yea.

A few of the "middle-sized" parts.

And there are a half-dozen un-pictured smaller parts drying out in another room.
Also finished the shaft adapter. After cutting the inner key:

The finished pic looks like the one in the previous post except keyways are cut.
Got home and had a UPS package. It's the sprockets, chain and new alternator pulley assembly. So now I can mock up the stuff that mounts to the shaft and finalize the lengths. I made the adapter to the length I calculated before because it can easily be shortened if need be, which I think is likely. And that also means I can move ahead with the pump and alternator brackets so I can get that over with.
This is very cool. While the paint is curing over the next few days, I'll quit being lazy about the hydrostats and get them buttoned up. With those done, I should be able to start putting some major systems back into the machine.
If anybody were near, I'd ask them to pinch me in case I was dreaming. It's been such a drawn-out stretch of time to finally get to this point, I was kind of starting to just believe I'd never be here.
So whadda ya think of the color?
Color looks good- What brand and type of paint? Color? Also, what brand and type of primer?
 
OP
OP
vinito

vinito

Well-known member
Joined
Nov 19, 2015
Messages
199
Color looks good- What brand and type of paint? Color? Also, what brand and type of primer?
I'll tell you what I know at the moment and I'll get back to you with specifics. The painter showed me the color mix label today so that would be helpful if you (or I) want to match this color.
It's PPG brand and it's called PSX. I think there's more to it, like PSX 700 but I'll find that out for sure tomorrow.
The color is "traffic yellow" which is apparently a mix of "safety yellow" but toned down a fair bit. Looks to me a little like a slightly ligher CAT yellow maybe.
I was able to mock up the pulleys and stuff on the shaft and double-check to make sure the hydrostat pulley position won't end up wonky. Looks like it will line up pretty good. I ended up shortening the shaft (and subsequently the pump cage) almost an inch, which is good. To shorten my shaft adapter won't take but about 10 minutes tomorrow. Full set of drawings for this repower kit if anybody wants them. I'll see if I can generate a PDF for them so it's easy to download & print.
 
OP
OP
vinito

vinito

Well-known member
Joined
Nov 19, 2015
Messages
199
I'll tell you what I know at the moment and I'll get back to you with specifics. The painter showed me the color mix label today so that would be helpful if you (or I) want to match this color.
It's PPG brand and it's called PSX. I think there's more to it, like PSX 700 but I'll find that out for sure tomorrow.
The color is "traffic yellow" which is apparently a mix of "safety yellow" but toned down a fair bit. Looks to me a little like a slightly ligher CAT yellow maybe.
I was able to mock up the pulleys and stuff on the shaft and double-check to make sure the hydrostat pulley position won't end up wonky. Looks like it will line up pretty good. I ended up shortening the shaft (and subsequently the pump cage) almost an inch, which is good. To shorten my shaft adapter won't take but about 10 minutes tomorrow. Full set of drawings for this repower kit if anybody wants them. I'll see if I can generate a PDF for them so it's easy to download & print.
This will be another boring (picture-free) update.
The bulk of the parts are painted and I'm dragging them home this evening. Of course I discovered several small things that could have been painted with them, but I can do that myself since it's mostly small stuff. The only large items are the two fiberglass chain covers. They are cracked and I'll patch them today or tomorrow and get them ready for paint. I've been putting them off since I'm not good (very slow) at "body work" but it shouldn't be too bad, especially since it's not a car and just a cover panel.
I built a new pump cage bracket, but it shifted during welding and I just need to line up the opposite bores and mill the faces flat and square to each other. Light cuts. I still need to fabricate the alternator bracket, but that's a simple one and won't take but a couple hours.
I'm only about a day or two away from starting to reassemble things. There will be several pauses along the way because some things need to be set in place so I can make sure my fat head and various assemblies will fit some yet-to-be-made parts. But beginning to put things back together will probably be such an energizing feeling I don't thing it will be so dreadful as it has been so far.
I may get this thing back together after all !!
 
OP
OP
vinito

vinito

Well-known member
Joined
Nov 19, 2015
Messages
199
This will be another boring (picture-free) update.
The bulk of the parts are painted and I'm dragging them home this evening. Of course I discovered several small things that could have been painted with them, but I can do that myself since it's mostly small stuff. The only large items are the two fiberglass chain covers. They are cracked and I'll patch them today or tomorrow and get them ready for paint. I've been putting them off since I'm not good (very slow) at "body work" but it shouldn't be too bad, especially since it's not a car and just a cover panel.
I built a new pump cage bracket, but it shifted during welding and I just need to line up the opposite bores and mill the faces flat and square to each other. Light cuts. I still need to fabricate the alternator bracket, but that's a simple one and won't take but a couple hours.
I'm only about a day or two away from starting to reassemble things. There will be several pauses along the way because some things need to be set in place so I can make sure my fat head and various assemblies will fit some yet-to-be-made parts. But beginning to put things back together will probably be such an energizing feeling I don't thing it will be so dreadful as it has been so far.
I may get this thing back together after all !!
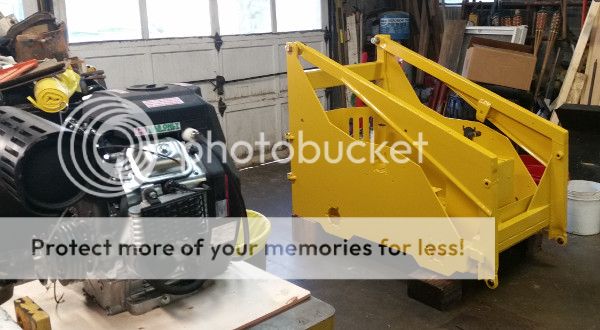
I got her home tonight. I'm liking it so far.
 photo shehome.jpg
 

hydra-mac-8b

Member
Joined
Jun 13, 2016
Messages
7
looks sweet. Any idea how the flexible couple guard is installed? It is number 57 in the parts diagram. If you have gotten that far.
now for a little operator protection? I have heard the Gehl type cab/guards are a bit low for tall people. The old hydra-mac cab/guard on the other hand seems to have more than enough height for my 6'5 body.
 
OP
OP
vinito

vinito

Well-known member
Joined
Nov 19, 2015
Messages
199
looks sweet. Any idea how the flexible couple guard is installed? It is number 57 in the parts diagram. If you have gotten that far.
I'm not sure how much good that guard even is. It wasn't installed in mine and there are no "extra" holes in the floor to indicate it ever had one. It looks like it might just be there to capture the center shaft (#54) to keep it from flopping around if'n the fiber discs ever fell apart maybe. Personally I'm not going to add it because I don't think it would likely be needed and it's not worth the work (to me). But if you have one I'm guessing it is just drilled through and bolted to the floor straddling the center shaft, then a bolt or pin slipped through the holes in the yoke.
As for operator protection, I've thought a lot about this and I'm going to simply make and install a beefy roll bar and shade canopy. Since the controls are between the knees, it encourages the operator to not stick things out the side anyway, visibility would be better and along with a seatbelt, will provide protection like a million farm tractors out there and with a little less work and material as a bonus. I'm not putting it in until it's mostly back together and running so I can custom fit myself under it comfortably. I might even make a cardboard mock-up on it just to be sure.
 

hydra-mac-8b

Member
Joined
Jun 13, 2016
Messages
7
I'm not sure how much good that guard even is. It wasn't installed in mine and there are no "extra" holes in the floor to indicate it ever had one. It looks like it might just be there to capture the center shaft (#54) to keep it from flopping around if'n the fiber discs ever fell apart maybe. Personally I'm not going to add it because I don't think it would likely be needed and it's not worth the work (to me). But if you have one I'm guessing it is just drilled through and bolted to the floor straddling the center shaft, then a bolt or pin slipped through the holes in the yoke.
As for operator protection, I've thought a lot about this and I'm going to simply make and install a beefy roll bar and shade canopy. Since the controls are between the knees, it encourages the operator to not stick things out the side anyway, visibility would be better and along with a seatbelt, will provide protection like a million farm tractors out there and with a little less work and material as a bonus. I'm not putting it in until it's mostly back together and running so I can custom fit myself under it comfortably. I might even make a cardboard mock-up on it just to be sure.
Yeah I was wondering how it attached. I have one but it has no holes or ways to fasten it down. Waiting to see how yours comes out with the engine swap. It whole be a very useful machine .
 
OP
OP
vinito

vinito

Well-known member
Joined
Nov 19, 2015
Messages
199
Yeah I was wondering how it attached. I have one but it has no holes or ways to fasten it down. Waiting to see how yours comes out with the engine swap. It whole be a very useful machine .
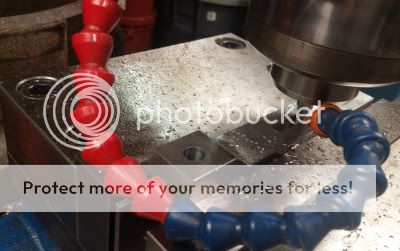
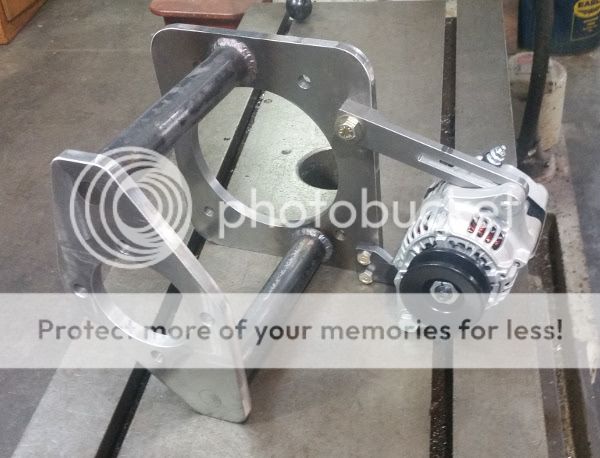
I finished up the new bracket for the pump & alternator today. Currently the paint is drying but in the meantime here's a picture of it before painting and another of one milling the slot in one of the alternator bracket parts.
The slotting:
 photo slot.jpg
And the finished bracket before blasting & paint:
 photo unpainted.jpg
As you can see, the new bracket handles both the hydraulic pump and alternator. Next picture will be of the assembly installed on the motor.
 

7LBSSMALLIE

Well-known member
Joined
Feb 2, 2012
Messages
1,294
Nice score on the back hoe attachment! I can think of a lot of uses for that thing!
tires look good, dont mean to rain. but seeriously dude that much time and effort into a ghel.? you obiouvisly got some game. WHY THIS PROJECT. they were junk from the get go. if you are goining to this much effort. find a 763 f. non boss. and get youre game on
 

hydra-mac-8b

Member
Joined
Jun 13, 2016
Messages
7
what you have done is found a money pit.
No, what he has is a very useful machine and an excellent hobby. A 2500lb gehl vs a stupidly heavy 5500 lbs 763f. Give me the small, nimble gehl any day and I don't need a 1 ton dually truck to haul it. You can keep the fuel sucking, sod destroying, stupidly expensive to repair 763f monster. Keep up the excellent work I can't wait to see it done and working.
 
OP
OP
vinito

vinito

Well-known member
Joined
Nov 19, 2015
Messages
199
No, what he has is a very useful machine and an excellent hobby. A 2500lb gehl vs a stupidly heavy 5500 lbs 763f. Give me the small, nimble gehl any day and I don't need a 1 ton dually truck to haul it. You can keep the fuel sucking, sod destroying, stupidly expensive to repair 763f monster. Keep up the excellent work I can't wait to see it done and working.
I totally agree that I bought a money pit. The thing is, I knew that before I bought it but I got it anyway because 1) I haven't worked much with these types of machines before and I wanted to learn more so I figured it is tuition 2) I wanted a smaller machine not only because of the intended use once it's finished, but while working on it the space it invades would be much less than a full size machine. It needed more done to it than I thought or hoped - let's face it, the thing was beat to a pulp - but it is coming along and will turn out fine in the end.
After working on it for so long now and learning it inside & out, I have to disagree that it is junk (in terms of design rather than condition). Sure there are much better, slicker machines out there but not for the price I paid for this one. The short time that I got to use it before taking it apart, it proved to be more powerful than I thought it would be. I think no matter what you have you'll wish you had something bigger, but the hydraulics, while kind of slow, are enough to tear itself up if you kept at it. The drive is hydrostatic which I would prefer over the small Bobcat variable belt drive small machines (for example), plus I discovered that it shares the same Sundstrand hydrostat used in several small John Deer machines (mowers) making used parts pretty easy to find, which was a pleasant surprise. This drive is robust too, evident in the condition of it after 40+ years of probably negligent use and showing only minor, easy-to-recondition wear.
I have a 1-acre lot and for my purposes a large skidsteer would be under-utilized. I will be doing some amount of moving dirt and digging, but the speed at which I do it is not so important as for a guy using one for profit. It's all just for my own personal use and a lot of that will be just using forks to move heavy stuff from place to place and a tiny skidsteer like this is a great fit.
So anyway, that's why I've picked this project rather than another. With a bit of luck, I could have possibly spent the same amount and ended up with a more powerful machine. So I think the question is not whether what I'll end up with is less powerful or less valuable than something else, but what arguments could be made where this little thing is preferable to a 763 or the like. No one thing would be enough to be worth the difference, but totaling up the preferable differences, again for my purposes, makes this little Gehl win out over other machines. The simplicity and cost of the much smaller and simpler engine, pump, hydrostats, cylinders, fuel, etc. is appealing to me. Since I won't be using it professionally, keeping the maintenance costs for my machine this low are quite appealing. The weight means I can tow it with my F150 pretty easily. I won't be hauling it that often, but I'm pretty much already "tooled up" to do so when those times come up. The trailer alone heavy enough to haul a big skidsteer costs more than I have into this machine so far. The small size means I can fit it with a bucket into my garage along with my mower in a single bay, and I'm not positive yet but I think the hoe attachment can even be shoehorned in there as well.
So on to new things. Here's the picture of the installed bracket:
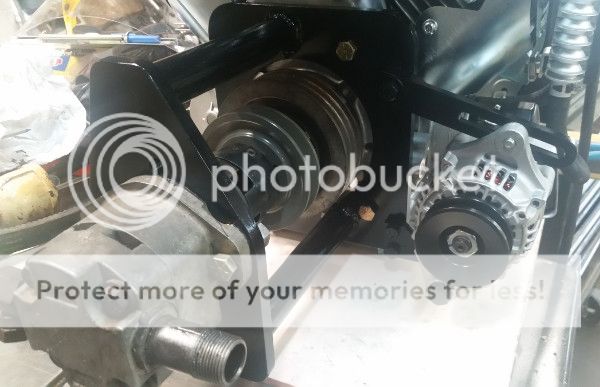
 photo bracket p.jpg
Since that is complete, I thought it time to turn attention back to getting the hydrostats put back together. I forgot that there were two bearings still needing to be removed for replacement. This is because I needed an internal puller to get them out. I didn't already have one, so I whipped one up and it worked fine.
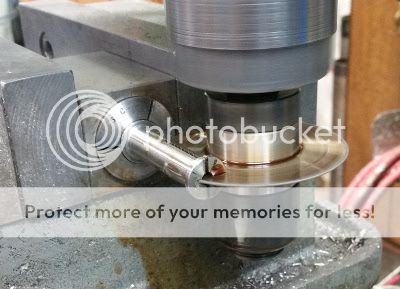
 photo slotsc.jpg
 photo slots.jpg
 photo pparts.jpg
 photo Puller b.jpg
And then the bearings were out:
 photo voila.jpg
So that's the update of the day. And by the way, thanks for the compliment. I don't think anyone has ever told me "I got game" hehe. I like it.
 

bill7101

Member
Joined
Apr 3, 2016
Messages
12
I totally agree that I bought a money pit. The thing is, I knew that before I bought it but I got it anyway because 1) I haven't worked much with these types of machines before and I wanted to learn more so I figured it is tuition 2) I wanted a smaller machine not only because of the intended use once it's finished, but while working on it the space it invades would be much less than a full size machine. It needed more done to it than I thought or hoped - let's face it, the thing was beat to a pulp - but it is coming along and will turn out fine in the end.
After working on it for so long now and learning it inside & out, I have to disagree that it is junk (in terms of design rather than condition). Sure there are much better, slicker machines out there but not for the price I paid for this one. The short time that I got to use it before taking it apart, it proved to be more powerful than I thought it would be. I think no matter what you have you'll wish you had something bigger, but the hydraulics, while kind of slow, are enough to tear itself up if you kept at it. The drive is hydrostatic which I would prefer over the small Bobcat variable belt drive small machines (for example), plus I discovered that it shares the same Sundstrand hydrostat used in several small John Deer machines (mowers) making used parts pretty easy to find, which was a pleasant surprise. This drive is robust too, evident in the condition of it after 40+ years of probably negligent use and showing only minor, easy-to-recondition wear.
I have a 1-acre lot and for my purposes a large skidsteer would be under-utilized. I will be doing some amount of moving dirt and digging, but the speed at which I do it is not so important as for a guy using one for profit. It's all just for my own personal use and a lot of that will be just using forks to move heavy stuff from place to place and a tiny skidsteer like this is a great fit.
So anyway, that's why I've picked this project rather than another. With a bit of luck, I could have possibly spent the same amount and ended up with a more powerful machine. So I think the question is not whether what I'll end up with is less powerful or less valuable than something else, but what arguments could be made where this little thing is preferable to a 763 or the like. No one thing would be enough to be worth the difference, but totaling up the preferable differences, again for my purposes, makes this little Gehl win out over other machines. The simplicity and cost of the much smaller and simpler engine, pump, hydrostats, cylinders, fuel, etc. is appealing to me. Since I won't be using it professionally, keeping the maintenance costs for my machine this low are quite appealing. The weight means I can tow it with my F150 pretty easily. I won't be hauling it that often, but I'm pretty much already "tooled up" to do so when those times come up. The trailer alone heavy enough to haul a big skidsteer costs more than I have into this machine so far. The small size means I can fit it with a bucket into my garage along with my mower in a single bay, and I'm not positive yet but I think the hoe attachment can even be shoehorned in there as well.
So on to new things. Here's the picture of the installed bracket:

Since that is complete, I thought it time to turn attention back to getting the hydrostats put back together. I forgot that there were two bearings still needing to be removed for replacement. This is because I needed an internal puller to get them out. I didn't already have one, so I whipped one up and it worked fine.

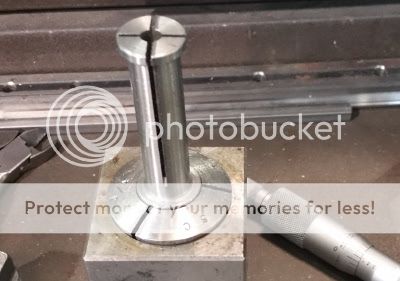
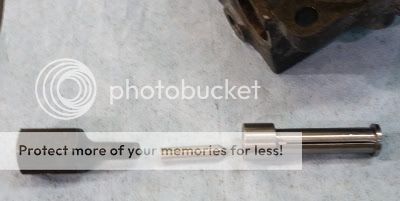
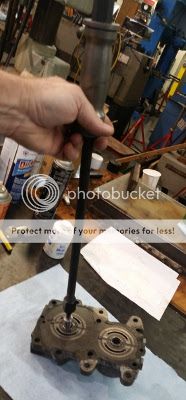
And then the bearings were out:
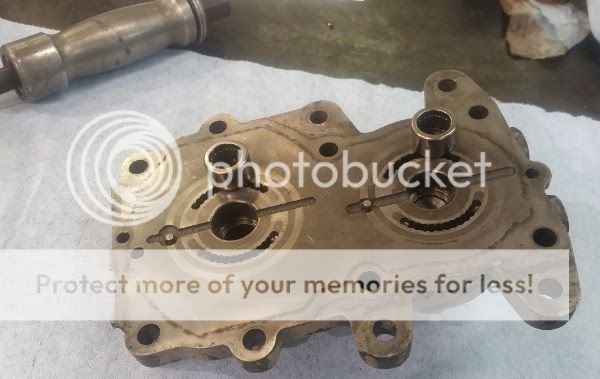
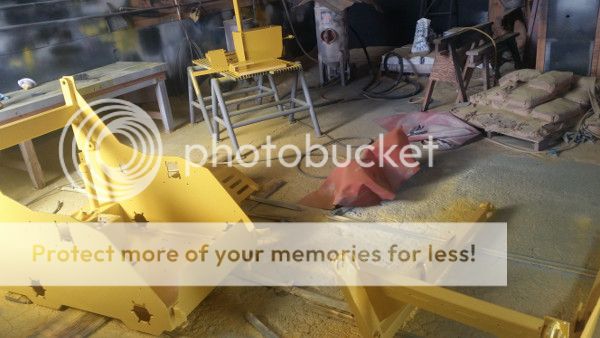
So that's the update of the day. And by the way, thanks for the compliment. I don't think anyone has ever told me "I got game" hehe. I like it.
the brackets u made look awesome, but i do have a question, does the alt you put on a reverse spinning one? i had to mount mine so the back was towards the pump since the drive would run the wrong direction on the output side of the engine.
 
OP
OP
vinito

vinito

Well-known member
Joined
Nov 19, 2015
Messages
199
the brackets u made look awesome, but i do have a question, does the alt you put on a reverse spinning one? i had to mount mine so the back was towards the pump since the drive would run the wrong direction on the output side of the engine.
Well I'll be danged, you're right. I even read up on it beforehand and found that pretty much all engines turn the same direction, but I didn't think to consider we're driving stuff from the back end instead of the front like a car does. Duuuhh!
So I just looked into it and the consensus is that these alternators will work OK running in either diraction except for the cooling since the fins spin opposite of the design. Mine doesn't have straight fins, otherwise it woudn't matter at all. For my use, this would probably not be an issue, but it's not for positively sure. Depending on how things go, I may just see if it works OK as it is. But there is room in there and it wouldn't be too awful tough to flip it around. The difference along the length is about 1-1/2" so I could just make a couple spacers. I haven't supplied a belt yet so I can just wait on that until I switch it maybe.
So for anybody else's future reference, apparently these alternators are designed to spin clockwise as you're looking at the pulley. My motor, and most anybody else's, spins counterclockwise as you're looking at the output end of the engine.
Well here we go again don't we? At least I'm going two steps forward, one step back now instead of one step forward, two steps back. That's progress of a sort.
Thanks for the heads-up.
 
OP
OP
vinito

vinito

Well-known member
Joined
Nov 19, 2015
Messages
199
Well I'll be danged, you're right. I even read up on it beforehand and found that pretty much all engines turn the same direction, but I didn't think to consider we're driving stuff from the back end instead of the front like a car does. Duuuhh!
So I just looked into it and the consensus is that these alternators will work OK running in either diraction except for the cooling since the fins spin opposite of the design. Mine doesn't have straight fins, otherwise it woudn't matter at all. For my use, this would probably not be an issue, but it's not for positively sure. Depending on how things go, I may just see if it works OK as it is. But there is room in there and it wouldn't be too awful tough to flip it around. The difference along the length is about 1-1/2" so I could just make a couple spacers. I haven't supplied a belt yet so I can just wait on that until I switch it maybe.
So for anybody else's future reference, apparently these alternators are designed to spin clockwise as you're looking at the pulley. My motor, and most anybody else's, spins counterclockwise as you're looking at the output end of the engine.
Well here we go again don't we? At least I'm going two steps forward, one step back now instead of one step forward, two steps back. That's progress of a sort.
Thanks for the heads-up.
This could get interesting.
I finally set the engine roughly where it goes and it's going to be close clearance however I end up figuring it to go. I can probably get the alternator to flip around (I think) but it sure fits better in my originally designed position as shown above. Any thoughts from you's guys on the cooling if spinning backwards is welcome. Of course I'd like it to spin the intended direction, but not positive whether that will be a go or not.
OK time to step back. I need to put the hydrostats back together and get the gearboxes painted so I can put those assemblies in place. The driven pulley for they hydrostats is a fixed position which can't be changed, so it's all about lining the driving pulley off the motor so it would all be good. I think until I put that stuff in place, it's all a guess.
So OK, time to get systematic. First order of business is to get the gearbox/hydrostats bolted in. That's a fixed reference point. I know where to start.
 

Tazza

Moderator
Staff member
Joined
Dec 7, 2004
Messages
16,838
This could get interesting.
I finally set the engine roughly where it goes and it's going to be close clearance however I end up figuring it to go. I can probably get the alternator to flip around (I think) but it sure fits better in my originally designed position as shown above. Any thoughts from you's guys on the cooling if spinning backwards is welcome. Of course I'd like it to spin the intended direction, but not positive whether that will be a go or not.
OK time to step back. I need to put the hydrostats back together and get the gearboxes painted so I can put those assemblies in place. The driven pulley for they hydrostats is a fixed position which can't be changed, so it's all about lining the driving pulley off the motor so it would all be good. I think until I put that stuff in place, it's all a guess.
So OK, time to get systematic. First order of business is to get the gearbox/hydrostats bolted in. That's a fixed reference point. I know where to start.
Nice job, now i should put an order in for internal bearing pullers too! My dad got hold of a few from a joint he used to work at, but not a full set sadly.
What type of cooling fins does it have? i thought most had straight fins that would push air out no matter what direction it was going. As your machine won't be really sucking the amps, it may not get hot enough to be an issue. I too can't see rotation for exciting it being an issue, just cooling.
 
OP
OP
vinito

vinito

Well-known member
Joined
Nov 19, 2015
Messages
199
Nice job, now i should put an order in for internal bearing pullers too! My dad got hold of a few from a joint he used to work at, but not a full set sadly.
What type of cooling fins does it have? i thought most had straight fins that would push air out no matter what direction it was going. As your machine won't be really sucking the amps, it may not get hot enough to be an issue. I too can't see rotation for exciting it being an issue, just cooling.
Thanks Tazza. Get your order together, hehe.
I was hoping this alternator had straight fins, maybe just offset a bit or something. But they are pretty tight little curved volutes, so it's probably pretty inefficient spinning backward. You might be right that the load may not ever be enough to cause it to overheat, but I guess until it's tested that will continue to be unknown.
Once I install enough things so I can place the motor and see what else I may need to do to align stuff, it will be difficult to know whether or not I can flip the alternator around or not. I'm just going to have to tread water until I get the drive in. That is going to take several days since I have a bunch of things on the list this week taking up my otherwise project time. It's a good thing I didn't need this machine working in a hurry, eh?
 

Tazza

Moderator
Staff member
Joined
Dec 7, 2004
Messages
16,838
Thanks Tazza. Get your order together, hehe.
I was hoping this alternator had straight fins, maybe just offset a bit or something. But they are pretty tight little curved volutes, so it's probably pretty inefficient spinning backward. You might be right that the load may not ever be enough to cause it to overheat, but I guess until it's tested that will continue to be unknown.
Once I install enough things so I can place the motor and see what else I may need to do to align stuff, it will be difficult to know whether or not I can flip the alternator around or not. I'm just going to have to tread water until I get the drive in. That is going to take several days since I have a bunch of things on the list this week taking up my otherwise project time. It's a good thing I didn't need this machine working in a hurry, eh?
No sense rushing it, take your time and do it right. If you cut corners, there is always the chance of it biting you on the butt later.
 
Top