Remove the bottom plate on the Oil Pump. See if it will turn over so you have a new flat side. Failing that, lap the original side flat with a sheet of wet-dry sandpaper placed a piece of Lexan window pane. The little half-moon wear mark you see will reduce pump performance quite a bit. Just wet it with water as you sand.
You are using an out of date browser. It may not display this or other websites correctly.
You should upgrade or use an alternative browser.
You should upgrade or use an alternative browser.
Bobcat 632 - Blown Head Gasket?
- Thread starter bobcatzack
- Start date


OP
OP
bobcatzack
Well-known member
- Joined
- Oct 16, 2022
- Messages
- 122
Yea I do .. took it with me so Randy showed how to set it etc.Thats great! Great to hear! Do you have a good torque wrench?
BTW, I must correct myself .. Randy did say something to the tune of what you have observed about the cylinder bores, but he said they can get by without major work (basically he said they get wider towards the top - but the new piston rings should be able to handle that). Secondly, he did say that ideally, I should get the engine head resurfaced as he saw very minor warpage - he asked me to get the surface 100% cleaned and retest for straightness. If a bit better, then things should be okay without a need to resurface.
OP
OP
bobcatzack
Well-known member
- Joined
- Oct 16, 2022
- Messages
- 122
Priceless practical advise!! I will definitely rereading this several more times before attempting to clean the pistons and install the new piston rings! Thank you!Slip off the old rings and then spend whatever time it takes to remove the accumulated carbon to get the pistons really clean. A Ring Groove Cleaning tool is best and not so expensive. A wire brush on a bench grinder will work well IF you are careful to Not round over the ring groove edges. The bottom of the grooves need to be shiny clean, thus the groove tool. Choke Cleaning spray is better than nothing for the undersides. Use a brass or stainless 'toothbrush'.
The Hastings ring set uses a 3-piece Oil Ring which is what you want.
Get a can of the old thick STP. Use it to work the wrist pins back and forth side to side until you are sure the pin bores are fully lubed. It is easy to have a wrist pin seize in a dry engine. I would lift the Main Bearing Caps and load up the bearing inserts with more STP.
Replacing the Rear Main Seal is good insurance for ten dollars more.
You will need a Ring Compressor the install the pistons.
-Dick
OP
OP
bobcatzack
Well-known member
- Joined
- Oct 16, 2022
- Messages
- 122
Will do this - thanks Dick!Remove the bottom plate on the Oil Pump. See if it will turn over so you have a new flat side. Failing that, lap the original side flat with a sheet of wet-dry sandpaper placed a piece of Lexan window pane. The little half-moon wear mark you see will reduce pump performance quite a bit. Just wet it with water as you sand.
OP
OP
bobcatzack
Well-known member
- Joined
- Oct 16, 2022
- Messages
- 122
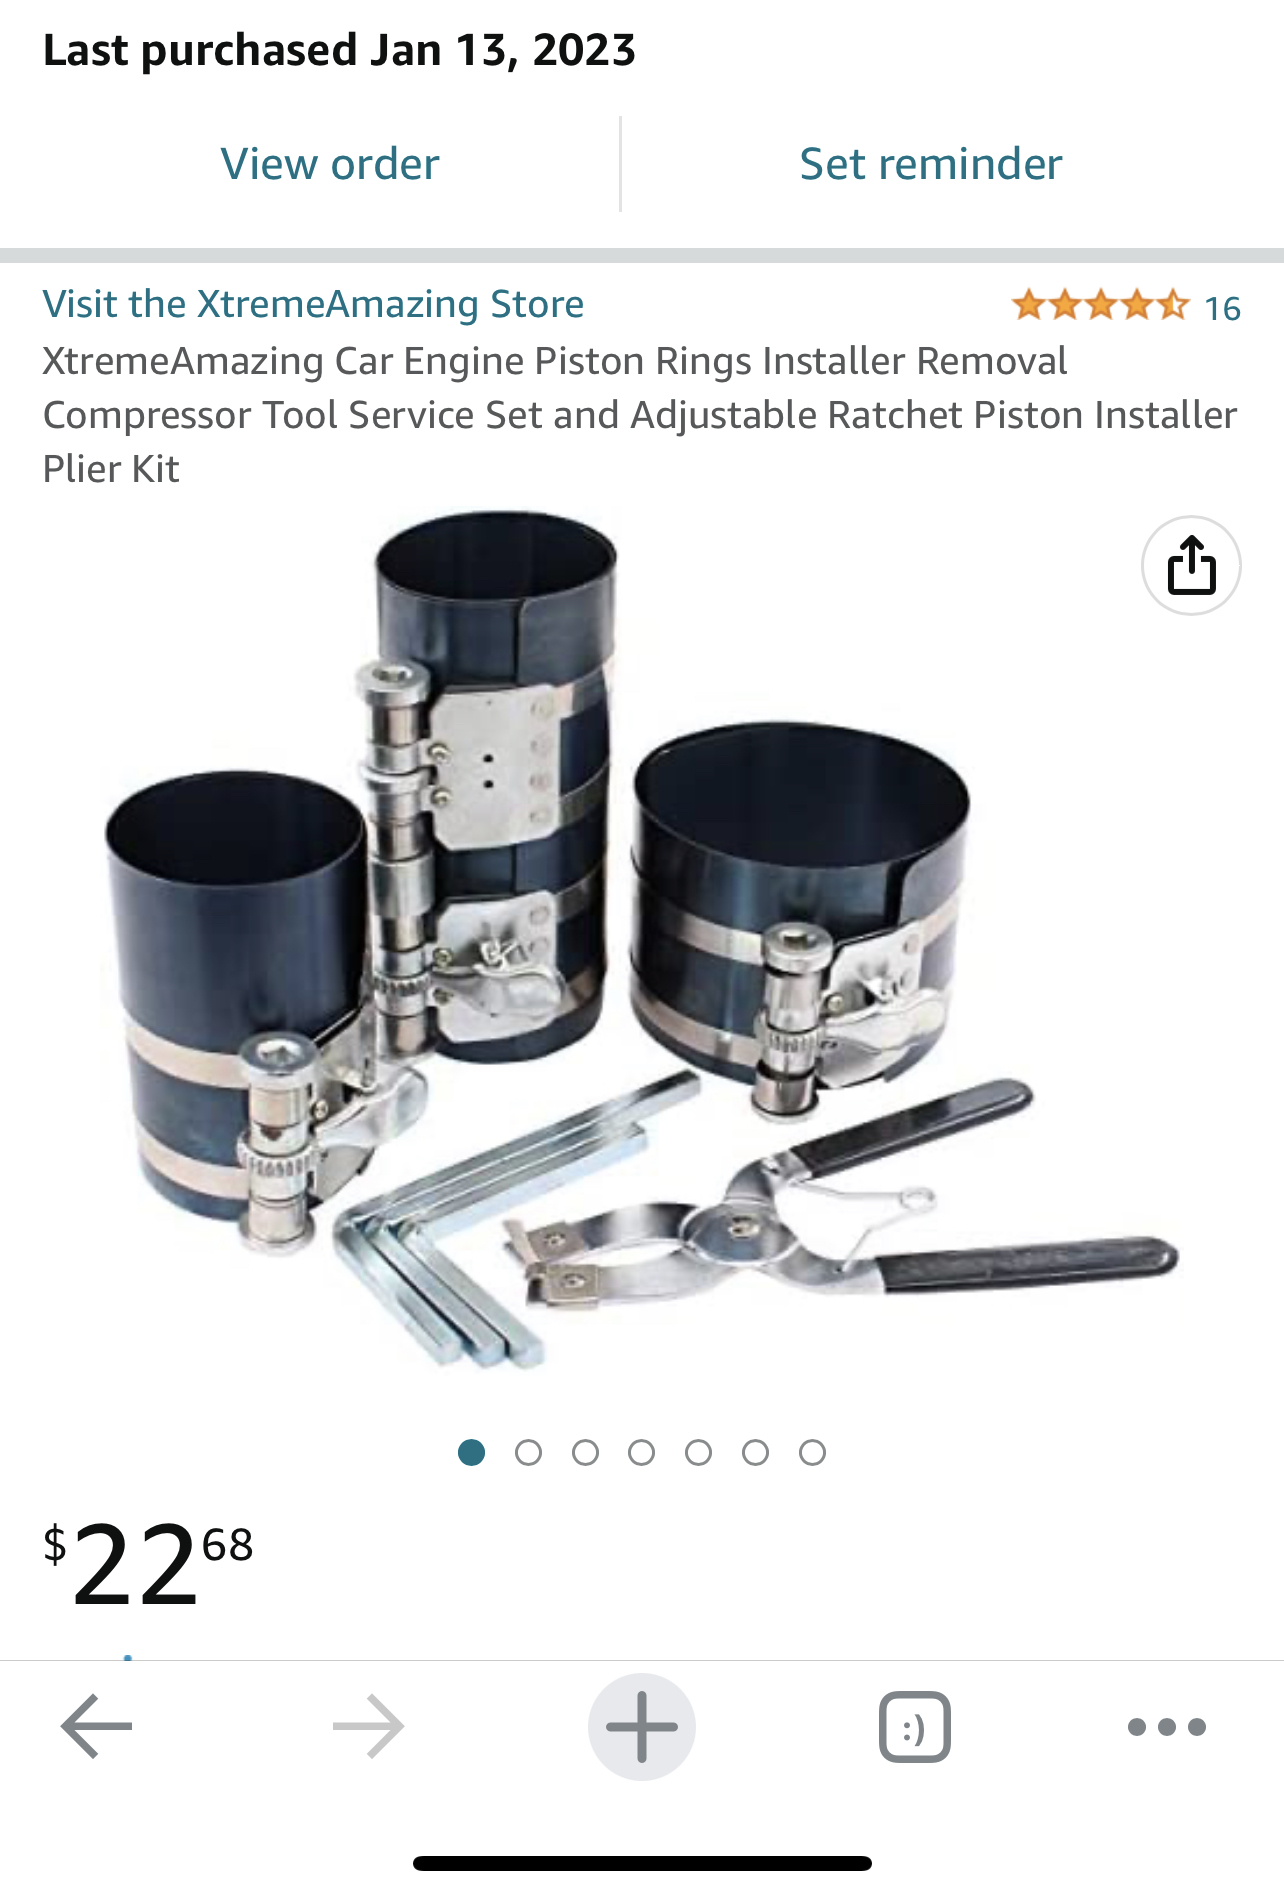
Did get a ring compressor (hopefully the right one) - pic below:Slip off the old rings and then spend whatever time it takes to remove the accumulated carbon to get the pistons really clean. A Ring Groove Cleaning tool is best and not so expensive. A wire brush on a bench grinder will work well IF you are careful to Not round over the ring groove edges. The bottom of the grooves need to be shiny clean, thus the groove tool. Choke Cleaning spray is better than nothing for the undersides. Use a brass or stainless 'toothbrush'.
The Hastings ring set uses a 3-piece Oil Ring which is what you want.
Get a can of the old thick STP. Use it to work the wrist pins back and forth side to side until you are sure the pin bores are fully lubed. It is easy to have a wrist pin seize in a dry engine. I would lift the Main Bearing Caps and load up the bearing inserts with more STP.
Replacing the Rear Main Seal is good insurance for ten dollars more.
You will need a Ring Compressor the install the pistons.
-Dick
Attachments
cdmccul
Well-known member
Yes that ring compressor will work.


![Pampers Sensitive Baby Wipes, Clinically Proven, Fragrance Free, Unscented, Water Based, Hypoallergenic, Multi-Use, Hand Wipes 336 Wipes Total (6X Flip-Top Packs) [Packaging May Vary]](https://m.media-amazon.com/images/I/41KLBHu9CAL._SL500_.jpg)


As an Amazon Associate we earn from qualifying purchases. Product prices and availability are accurate as of the date/time indicated and are subject to change.
cdmccul
Well-known member
How do you plan to clean the head?
OP
OP
bobcatzack
Well-known member
- Joined
- Oct 16, 2022
- Messages
- 122
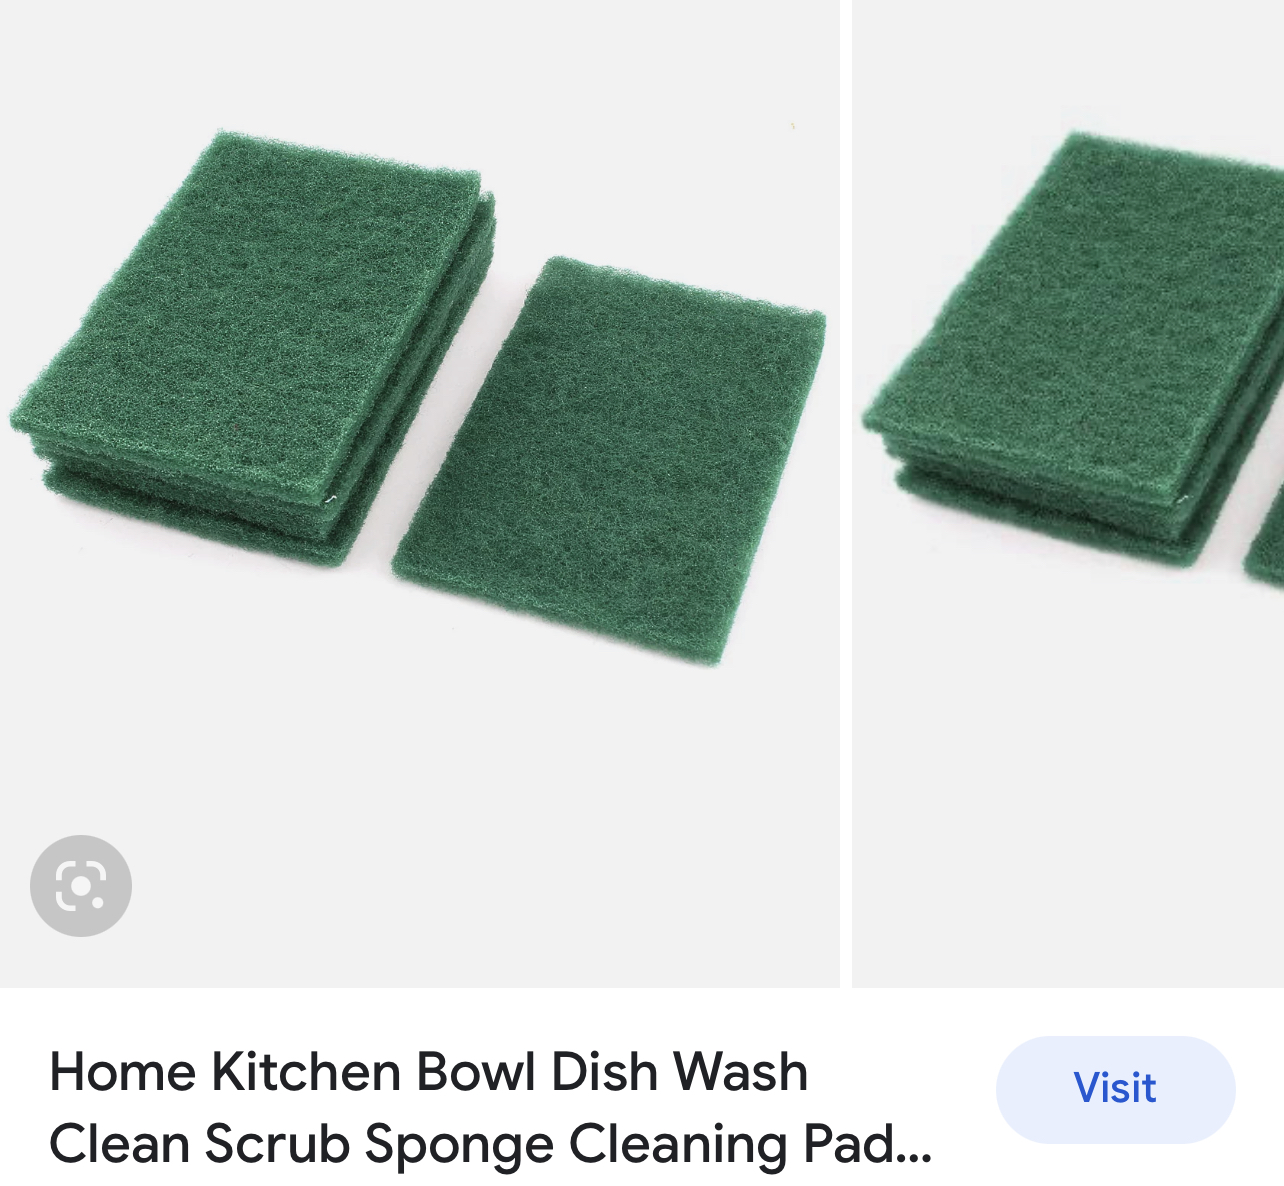
Saw a YouTube video where someone was using green scrubs / WD-40 and paper towels ..How do you plan to clean the head?
Any other suggestion would be welcome!
Attachments
cdmccul
Well-known member
I like using these.
https://www.harborfreight.com/pack-of-5-2-inch-fine-grade-fiber-grinding-discs-99985.html
Also called 3m Roloc in non-Harbor Freight places.")
https://www.harborfreight.com/pack-of-5-2-inch-fine-grade-fiber-grinding-discs-99985.html
Also called 3m Roloc in non-Harbor Freight places.
OP
OP
bobcatzack
Well-known member
- Joined
- Oct 16, 2022
- Messages
- 122
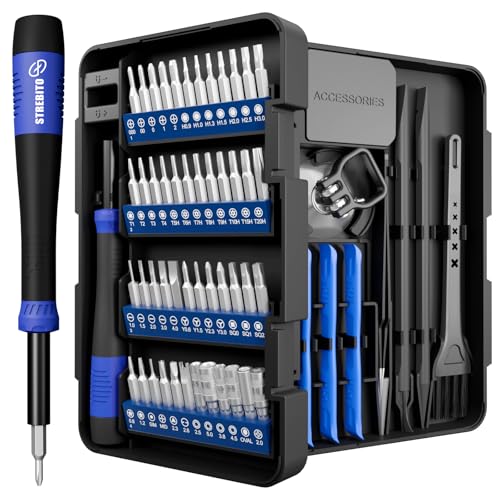
I do have a 5” wall plug-in sander - will check if the 3m Roloc are available in that size, THANKS!I like using these.
https://www.harborfreight.com/pack-of-5-2-inch-fine-grade-fiber-grinding-discs-99985.html
Also called 3m Roloc in non-Harbor Freight places.
cdmccul
Well-known member
They might make something like that... That sander is a "random orbit" style?
Those roloc pads fit on arbors that chuck into your favorite drill. They really work best spinning at several hundred rpm.
Your local NAPA (AutoZone/Parts America, Checker, Western Auto, etc... even Ace Hardware) probably has a set with the Arbor and a few different grits/grades/colors of pads in one package. On steel parts you'll be fine - on aluminium you'd want to be careful.
But yes, the single pads and elbow grease work too. The sander probably doesn't have enough motion to make the pads work... Unless this is a spinning sander not a vibrating/dancing (random orbit) sander.
cdmccul
Well-known member
As mentioned in prior posts, I have a 1978 Bobcat 632 that I bought a couple of months ago. It starts and runs now but is consuming coolant by the gallons .. with white cloud-like fumes coming off from the exhaust pipe .. then within about 5 minutes running at idle, the coolant level drops (since it evaporates so quickly) and the engine starts heating up!
Being a rookie, I am not sure what is going on but from reading various websites and forums I gather that the head gasket might be blown .. and as such the coolant leaks into the combustion chamber to burn off and evaporate (fast!).
I have no idea how I would be able to do this alone, but contemplating pulling the engine and see if I can get to the head gasket .. and possibly replace it. From experienced folks in this forum, can I get some suggestions for the following:
(1) can the engine be pulled without the hoist that everyone seem to use? I don’t have such a hoist and am thinking of creating a wooden platform behind the Bobcat to possibly slide the engine out .. is that even practical?
(2) If I indeed was able to pull the engine out, should I look into actually rebuilding it? If so, is that a very difficult and challenging task? Very expensive?
(3) Any other related advise from experts would be highly appreciated!
MANY THANKS!
Quick Background:
(A) Replaced radiator / radiator hoses (B) Added new electronic ignition distributor / flame thrower (C) New spark plugs (D) New starter (E) New carburetor (F) Compression tests at 110-90-110-110 (G) Engine is always oily from outside with tons of sludge at the bottom (H) Hydraulics seem to be fine - bucket is able to lift and maneuver 900 pound round bales for my horses (I) I realize that I made a bad decision buying this Bobcat, but at this point I feel if I put enough effort (and money!) to get it running correctly, it might be a useful addition to my homestead (I) So far I have about 6K into it.
I went back and reread your first post in the thread here. LOOK HOW FAR YOU'VE COME!!! In a matter of weeks, you have learned SOOOO much and done things that maybe you've never done or maybe never even thought you'd do.
Even if you have to stick a fork in it for some unforeseen reason, you'll never lose this experience that you've gained. GOOD ON YOU!
Ok, I've refilled my popcorn.
Great to see your progress getting through this motor job. There is no magic in there but attention to details are key.
I searched on Rockauto for that Hastings number, they do list it also in bore oversizes of .020, 030, 040 and .060, no standard size listed. You will need to know what size to order the correct one. If the bore has not been oversized you will need to check and likely file fit each ring to the bore it is going into checking it's end gap at the smallest dimension{most likely toward the bottom of the stroke}.
For the topic of conversation, a proper crosshatch pattern is necessary for oil retention on the cylinder walls to provide for good ring sealing.
To clean up the grit after honing you want to scrub the bores with hot soapy water and a brush. you know you are done when you can take a paper towel sprayed with carb or brake cleaner and wipe a dry bore and get no dirt{the towel will remain clean}. It can be time consuming but will yield long lasting results.
cdmccul
Well-known member
Oil retention! Thank you, that makes sense, and I remember reading that now that you say it. Didn't know about the scrubbing thing, very good to know.
OP
OP
bobcatzack
Well-known member
- Joined
- Oct 16, 2022
- Messages
- 122
My bad, was late last night I didn’t realize the small pads you’ve recommended fits on a drill! I will order these from Amazon today, thanks!They might make something like that... That sander is a "random orbit" style?
Those roloc pads fit on arbors that chuck into your favorite drill. They really work best spinning at several hundred rpm.
Your local NAPA (AutoZone/Parts America, Checker, Western Auto, etc... even Ace Hardware) probably has a set with the Arbor and a few different grits/grades/colors of pads in one package. On steel parts you'll be fine - on aluminium you'd want to be careful.
But yes, the single pads and elbow grease work too. The sander probably doesn't have enough motion to make the pads work... Unless this is a spinning sander not a vibrating/dancing (random orbit) sander.
OP
OP
bobcatzack
Well-known member
- Joined
- Oct 16, 2022
- Messages
- 122
Haha definitely like your post!! I would surely not been here without the tremendous help/encouragement I am getting on this forum! Thanks everyone!I went back and reread your first post in the thread here. LOOK HOW FAR YOU'VE COME!!! In a matter of weeks, you have learned SOOOO much and done things that maybe you've never done or maybe never even thought you'd do.
Even if you have to stick a fork in it for some unforeseen reason, you'll never lose this experience that you've gained. GOOD ON YOU!
Ok, I've refilled my popcorn.

OP
OP
bobcatzack
Well-known member
- Joined
- Oct 16, 2022
- Messages
- 122
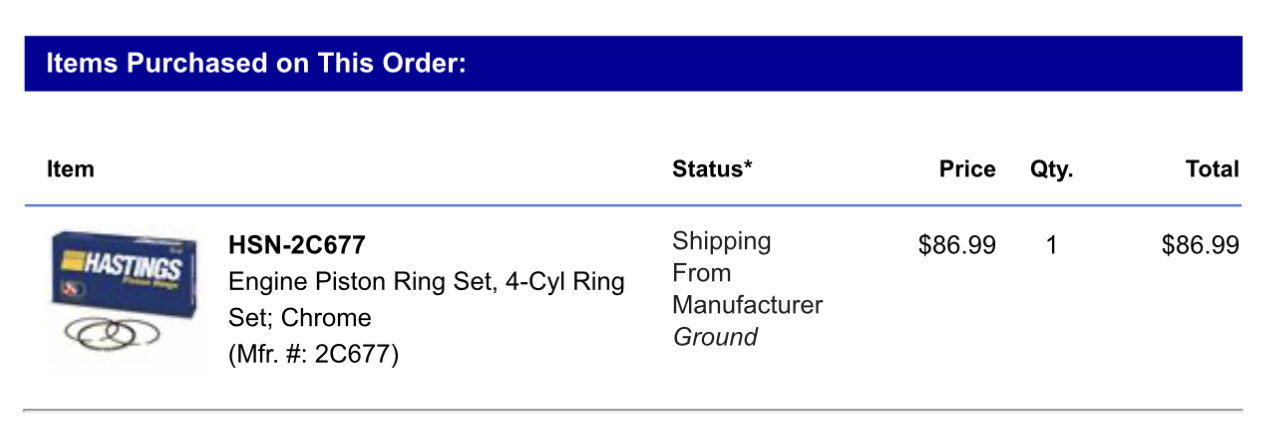
Thanks for the details! I am a bit unsure about the bore size/fit of the piston rings I ordered (pic attached). As far as cleaning with hot soapy water, did do that but will test with brake cleaner as you suggested. ThxGreat to see your progress getting through this motor job. There is no magic in there but attention to details are key.
I searched on Rockauto for that Hastings number, they do list it also in bore oversizes of .020, 030, 040 and .060, no standard size listed. You will need to know what size to order the correct one. If the bore has not been oversized you will need to check and likely file fit each ring to the bore it is going into checking it's end gap at the smallest dimension{most likely toward the bottom of the stroke}.
For the topic of conversation, a proper crosshatch pattern is necessary for oil retention on the cylinder walls to provide for good ring sealing.
To clean up the grit after honing you want to scrub the bores with hot soapy water and a brush. you know you are done when you can take a paper towel sprayed with carb or brake cleaner and wipe a dry bore and get no dirt{the towel will remain clean}. It can be time consuming but will yield long lasting results.
Attachments
As far as smoothing the head and block surfaces you are best to start with a 12" medium mill bastard file. Just press the file down with palm of your hand. It will highlight any low/high spots and get the residual sealer, etc off.
McMaster- Carr will ship overnight or second day.
If you disclose any high spots around the threaded holes for the head bolts (or the mating plain holes in the head) a 45-degree counter-sink in your drill will chamfer the hole in a couple of seconds. See above source. You want the bolts to clamp the full surface between bolts and not potentially just at the bolt. -Dick
OP
OP
bobcatzack
Well-known member
- Joined
- Oct 16, 2022
- Messages
- 122
I am a bit confused but will keep re-reading what you say and try to understand better. I do not want to damage the engine head surface by any means, right? I would be quite afraid to use a file (if it is made of metal)As far as smoothing the head and block surfaces you are best to start with a 12" medium mill bastard file. Just press the file down with palm of your hand. It will highlight any low/high spots and get the residual sealer, etc off.
McMaster- Carr will ship overnight or second day.
If you disclose any high spots around the threaded holes for the head bolts (or the mating plain holes in the head) a 45-degree counter-sink in your drill will chamfer the hole in a couple of seconds. See above source. You want the bolts to clamp the full surface between bolts and not potentially just at the bolt. -Dick
Last edited:
cdmccul
Well-known member
If the file is sitting flat against the head (large contact patch), and you're not trying to be aggressive, the file won't damage the head surface. But it will knock down burrs where holes were drilled or any machining operation was done.
Latest posts
-

-
T 243 HD upper pins and bushings at top rear of machine
- Latest: PALLETTOBYPALLET
-
-
-

-
-
-
-

-
-
