Mustang 1700 Reset

Help Support SkidSteer Forum:

jonesallu

Member
Joined
Nov 12, 2023
Messages
14
I acquired this skid steer from a friend for little to nothing. He said it ran and operated well, but smoked when it was parked 10 years ago. It's lived outside for 10 years but we'll pump some life back into it. I'll post periodically on my progress. I've narrowed it down to a 1972 to a 1976.

In the beginning:

IMG_20230914_122209653_HDR.jpg
IMG_20230914_122218793_HDR.jpg
IMG_20230914_130441506_HDR.jpg


Progress:

IMG_20230930_142214956_HDR.jpg
IMG_20230930_152742181_HDR.jpg
IMG_20231108_131851343_HDR.jpg
IMG_20231111_172800139.jpg


Today:

IMG_20231120_150451057.jpg
IMG_20231120_180003955.jpg


The bad:
- Left spool valve partially seized - already have another used one
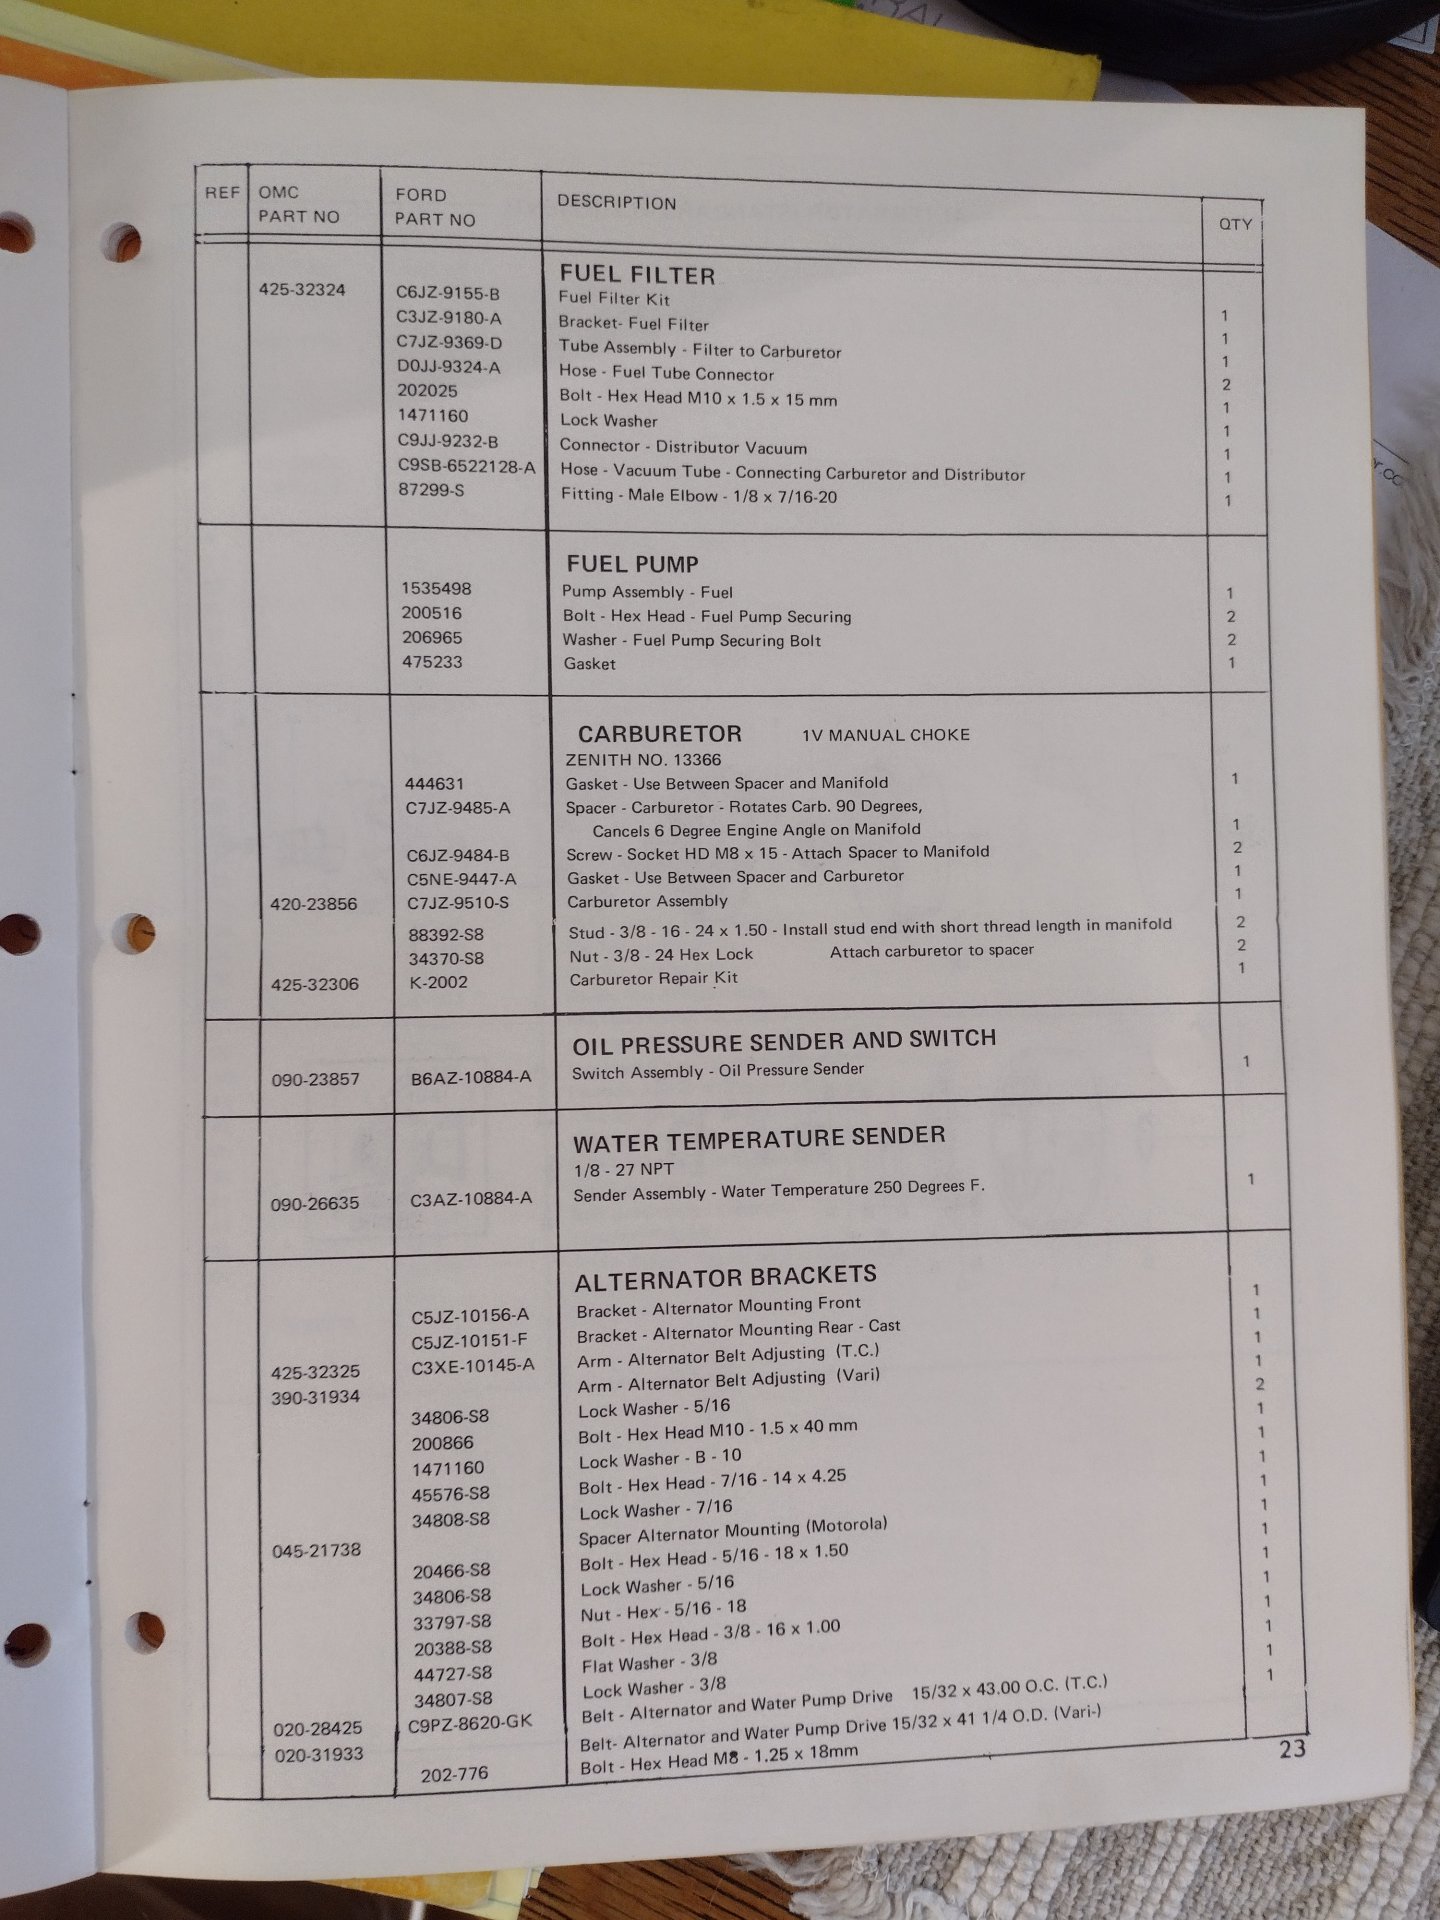
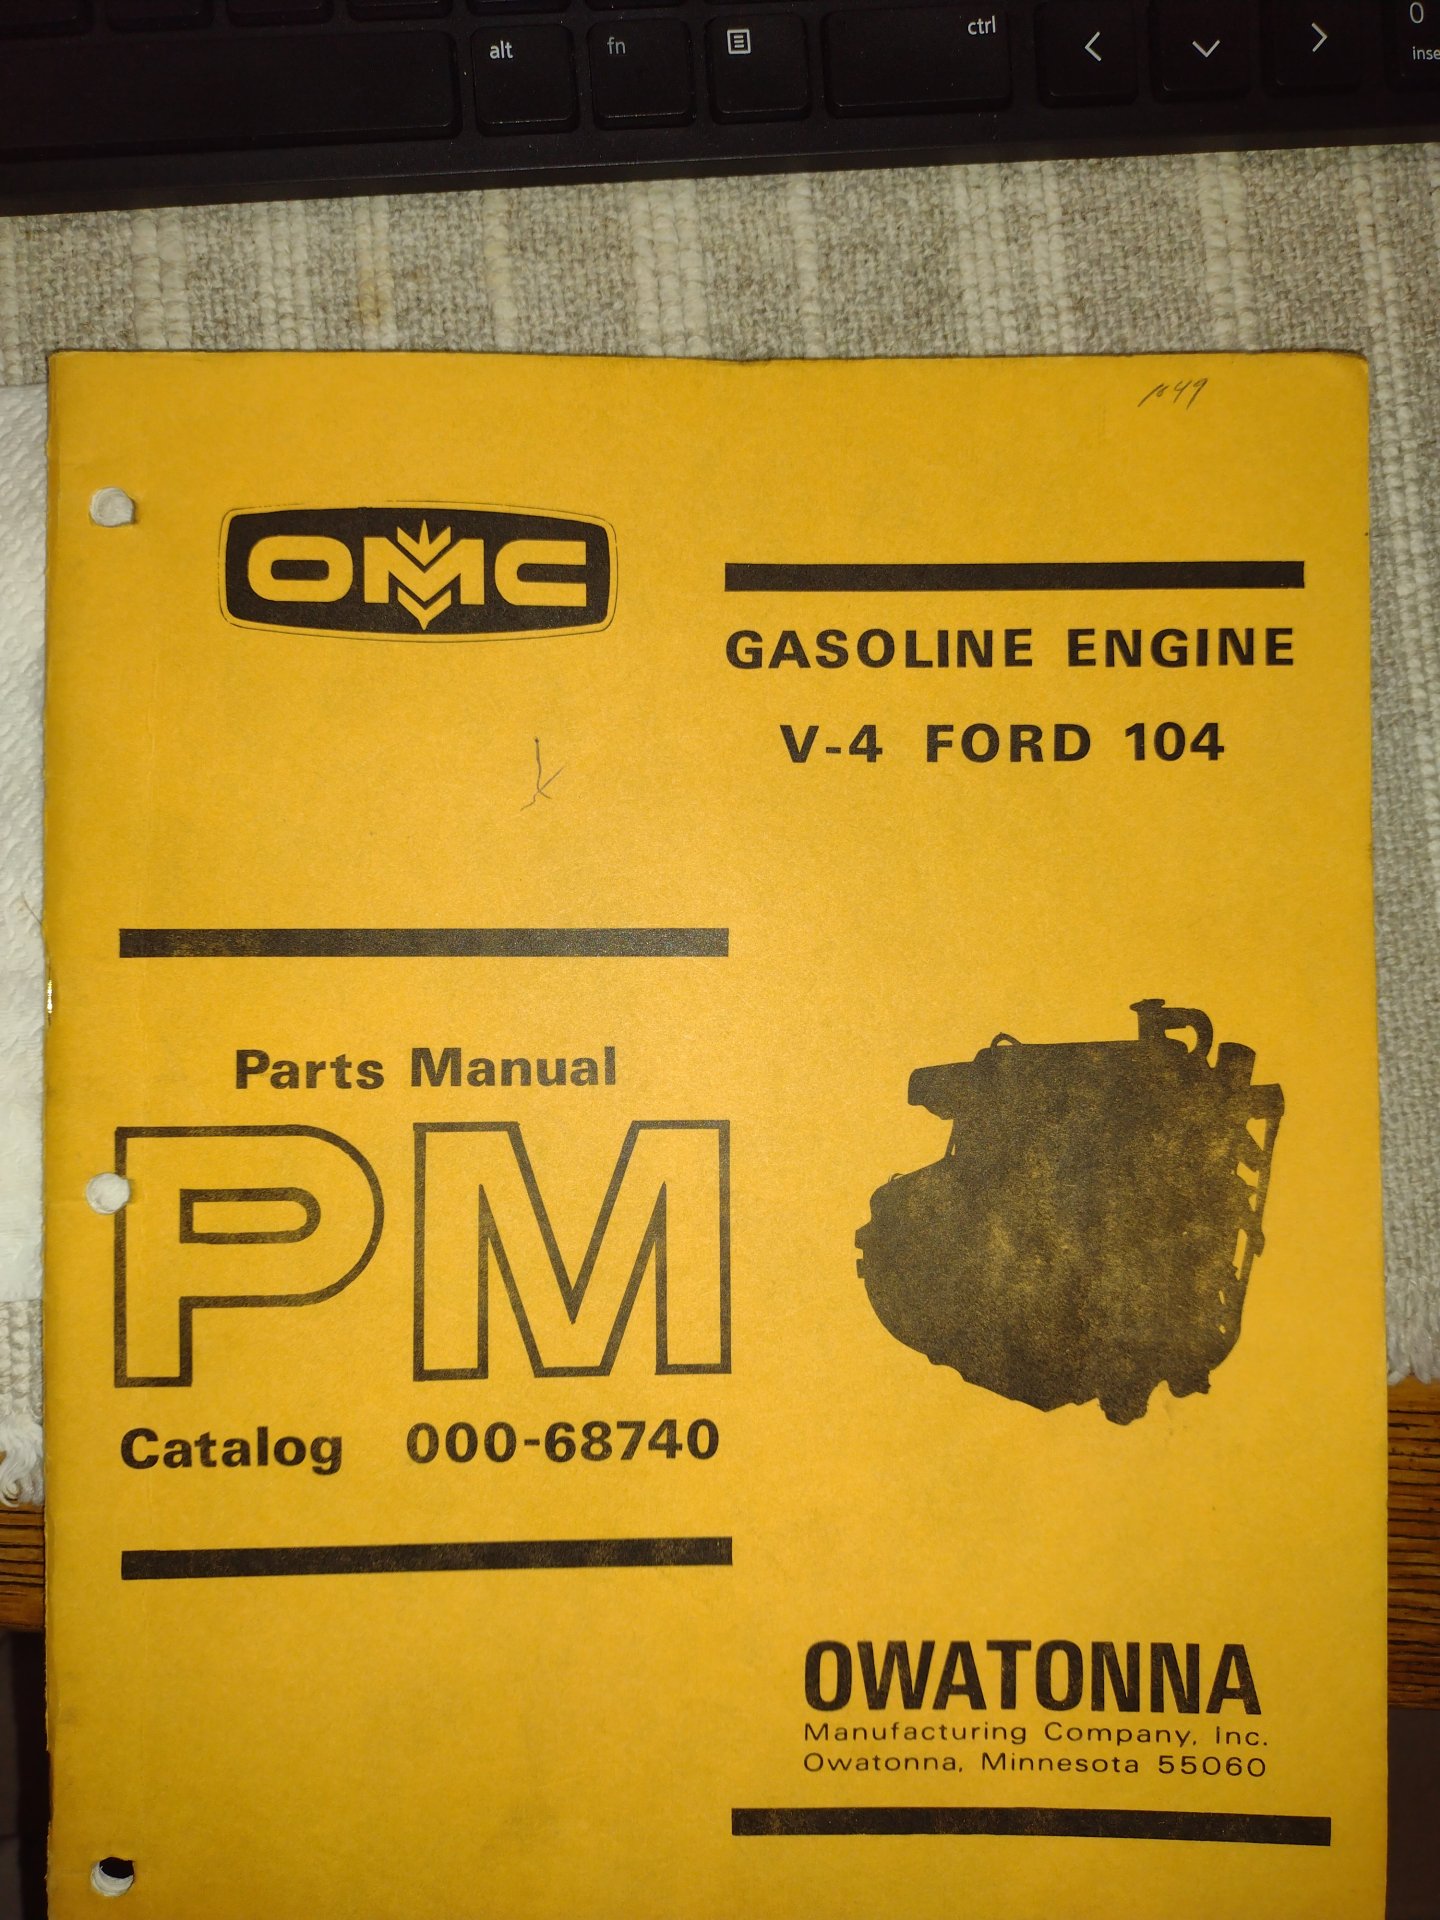
- Engine gets a complete overhaul $$ (Ford V4 104 CID)
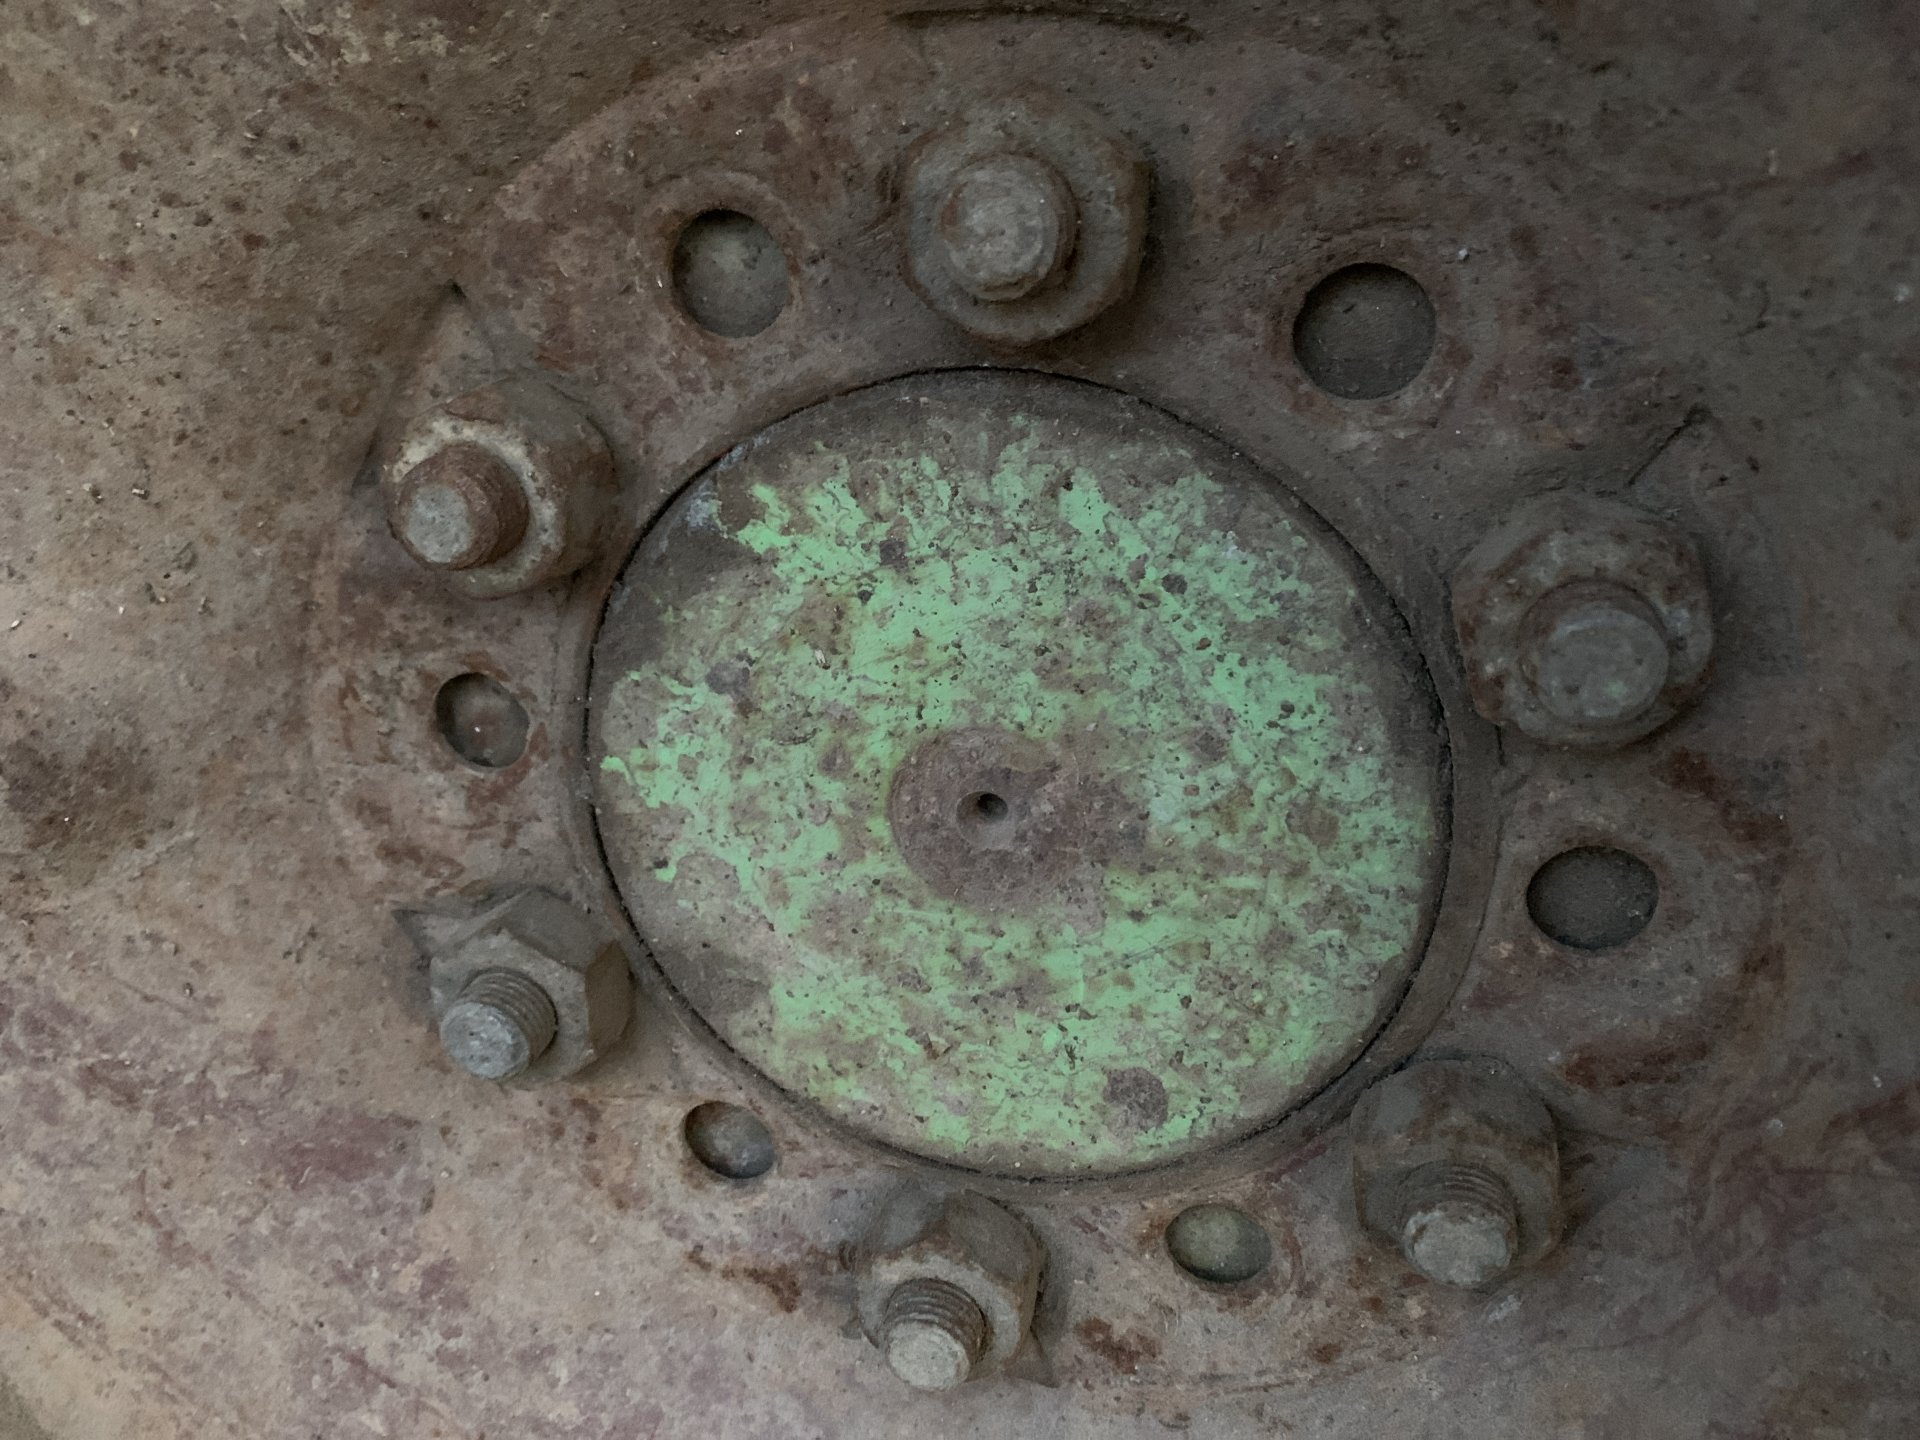
- Leaking rear axle shafts
- Tires, of course
- Missing fourth function hydraulic lines (anyone close to South Dakota have a 1700 they are parting out?)
- I will need to laser cut a few panels due to hacks and pitting

The good:
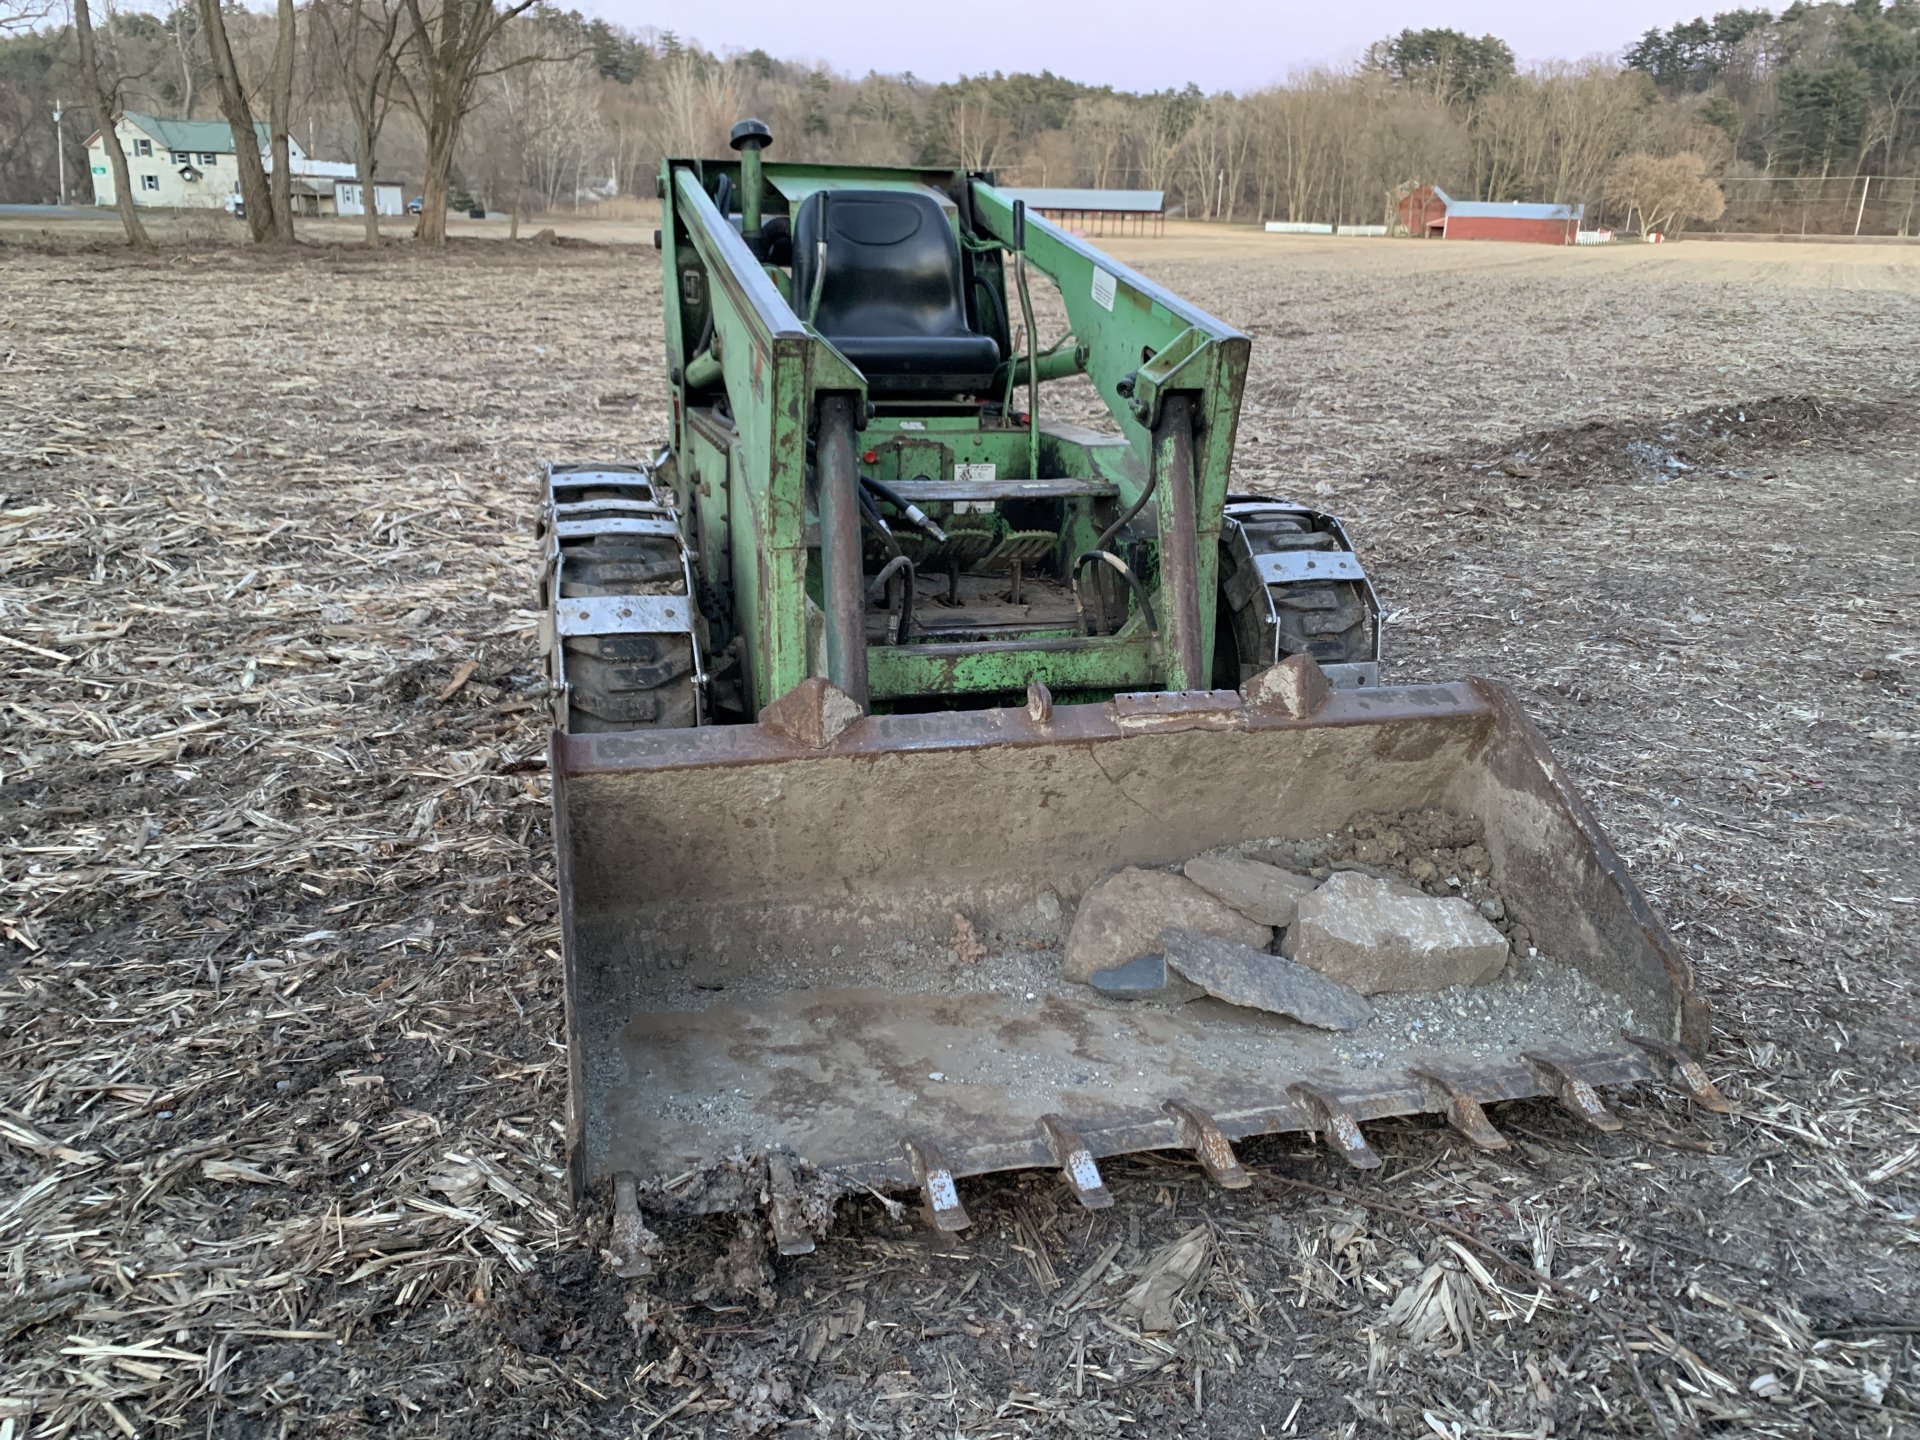
- Overall, pretty decent shape for the age
- Stock bucket - very good shape
- Stock Palm cab with Roll Guard - everything there including the door
- Hour meter was working and its at about 800 hours - don't know if total or at reset
- Someone reset this machine in the past and everything I've seen so far: they performed good work - I'm keeping my fingers crossed the clutch packs are good
- Gear box looks great
- Has the high-flow (25 gpm) pump in it
- Hydraulic fluid (Dex III) looks new and there is zero sludge on the bottom of the drive chambers - I think it's Dex as the machine was only used for clearing snow by the previous owner, i.e., for very cold weather

Next steps:
- Replace both rear axle seals
- Disassemble all the clutches and check for condition
- Adjust all chains
- Finish axle brakes
- Button-up the drive chambers and store for awhile - too many jobs needing the hoist bay in the heated part of the shop
- Gather all the parts I need to finish the drivetrain

Enjoy,
Al Jones
Brooking, SD
 
OP
OP
jonesallu

jonesallu

Member
Joined
Nov 12, 2023
Messages
14
The latest on the 1700 is figuring out if the engine is worth salvaging or finding a core to overhaul. There was a little antifreeze in the pan and some water got in the valve covers and cylinders. It was all from just sitting outside. I think the intake manifold gasket failed or there's a crack in it. The biggest disappointment is the engine did not have many hours on it from a prior overhaul. I think one cylinder will probably need to go 1 mm over. I've found all the parts I need, it's just a matter of $$.

IMG_20231129_105605796[1].jpg
IMG_20231129_125432616[1].jpg


IMG_20231203_151611899[1].jpg
IMG_20231208_133455608[1].jpg


That rusted head looks like it will clean up and be ok with new valves and seats.

I'll post photos oft he block when I get it stripped.

Al Jones
early 70s Mustang 1700
Brookings SD
 
OP
OP
jonesallu

jonesallu

Member
Joined
Nov 12, 2023
Messages
14
I decided to overhaul my engine. It's going to be WAYYYYY cheaper than purchasing any unknown engine out there.

Progress:

Here's what the drive clutches look like. I'm going to run them and see if I regret it.

IMG_20240107_151106880_HDR.jpg
IMG_20240107_151057730_HDR.jpg


Decided to sidetrack and overhaul the 12SI alternator. Whew, something easy. But, not much useable inside.

IMG_20240121_164928462.jpg
IMG_20240121_170620035.jpg


Time to pull the torque convertor.

IMG_20231203_151611899.jpg
IMG_20240123_134358022.jpg


IMG_20240123_125731381.jpg
IMG_20240123_132649480.jpg


This is a Ford C-4 transmission charge pump. You can see the torque convertor is a direct drive to the pinion that mates to the gear box.

IMG_20240123_134255744.jpg
IMG_20240123_134316018.jpg


While I'm waiting for parts to arrive, I'm going to replace the two rear axle seals. Look for that in a week or so.

Al Jones
early 70s Mustang 1700
Brookings SD
 
Last edited:

Berlincam86

Member
Joined
Nov 29, 2016
Messages
8
Nice I have one also. Do you happen to have a picture of how the alternator is mounted? Specifically the adjustment side. My bracket is missing.
 
OP
OP
jonesallu

jonesallu

Member
Joined
Nov 12, 2023
Messages
14
Nice I have one also. Do you happen to have a picture of how the alternator is mounted? Specifically the adjustment side. My bracket is missing.

Here is one marked up. One piece is cast that bolts above the exhaust exit in the head, the other two stamped. The adjuster bolts to the water pump housing. Other information attached

Alternator Brackets.jpg


Note I use a Delco 12SI that uses a standard spacer to use the stock alternator brackets.

Good luck,
Al
 
OP
OP
jonesallu

jonesallu

Member
Joined
Nov 12, 2023
Messages
14
Nice I have one also. Do you happen to have a picture of how the alternator is mounted? Specifically the adjustment side. My bracket is missing.
Here's another photo of where the adjuster bolts to the water pump housing. I've also included the pages out of the Owatonna Loader parts manual, Owatonna Engine parts manual, and Ford parts list that pertain to the mounting parts if that helps you.

Water Pump.jpg


IMG_20240209_180656120.jpg
IMG_20240209_180720547.jpg
IMG_20240209_180726696.jpg


IMG_20240209_180641700.jpg
IMG_20240210_094456983.jpg


IMG_20240210_093657242.jpg
IMG_20240210_093831415.jpg


Al Jones
 

Attachments

  • IMG_20240210_094456983.jpg
    IMG_20240210_094456983.jpg
    383.3 KB · Views: 25
  • IMG_20240209_180641700.jpg
    IMG_20240209_180641700.jpg
    420.8 KB · Views: 27

Berlincam86

Member
Joined
Nov 29, 2016
Messages
8
Awesome thank you. Yea I'm missing that adjustment bar. Hopefully I can find one. Love the enclosed cab on that one. I have a open cab.
 

Berlincam86

Member
Joined
Nov 29, 2016
Messages
8
Oh can you help with one more thing. Can you measure backspacing on your rims? I'm trying to get new ones. Mine has 4 different rims on it. Also is the backspacing different from front to rear. I know the front has the brakes but Mine didn't come with drums or anything. Would like the rims to be in line with the rears I'd like to get over the tire tracks eventually.
 
OP
OP
jonesallu

jonesallu

Member
Joined
Nov 12, 2023
Messages
14
Awesome thank you. Yea I'm missing that adjustment bar. Hopefully I can find one. Love the enclosed cab on that one. I have a open cab.
I'm sorry, I should have done this first - I dug the arm out of storage and here are two photos. Using the Ford part number on it, there are several for sale on ePay.

IMG_20240210_160725277.jpg
IMG_20240210_160732588_HDR.jpg


Al jones
 
OP
OP
jonesallu

jonesallu

Member
Joined
Nov 12, 2023
Messages
14
Oh can you help with one more thing. Can you measure backspacing on your rims? I'm trying to get new ones. Mine has 4 different rims on it. Also is the backspacing different from front to rear. I know the front has the brakes but Mine didn't come with drums or anything. Would like the rims to be in line with the rears I'd like to get over the tire tracks eventually.
I measured the backspacing from the extreme, inside edge of the wheel to the mounting surface on the wheel. It was 6-1/8 inches. I would have taken a picture but forgot my phone.

All the wheels are the same so the backspacing should be the same too. I eyeballed mine and all the axle flanges are in line. The front, outside axle housing accounts for the added brake components.

Let me know if you need anything else.

Al Jones
 

Berlincam86

Member
Joined
Nov 29, 2016
Messages
8
Ok thank you. I took all the tires off my rims and found 1 rim had the part number that's in the parts manual on it so I'm guessing it's the original rim. I measured mine with the tire off and got 6 inches to the pad that's on the back of the rims. But when those rims are on the rear axles they are really close to the body. On the front they are further away.
 
OP
OP
jonesallu

jonesallu

Member
Joined
Nov 12, 2023
Messages
14
Ok thank you. I took all the tires off my rims and found 1 rim had the part number that's in the parts manual on it so I'm guessing it's the original rim. I measured mine with the tire off and got 6 inches to the pad that's on the back of the rims. But when those rims are on the rear axles they are really close to the body. On the front they are further away.
Yes, the tires are close to the body. If I use chains or tracks, I'll have to put spacers in.
 

Berlincam86

Member
Joined
Nov 29, 2016
Messages
8
The rim in the back is a different backspace. Rim in front is original don't know if you can see it in the pic but the part number is there.
20240223_114017.jpg
20240223_114011.jpg
 

T-rustyfix

Active member
Joined
Aug 27, 2022
Messages
31
These wheels have extra lug holes. I turned my rims around on my 1200 and used the other set of holes to widen my wheelbase. No spacers are necessary. A reamer and 35 degree countersink rasp does a great job of enlarging the holes and machining a countersink for the lug nuts. The wheelbase is now exactly the same width as my bucket sides with the tracks installed. Two issues are that the tread pattern of the tires needs to be considered during mounting, and the tire stem will be on the inside. I mounted the rubber to orient forward, and I don't mind the stem location. The stability is markedly improved, and it is one of the best mods I ever did.
 

Attachments

  • image.jpg
    image.jpg
    785.7 KB · Views: 33
  • image.jpg
    image.jpg
    479.6 KB · Views: 34
OP
OP
jonesallu

jonesallu

Member
Joined
Nov 12, 2023
Messages
14
The rim in the back is a different backspace. Rim in front is original don't know if you can see it in the pic but the part number is there.
I threw two wheels back on mine and measured the distance between the wheel and body, and where the tire bulges the most. At the wheel is right at 2" and where the tire bulges is 1-3/4". Applies to both front and rear. I've also attached a photo from the parts book. I hope it helps.

Note the brakes on the front do not affect clearance to the body. All four axle shafts are the same part number so all four tires should have the same clearance. That being said, note the * in the parts book.

Good luck!

IMG_20240224_140132919.jpg
IMG_20240224_140108031_HDR.jpg
IMG_20240224_140142226.jpg


IMG_20240225_091412311.jpg
 

Latest posts

Top