Disgusting that they dropped your engine, just glad its only minimal damage. Looks really good so far!
It lives! Friday after work I began putting all the externals back on the long block. Intake/exhaust manifold, distributor, starter, oil fill, oil filter all went back on smoothly. Martin Motors included the gaskets for everything.

I got up early Saturday morning and continued by putting on all the cooling shrouds.

Later that morning I got some help and we stuffed the assembly into the machine.

Sunday morning and I'm ready to finish this off. I had already set piston one at TDC so it was just a matter of setting the distributor to fire cylinder one. Installed the plugs, wires, fuel pump, battery and added motor oil. Crossed my fingers and BAM the engine fires up first start! I hadn't put on the air cleaner and vacuum hoses yet so it was running pretty fast. Got all that hooked up and still too much RPM. I read through the service manual about the hook-up on the goverenor and it became clear. The throttle control rod was too short (it broke during tear down and I spliced it togeather). So after some adjustments there I was able to get the idle down and set high throttle to what I believe is 2800 rpm. The goverernor is kicking in under load so that's good. Next is getting wheels back on and getting out of the garage.

Another call for some help and I've got a buddy coming over to help me get the ROPS back on. The neighbors Case backhoe comes real handy!

Having a helping hand for that was huge. We got everything lined up and bolted down.

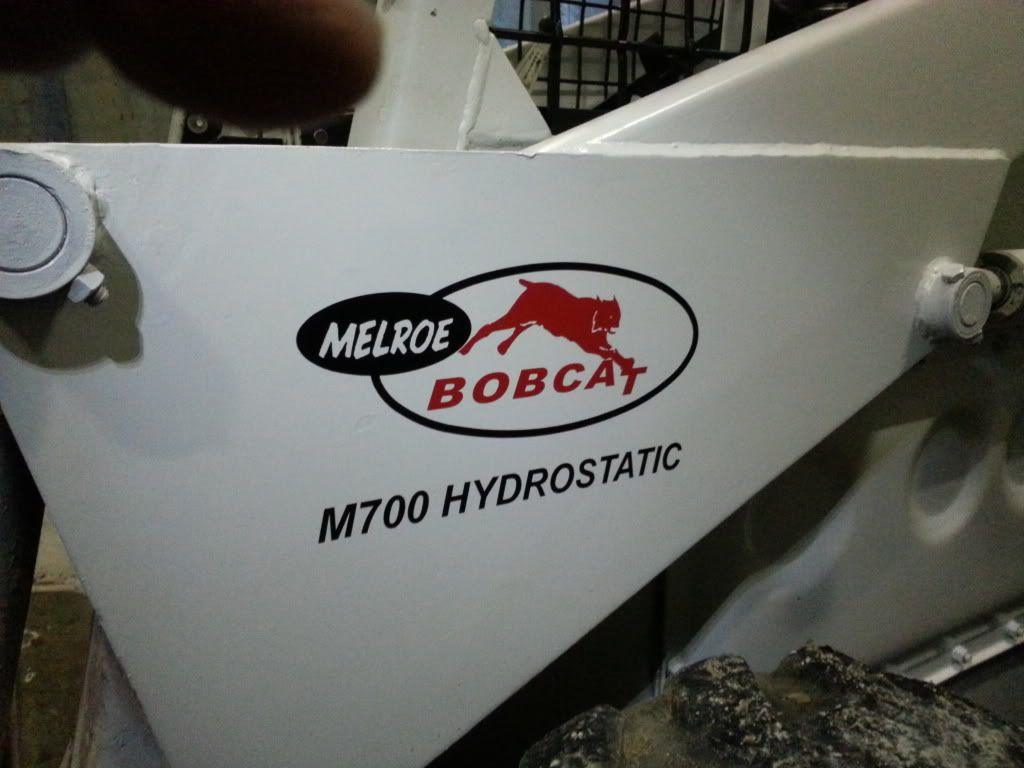
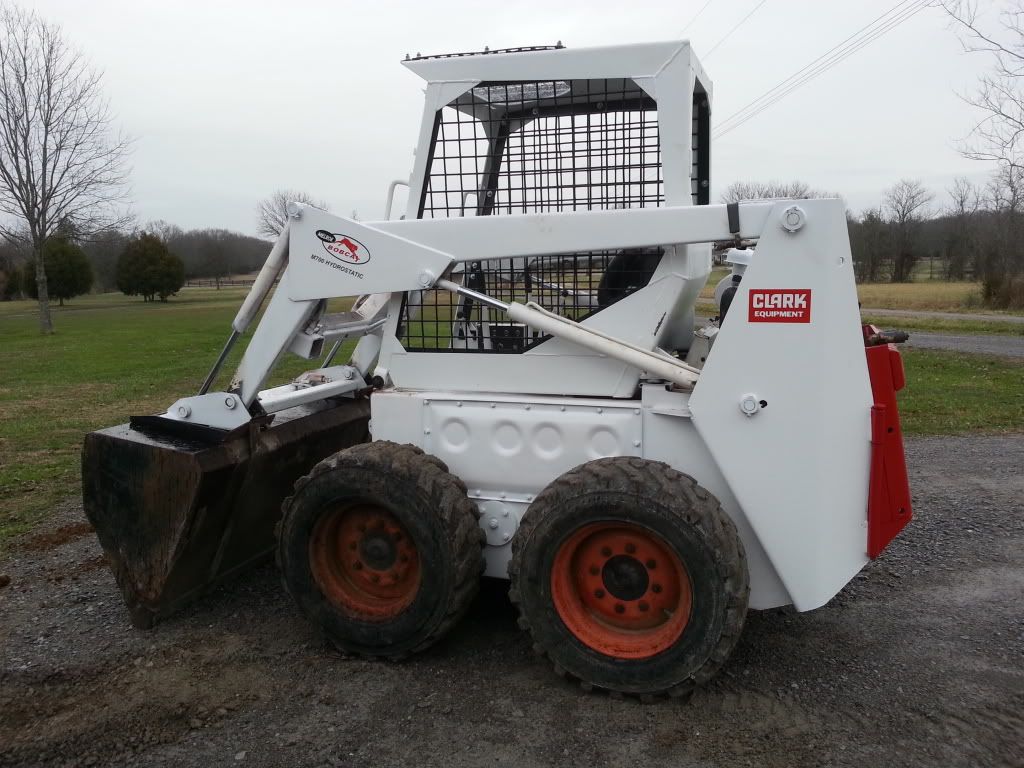
All I need to do now is put on the reproduction Melroe Bobcat stickers I had made. That and I'll strip the original wheels and repaint them. That will give me a good excuse to buy new tires too!

Aside from the appearence, the rebuilt motor has so much more power. No stumbling under load like before. The hydraulics are very responsive and strong.

Not bad for a 38 year old machine!
")