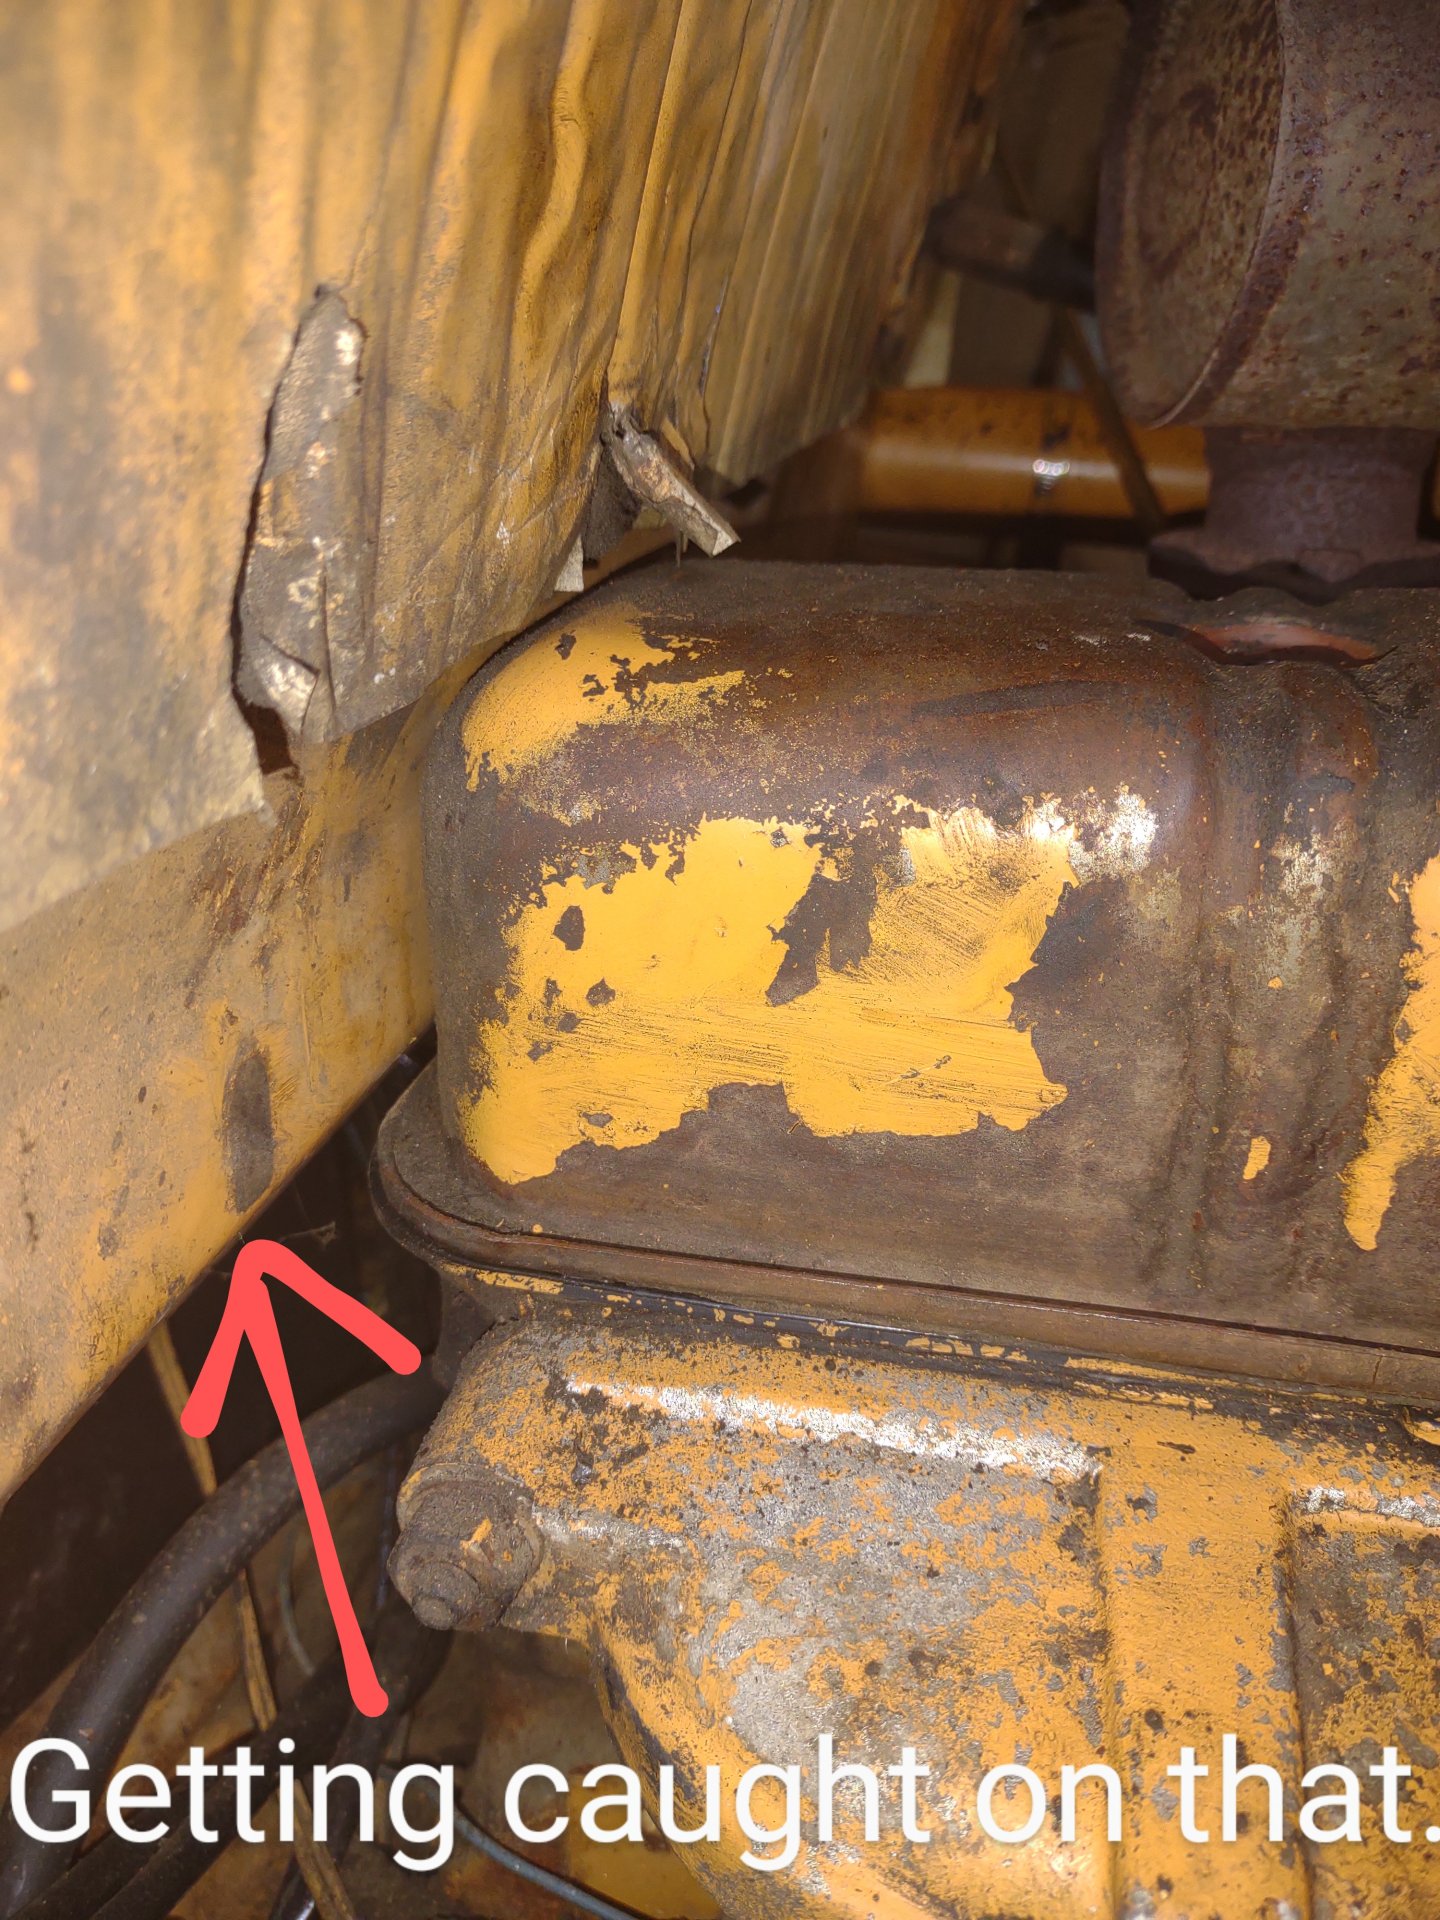
Depending on the machine it is in, it is fairly simple. I would recommend carefully power washing your engine first, as you dont want to get any dirt inside the fuel system. If your fuel tank is above the engine you will need to shut off the fuel valve or it will continue to drain once the fuel system is opened up. My tank is in the bottom of my skid steer so this wasnt an issue for me. Determine the direction of rotation of the engine (bump the starter while watching it), then remove the valve cover by removing the 2 nuts on the top. Rotate the engine with a ratchet until you can see the timing marks on the flywheel. I had to remove the radiator to access the crank pulley with a ratchet. These timing marks are seen through the hole near the starter. There is a pin in there that designates the degree the crankshaft is at. Once you begin to see the marks, check the #1 cyl valve pushrods. These should easily spin when rolling between fingers when the #1 Cyl is on the compression stroke. Continue rotating the engine until you line up "DC" with the timing pin indicator. Get a container to catch about a cup of fuel and place under the timing window of the fuel pump. Remove the little rectangle cover. This is usually held on with 2 flat tip screws and seals with a gasket. Fuel will come out for about 30 seconds. Look into the window and you will hopefully see 2 lines. One is stationary, and one is on the governor weight cage which rotates with the engine (once per 2 crank revolutions I believe). Line up these 2 lines using the ratchet on the crank pulley, now the pump is timing is set for removal. Remove any throttle linkages and shutoff solenoid wires/shutdown linkages. The fuel filter assembly has to come off, as well as the fuel lines. Mark the pump mount flange and timing cover (for ease of fine tuning the timing during reinstallation). Remove the nuts and washers on the pump. I had to grind down a horseshoe shaped wrench to fit the nut on the backside of the pump, its a tight fit. the other 2 weren't bad to access. Mine was not too hard to pull, aside for it being in a skid steer and having to reach through the loader arm and not being able to stand next to the engine due to the frame. Kinda reminds me of working on a jet ski.... Once everything is out of the way the pump will slide right off the pump drive shaft. There are 2 seals on the shaft which should be replaced. These seals keep crankcase pressure/oil out of the pump, and fuel in the pump (keeps the crankcase from filling with diesel fuel).
Download the DB2 pump rebuild instructions.
Cleanliness is important with the pump, so before taking the pump apart, set up a nice clean work area with good lighting. If you have a GoPro or action camera, record how it comes apart. You'll thank yourself later as the drawings in the instructions aren't always that great and there are a lot of parts that look similar inside the pump. Get some good quality paper towels or lint free absorbents for cleaning, as lint from rags can plug up the small passages inside the pump. The precision machining inside this old pump was very impressive, but any foreign material could easily destroy it. Keep it clean and you should be ok.
The seal kit I used was a Stanadyne 33814.
A few things to note when rebuilding:
Clean out each and every part of the pump during the process. Those flex ring pieces will get everywhere inside those pumps. Ensure you clean out the housing return lines where that check ball and spring assembly is. Mine was packed full of that material. If you have an electric solenoid on the cover, take that thing off and clean it. The pieces may hide behind and beside it.
Make sure to measure the High-Pressure pump piston travel, as this is critical to pump operation.
Be careful when reassembling the head into the body, as if you go too far the O-ring seal can expand into the openings for the bolts and vent wire area.
The governor weights can be a little tricky, just take your time getting the washer and shaft placed correctly, then line up the shaft with the governor arm before inserting the head into the pump body (if the governor arm is inat this point) as it wont be able to spin 360 degrees once fully inserted.
Use caution when reinstalling the cam advance screw on the bottom. I would recommend getting the correct tool for installation. I tried to torque mine and ended up cracking it in half. It was a bear to remove it. Ended up drilling it out with an oversize bit until the head of it came off. This created Little metal shavings. I took each and every part of the pump apart again and with a magnifying glass carefully removed the metal, rinsed in diesel, dried, inspected again, and bagged in ziplocks. This was tedious and took many hours to verify no metal was left.
All said and done it was time consuming and a little daunting at first, but once you figure out how it functions, assembly becomes easy to understand. Keep in mind mine did not work, but I will keep investigating.


![Pampers Sensitive Baby Wipes, Clinically Proven, Fragrance Free, Unscented, Water Based, Hypoallergenic, Multi-Use, Hand Wipes 336 Wipes Total (6X Flip-Top Packs) [Packaging May Vary]](https://m.media-amazon.com/images/I/41KLBHu9CAL._SL500_.jpg)