bobcat 853 hydrostatic pump leaks heavy between right and left side

Help Support SkidSteer Forum:

krabill

Member
Joined
Apr 5, 2023
Messages
14
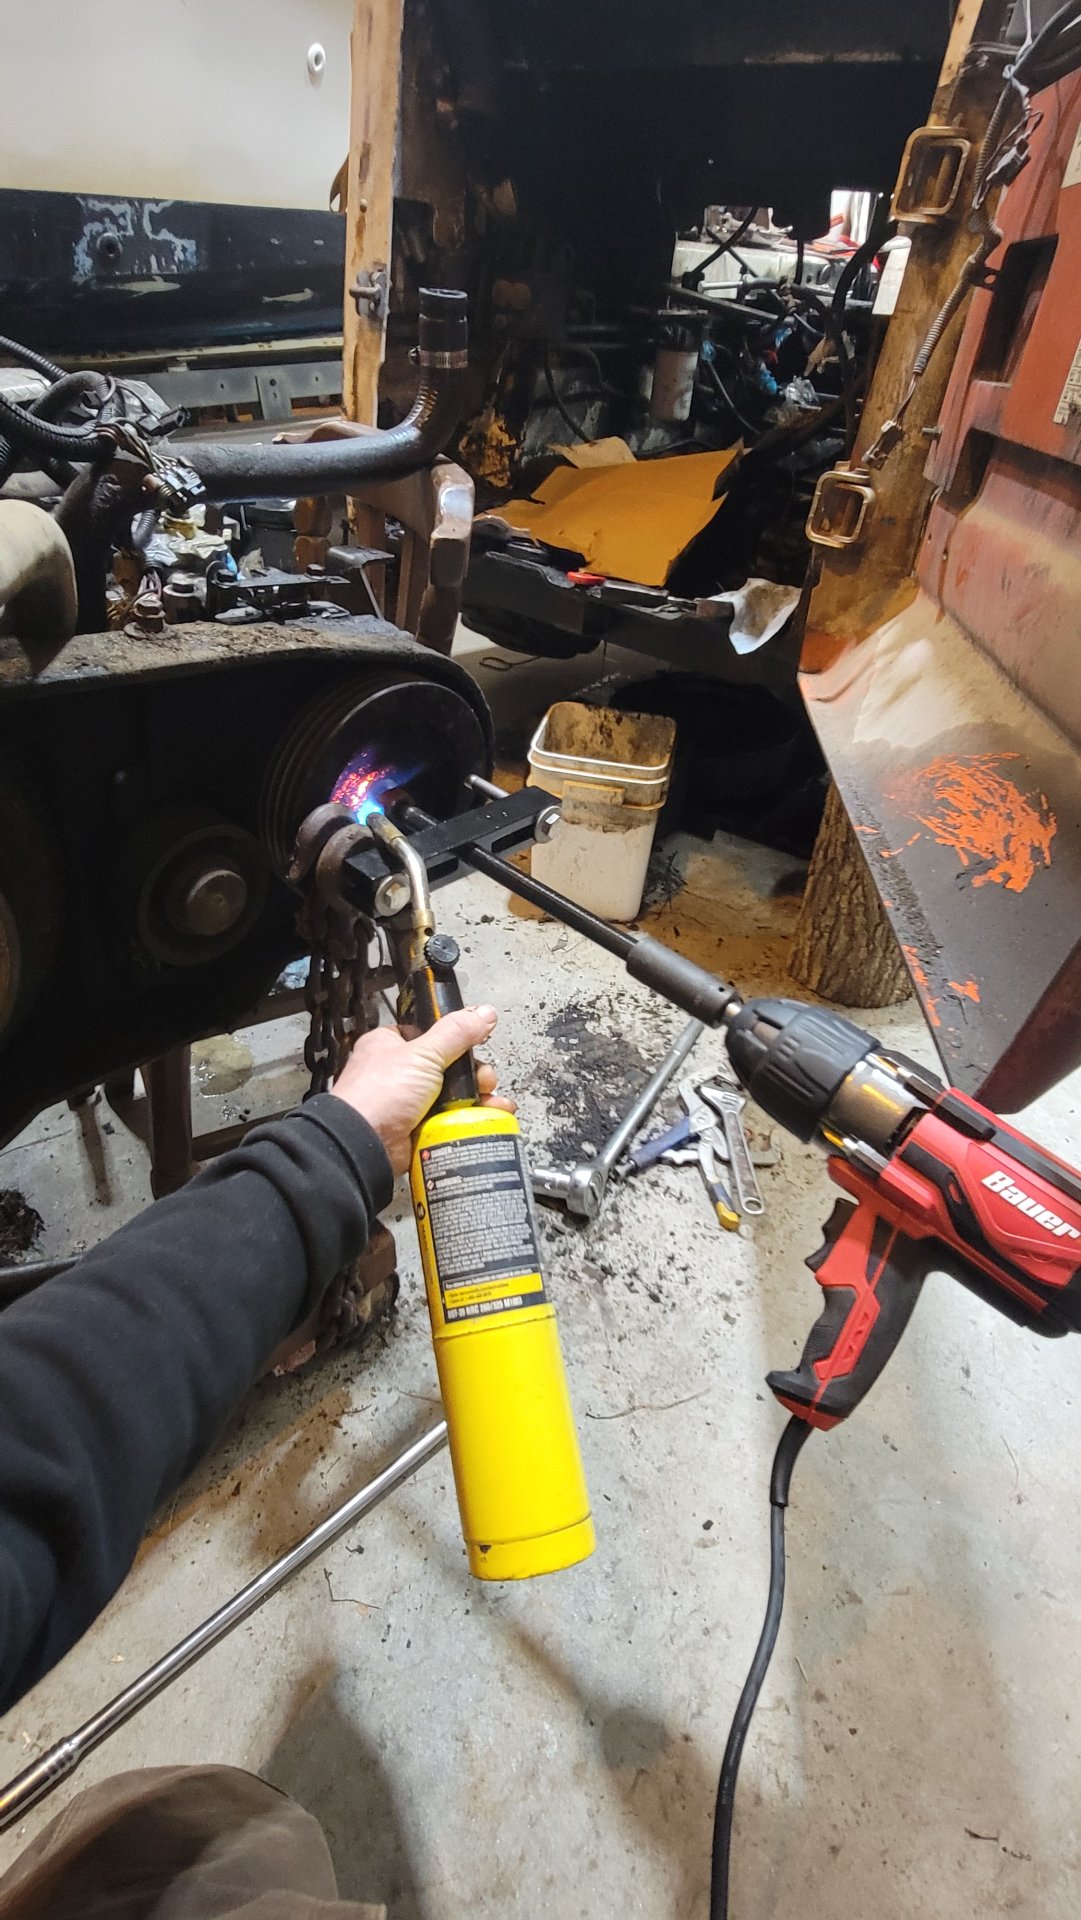
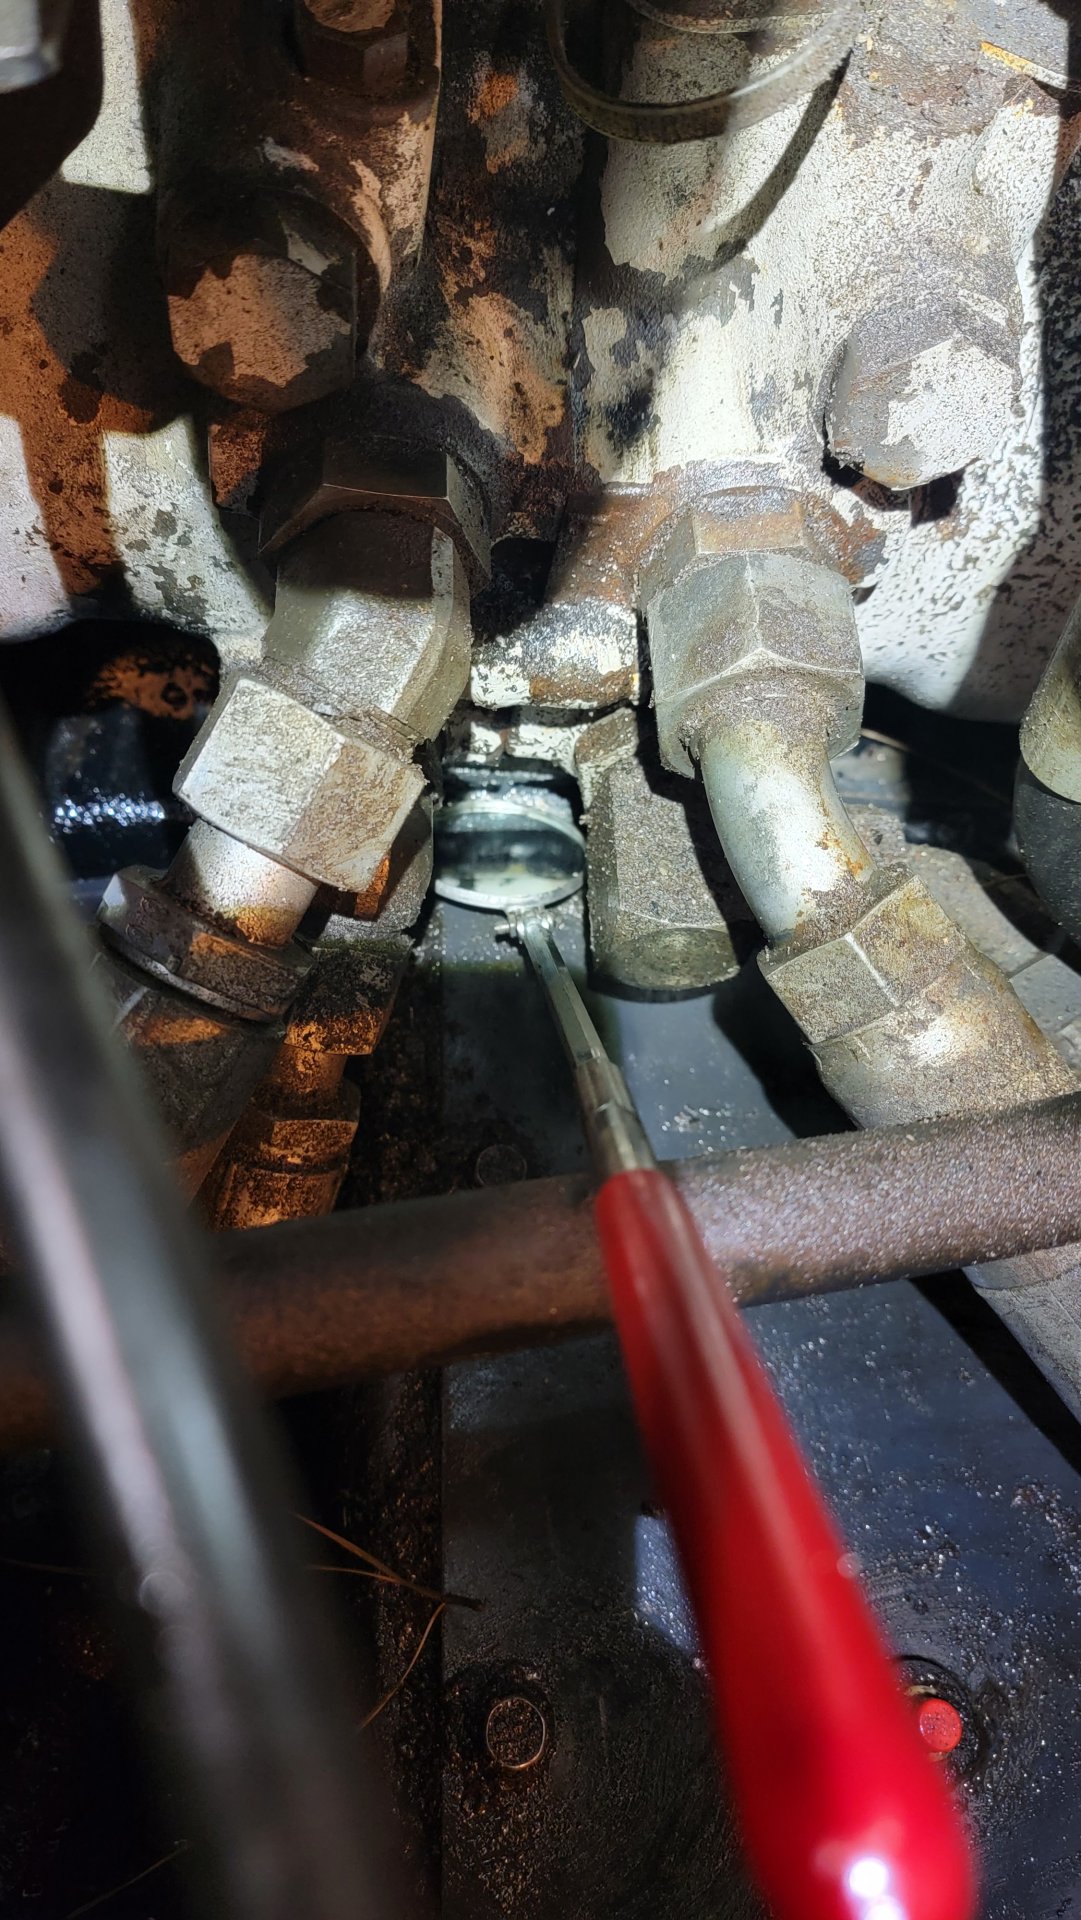
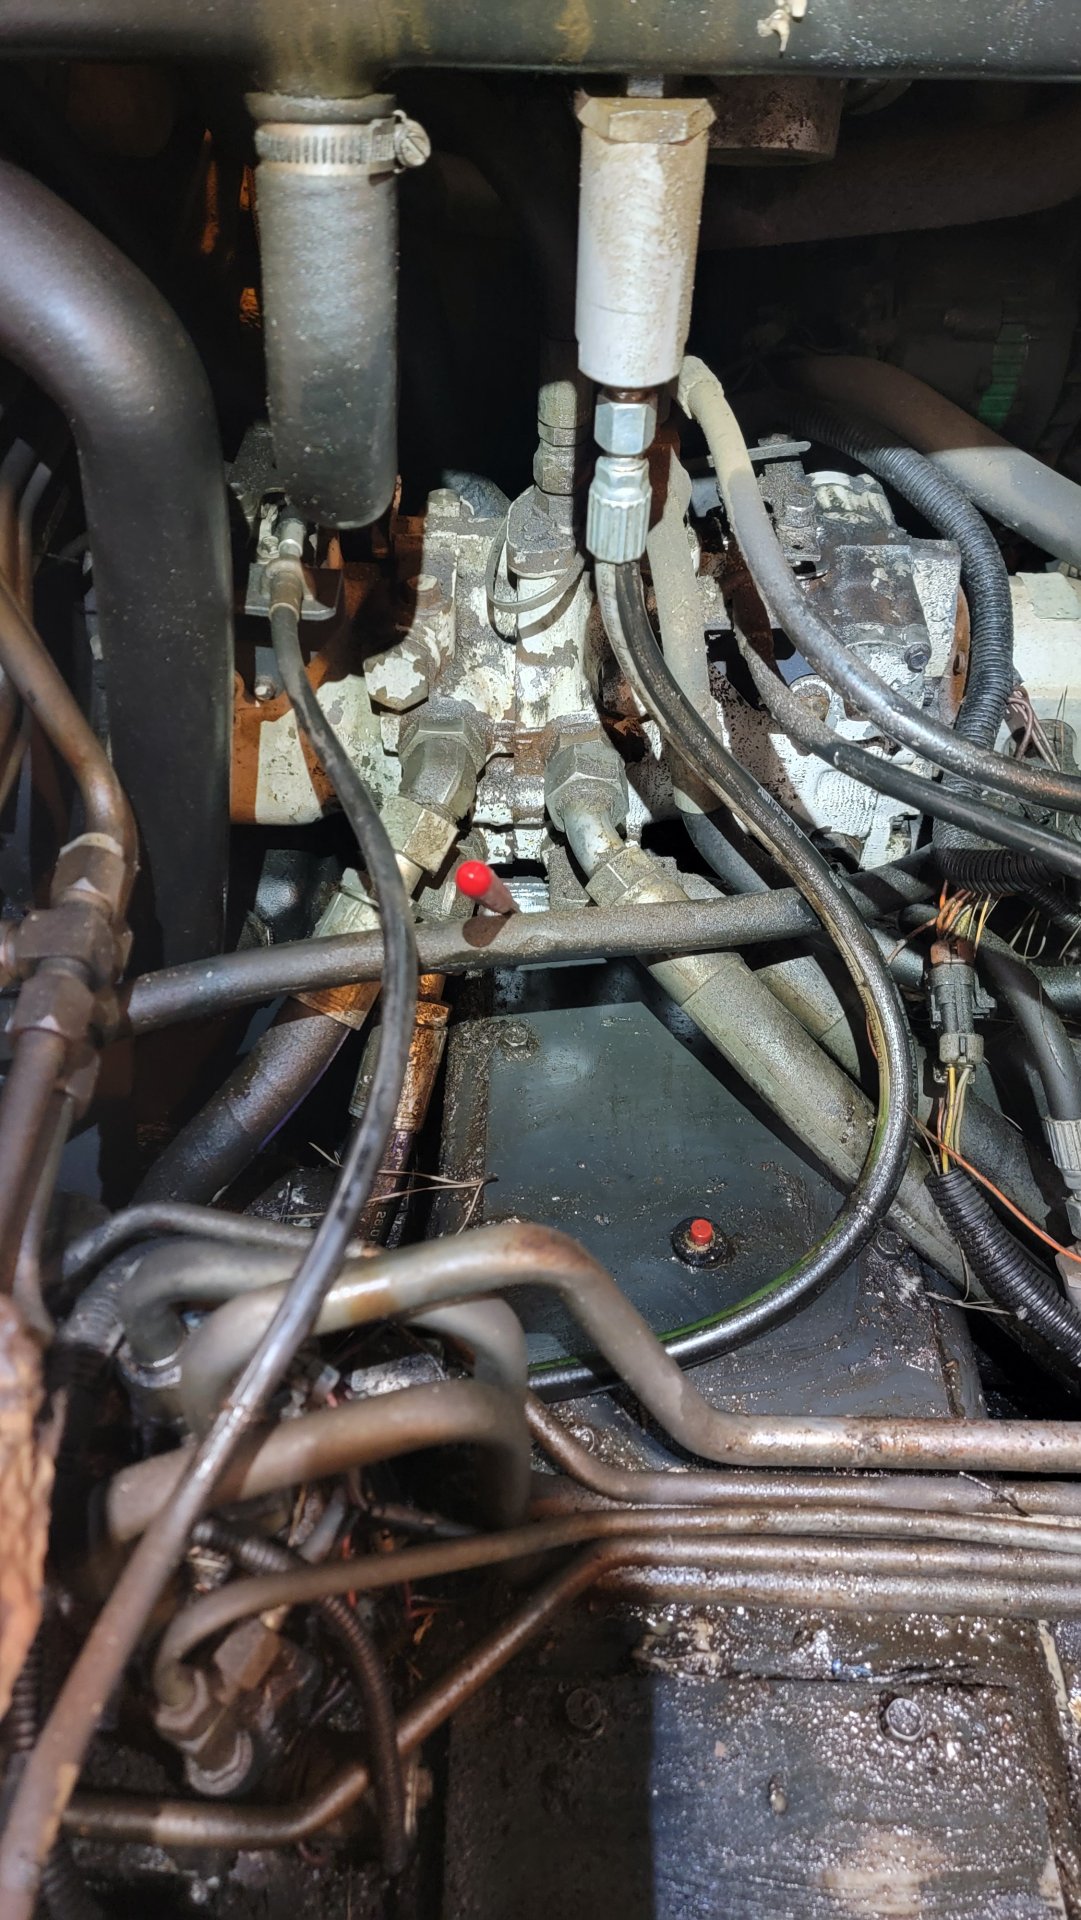
A new to me 853 I got knowing it had a "BAD" leak but the old owner didnt know where. I got it all cleaned up and found the leak. Its where the hydrostatic pump left and right sides mate, at the bottom. The leak is very strong when running. attached are pics showing the inspection mirror and you can almost see a drop of fluid coming out. It looks like there is a gasket between the two sides that failed which is causing the leak.

I expect I have to pull the engine/pump assembly to do the repair which is fine and I think I am setup to do so. I have the service manual for the 853 but in the section for the hydrostatic pump it says "
"SEE THE COMPONENT REPAIR MANUAL FOR HYDROSTATIC PUMPS FOR DISASSEMBLY AND ASSEMBLY PROCEDURE." I have searched all over for that manual online and came up empty. Does anyone have that manual in PDF? How hard is it to split that pump in half?

Any tips for dealing with a leak between here? Rest of the machine seem solid otherwise. It still runs great and moves fine with the leak, but leaks a gallon an hour I was told.
 

Attachments

  • 20231219_171954.jpg
    20231219_171954.jpg
    427.4 KB · Views: 85
  • 20231219_172001.jpg
    20231219_172001.jpg
    402 KB · Views: 92
OP
OP
K

krabill

Member
Joined
Apr 5, 2023
Messages
14
Update, found a newer service manual (rev 1996) that shows some of the pump breakdown. Much more helpful. Bobcat dealer will not rent or allow a borrow of the engine removal tool so I guess I am stuck building one.
 

wateka

Well-known member
Joined
May 25, 2022
Messages
124
Here's how I built the removal tool shown in the manual:


Here's how I removed the engine/pump assembly using the steps shown in the manual:
 
Last edited:

River Fluid Power

Well-known member
Joined
Aug 18, 2022
Messages
107
That pump only has three bolts holding it together. 2 twelve points and a nut on a stud. There are 4 or 5 o-rings between the two halves. The charge pump is also in between the two halves. You must make sure the charge pump cover locating pin goes back into the hole it is in when you take it apart. Moving the pin will change the operating rotation of the charge pump. If it is incorrect you will have no charge pressure. Good luck!
 
OP
OP
K

krabill

Member
Joined
Apr 5, 2023
Messages
14
That pump only has three bolts holding it together. 2 twelve points and a nut on a stud. There are 4 or 5 o-rings between the two halves. The charge pump is also in between the two halves. You must make sure the charge pump cover locating pin goes back into the hole it is in when you take it apart. Moving the pin will change the operating rotation of the charge pump. If it is incorrect you will have no charge pressure. Good luck!
wow, many thanks for the tip. Ive pulled a tandem pump apart once for an old case skidsteer but i'm no expert on this. Is that pin something that will just fall out when I split it or if I am careful will things stay in place so I will know how to put them back in?

I dont plan on doing a complete overhaul on the pump, my goal is to just fix that leaking gasket. But, when I split it, what should i really make sure to replace other than the gasket and those Orings you mention. Anything else that REALLY should be replaced while I have it split?
 
Last edited:

wateka

Well-known member
Joined
May 25, 2022
Messages
124
Having just rebuilt my pump, I learned that splitting the pump was the easy part. Getting it out and removed from the engine was much more labor intensive.

My guess is that you'll be able to decide that for yourself once you get the pump removed. You'll be able to decide if you want to repeat that again sooner, rather than later. Then, do you replace just the o-rings, or look at the wear parts, or...

While the engine is out replace your fuel pickup line. Very easy at that point. Much harder with the engine and pump installed.

All that said, do not take me for any type of expert. I have rebuilt a massive quantity of -one- hydrostatic pump in my lifetime, and I think I just learned, (courtesy of, and with much gratitude to, @River Fluid Power ) why my rebuilt pump has zero charge pressure. I have been bird-dogging my charge pressure issue since I reinstalled it and was about to build a hydraulic flow meter to help figure out why. Based on their comment, it would seem that I installed the charge pump cover pin in the incorrect hole and will have to remove the pump and engine (again) and split the pump.

I have some videos I made that may be helpful. I included links to them in an earlier part of this thread, but they aren't visible yet because "This message is awaiting moderator approval, and is invisible to normal visitors."

Meanwhile, here are some photos of what awaits you:

IMG_5327.jpg

IMG_5328.jpg

68045711713__E42A58AE-E96B-402B-9A40-20445FA191C4.jpg

IMG_5894.jpg

IMG_5891.jpg
 
OP
OP
K

krabill

Member
Joined
Apr 5, 2023
Messages
14
Thanks for the insight!!! I hope to have my motor removing jig built by new years. I've got a cherry picker to get it out but no forklift etc, so going to build their tool and do it right.

On the case skidsteer tandem pump I previously did, I pulled it out, fixed a broken shaft in the center of it only to put it all back together and find a single Oring that I did not get seated correctly. 10 hours later after doing the entire job again I replaced that Oring and it worked. That was not a fun day :) I'm trying not to pull this engine twice.....
 

River Fluid Power

Well-known member
Joined
Aug 18, 2022
Messages
107
wow, many thanks for the tip. Ive pulled a tandem pump apart once for an old case skidsteer but i'm no expert on this. Is that pin something that will just fall out when I split it or if I am careful will things stay in place so I will know how to put them back in?

I dont plan on doing a complete overhaul on the pump, my goal is to just fix that leaking gasket. But, when I split it, what should i really make sure to replace other than the gasket and those Orings you mention. Anything else that REALLY should be replaced while I have it split?
No problem at all. If you have the pump laying down on your bench you should easily be able to see where the pin is so you can get it back into the same hole. Otherwise I would recommend inspecting the charge pump components for excessive wear.
 

wateka

Well-known member
Joined
May 25, 2022
Messages
124
@River Fluid Power since a picture is worth a thousand words, using the below compilation of my pump and the Danfoss manual, there are two holes 180° apart, where the green and blue circles are? I obviously drew the dotted white hole since I unfortunately didn't get a full picture of that side of the pump.

1D082B60-C862-4FB8-A871-60A21CEE394A.jpeg
 

River Fluid Power

Well-known member
Joined
Aug 18, 2022
Messages
107
Having just rebuilt my pump, I learned that splitting the pump was the easy part. Getting it out and removed from the engine was much more labor intensive.

My guess is that you'll be able to decide that for yourself once you get the pump removed. You'll be able to decide if you want to repeat that again sooner, rather than later. Then, do you replace just the o-rings, or look at the wear parts, or...

While the engine is out replace your fuel pickup line. Very easy at that point. Much harder with the engine and pump installed.

All that said, do not take me for any type of expert. I have rebuilt a massive quantity of -one- hydrostatic pump in my lifetime, and I think I just learned, (courtesy of, and with much gratitude to, @River Fluid Power ) why my rebuilt pump has zero charge pressure. I have been bird-dogging my charge pressure issue since I reinstalled it and was about to build a hydraulic flow meter to help figure out why. Based on their comment, it would seem that I installed the charge pump cover pin in the incorrect hole and will have to remove the pump and engine (again) and split the pump.

I have some videos I made that may be helpful. I included links to them in an earlier part of this thread, but they aren't visible yet because "This message is awaiting moderator approval, and is invisible to normal visitors."

Meanwhile, here are some photos of what awaits you:

View attachment 5350
View attachment 5349
View attachment 5351
View attachment 5347
View attachment 5348
If your charge pump is clocked 180° out it will push back through the suction line instead of pulling oil in to the pump. Hope this helps.
Doh! I found the page and now I remember reading this.

View attachment 5359
Yes, you would put the pin in the "green" hole, opposite from the control side of the pump, for CCW input rotation.
 

wateka

Well-known member
Joined
May 25, 2022
Messages
124
Shout out to @River Fluid Power because I got the engine/pump out, split the hydrostatic pump, and sure enough, I had the charge pump installed incorrectly. I rotated the charge pump 180°, bolted it back together, reinstalled everything and now my wheels finally turn and I'm showing 80 ohms on my VDO charge pressure sender which translates to approximately 312 PSI.

Without that tip, I'd still be scratching my head. Thanks!

71440251-104B-4A14-8B4E-EAF3A031B4DA.jpeg
 

River Fluid Power

Well-known member
Joined
Aug 18, 2022
Messages
107
Shout out to @River Fluid Power because I got the engine/pump out, split the hydrostatic pump, and sure enough, I had the charge pump installed incorrectly. I rotated the charge pump 180°, bolted it back together, reinstalled everything and now my wheels finally turn and I'm showing 80 ohms on my VDO charge pressure sender which translates to approximately 312 PSI.

Without that tip, I'd still be scratching my head. Thanks!

View attachment 5463
You're very welcome, Wateka! Happy to help!
 
OP
OP
K

krabill

Member
Joined
Apr 5, 2023
Messages
14
Got my engine out yesterday and found the cause of the leak. the drive pumps only have the two bolts holding them together, well the bolt on the backside (next to engine) is broken off, I can see what is left of a stud. Not only that bolt is broken but the mounting bolt for the entire pump on the left side of the machine is also broken off!

Next is pulling the pump pully off of the shaft so I can take the pump to a workbench, I tried with a 3 jaw puller and a bit of heat with no joy. I just ordered the correct two bolt puller and will try again this week, that pulley is stuck on the shaft good!
 

wateka

Well-known member
Joined
May 25, 2022
Messages
124
Glad you got it out. I went through a couple of two bolt pullers at local stores until I found one online, below, with enough spread to match the two 1/2"-13 bolt holes on the pulley. I had to chase the pulley hole threads to clean them because they were completely clogged and wouldn't take the bolts. If the one you ordered is not wide enough, the below worked for me, although I had to grind the neck of my bolts a tad bit to fit them in the puller.

IMG_7792.jpeg
 
OP
OP
K

krabill

Member
Joined
Apr 5, 2023
Messages
14
Got my pulley off last night, what a bear! MAP gas wouldn't get it hot enough and had to switch to some light torching then some hits with a hammer and it finally popped off using the good puller.

One question. I bought a new fuel pickup line to replace as was mentioned earlier in this thread. But it looks like there are actually two? One for the primer ball and one for the other fuel line? Should I replace both pickups or just the one (and which one?) I have one pickup line kit now that I bought and it does have the screen at the bottom which seems to match the diagram for the fuel line that has the primer ball. Is that the main one to replace?
 

Attachments

  • fuelsystem.JPG
    fuelsystem.JPG
    63.7 KB · Views: 34
  • pulley.jpg
    pulley.jpg
    373.2 KB · Views: 35

Latest posts

Top