$#@##$! Spent the time to rebuild the right drive motor. Put it in whithout changing the seal from the motor to the chain case. 15 gallons ($170) of Bobcat hydro fluid later, now it is all in the chaincase. First question, would it be wise to clean the area around the chain case plug, drain, filter and reuse the fluid since 15 GALLONS of it is new? Second question, if the seal between the chaincase and dive motor was good before, should I have changed it out anyway? There was a O-ring on the mounting side of the pump, near a brass bushing, that I did not change. The one in the kit appeared to be too big. The Bobcat has 2000 hrs. This o-ring looked good, but could it be my problem instead of the chaincase seal? Thanks for any info.
You are using an out of date browser. It may not display this or other websites correctly.
You should upgrade or use an alternative browser.
You should upgrade or use an alternative browser.
Help Support SkidSteer Forum:
I would advise against taking fluid from the chain case, it will be full of metal particles from the chains and sprockets as they wear.
The seal you want is the one on the shaft that comes out of the motor carrier. The large O ring is just to seal the motor against the carrier. Ensure the case drain filter is not plugged, if it is, it can push fluid past the seal and into the chain case.
The seal you want is the one on the shaft that comes out of the motor carrier. The large O ring is just to seal the motor against the carrier. Ensure the case drain filter is not plugged, if it is, it can push fluid past the seal and into the chain case.
"The seal you want is the one on the shaft that comes out of the motor carrier. The large O ring is just to seal the motor against the carrier. Ensure the case drain filter is not plugged, if it is, it can push fluid past the seal and into the chain case." "motor carrier" sorry but I am new to some of the terms. Is the motor carrier the drive motor or are you talking about the side of the Bobcat itself where I pulled the motor off of? I replaced the O-ring that was approx. 4" that went between the motor and the side of the Bobcat, as you stated, that is not the one that is giving me the problem.I would advise against taking fluid from the chain case, it will be full of metal particles from the chains and sprockets as they wear.
The seal you want is the one on the shaft that comes out of the motor carrier. The large O ring is just to seal the motor against the carrier. Ensure the case drain filter is not plugged, if it is, it can push fluid past the seal and into the chain case.
The motor carrier is the big cast part that bolts to the chain case, it also has the drive motor that bounts to it. With the drive motor off, you should see a large seal, about 4-5" diameter with a weird step in it. The one that seals the face of the motor, if it was leaking, yuou'd have oil on the ground. As the oil is going to the chain case, this seal is holding up just fine."The seal you want is the one on the shaft that comes out of the motor carrier. The large O ring is just to seal the motor against the carrier. Ensure the case drain filter is not plugged, if it is, it can push fluid past the seal and into the chain case." "motor carrier" sorry but I am new to some of the terms. Is the motor carrier the drive motor or are you talking about the side of the Bobcat itself where I pulled the motor off of? I replaced the O-ring that was approx. 4" that went between the motor and the side of the Bobcat, as you stated, that is not the one that is giving me the problem.
Did you check the case drain filters? the alloy things that are connected to the case drain ports of the motors (small hoses). If they get plugged, the case drain pressure will increase and push past the seal.
Does that make any sense?
If you grab a manual, look at the chain case area, it will make sense when you can see the pictures.
There are 4 different seal kits for a 763 drive motor , the serial number alone can't assure you got the right kit , my dealer always ask for the tag number off the side the motor to ensure the right kit , being you said " there was a seal that didn't match " then I would think you got the wrong seal kit , as when I do one there are no extra parts , everything is used ---also as Tazza said , the case drain filter could be a problem as it should always be changed not cleaned when a drive motor is worked on or at the recomended service interval , the rock is pourous and tiny fragments can get lodged in the rock and cleaning it you will never get it all out which causes a back pressure ------------------- if you looking to change the carrier seals , I find the best way to get them out is a small slide hammer , drill a hole in the seal , screw in a screw attached to the slide hammer and pop it out ---------------The motor carrier is the big cast part that bolts to the chain case, it also has the drive motor that bounts to it. With the drive motor off, you should see a large seal, about 4-5" diameter with a weird step in it. The one that seals the face of the motor, if it was leaking, yuou'd have oil on the ground. As the oil is going to the chain case, this seal is holding up just fine.
Did you check the case drain filters? the alloy things that are connected to the case drain ports of the motors (small hoses). If they get plugged, the case drain pressure will increase and push past the seal.
Does that make any sense?
If you grab a manual, look at the chain case area, it will make sense when you can see the pictures.
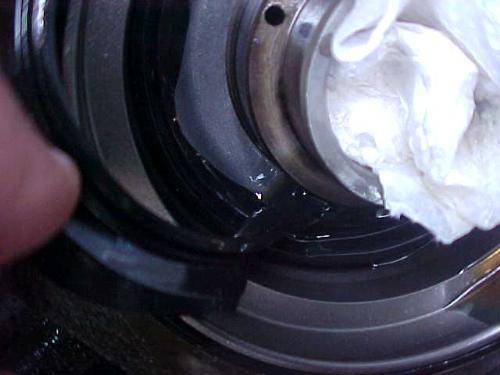
Sorry it took so long to post back. I finally had time today to remove the drive motor from th side of the bobcat. I found a tear in the 4-5" diaphram looking seal. I pulled on the rubber part of the seal and it started to come off. It looked like there is a metal plate behind the rubber part. As mentioned above, is this part of the seal that you said I need to drill a hole through to use the slide hammer? If so, is there anything behind the metal plate that will get hurt when I drill the hole? I am going to replace this seal and the rubber O-ring that sits next to the brass bushing on the drive motor, where the drive gear comes out, if that makes sense to everyone. Not sure how to post pics. I took three.There are 4 different seal kits for a 763 drive motor , the serial number alone can't assure you got the right kit , my dealer always ask for the tag number off the side the motor to ensure the right kit , being you said " there was a seal that didn't match " then I would think you got the wrong seal kit , as when I do one there are no extra parts , everything is used ---also as Tazza said , the case drain filter could be a problem as it should always be changed not cleaned when a drive motor is worked on or at the recomended service interval , the rock is pourous and tiny fragments can get lodged in the rock and cleaning it you will never get it all out which causes a back pressure ------------------- if you looking to change the carrier seals , I find the best way to get them out is a small slide hammer , drill a hole in the seal , screw in a screw attached to the slide hammer and pop it out ---------------
That's the seal you need the slide hammer for. There is a bearing behind it, but its about 3/4" back. Don't drill too deep and try and not force too many pieces of swarf back into it. The oil behind will fluch it out and not into the bearing, do don't be too concerned.Sorry it took so long to post back. I finally had time today to remove the drive motor from th side of the bobcat. I found a tear in the 4-5" diaphram looking seal. I pulled on the rubber part of the seal and it started to come off. It looked like there is a metal plate behind the rubber part. As mentioned above, is this part of the seal that you said I need to drill a hole through to use the slide hammer? If so, is there anything behind the metal plate that will get hurt when I drill the hole? I am going to replace this seal and the rubber O-ring that sits next to the brass bushing on the drive motor, where the drive gear comes out, if that makes sense to everyone. Not sure how to post pics. I took three.
You can even use self tapping screws and pliers to lever the seal out too. A slide hammer is a batter option though. You may want to do both sides, then you know its right.
Is the new seal a pain to get in? I also have pics if you let me know how to post them. I must have nicked the seal somehow when I was putting the drive motor back in. Thanks for the info.That's the seal you need the slide hammer for. There is a bearing behind it, but its about 3/4" back. Don't drill too deep and try and not force too many pieces of swarf back into it. The oil behind will fluch it out and not into the bearing, do don't be too concerned.
You can even use self tapping screws and pliers to lever the seal out too. A slide hammer is a batter option though. You may want to do both sides, then you know its right.
If you click media up the top and select images, follow the instructions to host pictures. When stored, you can right click then copy and paste to the message.Is the new seal a pain to get in? I also have pics if you let me know how to post them. I must have nicked the seal somehow when I was putting the drive motor back in. Thanks for the info.
I doubt you damaged the seal, it does sit a fair way back. Age and heat can make then fall apart over time.
As for installation, you really should have a tool to do it, but i'm sure you can do it with a punch. I made one that you use a hammer to drive into place.
OK, I put a new seal in and got everything back together and filled up with fluid. Everything works except the lift arms. It moves back and forth and the bucket tilt works. I checked for leaks and so far none found. What would cause the lift arms not to work? I am still going to post pics. Just a hint, I used a 4" PVC coupling piece with about a 12" section of 4" pipe, then a 4" into 2" reducer with a piece of 2" pipe lobbed off at the edge of the 2" side of the reducer which added strength for hammering. Kind of a backyard seal tool but it worked perfect. Just for info, the seal was about $13.If you click media up the top and select images, follow the instructions to host pictures. When stored, you can right click then copy and paste to the message.
I doubt you damaged the seal, it does sit a fair way back. Age and heat can make then fall apart over time.
As for installation, you really should have a tool to do it, but i'm sure you can do it with a punch. I made one that you use a hammer to drive into place.
The problem with your arms i bet is your seat or seat bar sensor not releaseing to allow you to move them. You may have bumped the solenoid on the control block or the wires? look for a solenoid hanging out the side of the control block, it will point to the other side of the frame. If you hot wire it with 12v, it should un-lock the arms.OK, I put a new seal in and got everything back together and filled up with fluid. Everything works except the lift arms. It moves back and forth and the bucket tilt works. I checked for leaks and so far none found. What would cause the lift arms not to work? I am still going to post pics. Just a hint, I used a 4" PVC coupling piece with about a 12" section of 4" pipe, then a 4" into 2" reducer with a piece of 2" pipe lobbed off at the edge of the 2" side of the reducer which added strength for hammering. Kind of a backyard seal tool but it worked perfect. Just for info, the seal was about $13.
Do you have a BICS machine? have a look at the lights, make sure they are all green.
Glad you rigged up an installation tool easily.
Tazza, I could not figure out how to add a picture folder. I put the pictures in the folder that says 763 additions. Could not figure out how to transfer pictures from there to this post ??The problem with your arms i bet is your seat or seat bar sensor not releaseing to allow you to move them. You may have bumped the solenoid on the control block or the wires? look for a solenoid hanging out the side of the control block, it will point to the other side of the frame. If you hot wire it with 12v, it should un-lock the arms.
Do you have a BICS machine? have a look at the lights, make sure they are all green.
Glad you rigged up an installation tool easily.
Tazza, I could not figure out how to add a picture folder. I put the pictures in the folder that says 763 additions. Could not figure out how to transfer pictures from there to this post ??


Thanks for posting the pics. I just got back to check the lift arm. I do have the bICS system and with the safety arm down, all lights light up. Movement forward and back work. Tilt up and down work. When I try the lift arms, they move just a little like pressure is trying to get to it. Everything worked before I took the drive motor off. I did power wash the heck out of everything before I started. I also removed some lines off of the square aluminum block under the seat thinking I could get better access to the small lines on the motor. Did this create air pockets? The only soliniods I see are two that point up that have two wires each. Any suggestions? Thanks
That block is the area that allows the arms to fall down when the solenoid locks you out.Thanks for posting the pics. I just got back to check the lift arm. I do have the bICS system and with the safety arm down, all lights light up. Movement forward and back work. Tilt up and down work. When I try the lift arms, they move just a little like pressure is trying to get to it. Everything worked before I took the drive motor off. I did power wash the heck out of everything before I started. I also removed some lines off of the square aluminum block under the seat thinking I could get better access to the small lines on the motor. Did this create air pockets? The only soliniods I see are two that point up that have two wires each. Any suggestions? Thanks
Try wiring 12V to the round coil on the control block, the one that points to the other side of the machine. It could have gotten water in to something it didn't like. Start there, if it lifts with power in the coil, you have a problem between the BICS box and the coil.Hopefully its just a connector. I'm not sure where the fuse is for this either, have a look at your fuses too, just in case.
I changed out the coils and had the same problem. When I jump it with a 12V wire, do I unplug the coil from the harness and do I need to ground the other terminal? The only coils that I see point straight up off of the Block.That block is the area that allows the arms to fall down when the solenoid locks you out.
Try wiring 12V to the round coil on the control block, the one that points to the other side of the machine. It could have gotten water in to something it didn't like. Start there, if it lifts with power in the coil, you have a problem between the BICS box and the coil.Hopefully its just a connector. I'm not sure where the fuse is for this either, have a look at your fuses too, just in case.
OK, I feel like an idiot. I rechecked everything I did and found that I had two hoses hooked in the wrong spots. I moved those where they should go and everything worked like it should. I ran the machine down the road and moved some stuff. So far no leaks and everything is working good. Thanks again for all of the advice.I changed out the coils and had the same problem. When I jump it with a 12V wire, do I unplug the coil from the harness and do I need to ground the other terminal? The only coils that I see point straight up off of the Block.
Excellent! glad its good to go now.OK, I feel like an idiot. I rechecked everything I did and found that I had two hoses hooked in the wrong spots. I moved those where they should go and everything worked like it should. I ran the machine down the road and moved some stuff. So far no leaks and everything is working good. Thanks again for all of the advice.
Well I spoke too soon. After using it for about an hour yesterday my original leak that I started with returned. There is a steady stream running from the drive motor. As you look at the motor installed, there is the end plate that has all of the hydraulic hoses to it. The leak is coming from between that plate and the next plate right about where there is a "shuttle valve". There is a pipe plug that takes an allen wrench to take off. What is this and what does it do? I left this in when I rebuilt the pump. I did not notice any cracks or anything unusual in this area when it was apart. I cleaned the filter located in the hydraulic line that has the aluminum filter houseing, so that should not be building up pressure.Excellent! glad its good to go now.