Mustang 1700 Reset

Skidsteer Forum - Bobcat, New Holland, Case, John Deere

Help Support Skidsteer:

I decided to overhaul my engine. It's going to be WAYYYYY cheaper than purchasing any unknown engine out there.

Progress:

Here's what the drive clutches look like. I'm going to run them and see if I regret it.

View attachment 5555 View attachment 5556

Decided to sidetrack and overhaul the 12SI alternator. Whew, something easy. But, not much useable inside.

View attachment 5557 View attachment 5558

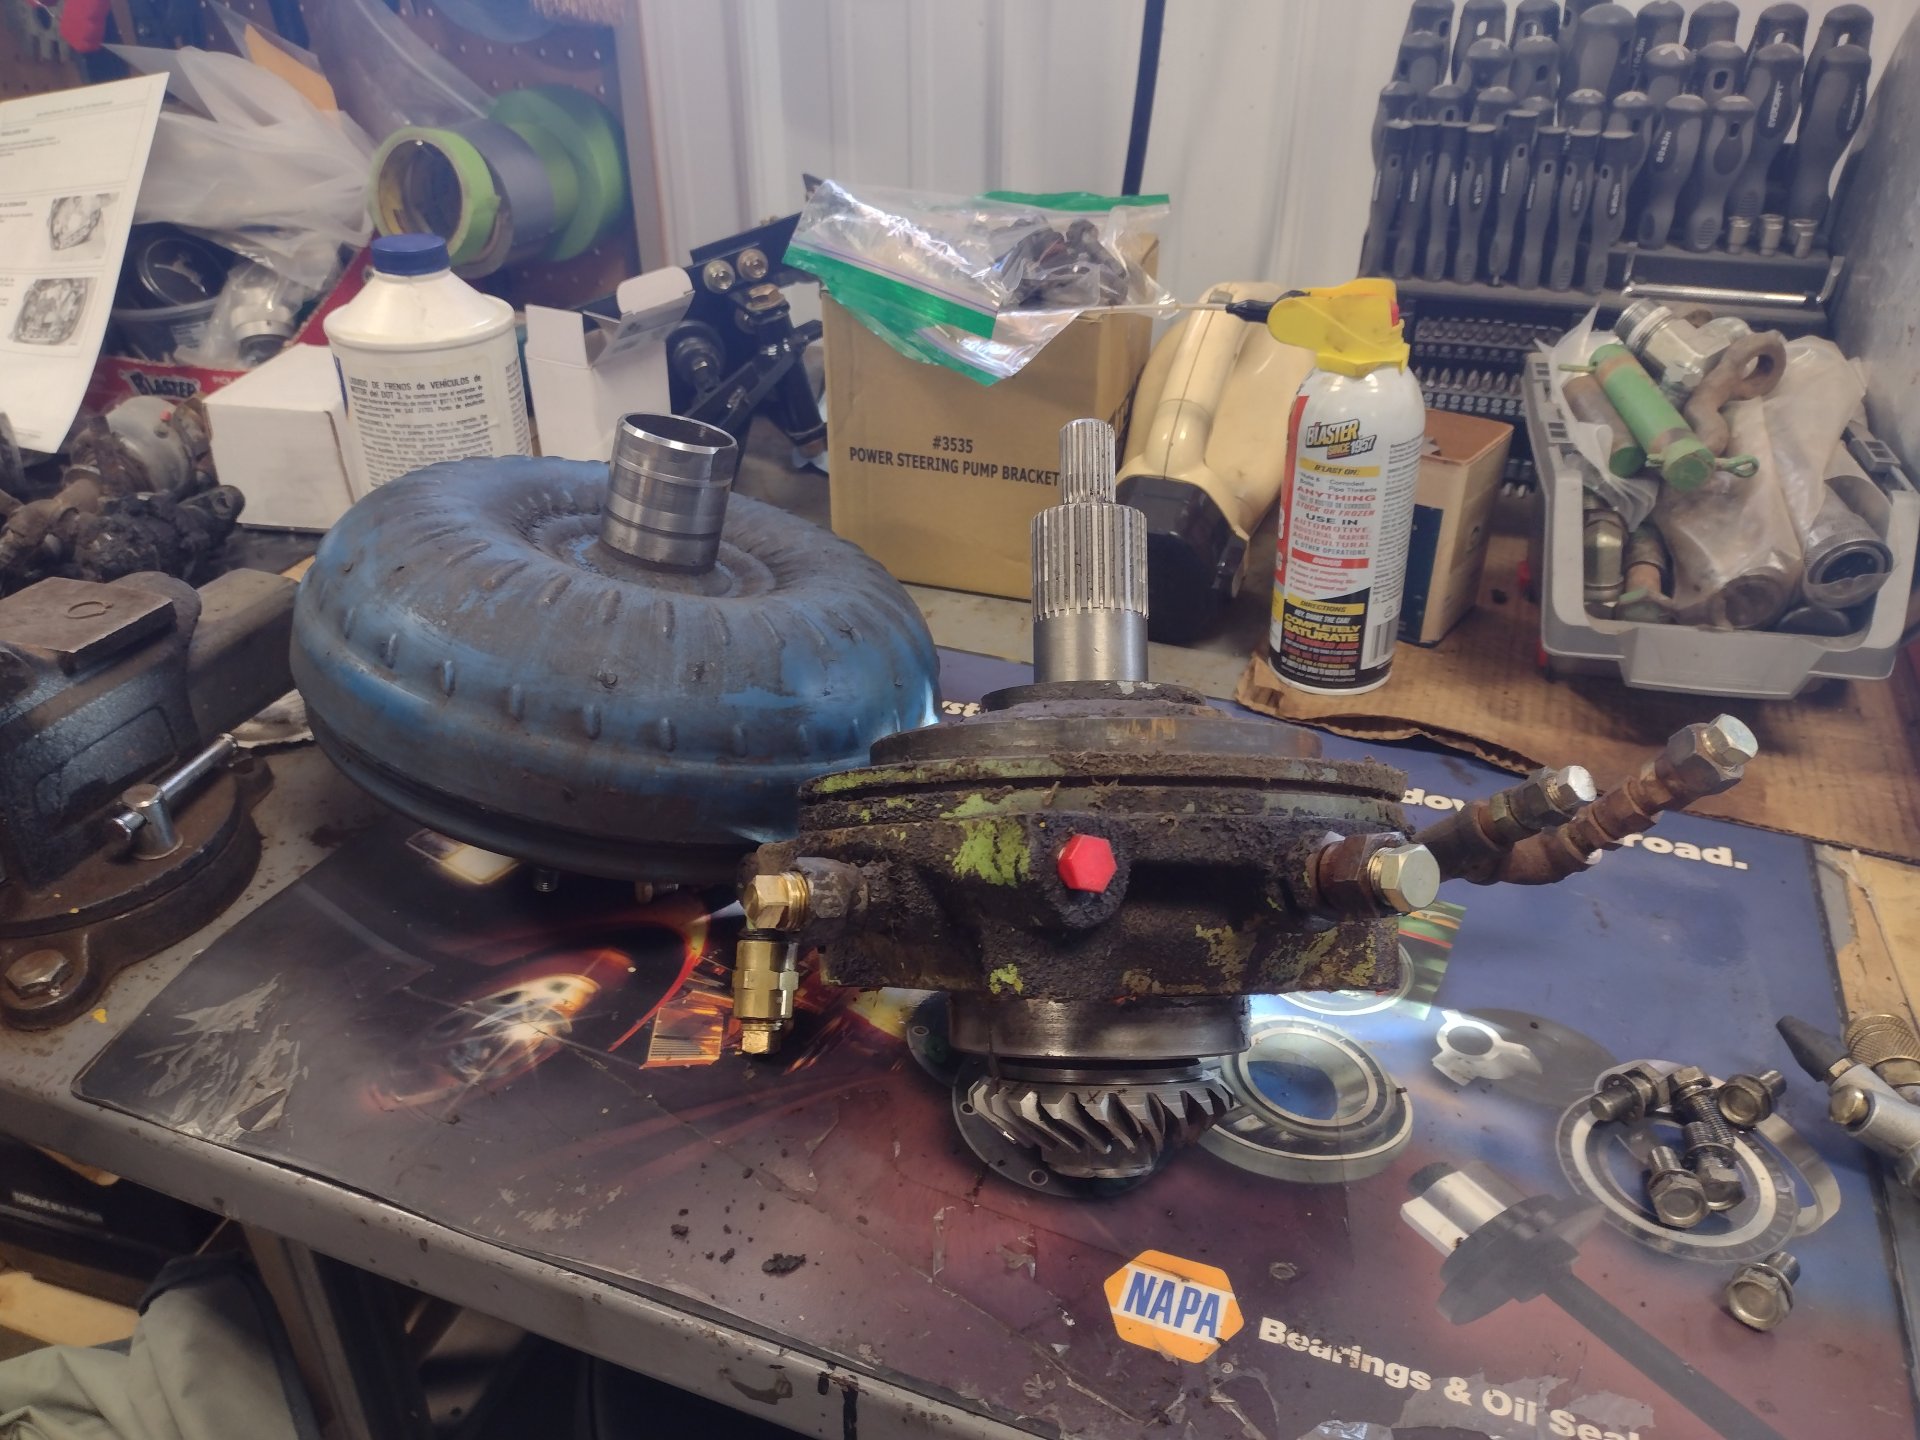
Time to pull the torque convertor.

View attachment 5561 View attachment 5560

View attachment 5559 View attachment 5562

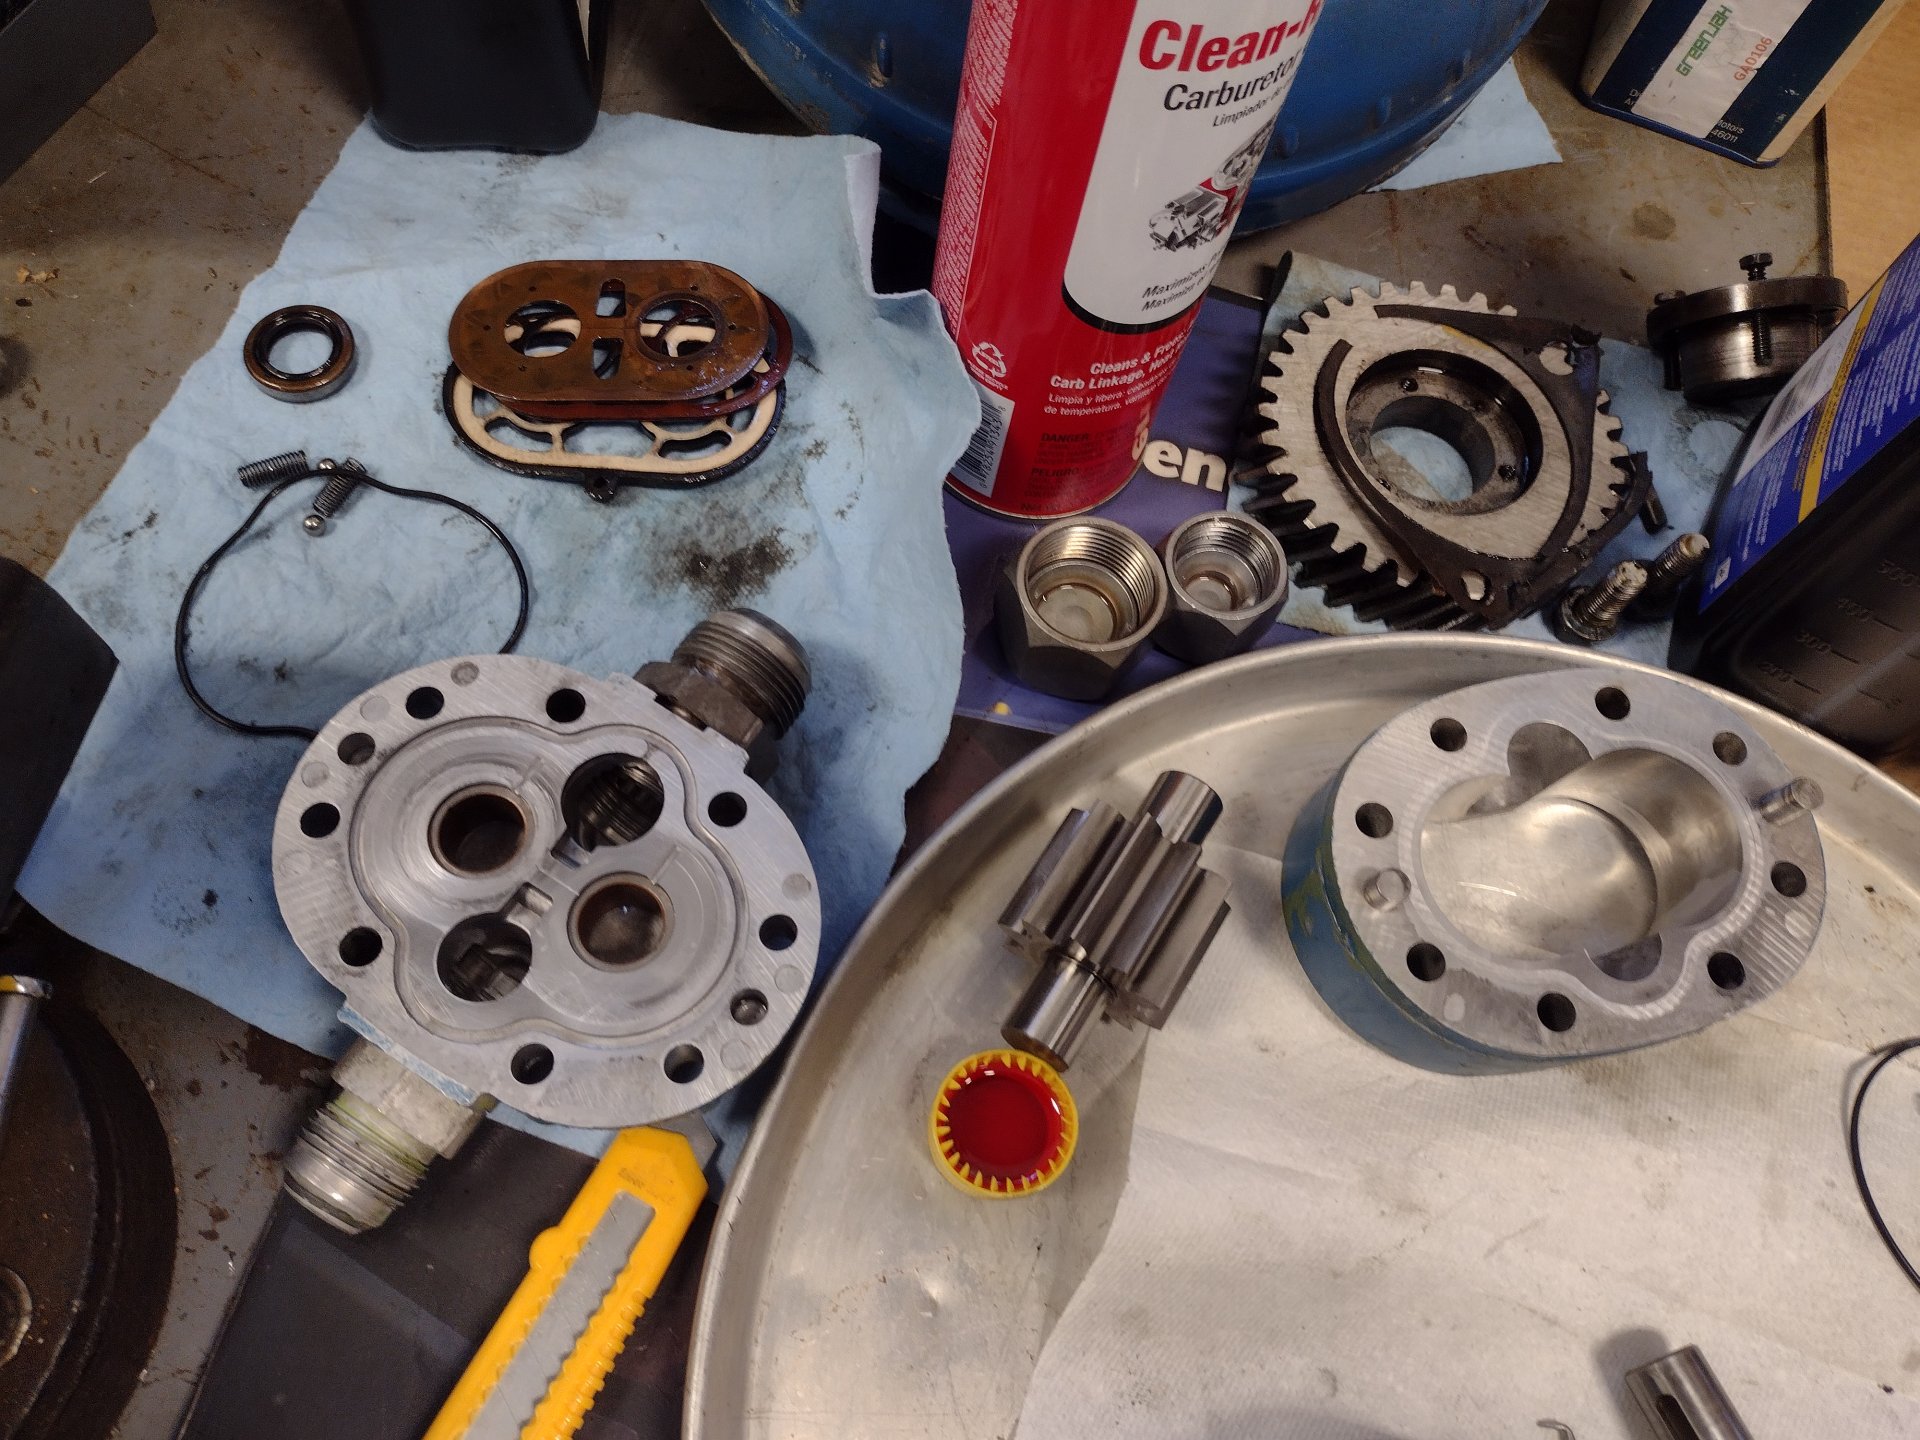
This is a Ford C-4 transmission charge pump. You can see the torque convertor is a direct drive to the pinion that mates to the gear box.

View attachment 5563 View attachment 5564

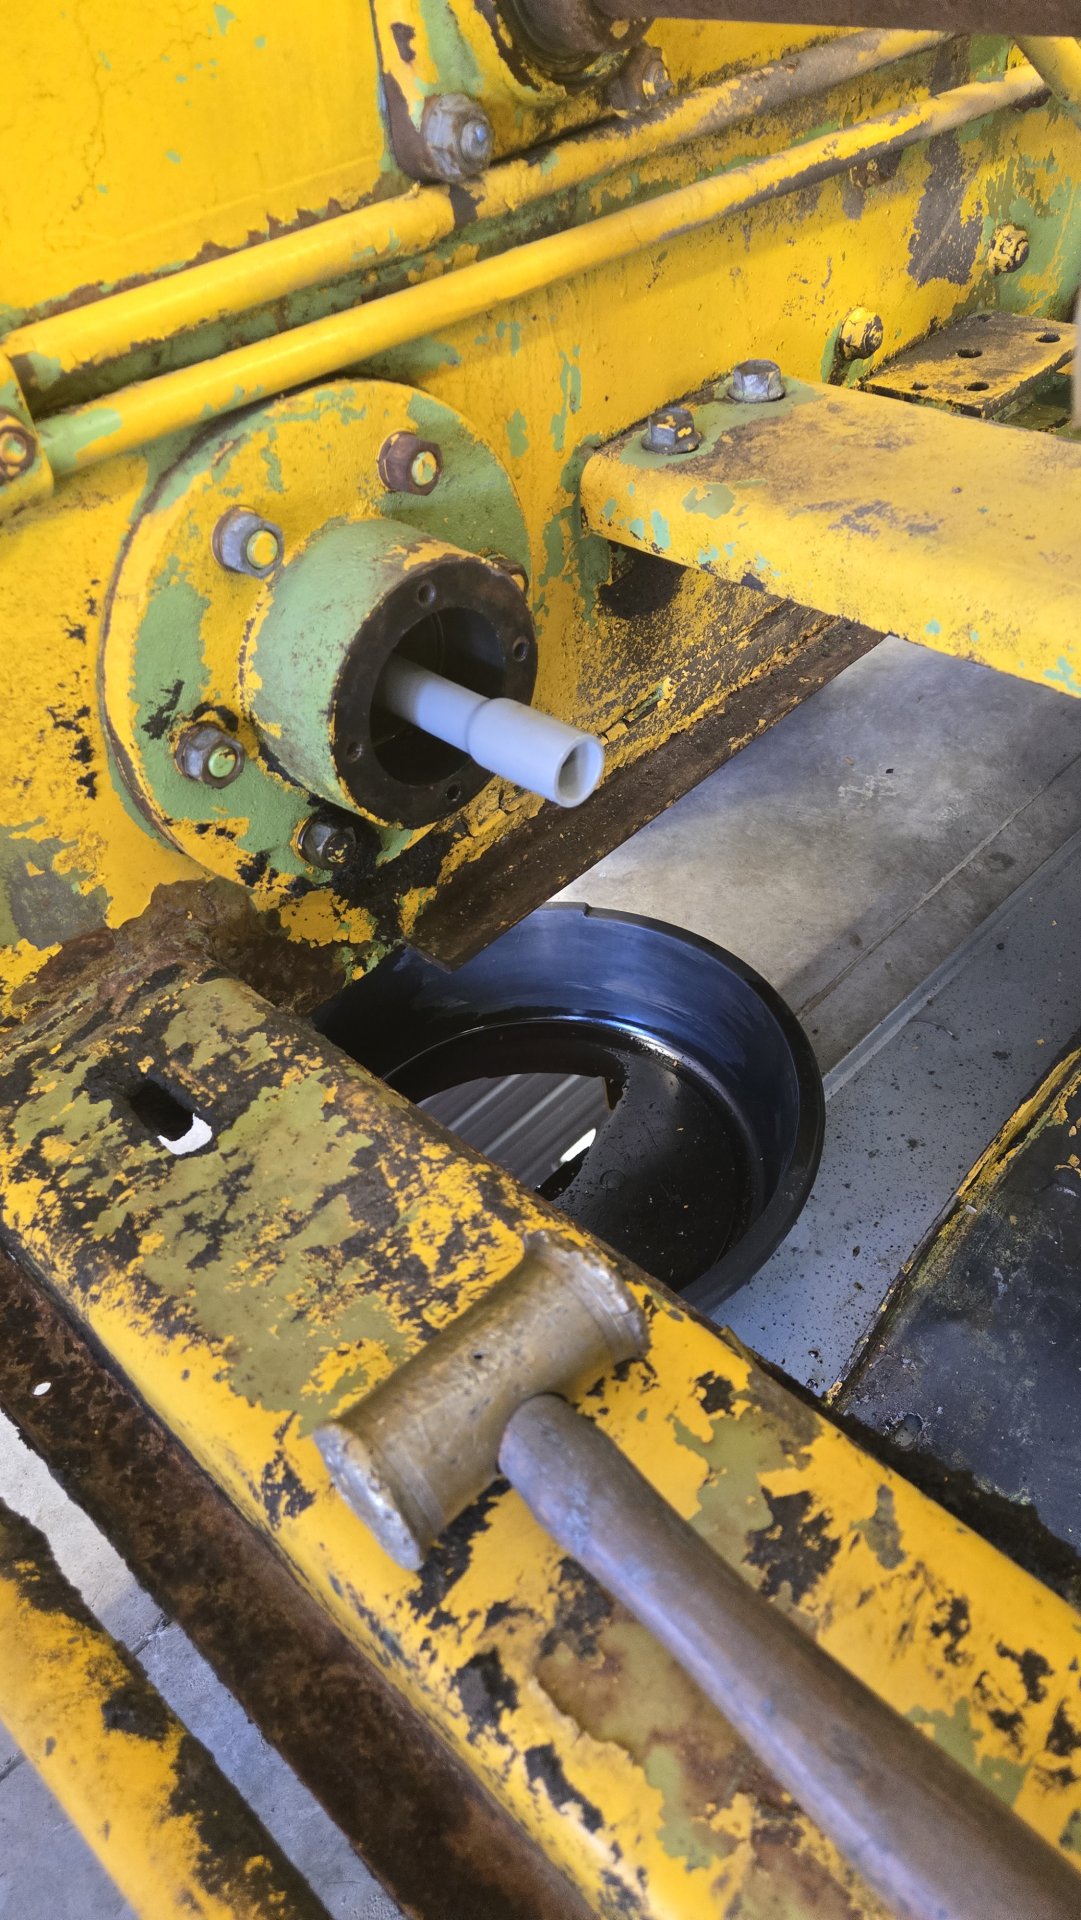
While I'm waiting for parts to arrive, I'm going to replace the two rear axle seals. Look for that in a week or so.

Al Jones
early 70s Mustang 1700
Brookings SD
Your clutches look great! I would definitely use them, considering a replacement clutch is $50 for each one… works out to about $1,200 to replace the packs. Adjust them perfectly, and you will get a lot of service life out of them. Running on low hydraulic fluid, or a steep upward incline burns them up. The pick up for the hydraulic transmission fluid is at the front of the machine on my 1200. This is the supply for the pump and the clutch lube. If you drive up an long, steep incline, the fluid stops flowing, the clutches can overheat, and they burn up just like automatic transmission clutches.

Looks like a fun project!
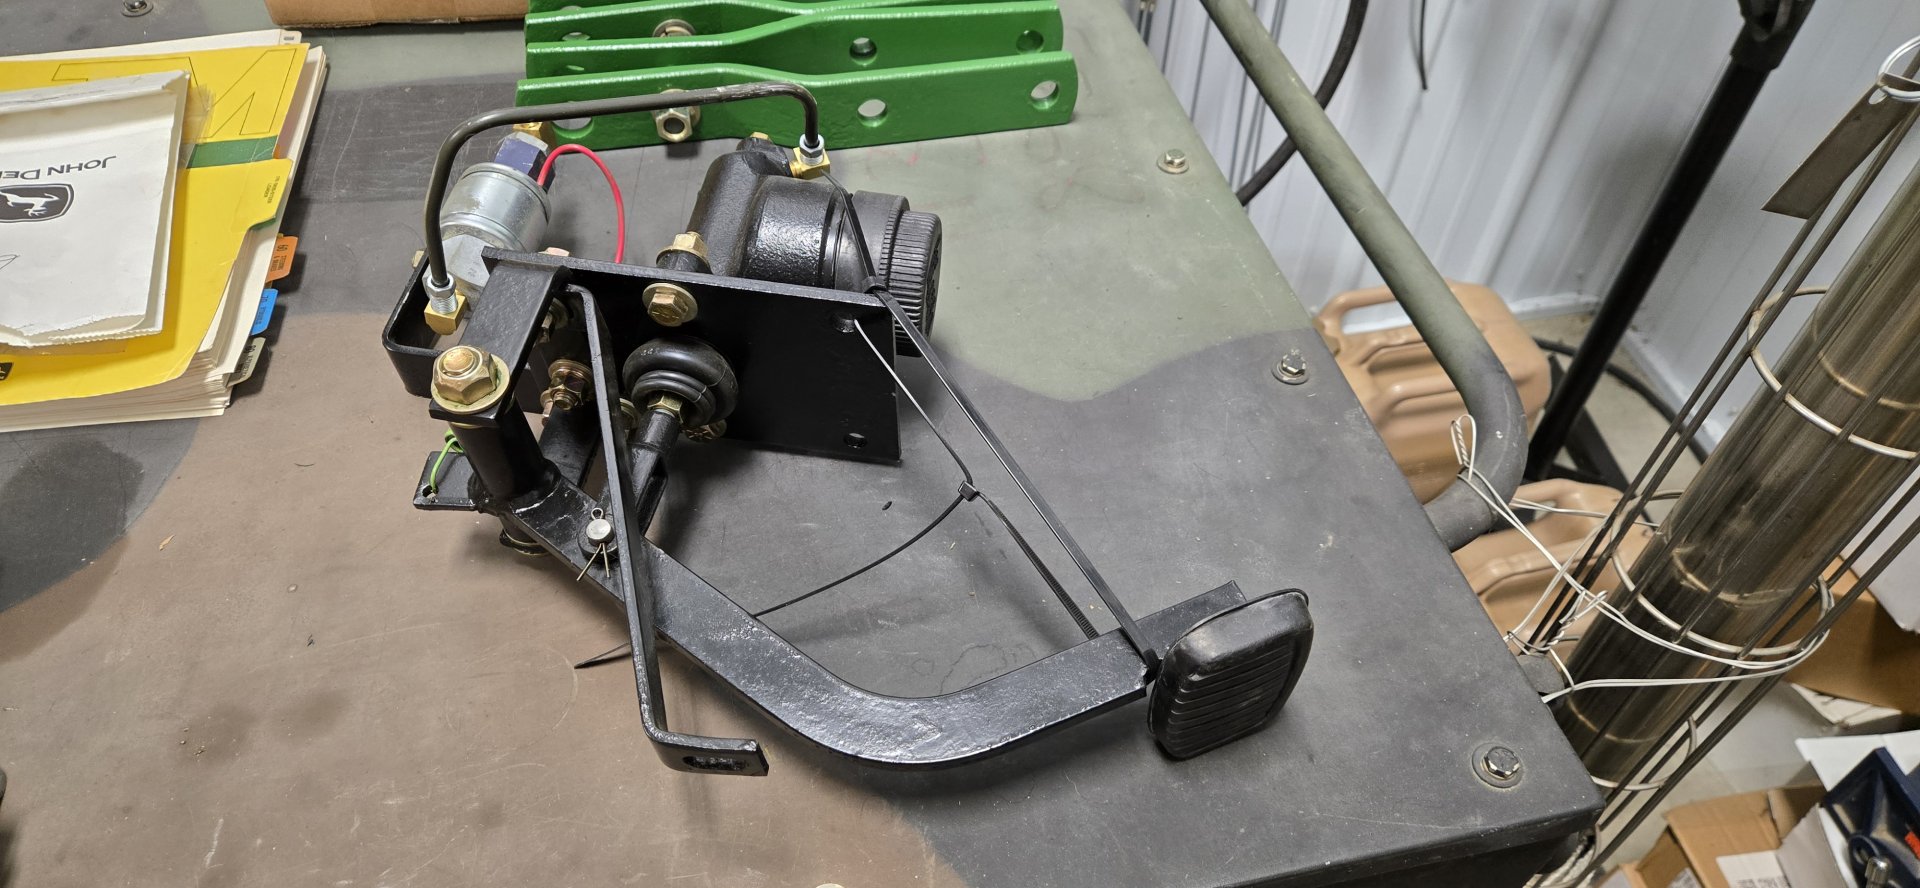
 
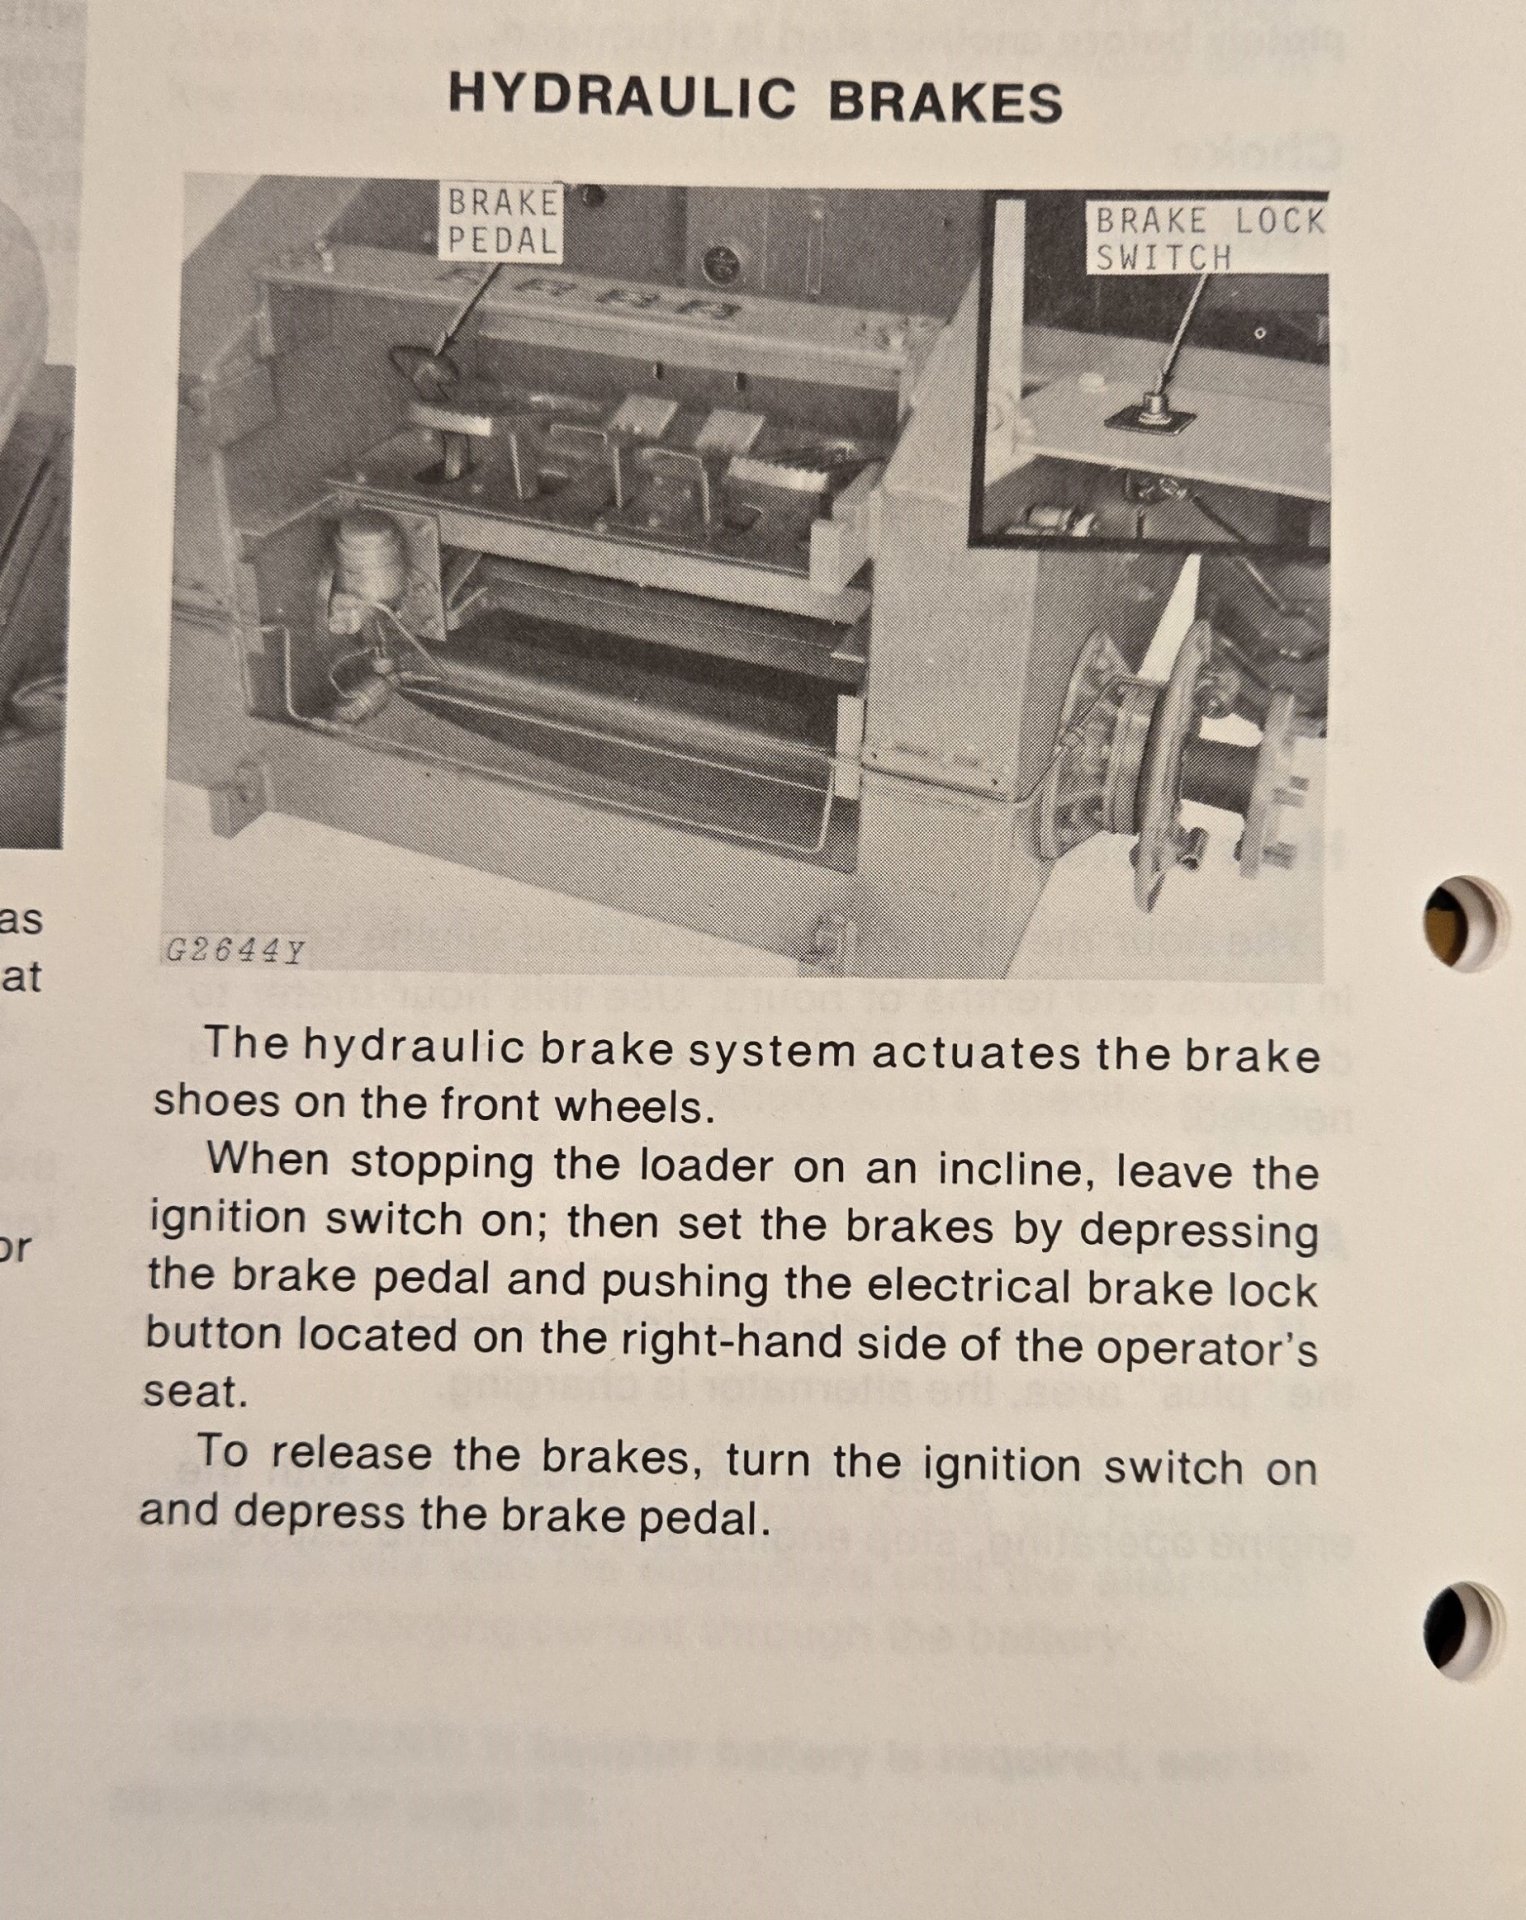
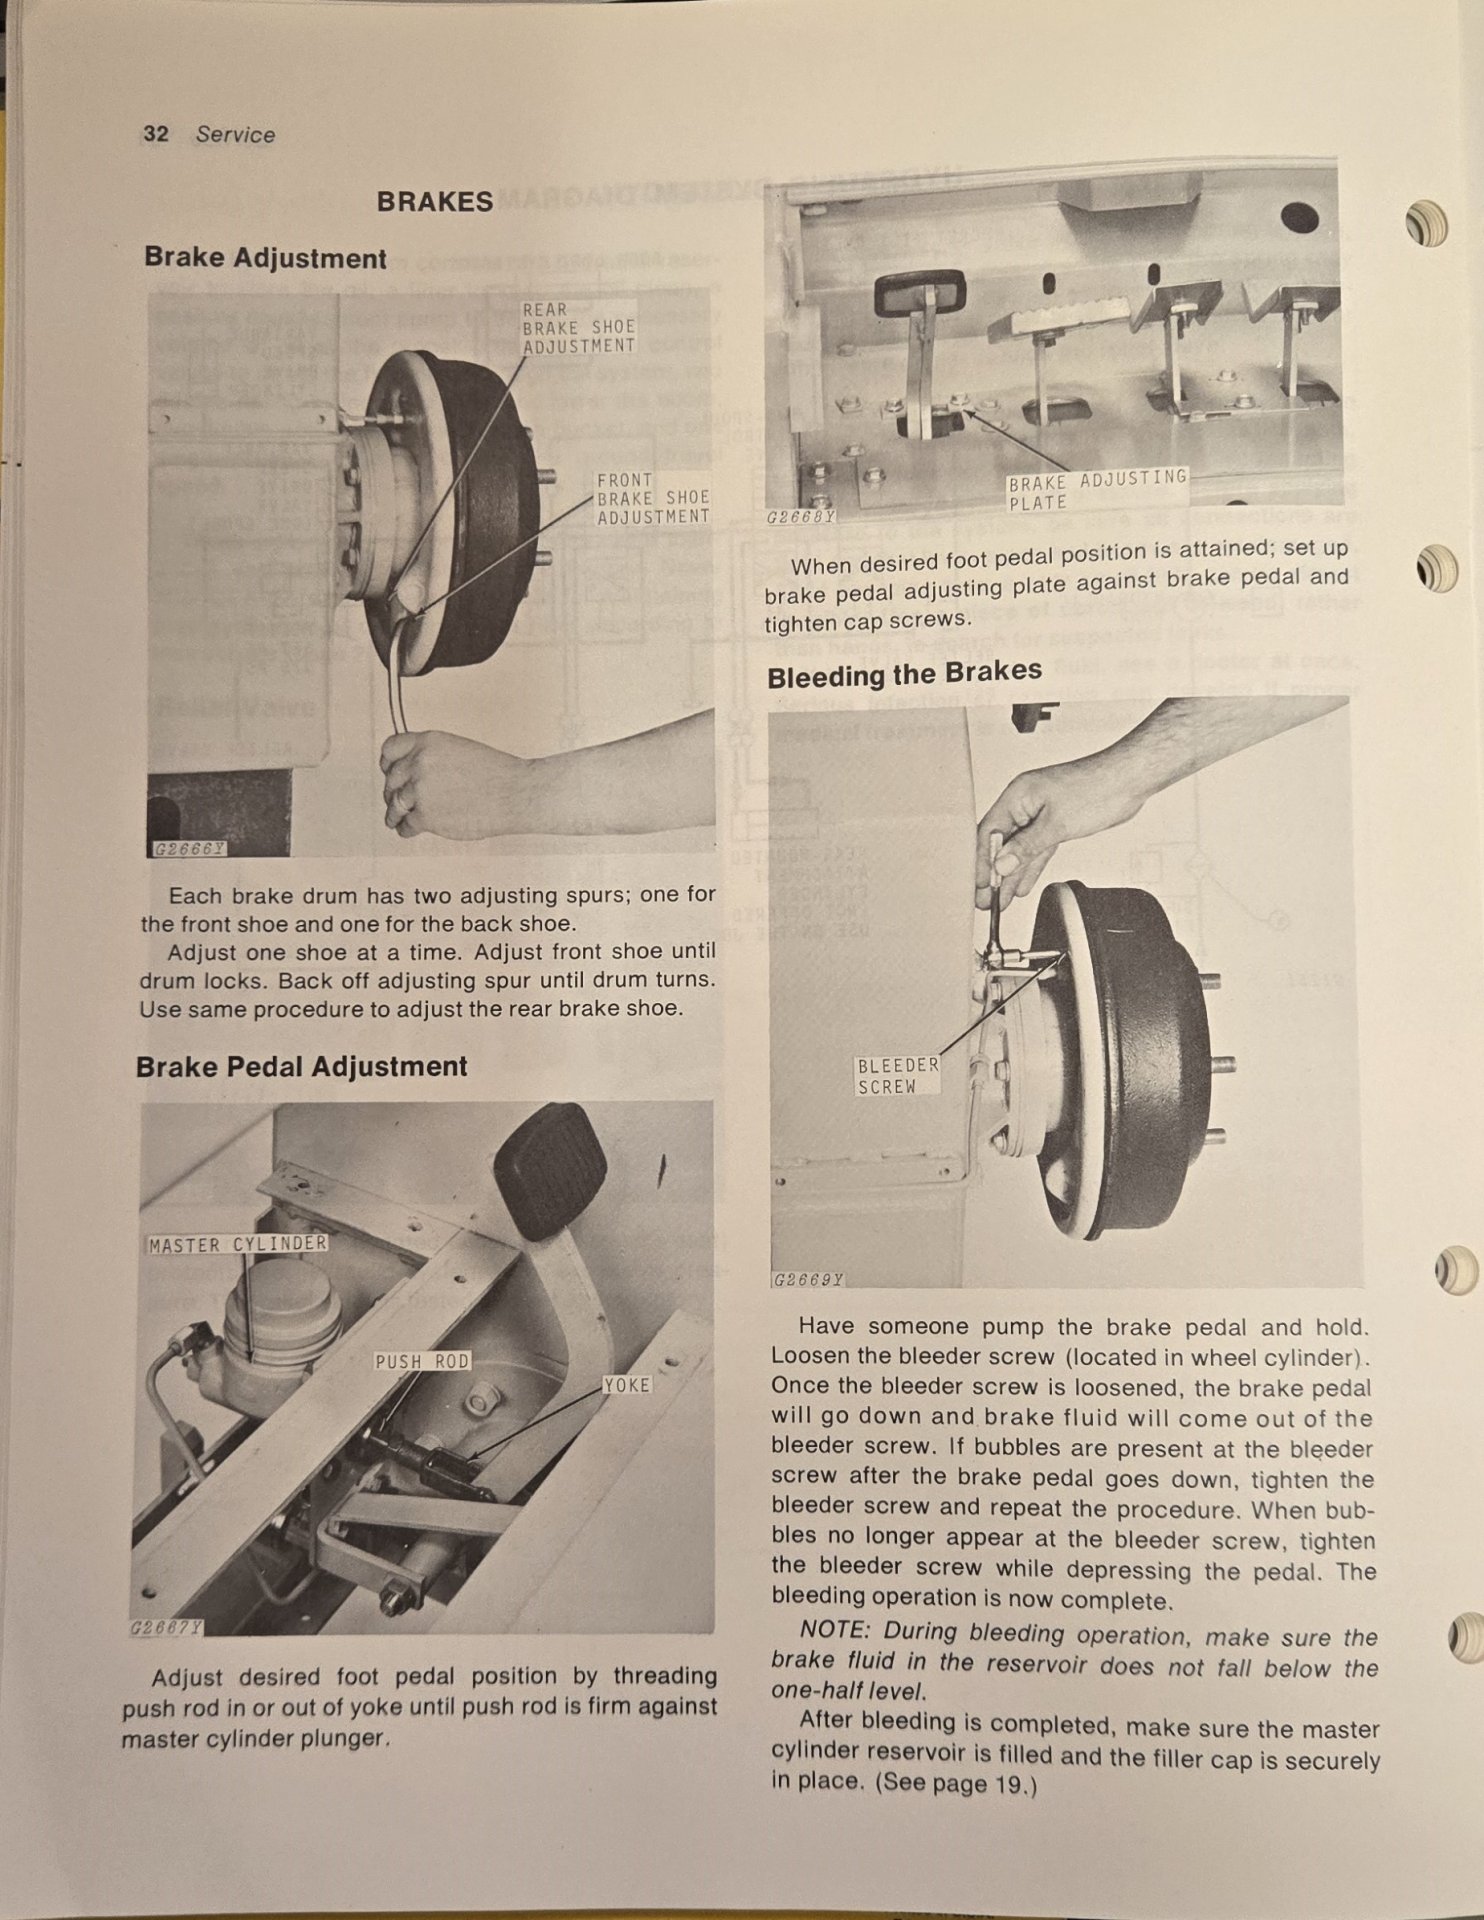
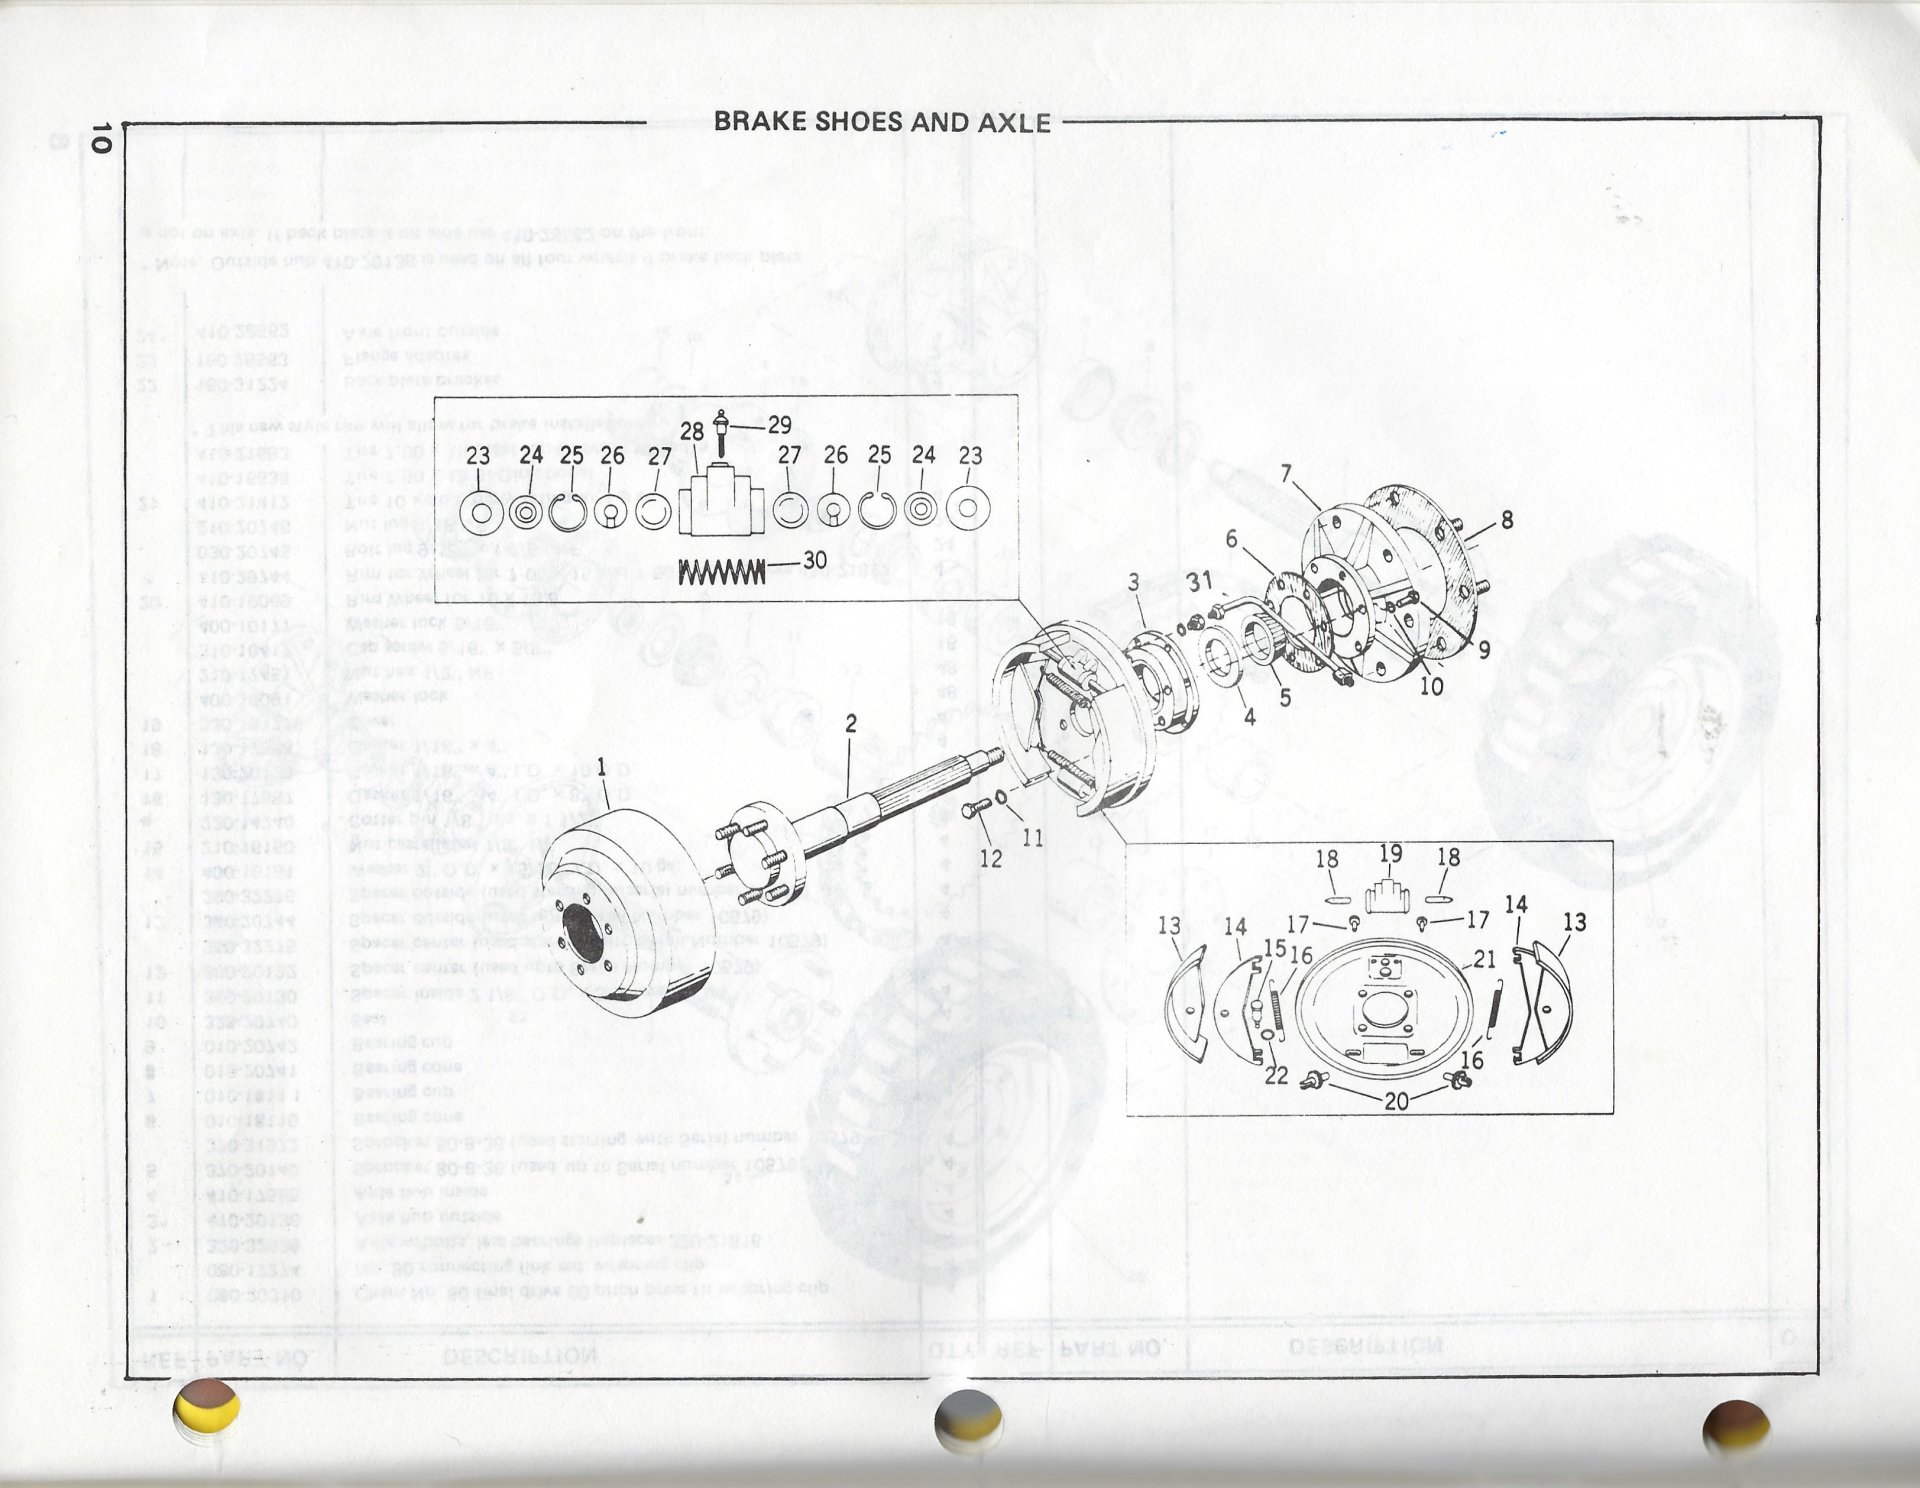
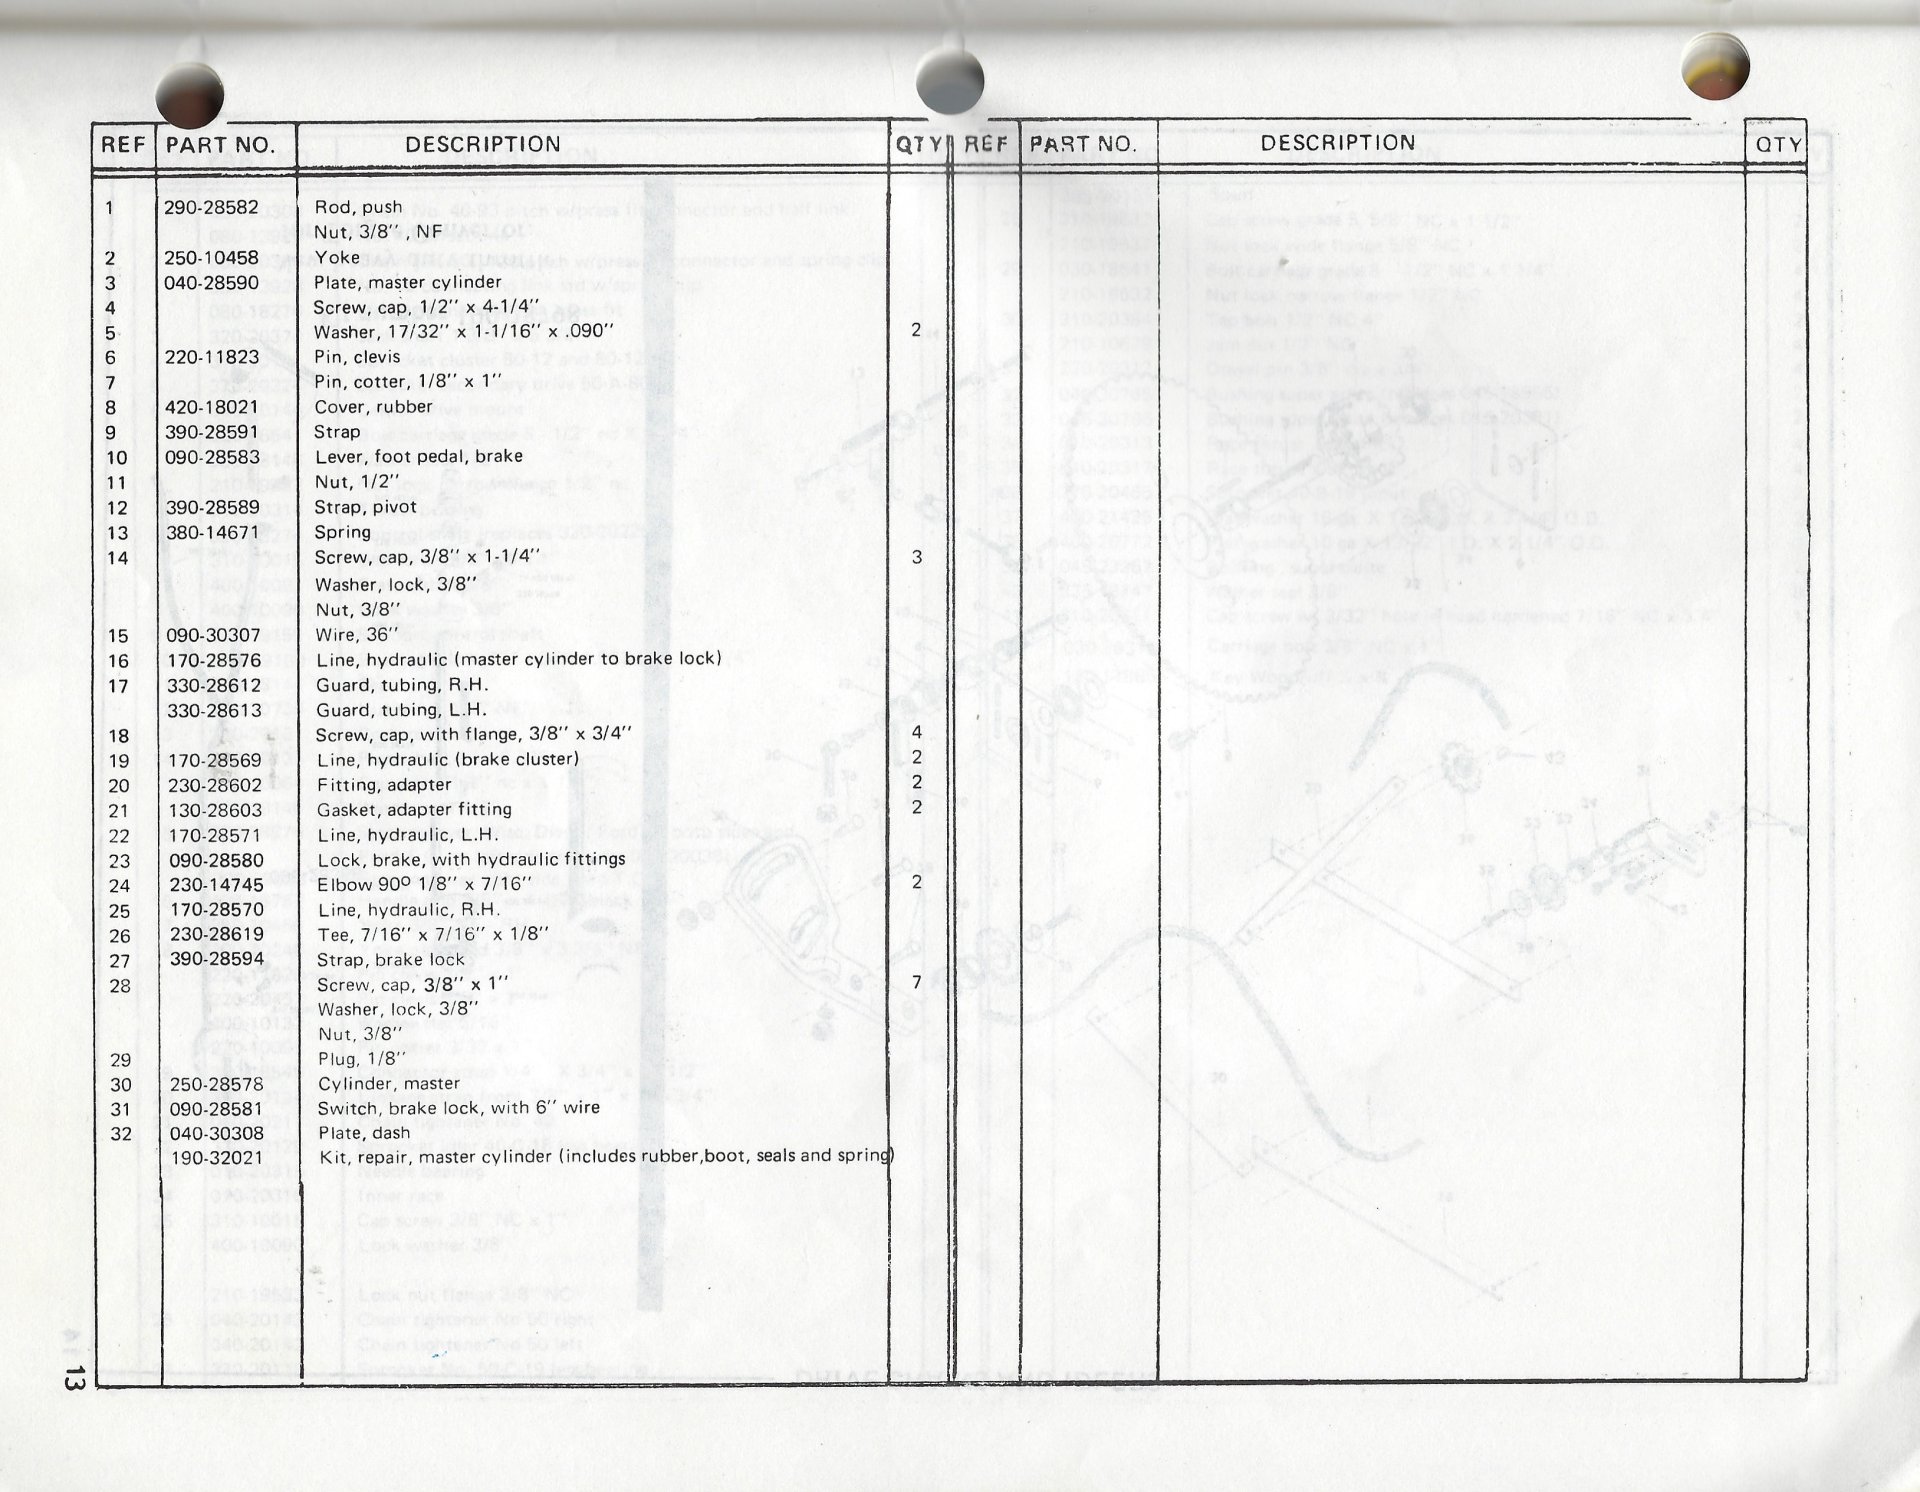
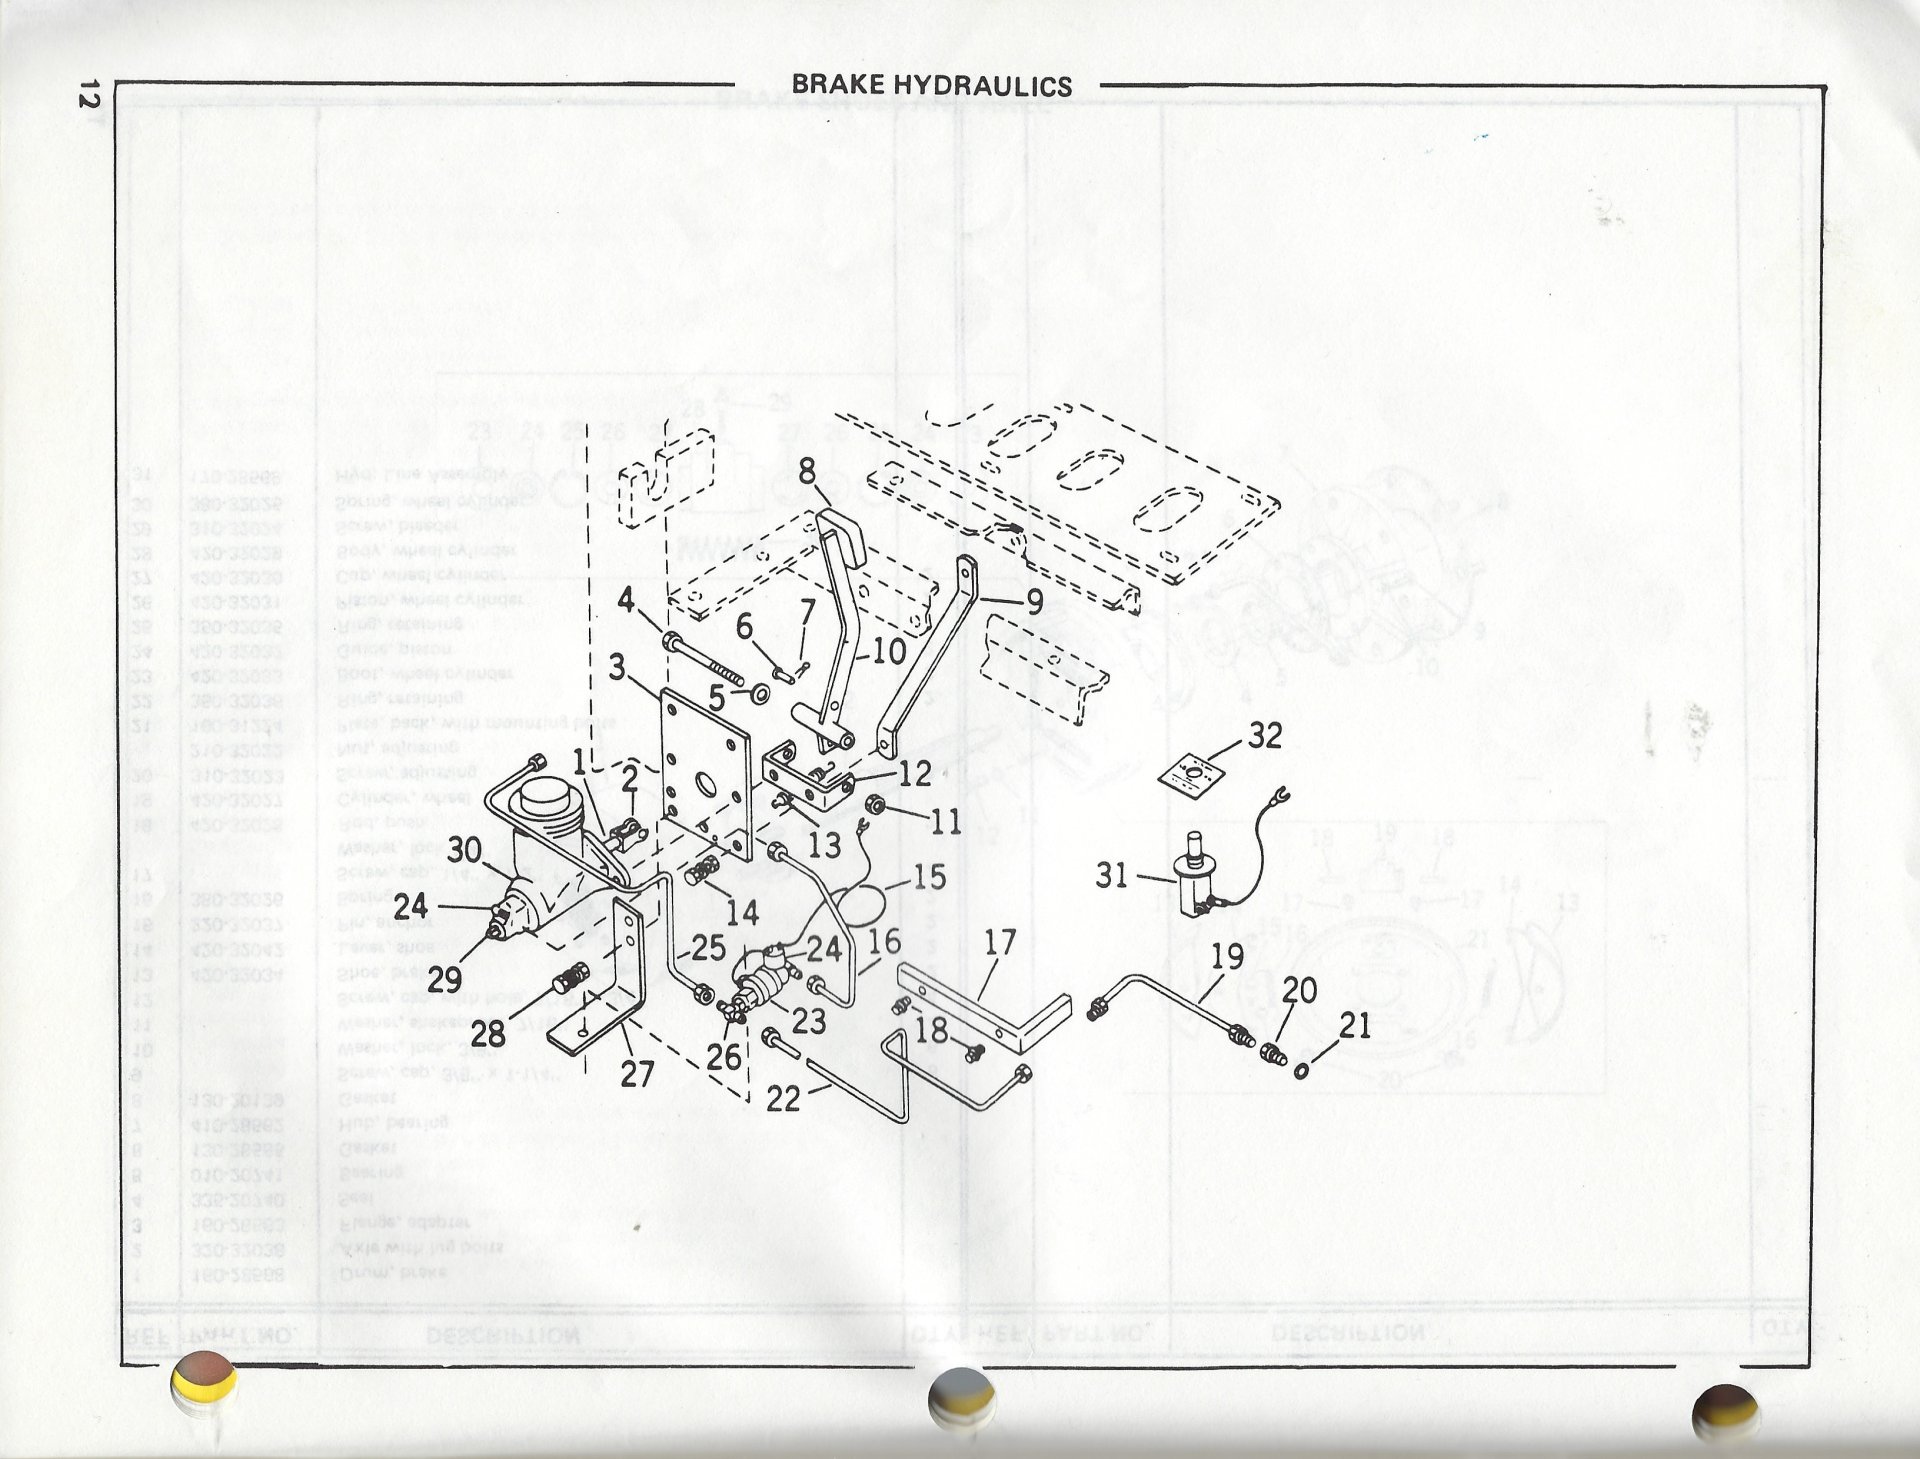
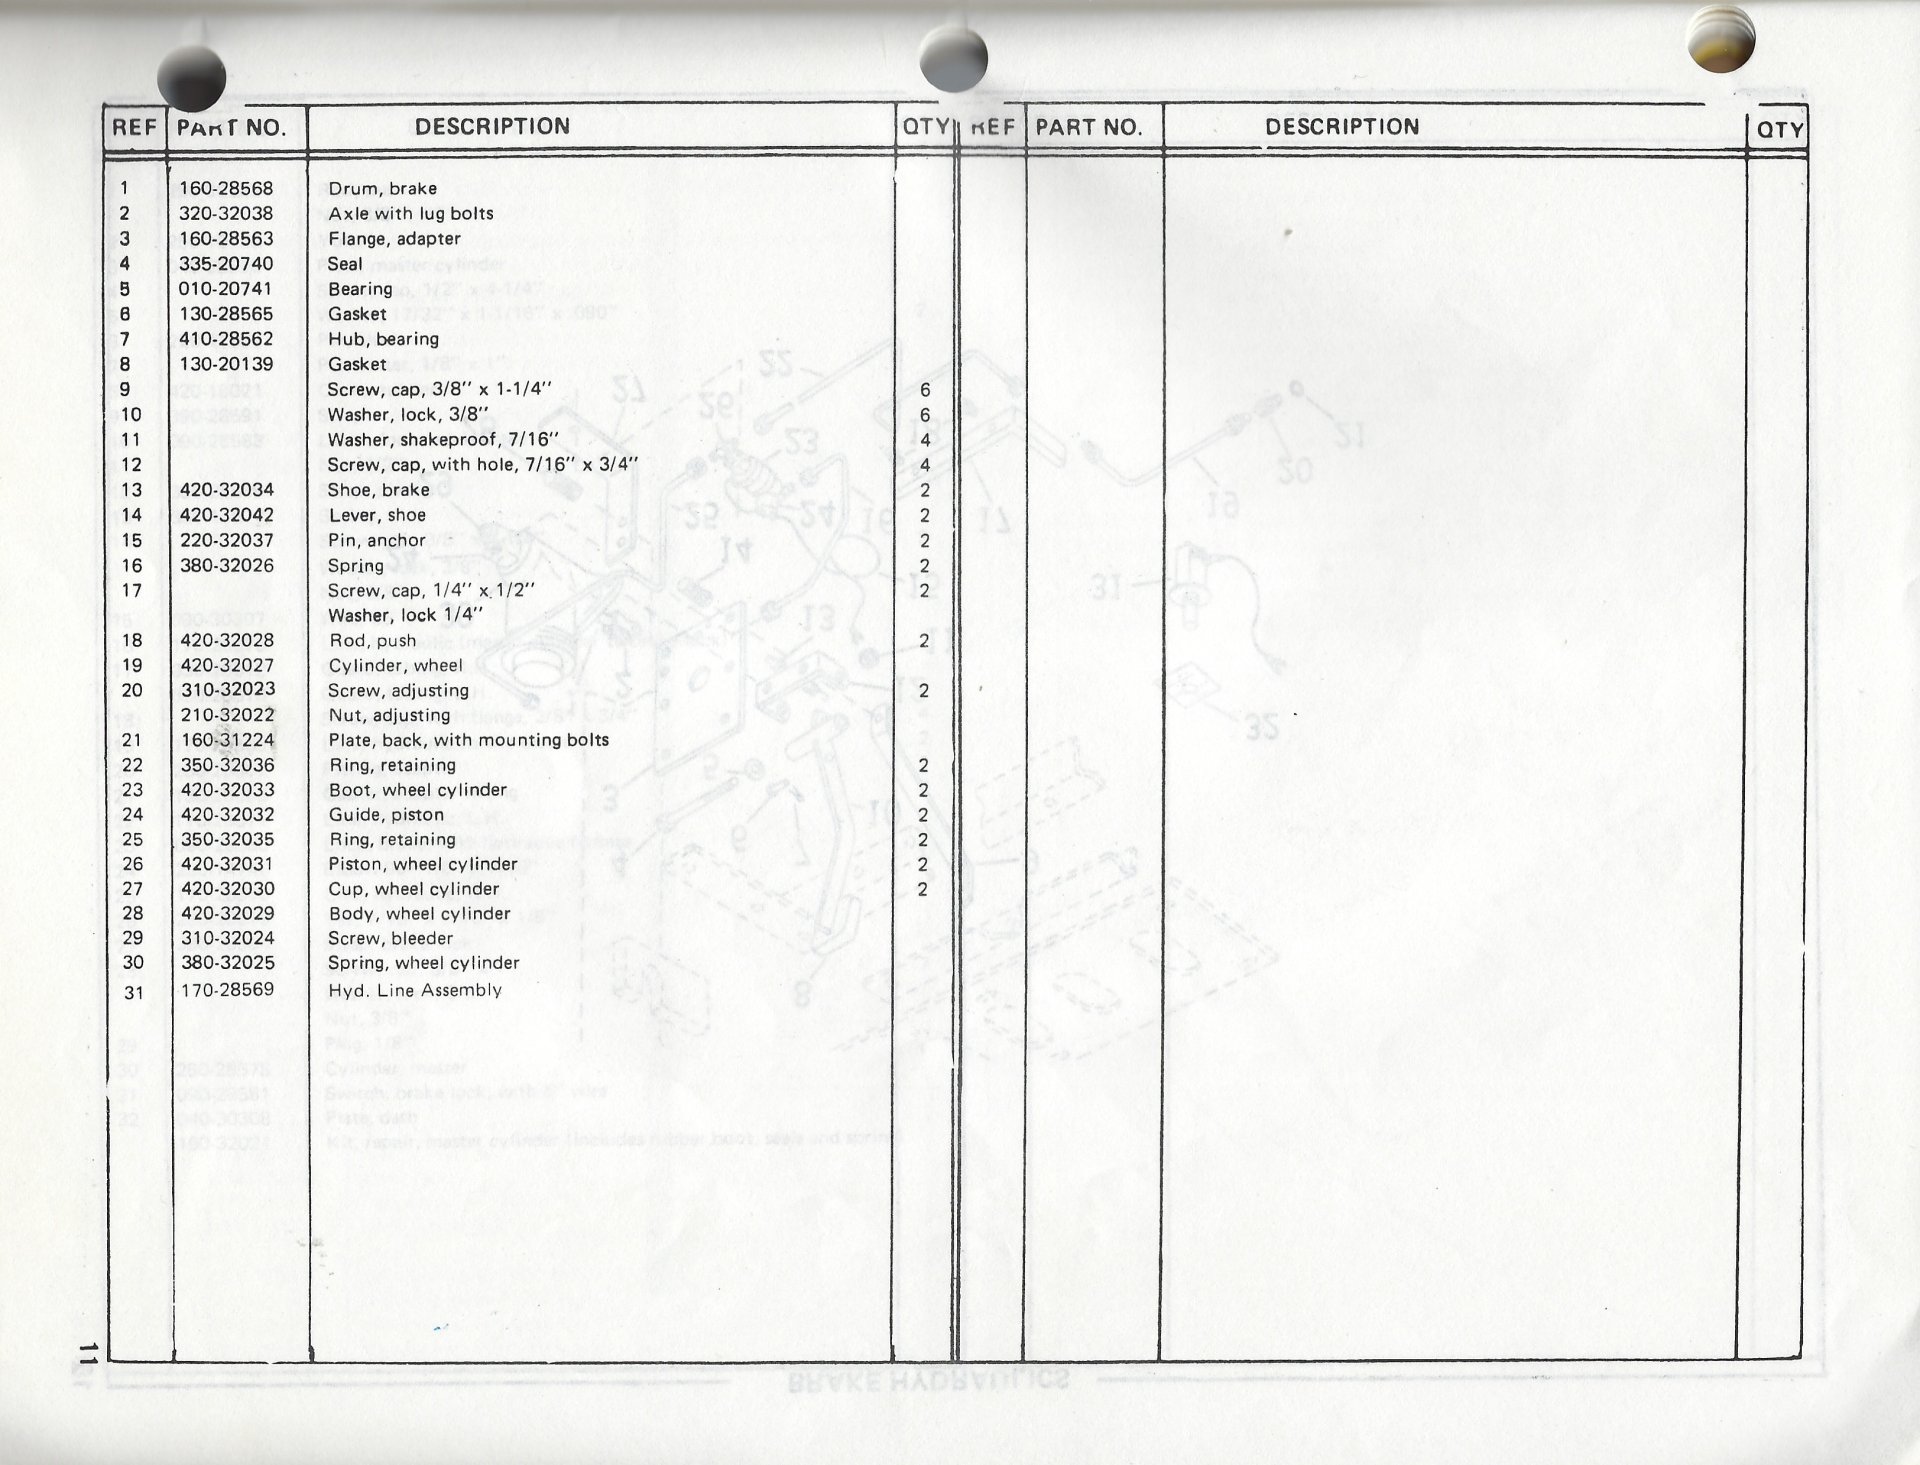
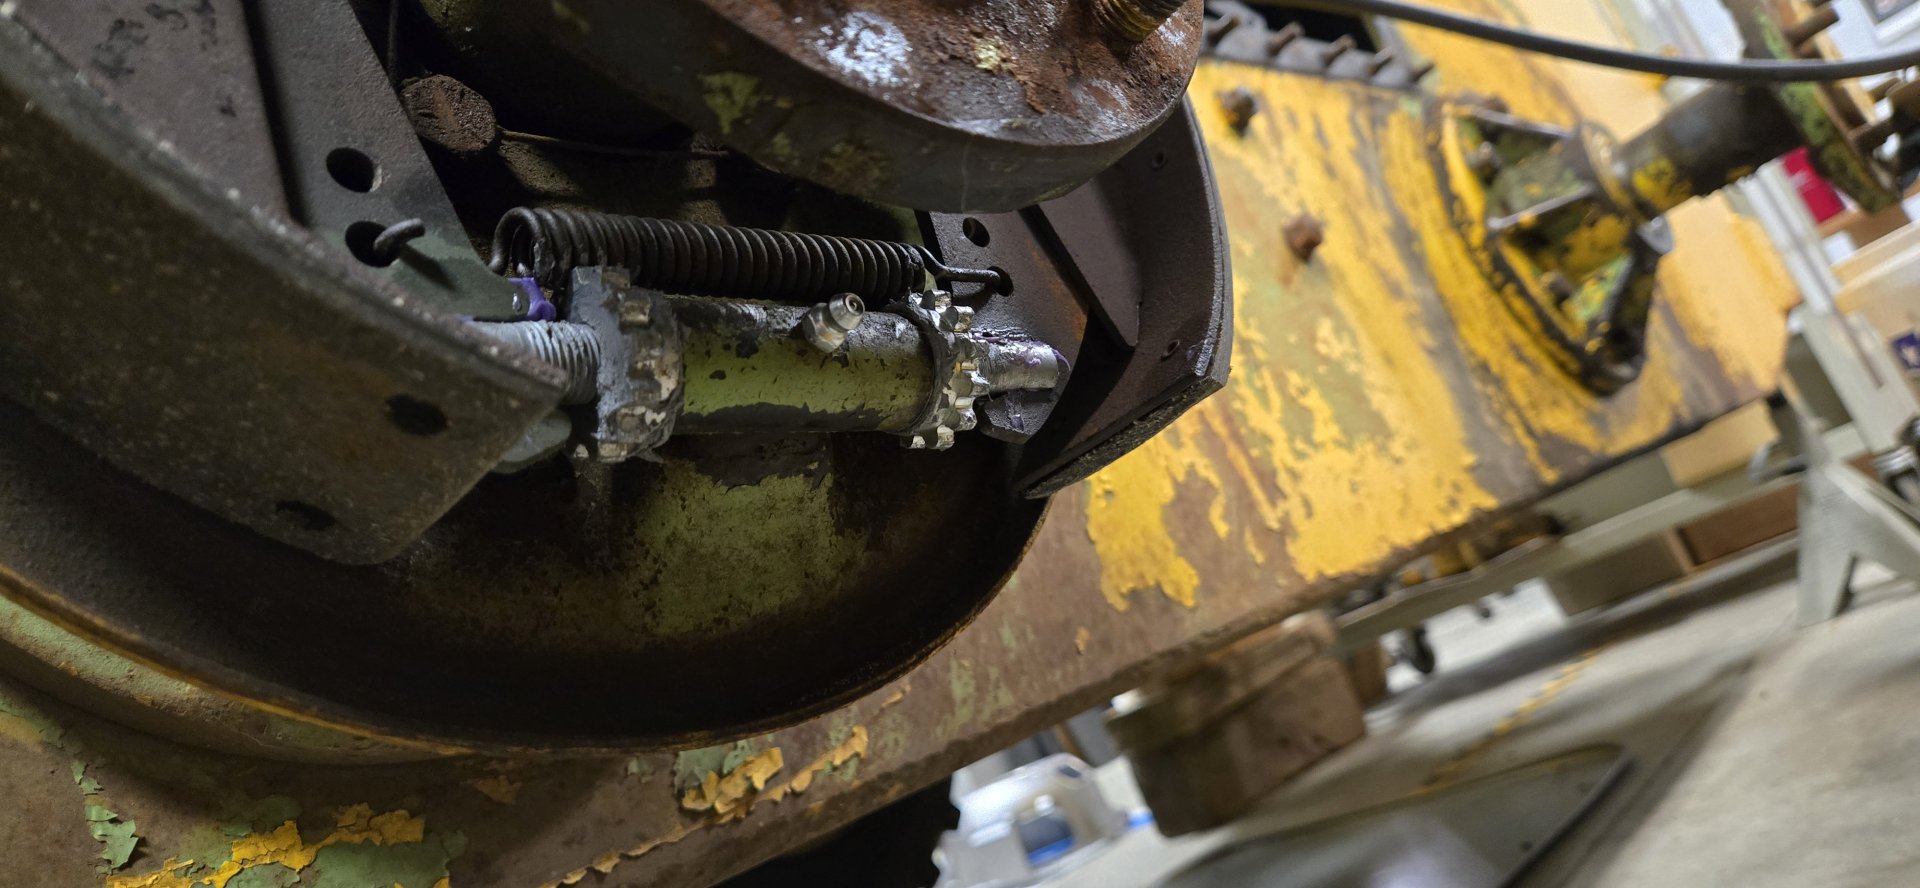
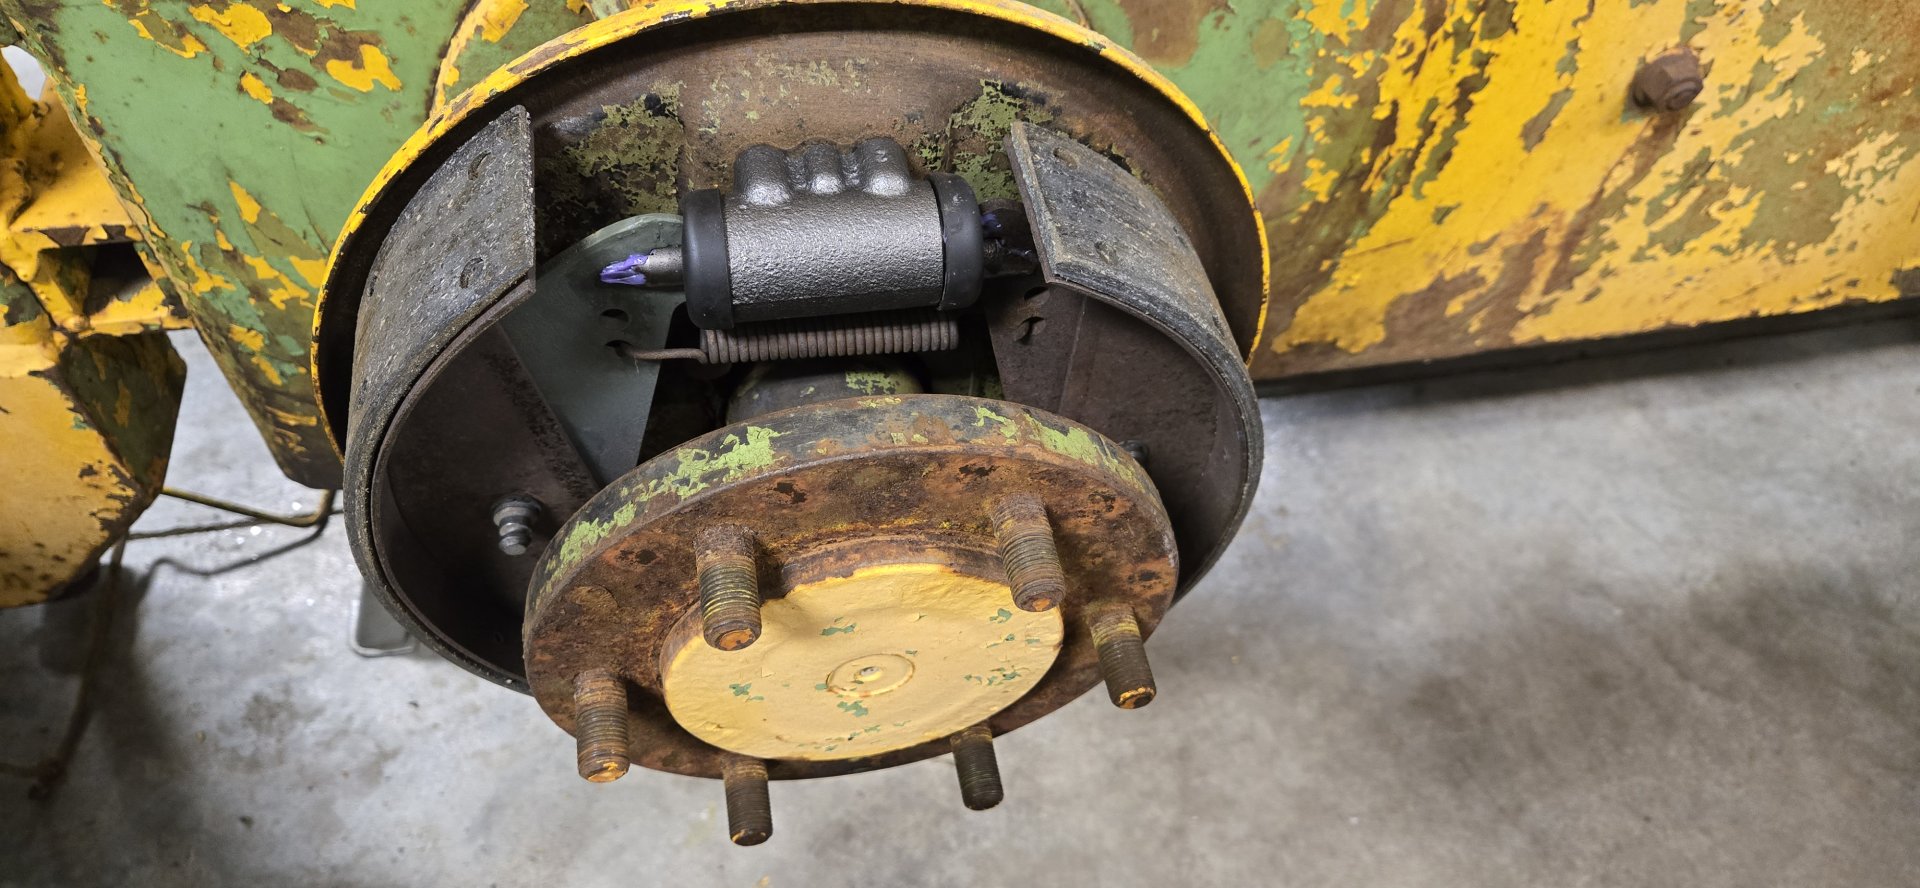
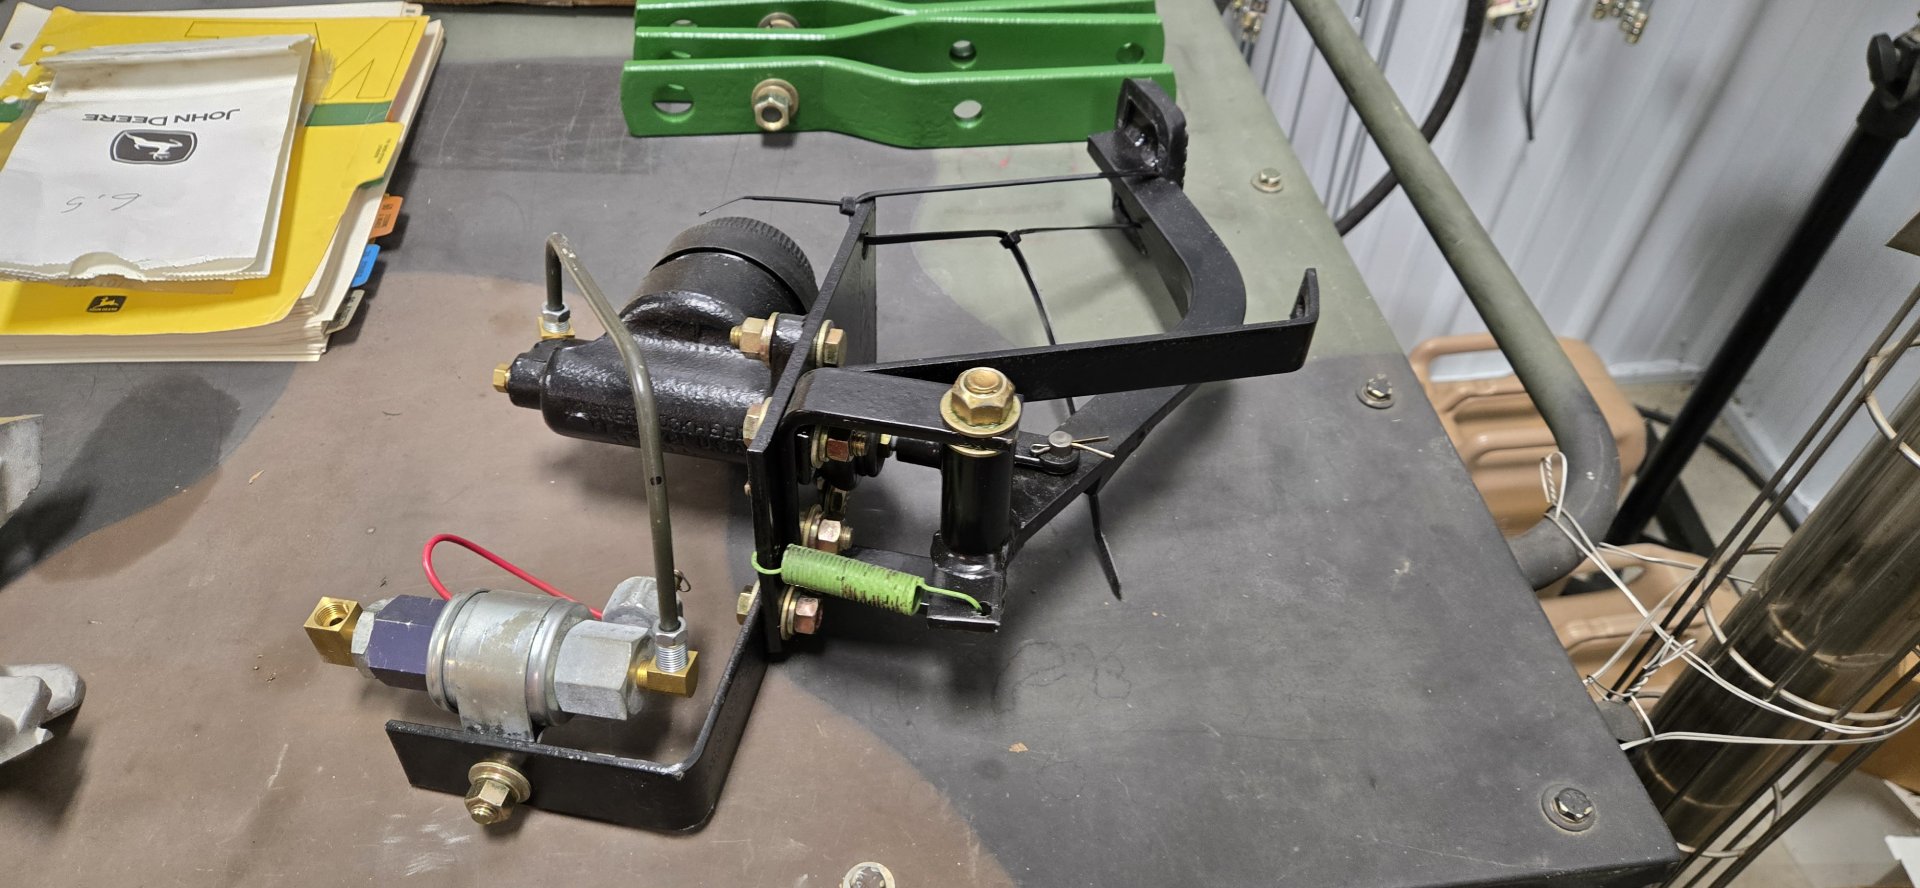
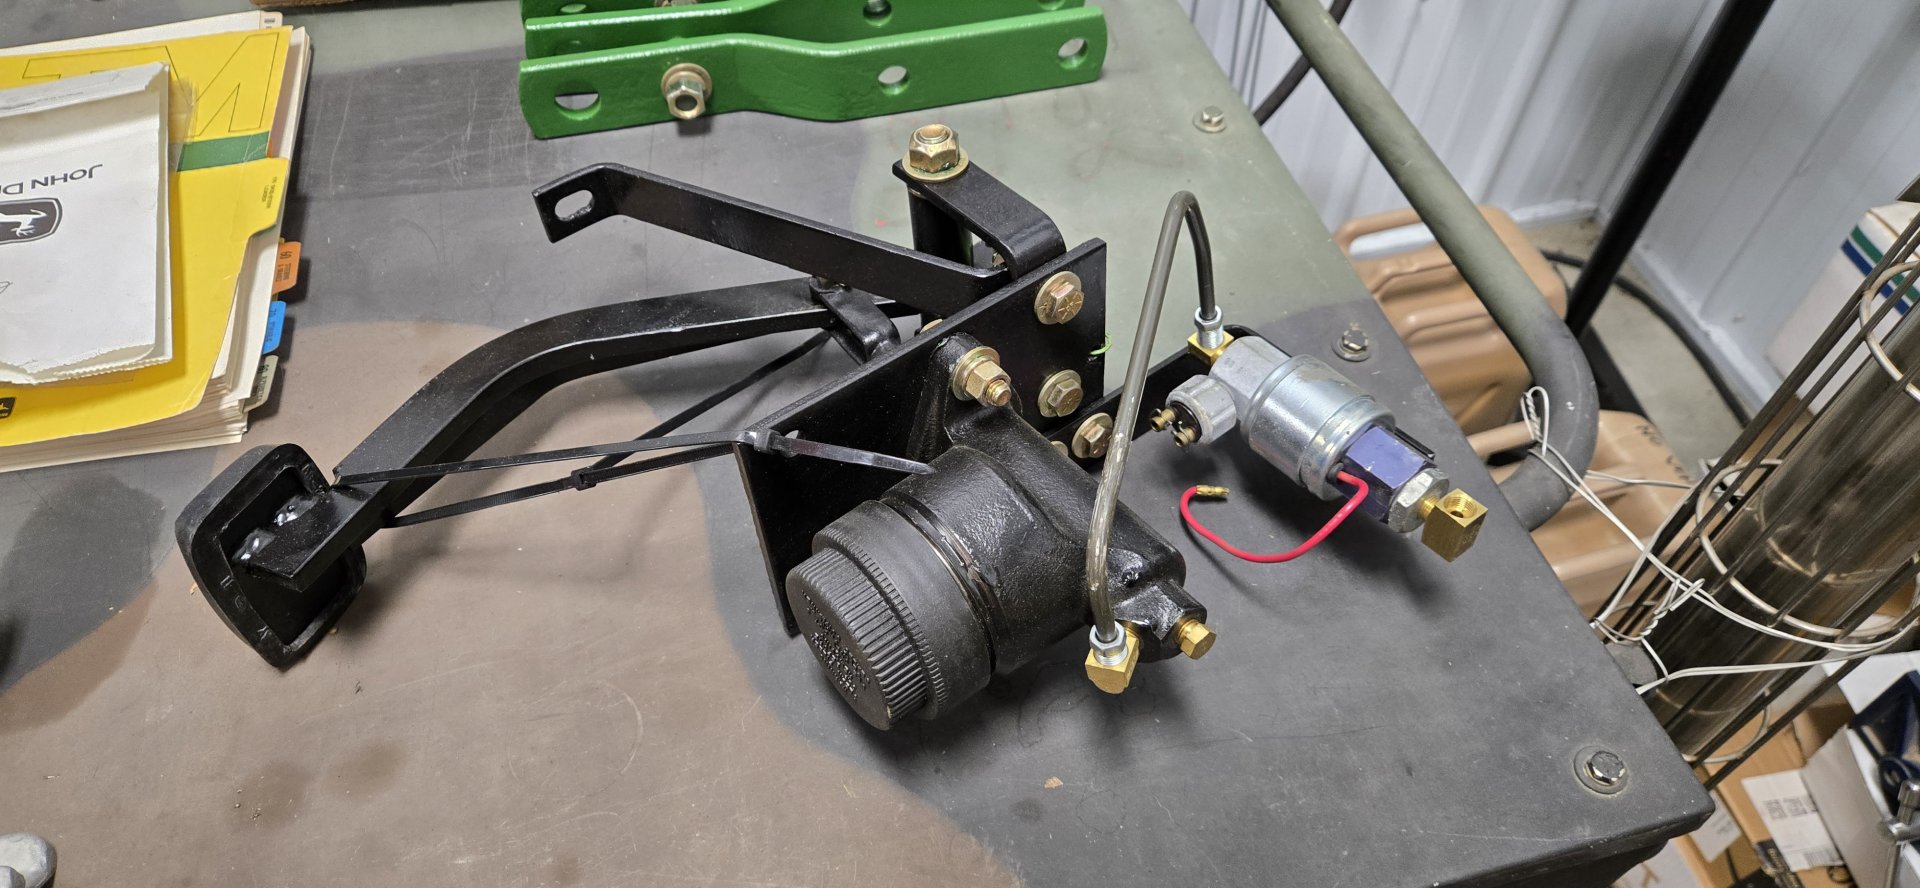
I've been asked about the brakes for the 1700. Here's what I have.

Operators Manual:

20241016_161348.jpg
20241016_161425.jpg


Parts Manual:

Scan_20241017.jpg
Scan_20241017 (4).jpg


Scan_20241017 (3).jpg
Scan_20241017 (2).jpg


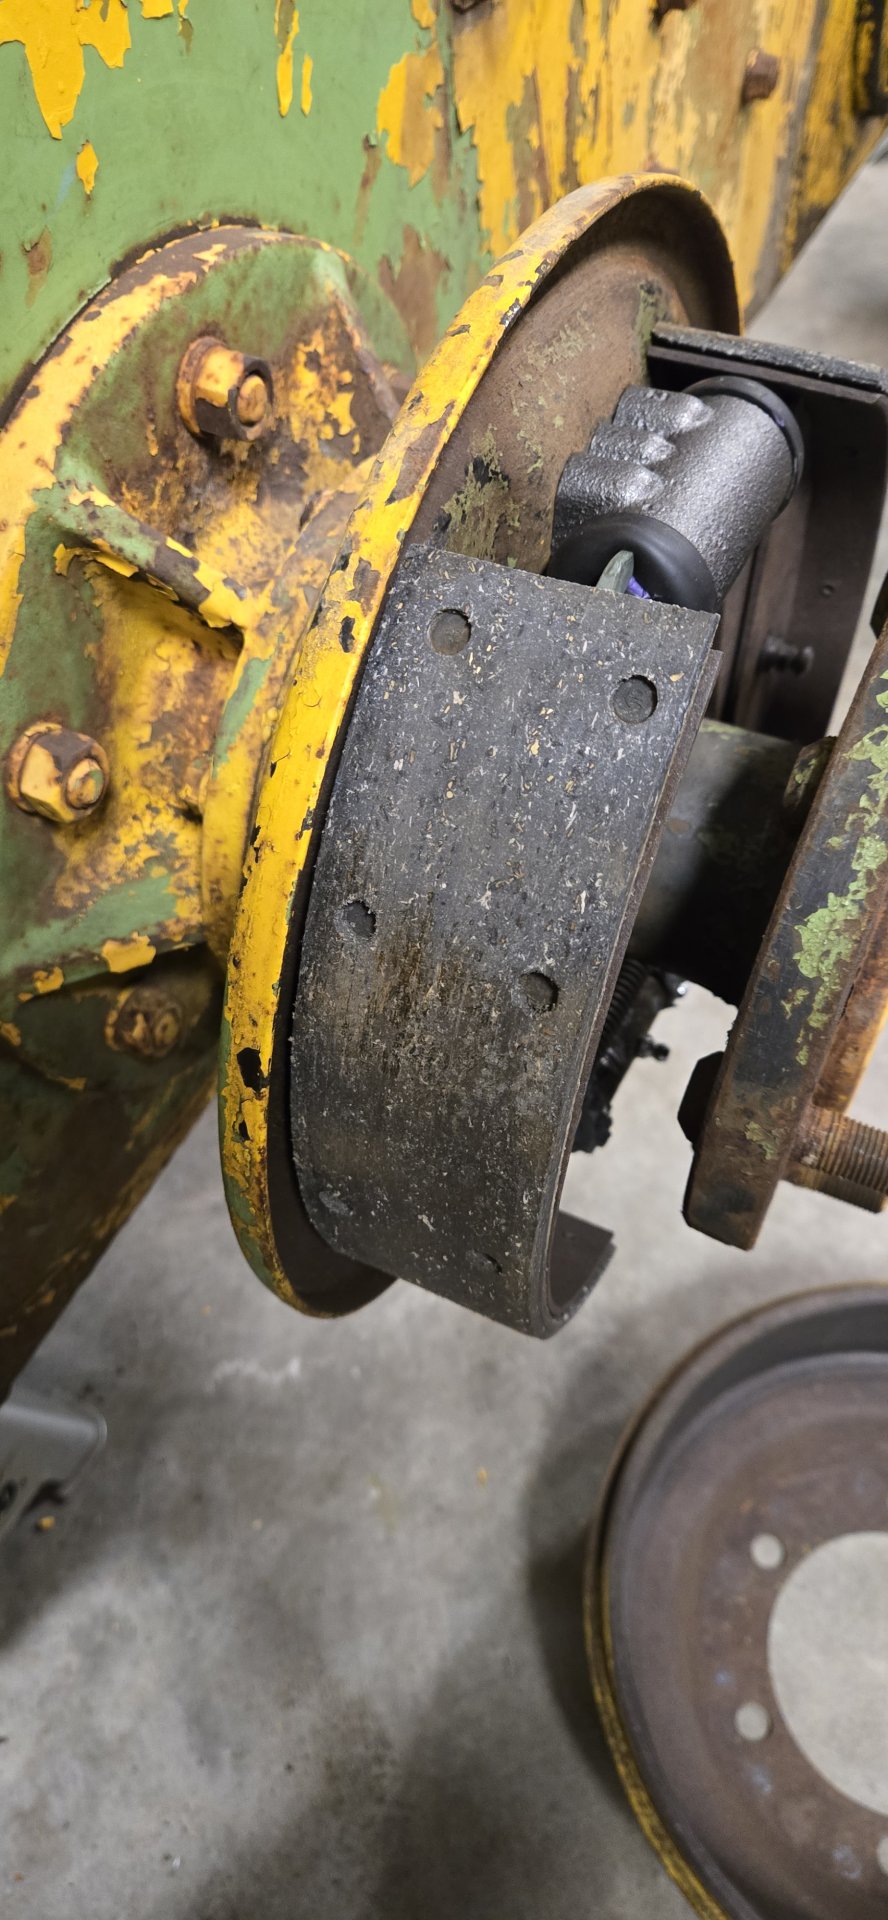
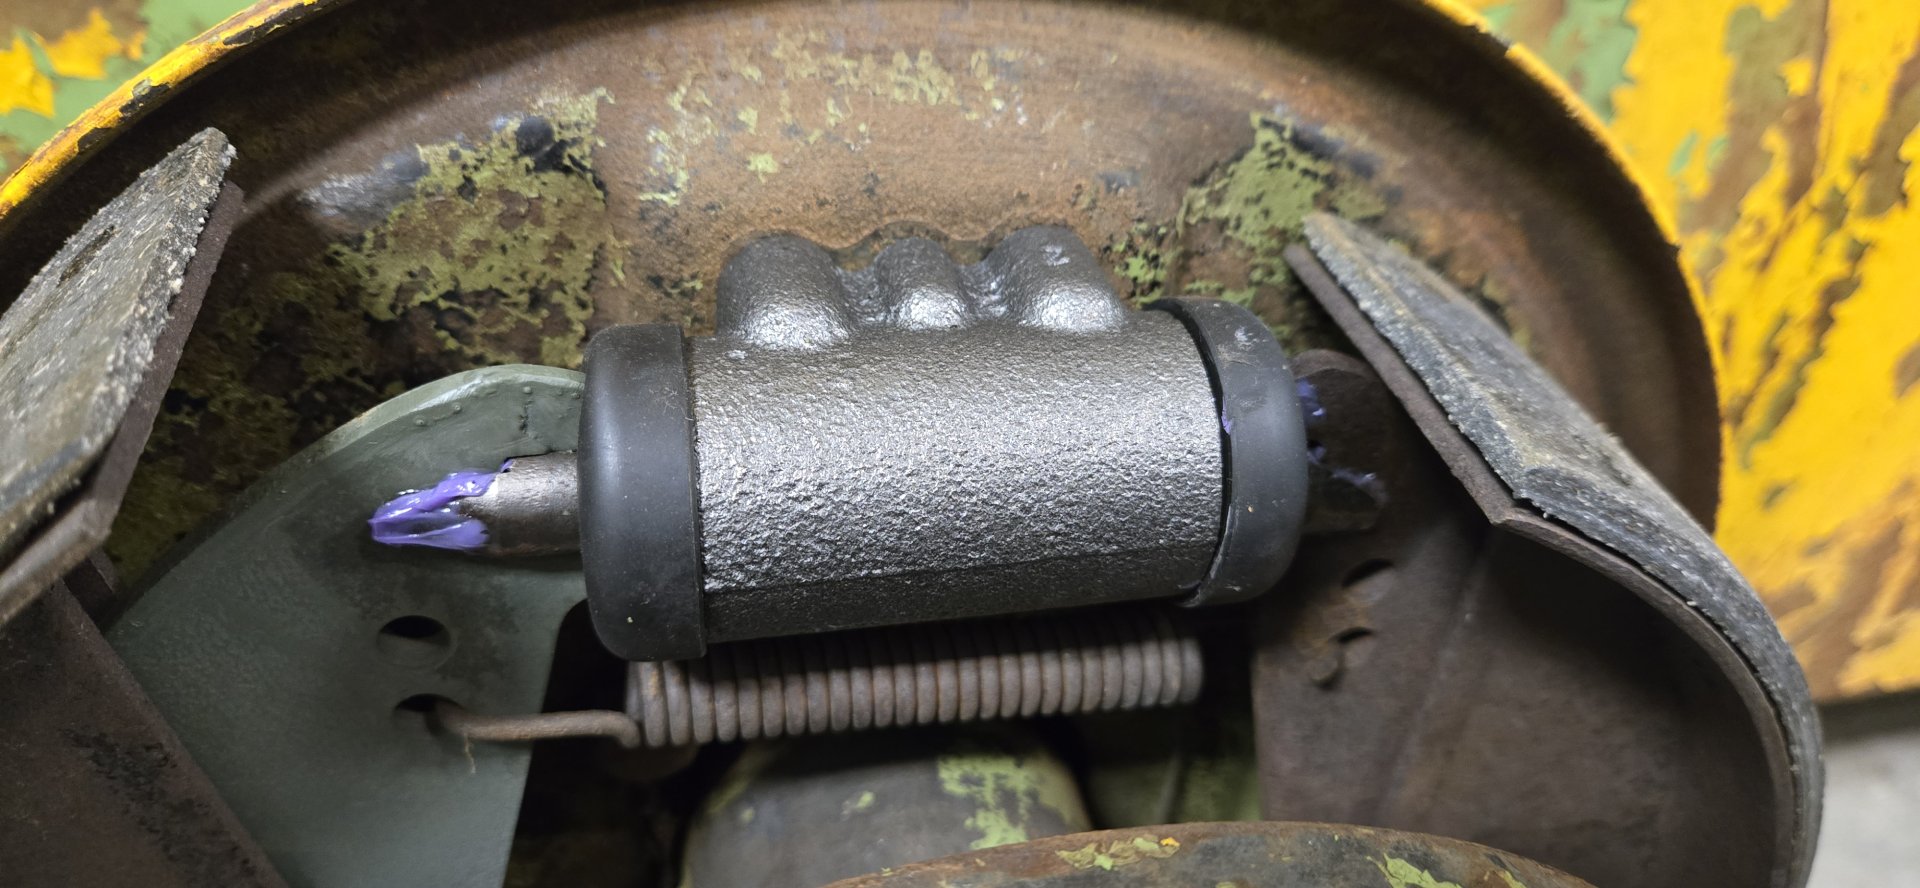
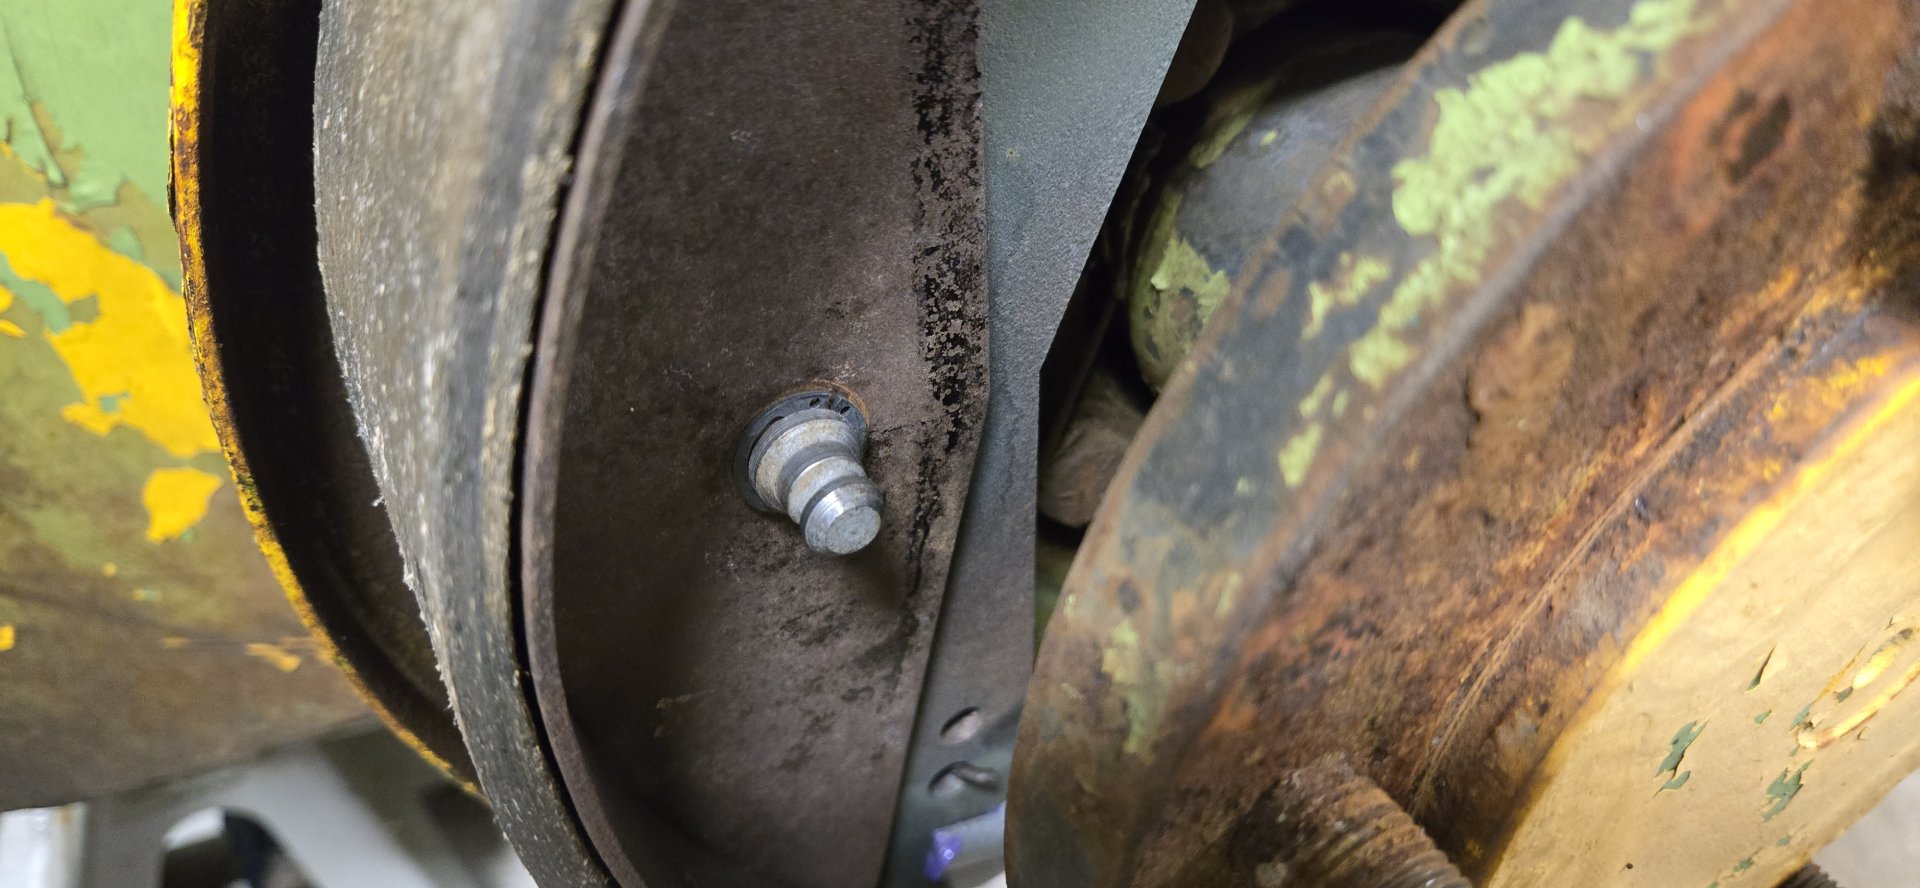
Photos of brake system on axle:

20241016_160829.jpg
20241016_160756.jpg


20241016_160748.jpg
20241016_160743.jpg


I installed the zirk fitting on the adjuster holder. That was so froze up, I drilled and tapped the hole, and then used my grease gun to force the adjusters out, and then left the zirk in. Doesn't hurt anything. I bathed, showered, drowned the adjusters in anti-seize.

More photos in next post (limited to 10 per post, I guess?).

Al Jones
 
Last edited:
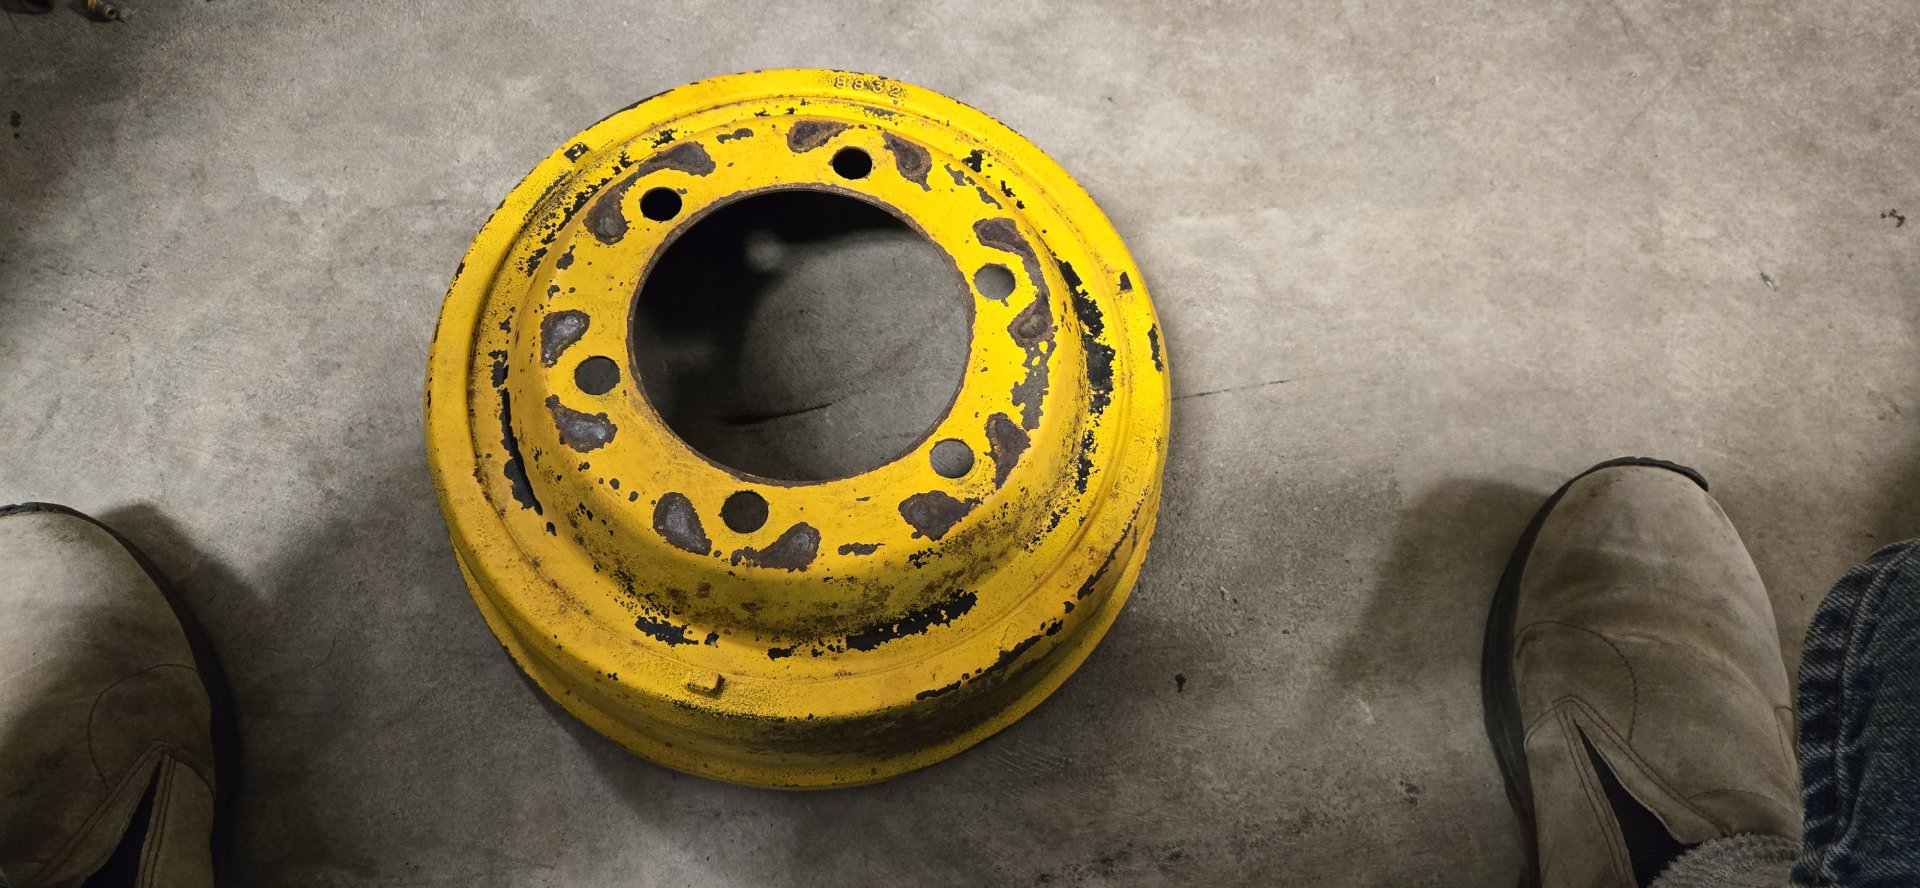
More of brakes on axle:

There is a casting number of 8832 on the drum, but that's not a part number.

20241016_160802.jpg
20241016_160739.jpg


Photos of master cylinder (rebuilt) system in cab, mounted under the floor, so you need 5 hole plate:

20241016_160523.jpg
20241016_160515.jpg
20241016_160507.jpg


If you're wondering about the green spring, I have been able to find NOS parts here and there. It's not been easy.

The master mount seems to be unique to the 1700. The master cylinder I used was M36071. That number works for both Napa and eBay. I used a new Wagner off eBay. I reused the drums and pads that were on mine as they were in good shape. Also, I could never find anything close to either when I was overhauling mine. I had damaged parts that I had laser cut for replacement. I cannot find a number for the slaves, but I'll keep looking. The way I found the slave was to look at Napa's Catalog "Wheel Cylinders by Illustration". There's a gazillion in the catalog but, it was worth it to browse it.

Al Jones
Brookings, SD
 
Last edited:
Mostly a one off, would consider another, but only for someone I know.
I have an Owatonna 1700 Mustang that I need to find a new home for, but there doesn’t seem to be the same level of interest in these machines in our area that you find on the skid loader forums.
 
Update on progress:

Straightening bent stuff:

003.jpg
004.jpg


I'm into the torque convertor and have found all the parts except where to sent the convertor to be overhauled. The "charge pump" is nothing more than a Ford C-3/C-4 automatic transmission pump. The torque convertor is also a standard convertor for small displacement cars. Someone mentioned it being cold blooded but IF you have the right ATF in the machine, temperature will not affect this part of the machine (charge pump+ torque convertor). There is a 50 psi relief valve on the top of the adapter - that could also be an issue if not adjusted correctly.

001.jpg


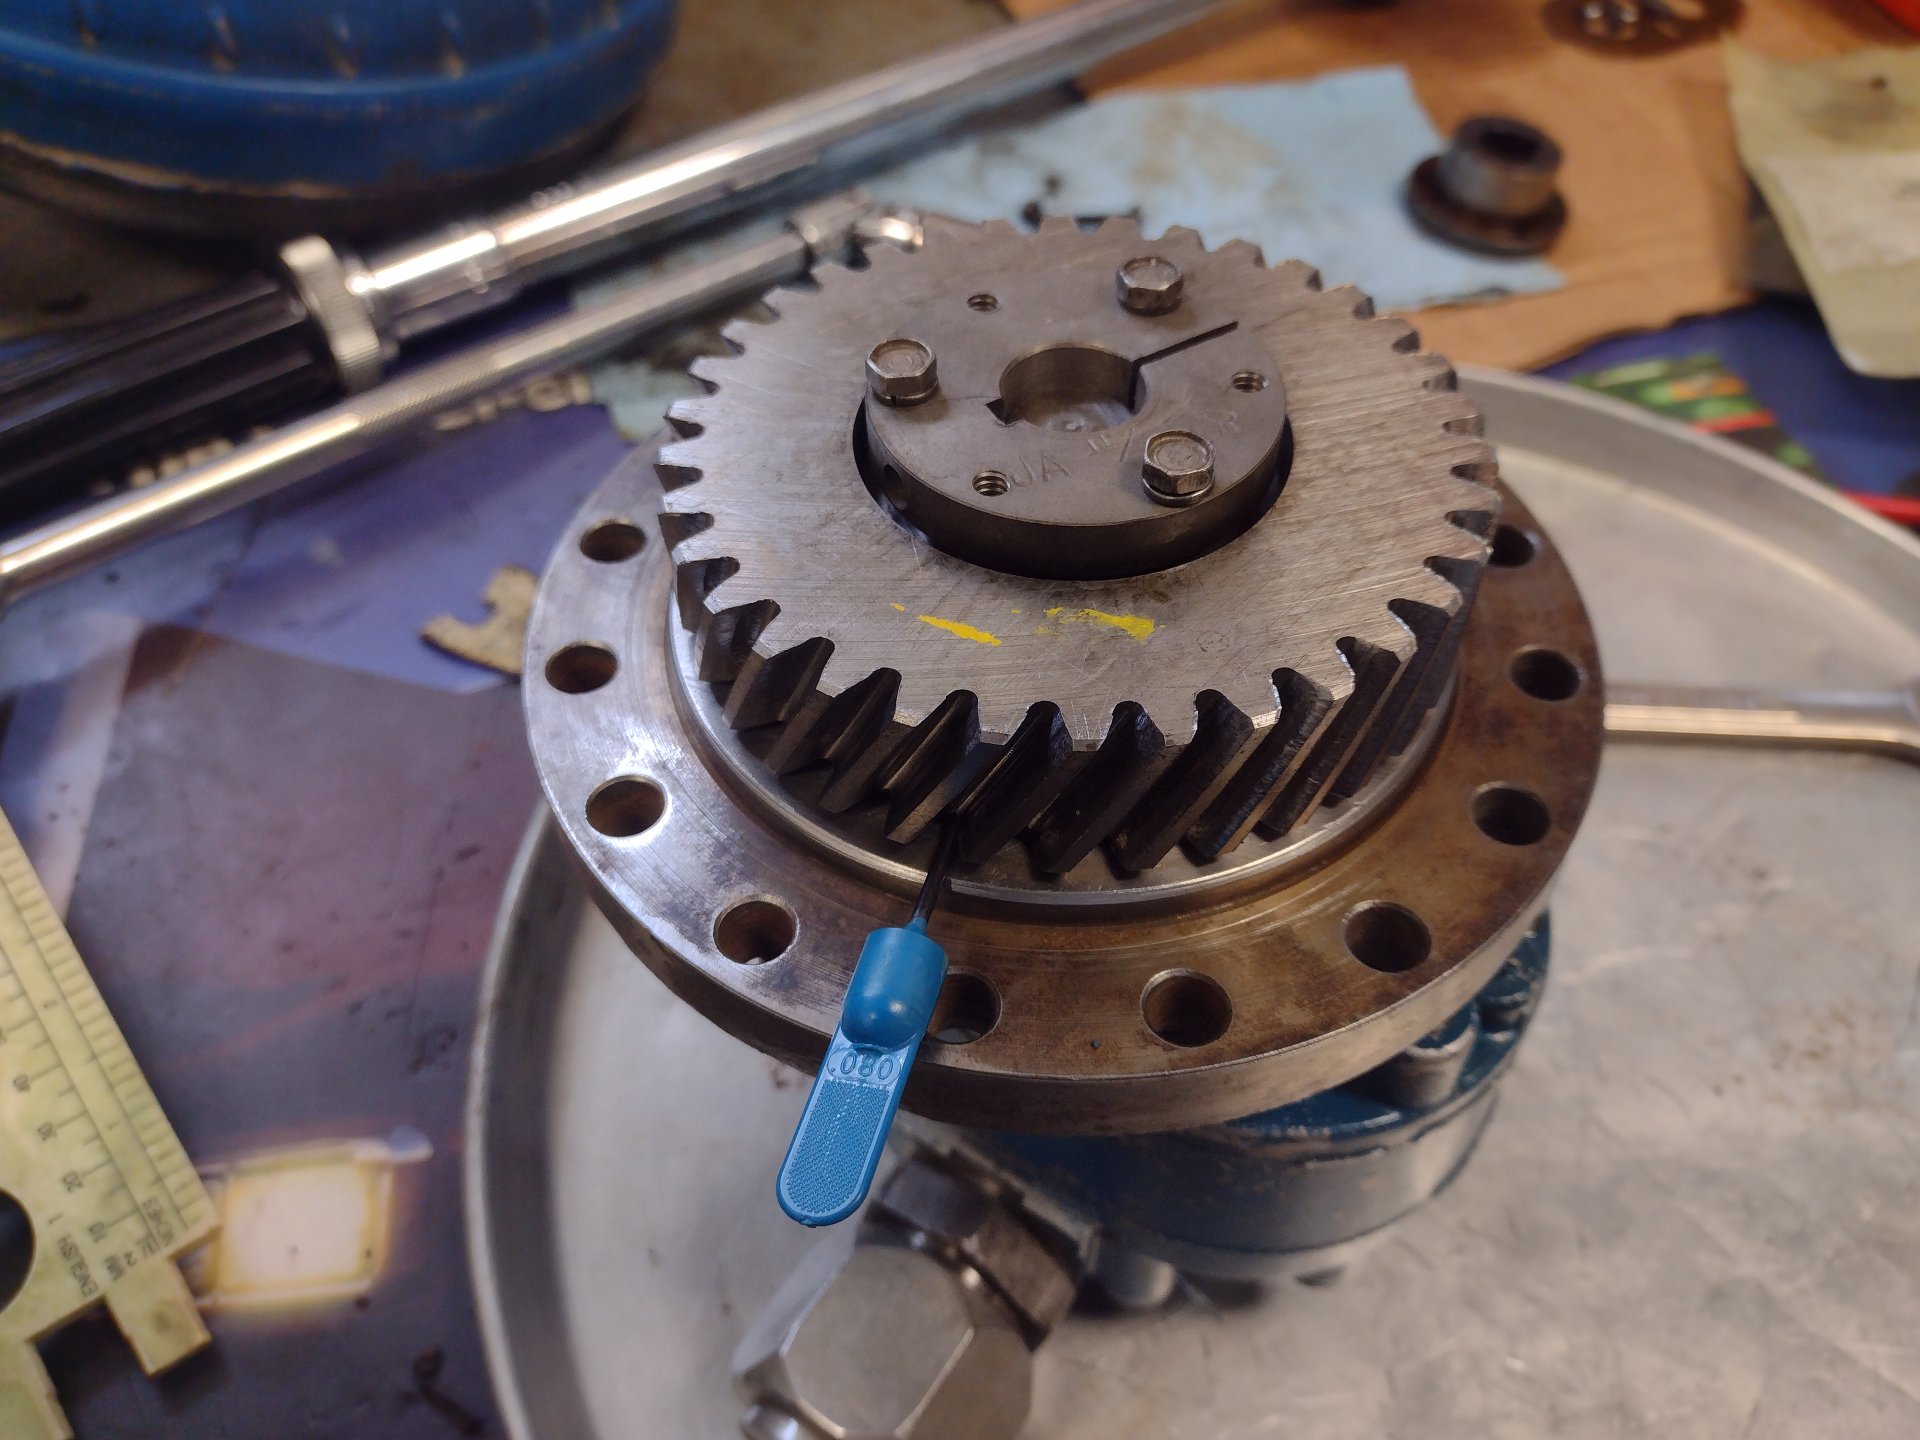
Overhauled the Cessna hydraulic pump. I had to use a new lock for the gear as the other had been previously bashed on. The one photo shows checking the correct clearance to the mounting adapter. The Cessna pump is rated at 24 gpm. I can't remember what the rated pressure is.

002.jpg
002.jpg


007.jpg
008.jpg


I bought this spare skid steer for $400 so I could pick a few parts off it. It is totally complete so I'll let parts from it go to others when I'm finished.

003.jpg
 
I'd like to comment on the engine here.

It's the Ford V-4 with a Ford torque convertor. I think it's way better than the variable pulley system. All parts are easy to find but certain ones can be very, very expensive. So, I've dug into other engine parts manuals to what other engine parts fit the V-4. I'm a scrapper and want to get the best deal I can, and am not in a hurry. In summary, this the Taunus engine, also called the German Ford V4 as it was only manufactured in West Germany. It is not the same at the British version. Parts from a 70s Capri (Mercury) 2.8L (171 cid ONLY) V6 will work in parts of the engine, and some parts from an 80s Ford Explorer V-6 will work as well. Your caliper will tell you what fits. The balance shaft bearings and seals are only for this engine so you might as well make your wallet scream and buy those on the open market. I could only find standard size pistons (90mm) used, and only 0.5mm and 1.0mm oversize pistons (essentially 20 and 40 over) new, but expensive. I have an engine lathe and Bridgeport mill so I am making some of my own parts for the engine. The cheapest (correct) intake valve I could find was $105 each so I bought a close one ($15) and turned it down on my lathe. I'm sticking with all metric so the next guy won't get confused. I'll post pictures once I get the engine assembled and tested. Again, if you have the $$, all the engine parts are readily available. The last time I looked, there was a rebuilt short block on ePay for $2800.

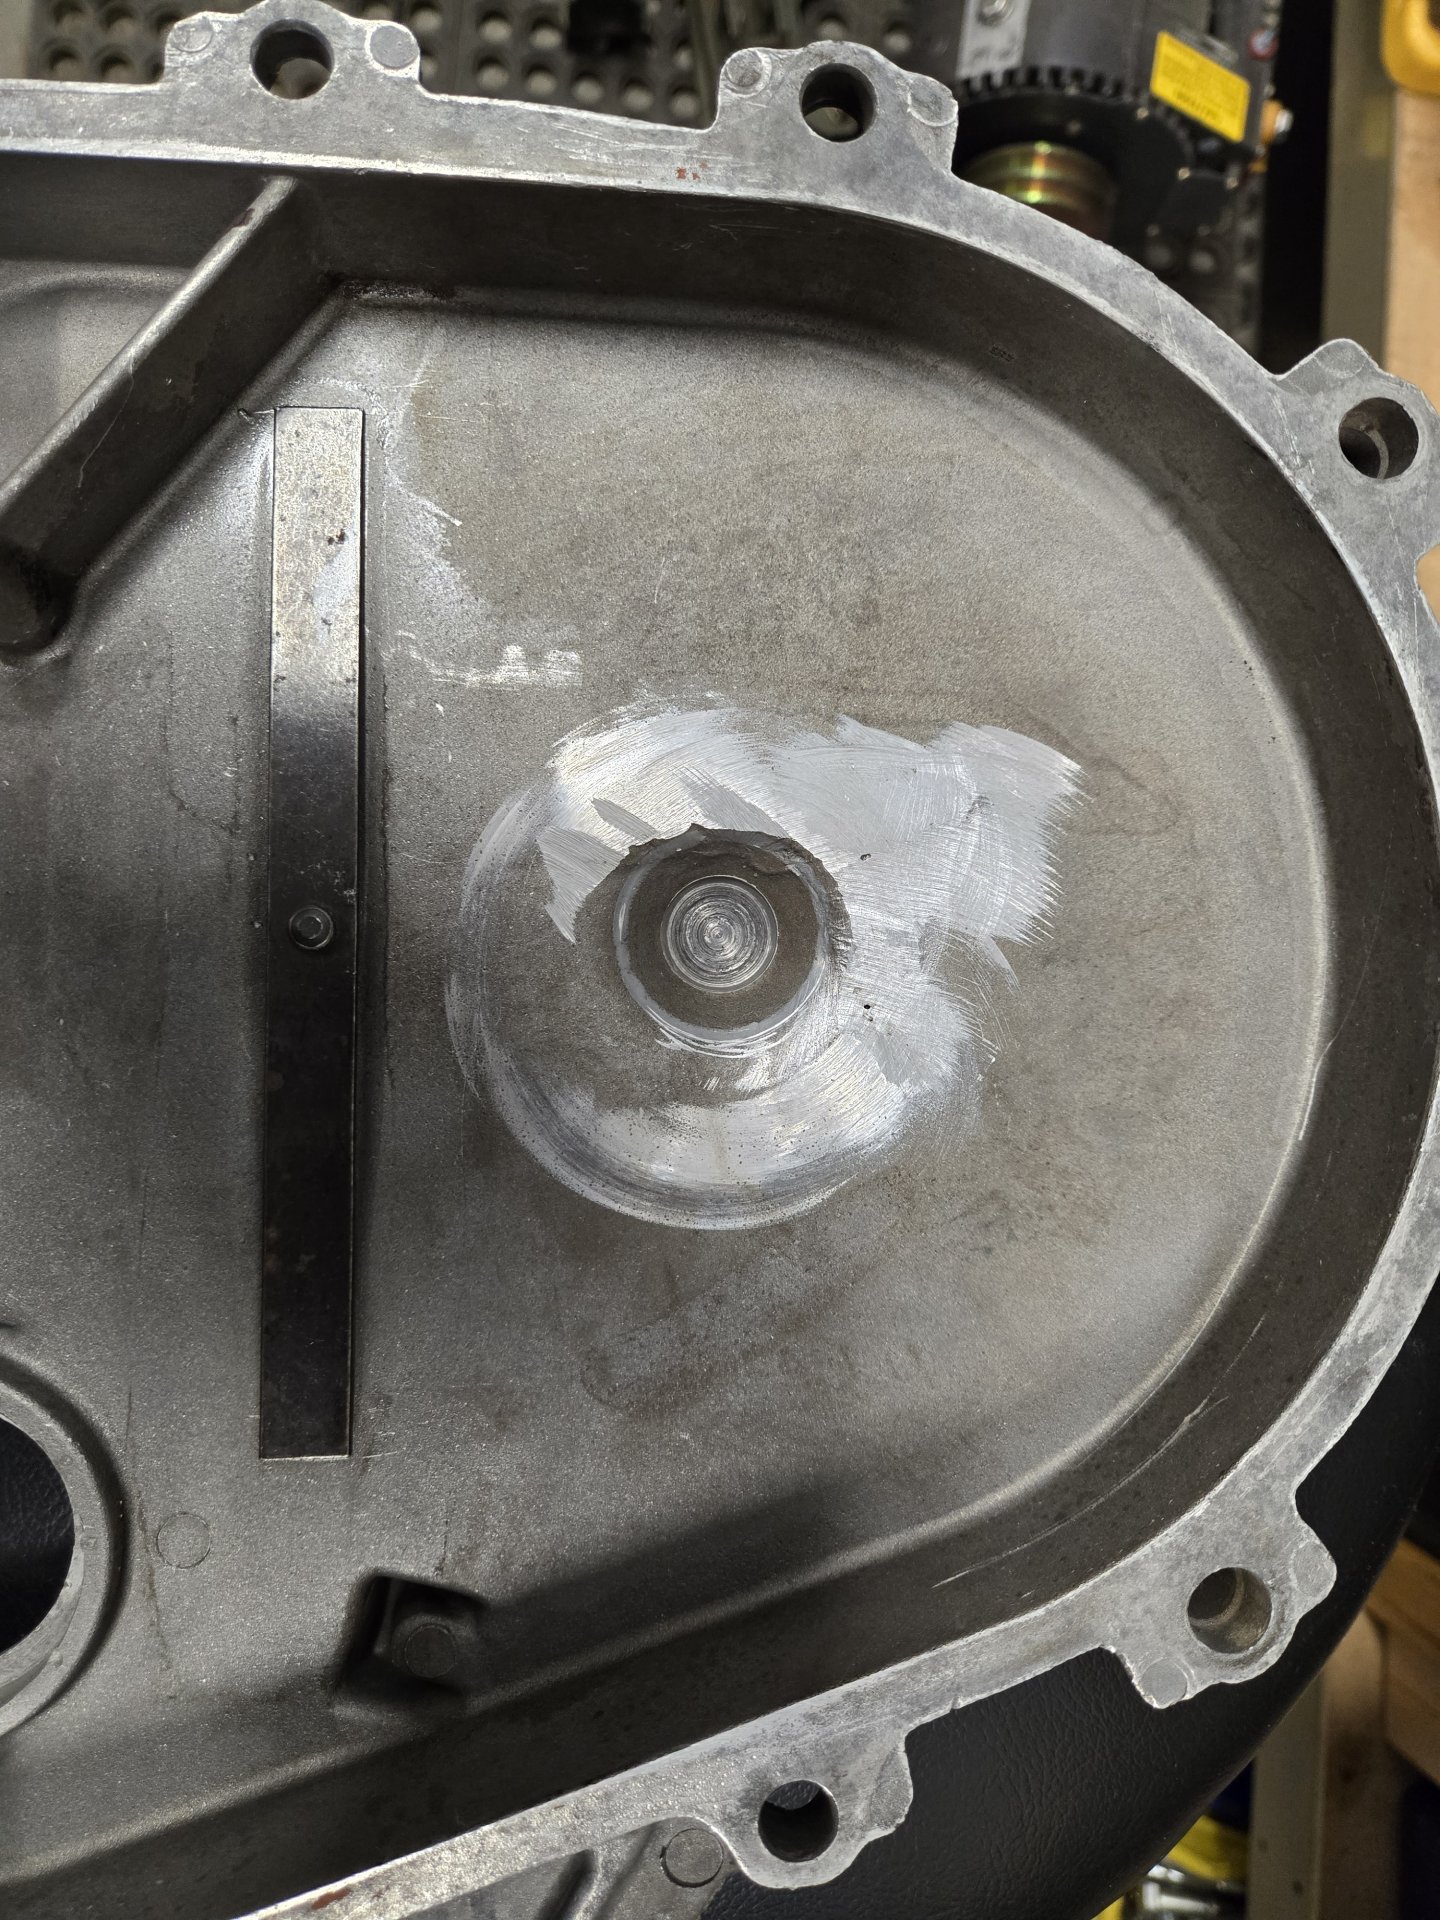
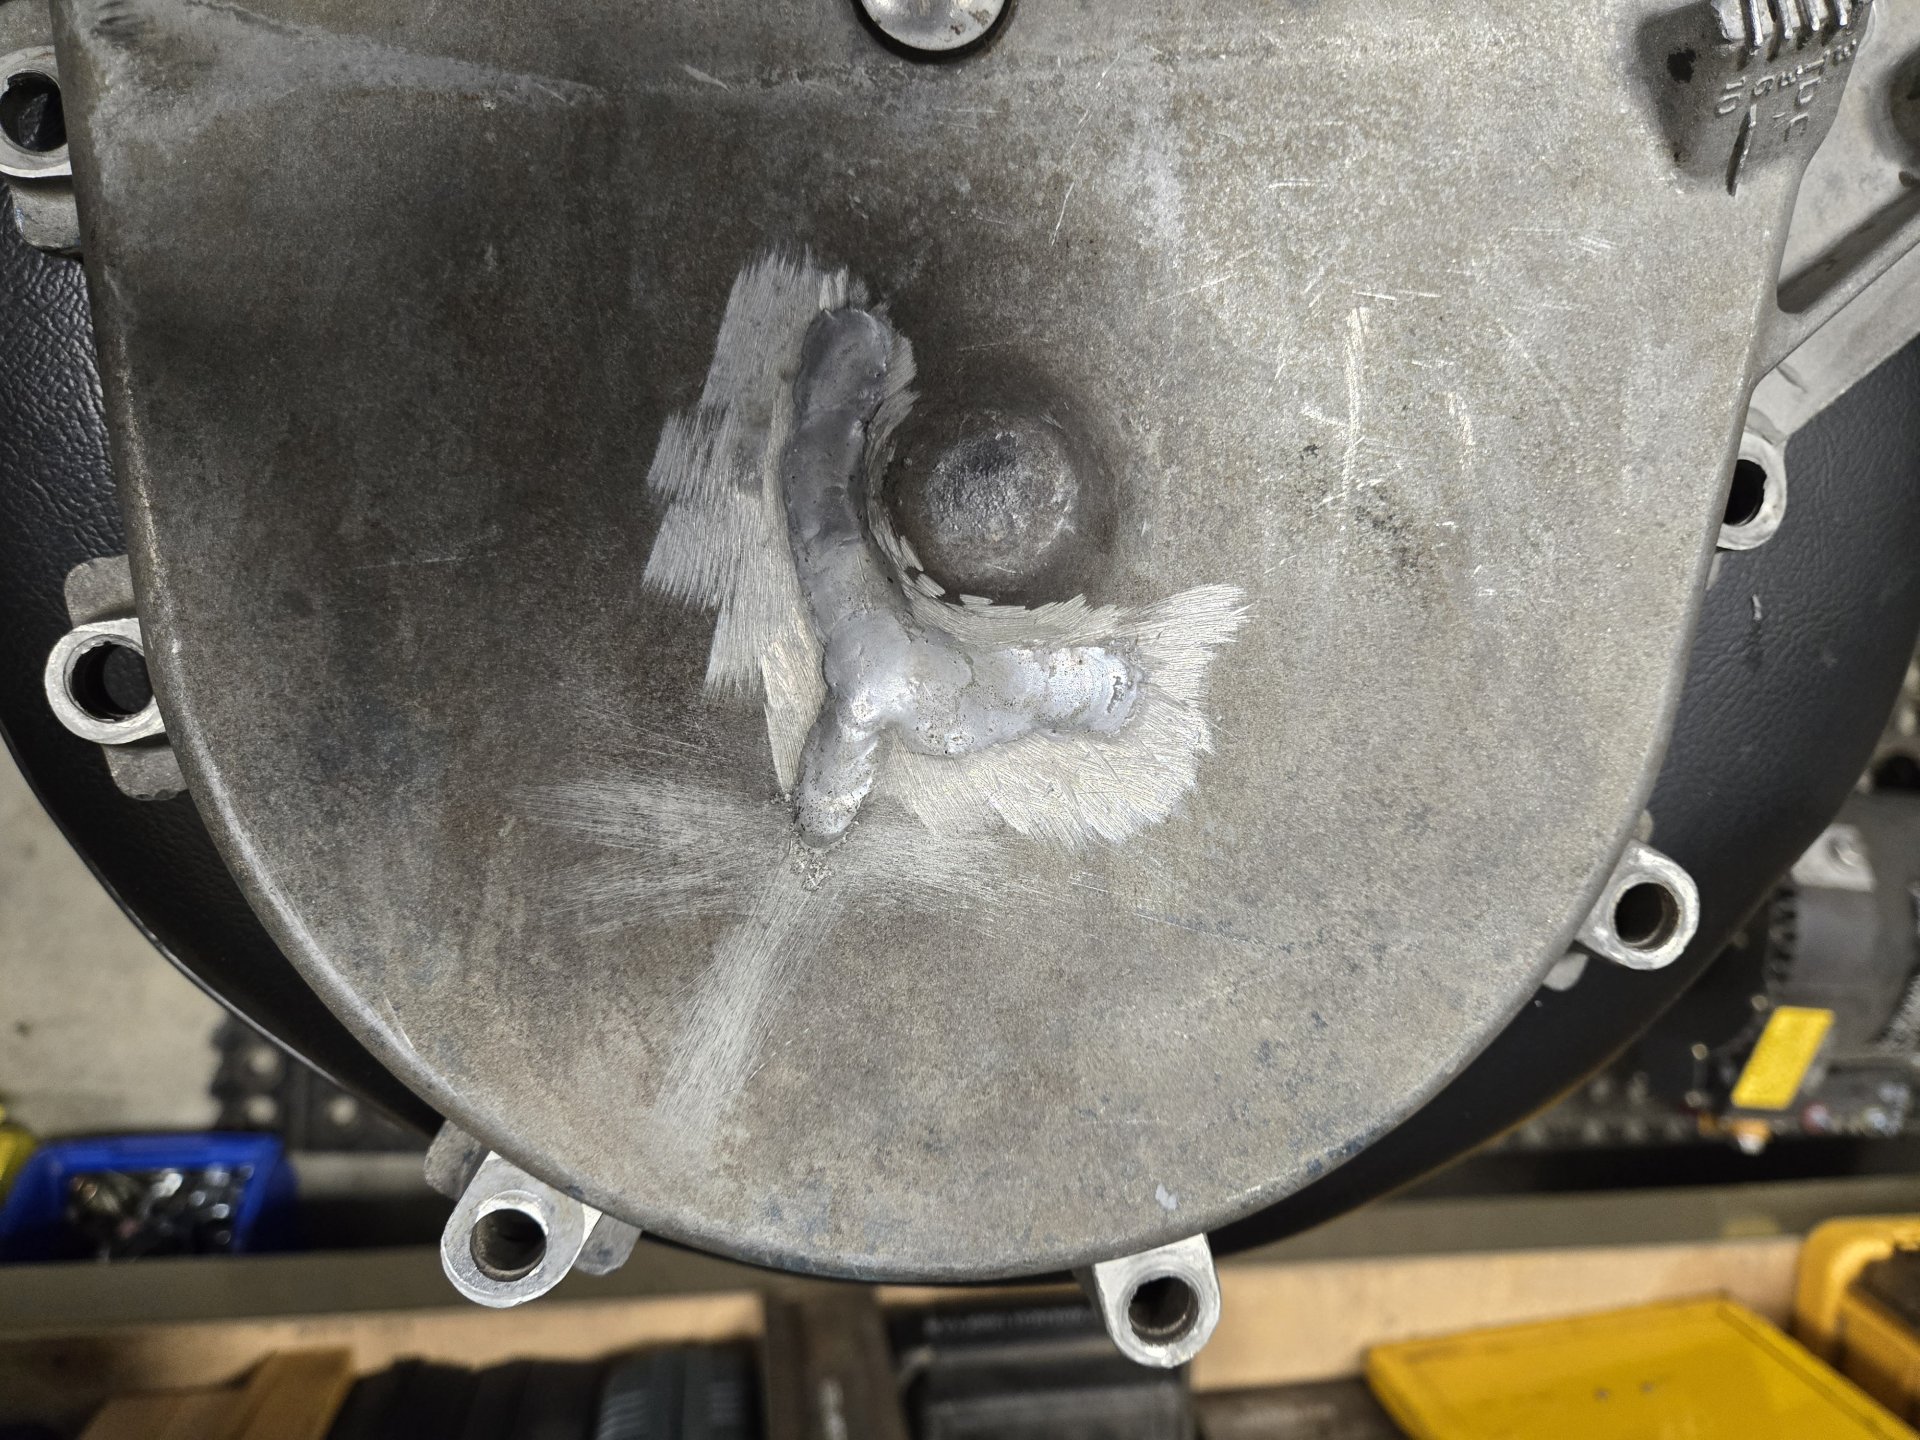
The camshaft gear previously divorced itself from the camshaft and damaged the aluminum cover. They appear to have done a nice job with the repair, and I'm a picky bugger, so that saying a lot. I found all Melling aluminum gears to replace the fiber ones. I'm not into the crankshaft yet, but am hopeful I will work with just a polish. The camshaft polished nicely.

20240820_161024.jpg
20240820_161034.jpg


Al Jones
1972 OMC Mustang 1700
 
Last edited:
As an Amazon Associate we earn from qualifying purchases. Product prices and availability are accurate as of the date/time indicated and are subject to change.
Btw I believe the 4 cylinder ford engine also was used in ford CL40 skidloaders from the 80s. I grew up running one and the engine looked identical. The loader itself was built by ericson. This would be another machine to source engine parts from
 
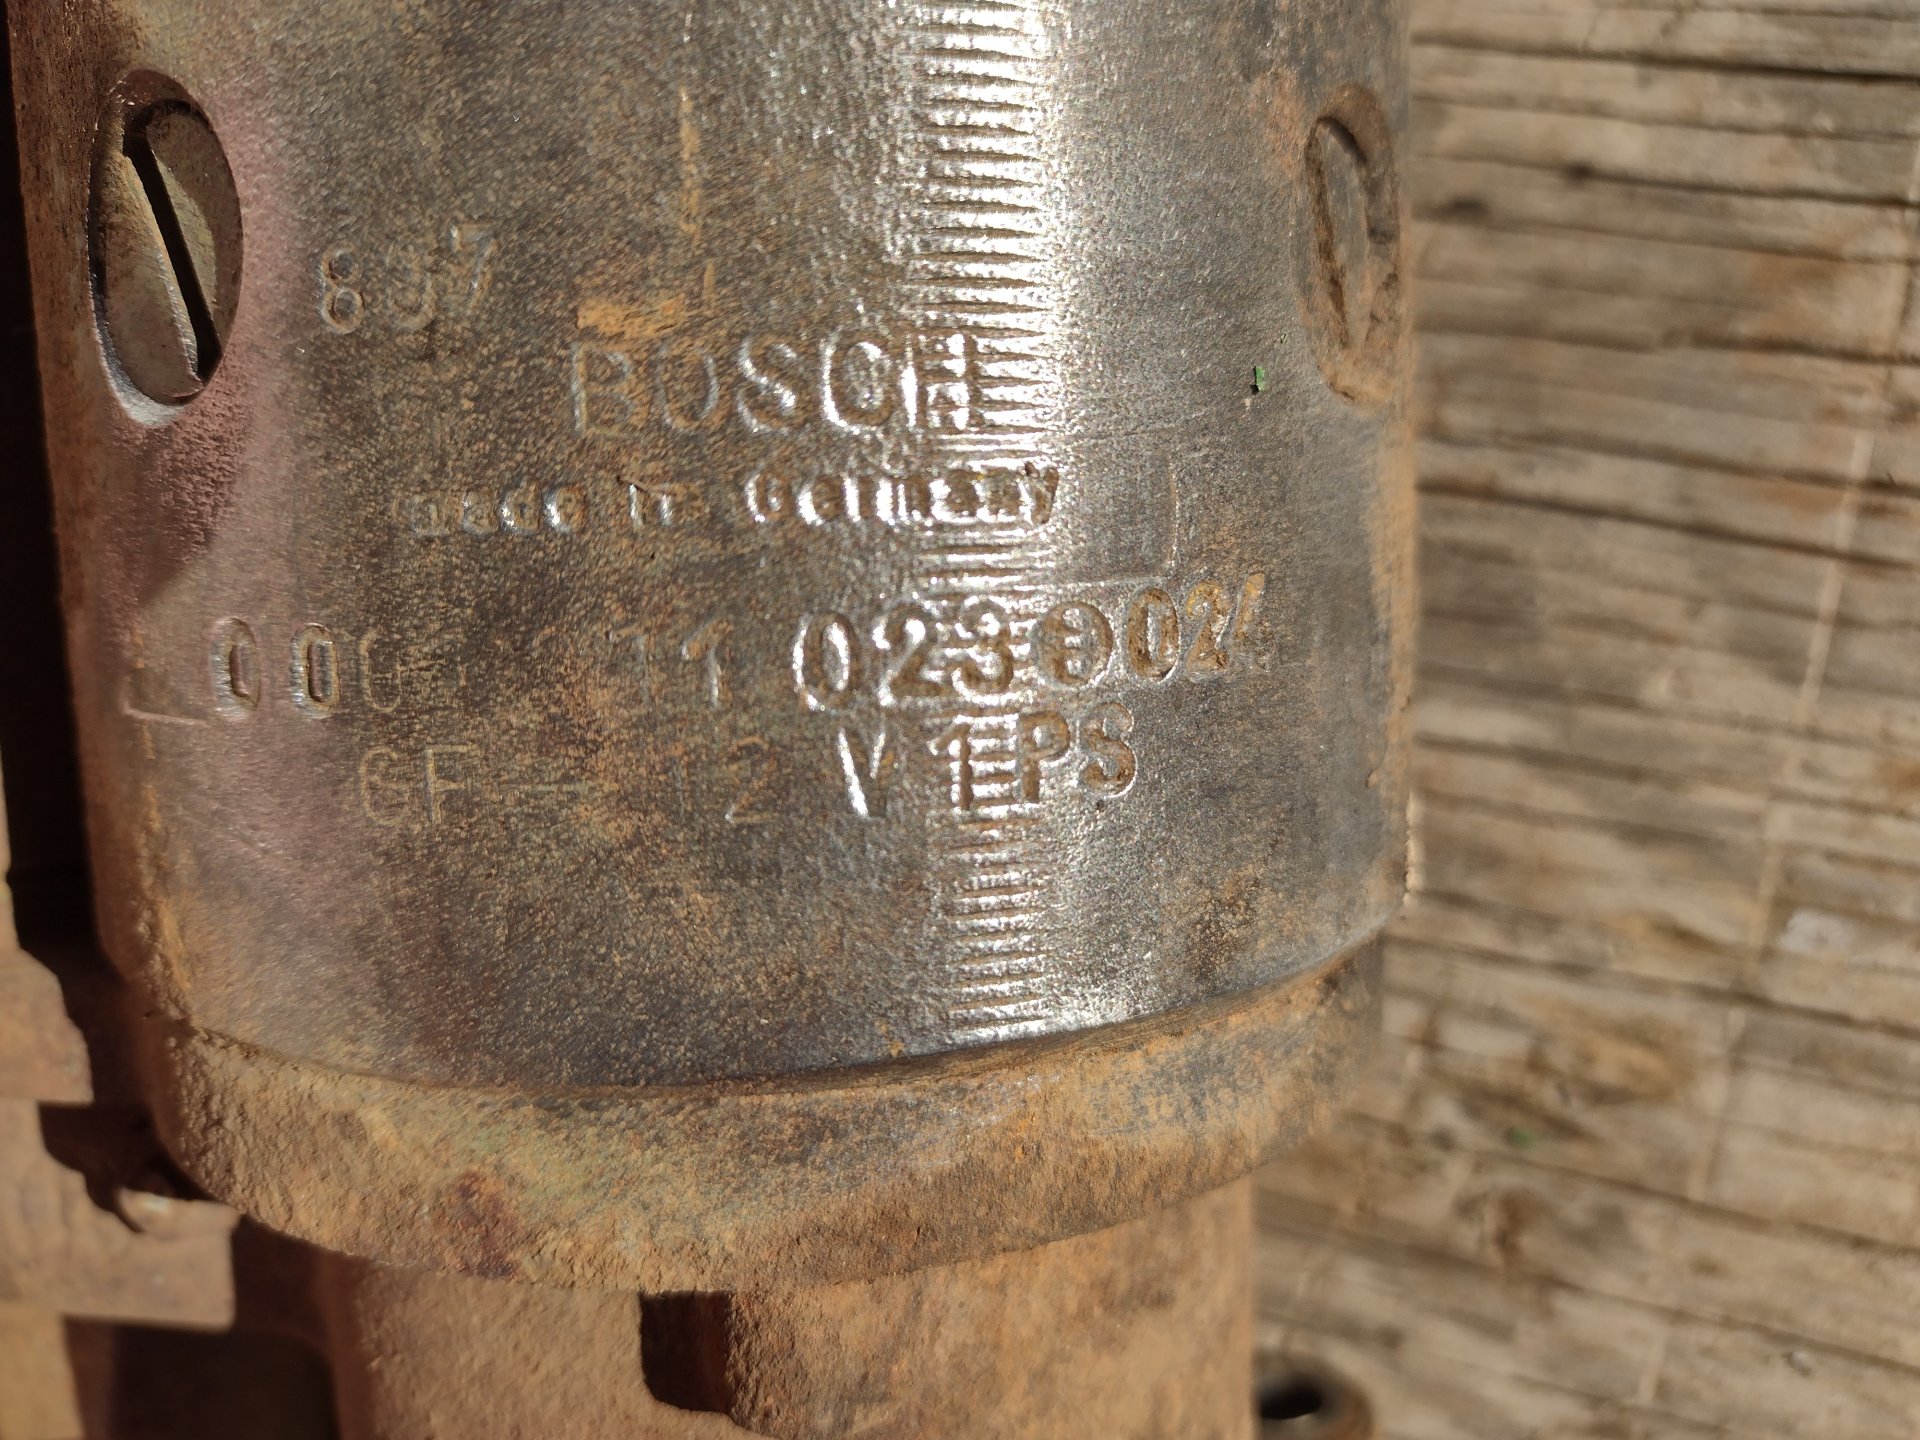
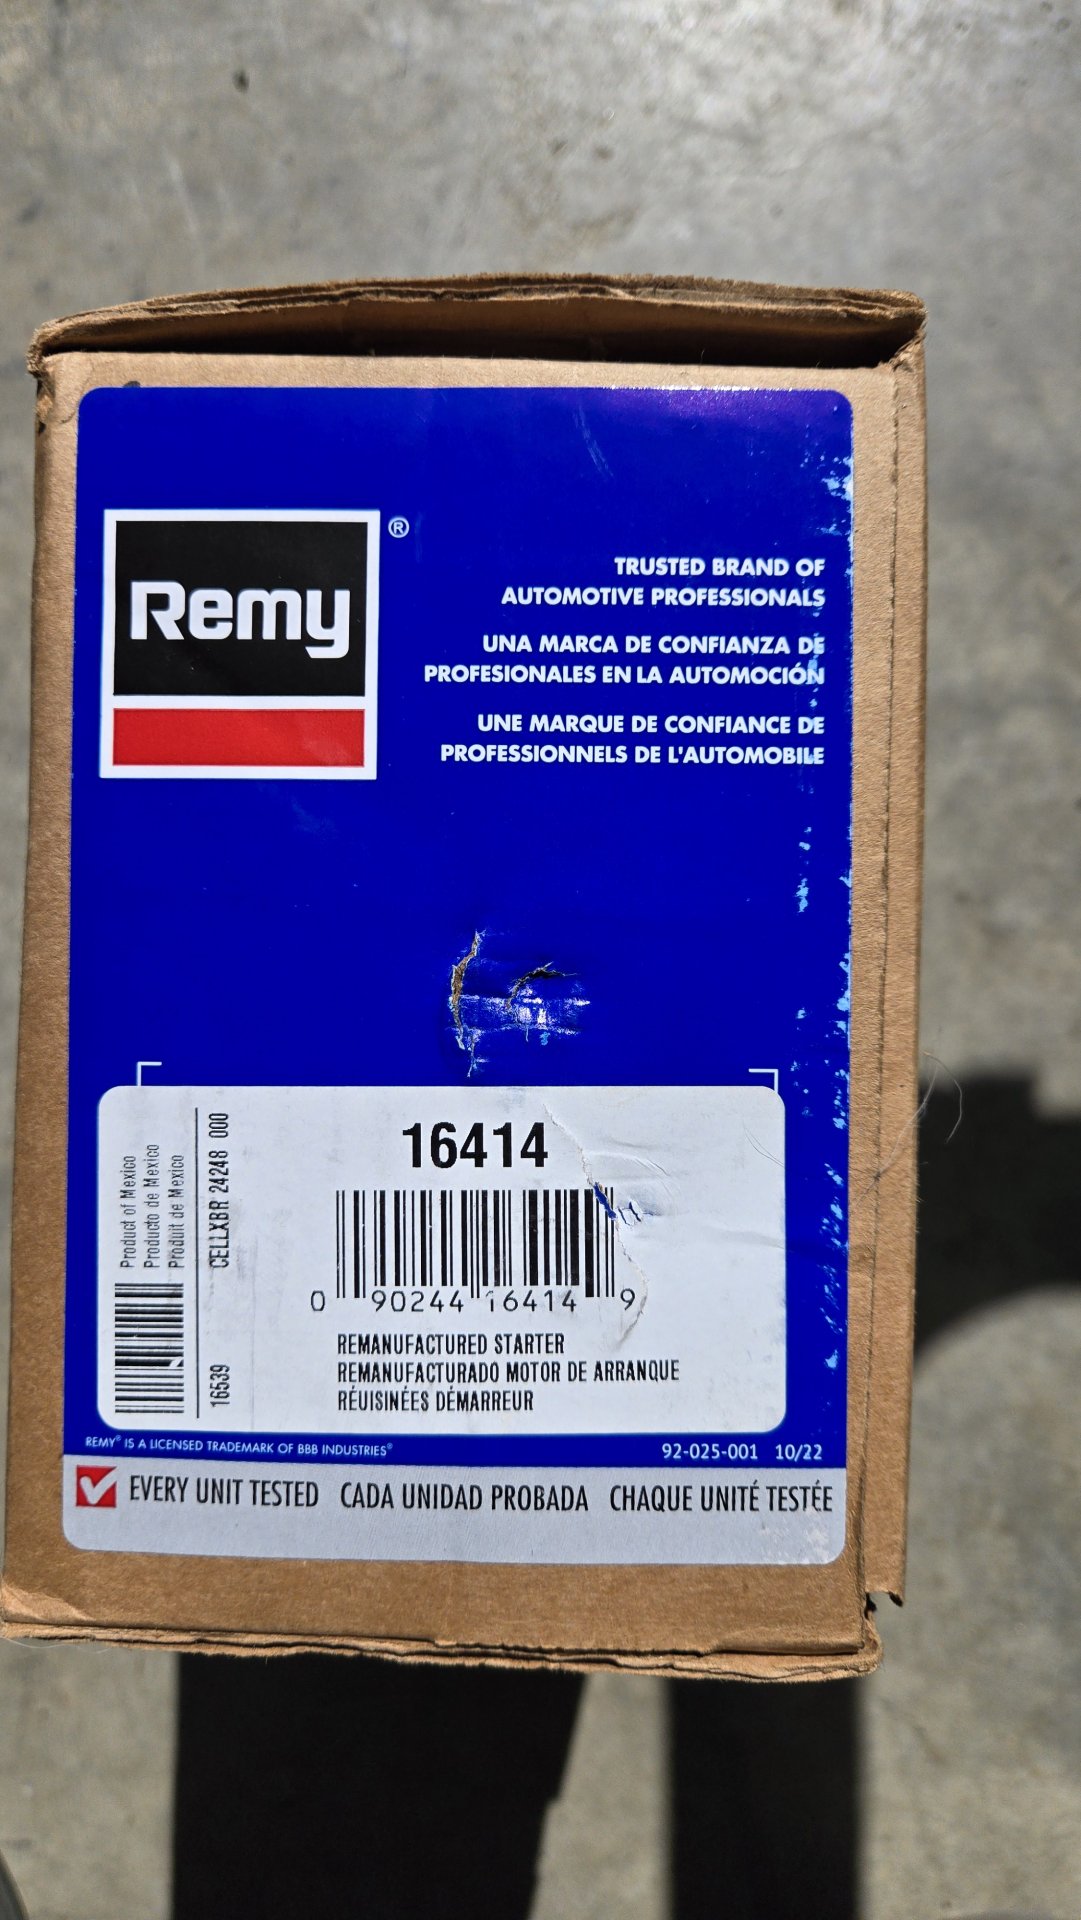
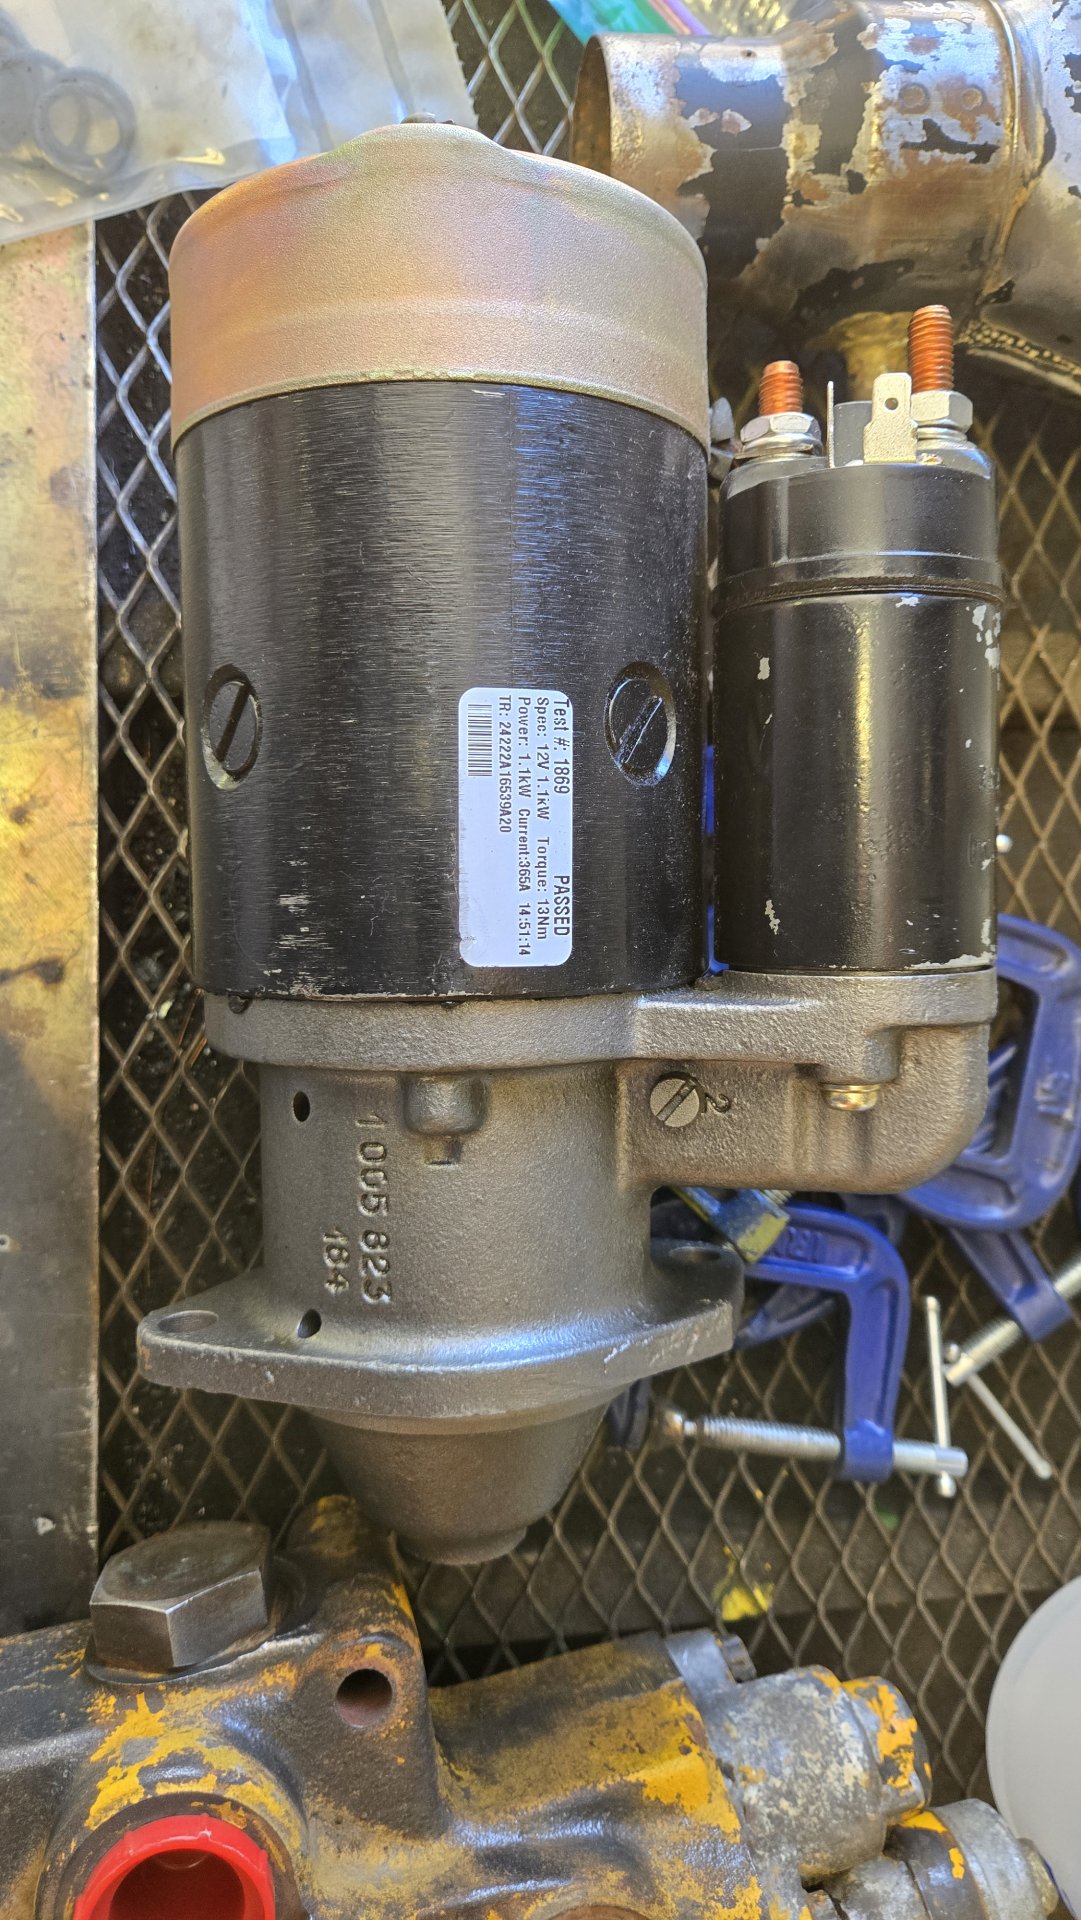
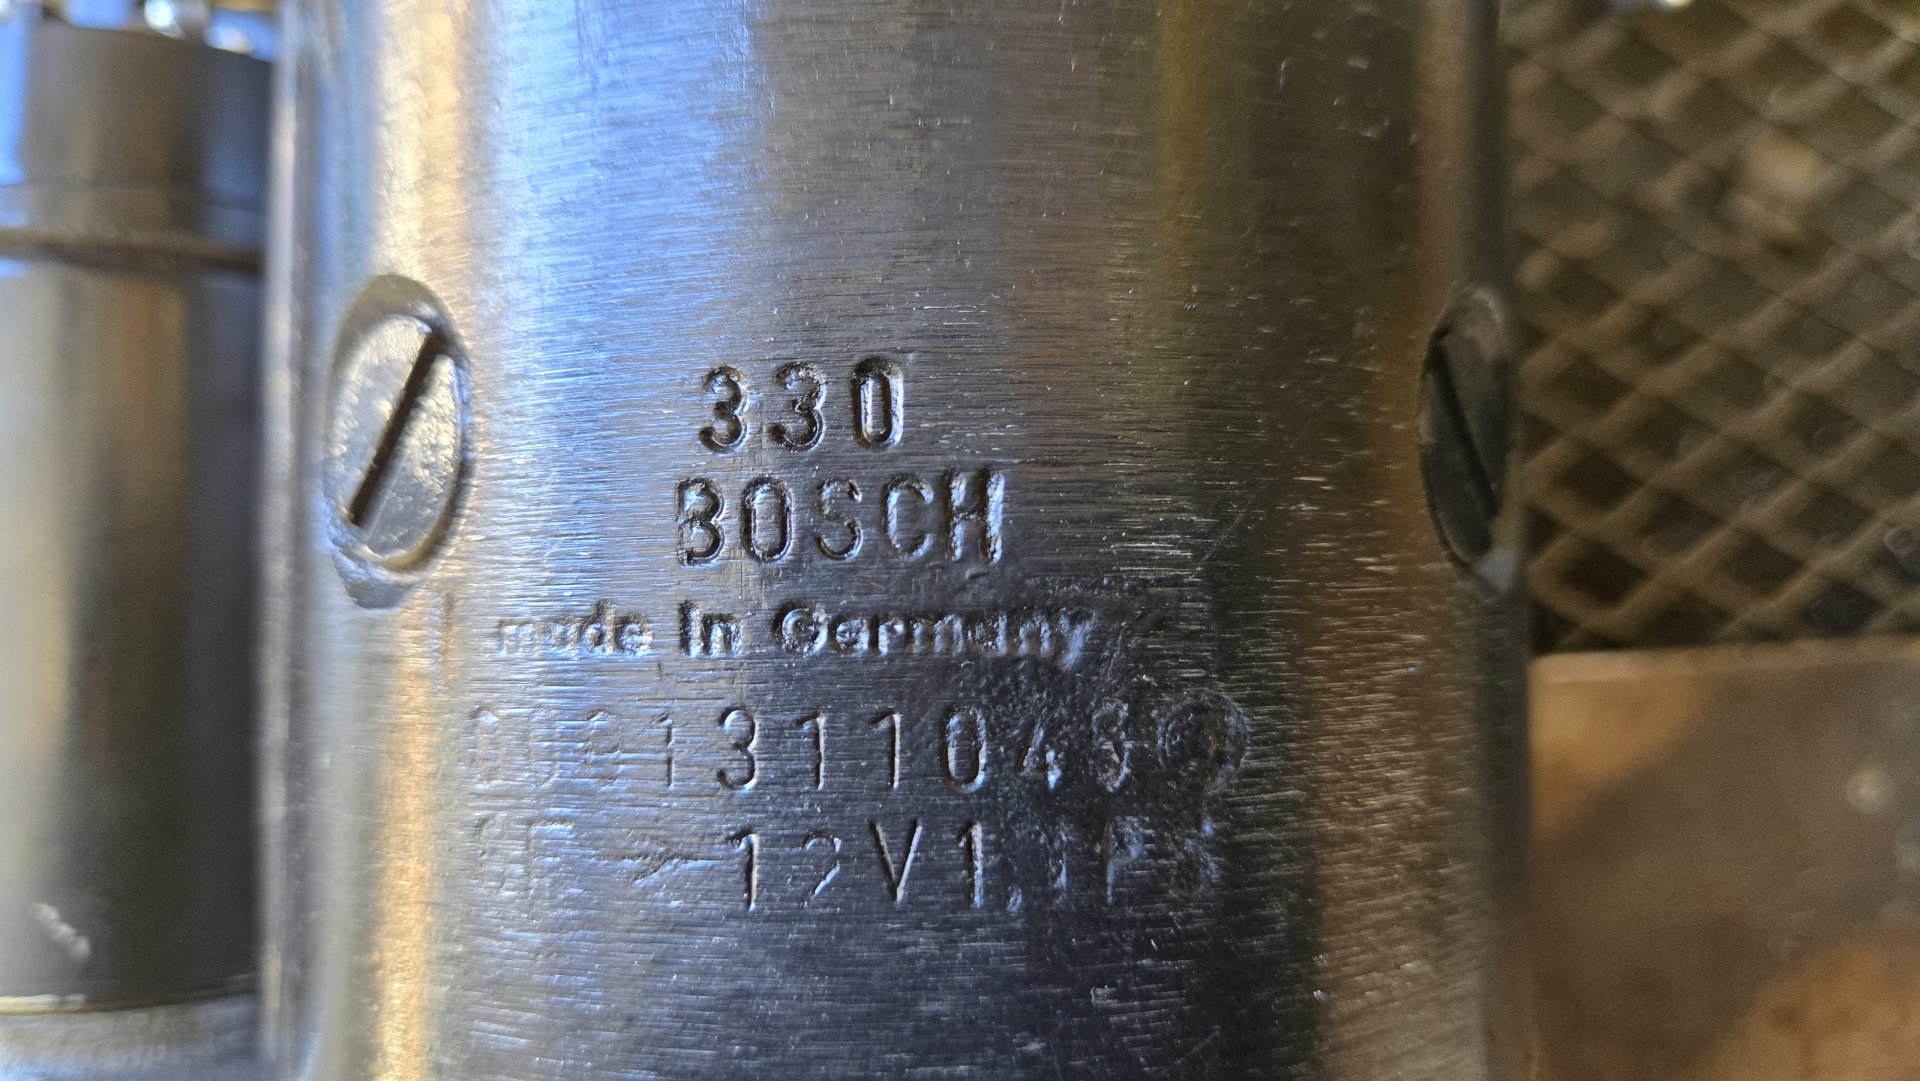
Starters: stock Bosch number is 0-001-211-023 and many variants on that number will work. If you're spiffy, you can find a variant that will fit and have more power. I think the stock starter is 1kW and the one I bought was 1.1kW. The stock Bosch starter also crosses to many, many rebuilder numbers. I bought mine from Rock Auto last year for $68.23 shipped (it was on special). I went with Remy 16414 as I've found them to be decent rebuilds. I don't think the gear reduction starters are worth the money if everything is in decent shape. The only rebuild parts I could find were from the European Union and their neighbors.

Photos: stock starter info, Remy number (it's a rebuilt Bosch), rebuilt starter, variant information.

IMG_20231112_123051437_HDR.jpg
20250327_135958.jpg
20250327_140056.jpg


20250327_140110.jpg


Good luck,
Allen
 
Last edited:
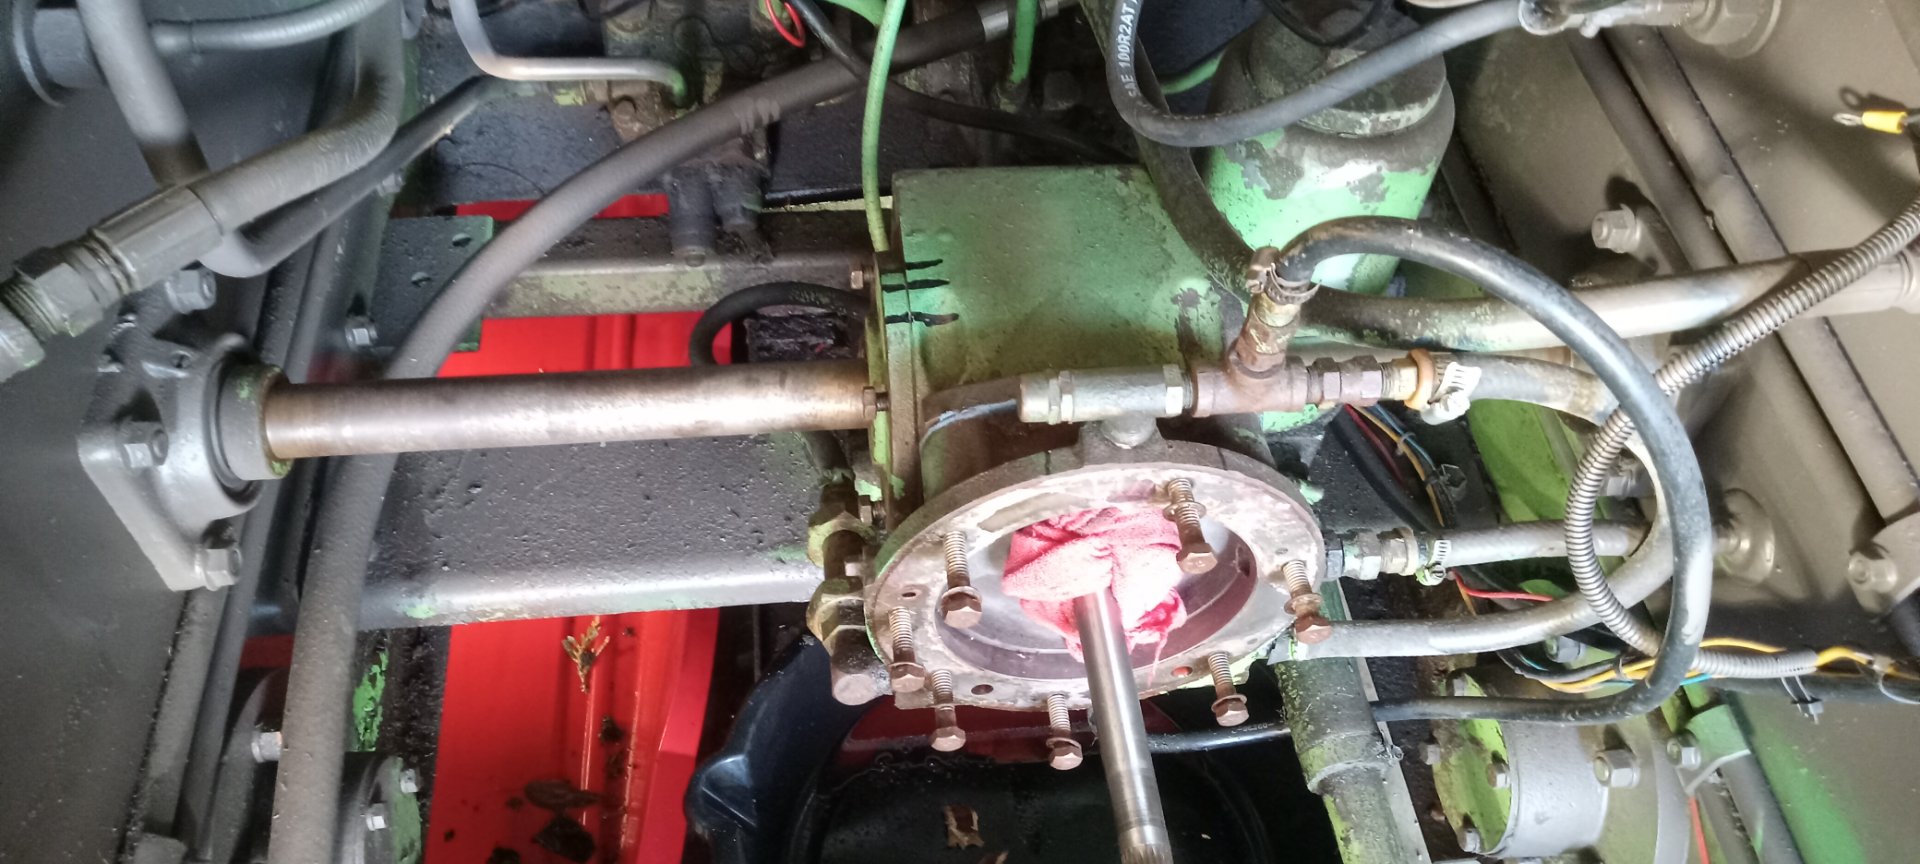
Hello, new here. I'm also in process of replacing drive Axle seals. Can you give me some pointers on replacing the shaft seals. So far I have removed 1.7 engine and removed bell housing and charge pump. I am guessing I have to take side drive gears off shaft and some how slide shaft out. Thanks Steve


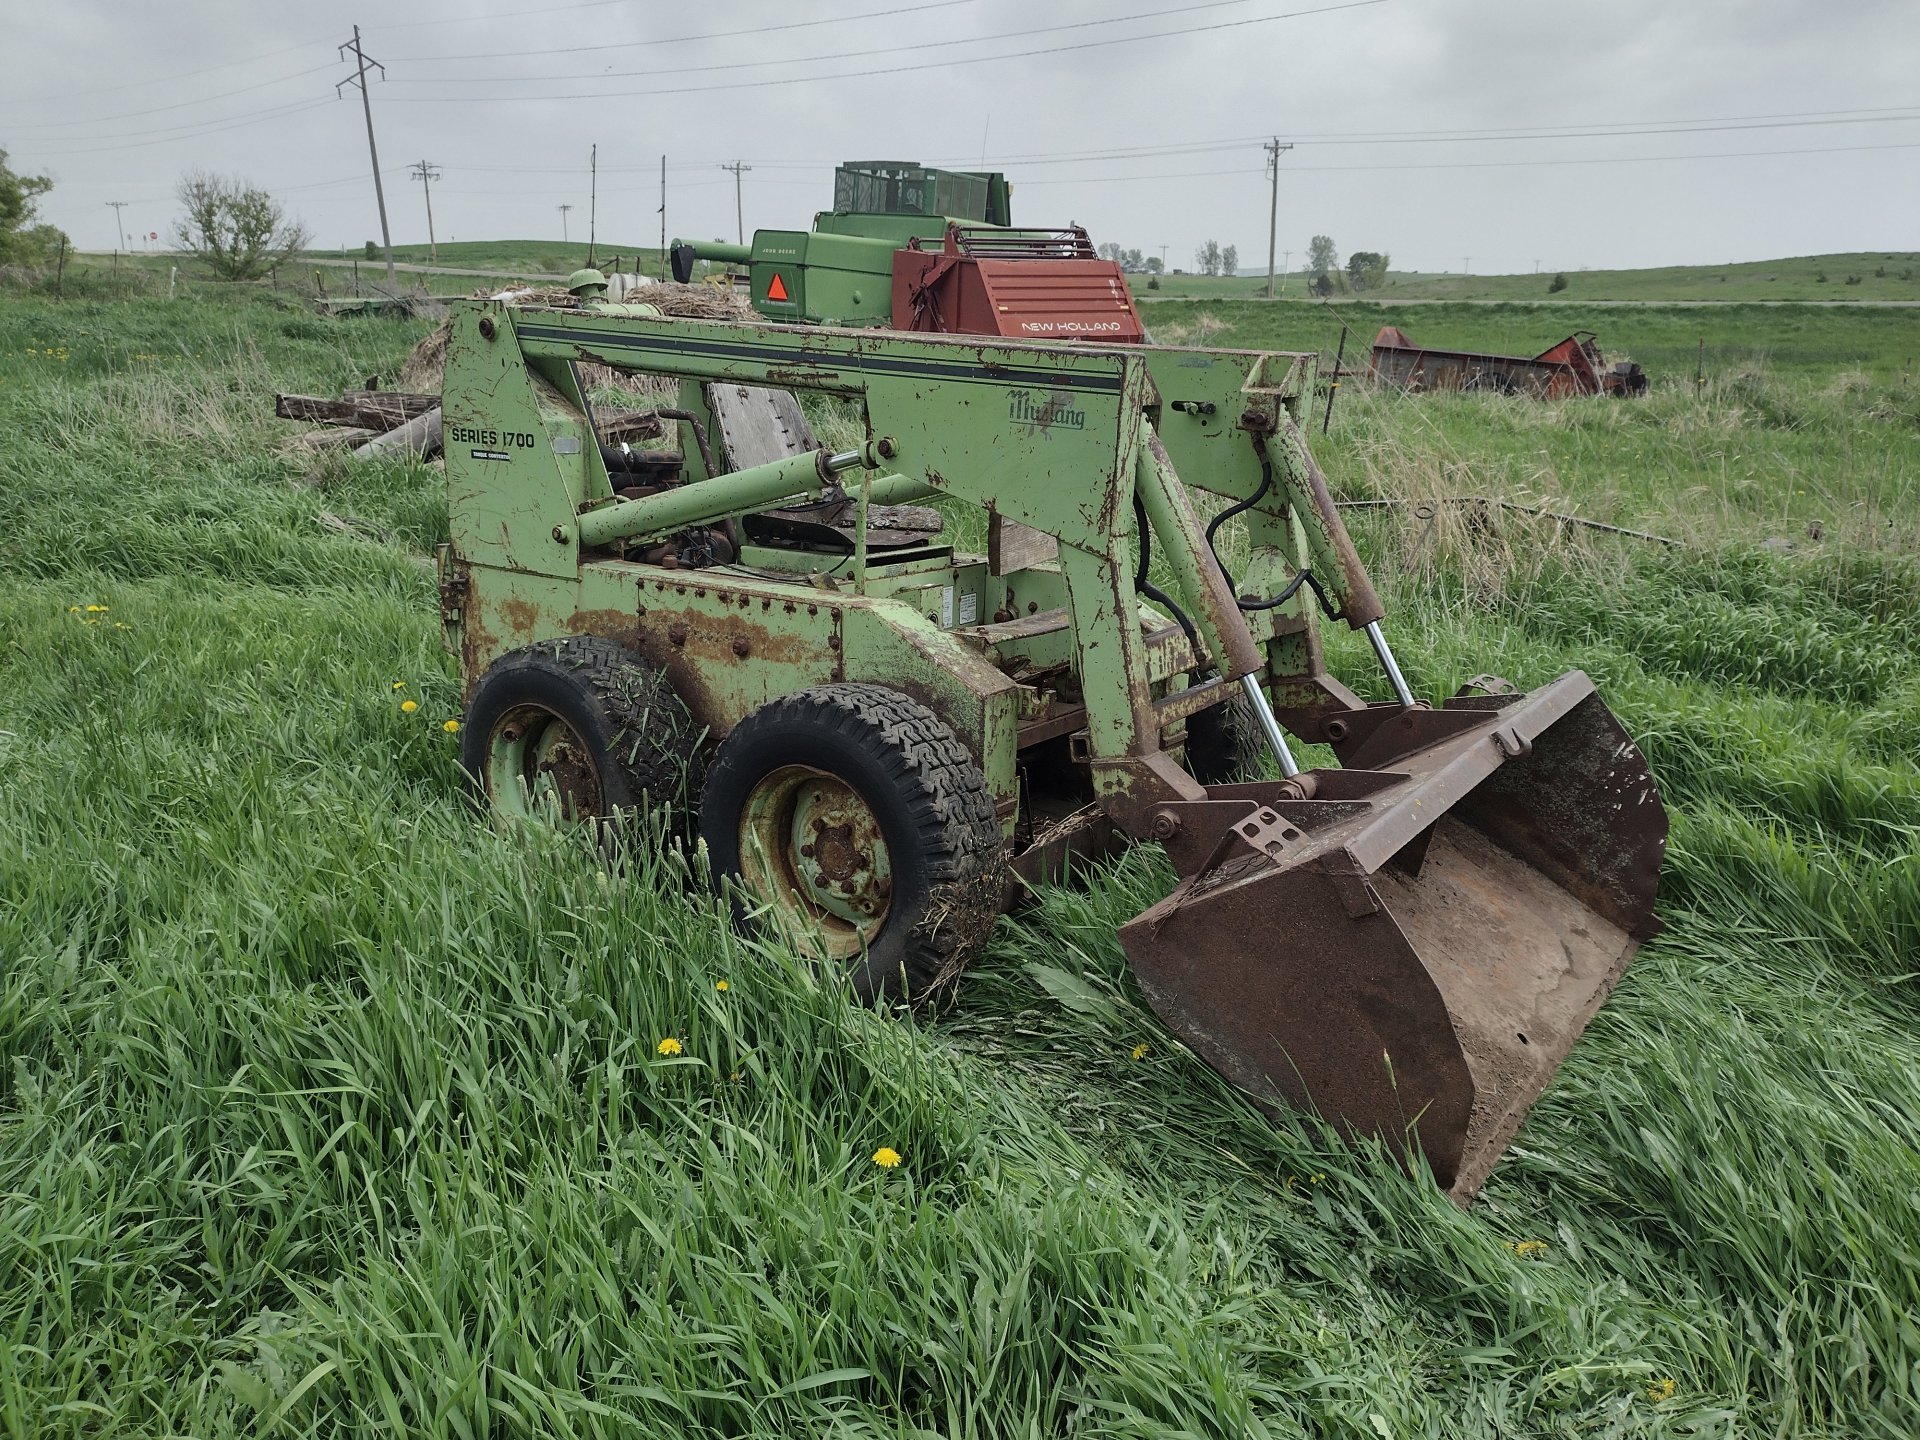
I acquired this skid steer from a friend for little to nothing. He said it ran and operated well, but smoked when it was parked 10 years ago. It's lived outside for 10 years but we'll pump some life back into it. I'll post periodically on my progress. I've narrowed it down to a 1972 to a 1976.

In the beginning:

View attachment 5132 View attachment 5133 View attachment 5134

Progress:

View attachment 5135 View attachment 5136 View attachment 5137 View attachment 5140


Today:

View attachment 5138 View attachment 5139

The bad:
- Left spool valve partially seized - already have another used one
- Engine gets a complete overhaul $$ (Ford V4 104 CID)
- Leaking rear axle shafts
- Tires, of course
- Missing fourth function hydraulic lines (anyone close to South Dakota have a 1700 they are parting out?)
- I will need to laser cut a few panels due to hacks and pitting

The good:
- Overall, pretty decent shape for the age
- Stock bucket - very good shape
- Stock Palm cab with Roll Guard - everything there including the door
- Hour meter was working and its at about 800 hours - don't know if total or at reset
- Someone reset this machine in the past and everything I've seen so far: they performed good work - I'm keeping my fingers crossed the clutch packs are good
- Gear box looks great
- Has the high-flow (25 gpm) pump in it
- Hydraulic fluid (Dex III) looks new and there is zero sludge on the bottom of the drive chambers - I think it's Dex as the machine was only used for clearing snow by the previous owner, i.e., for very cold weather

Next steps:
- Replace both rear axle seals
- Disassemble all the clutches and check for condition
- Adjust all chains
- Finish axle brakes
- Button-up the drive chambers and store for awhile - too many jobs needing the hoist bay in the heated part of the shop
- Gather all the parts I need to finish the drivetrain

Enjoy,
Al Jones
Brooking, SD
 
Hello, new here. I'm also in process of replacing drive Axle seals. Can you give me some pointers on replacing the shaft seals. So far I have removed 1.7 engine and removed bell housing and charge pump. I am guessing I have to take side drive gears off shaft and some how slide shaft out. Thanks Steve
 

Attachments

  • 20250918_182117.jpg
    20250918_182117.jpg
    272.8 KB
@stevec

I'm glad to help. Your request timing is perfect as I was about to post how I did it. Here are some documents to help:

John Deere TM axle section attached as a file in pdf,
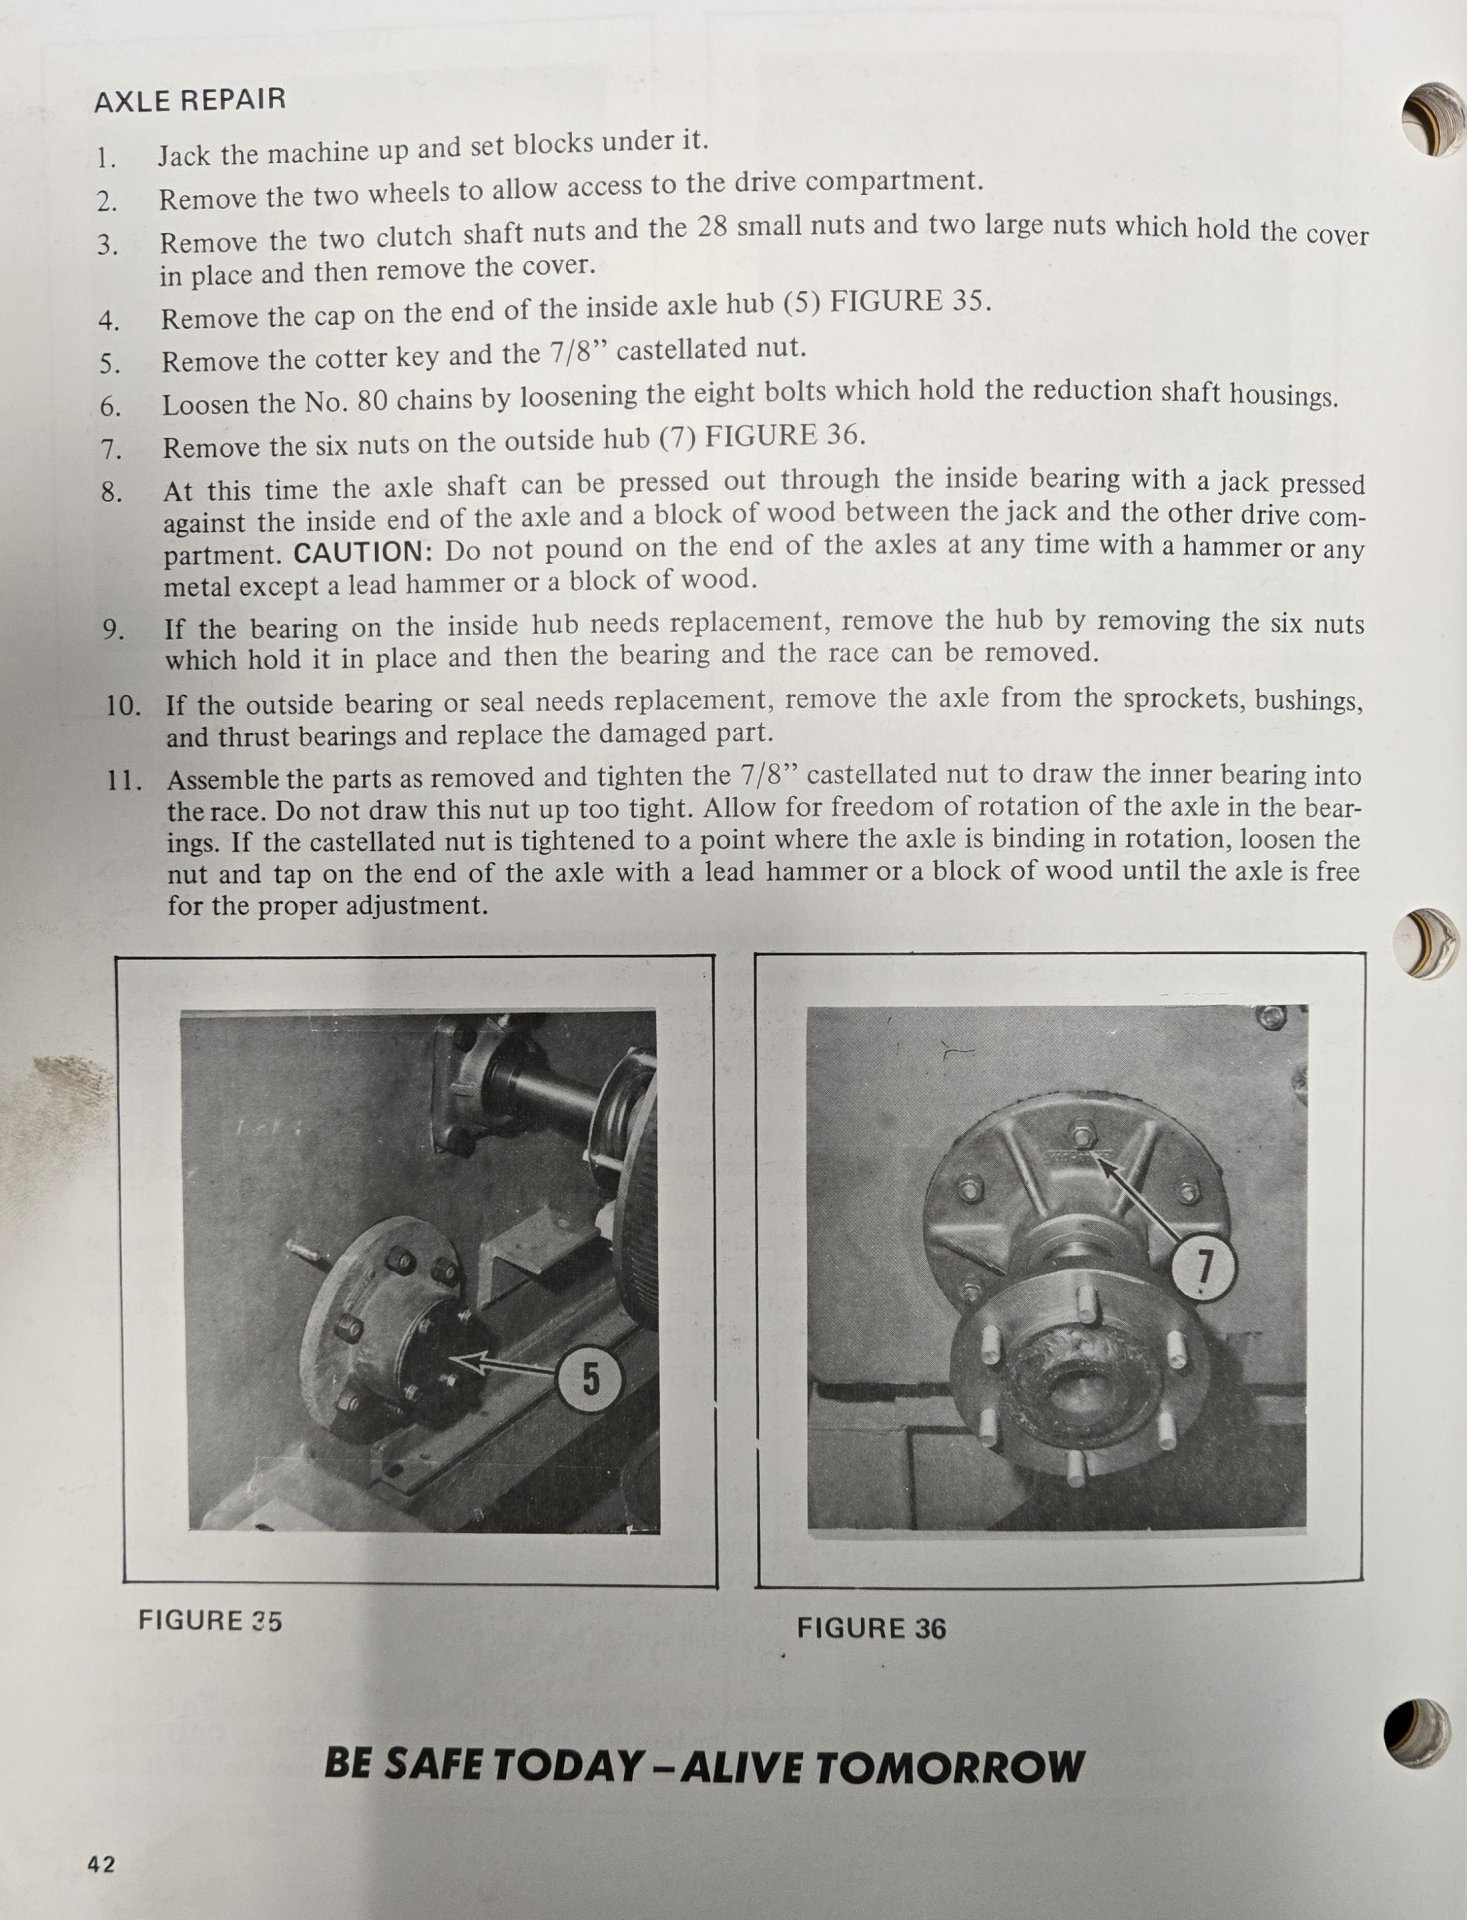
and Owatonna's method from the Operator's Manual:

Owatonna Axle Repair.jpg


NOTE/IMPORTANT: I saw no reason to remove the hub per the Owatonna instructions.

Additional Information:

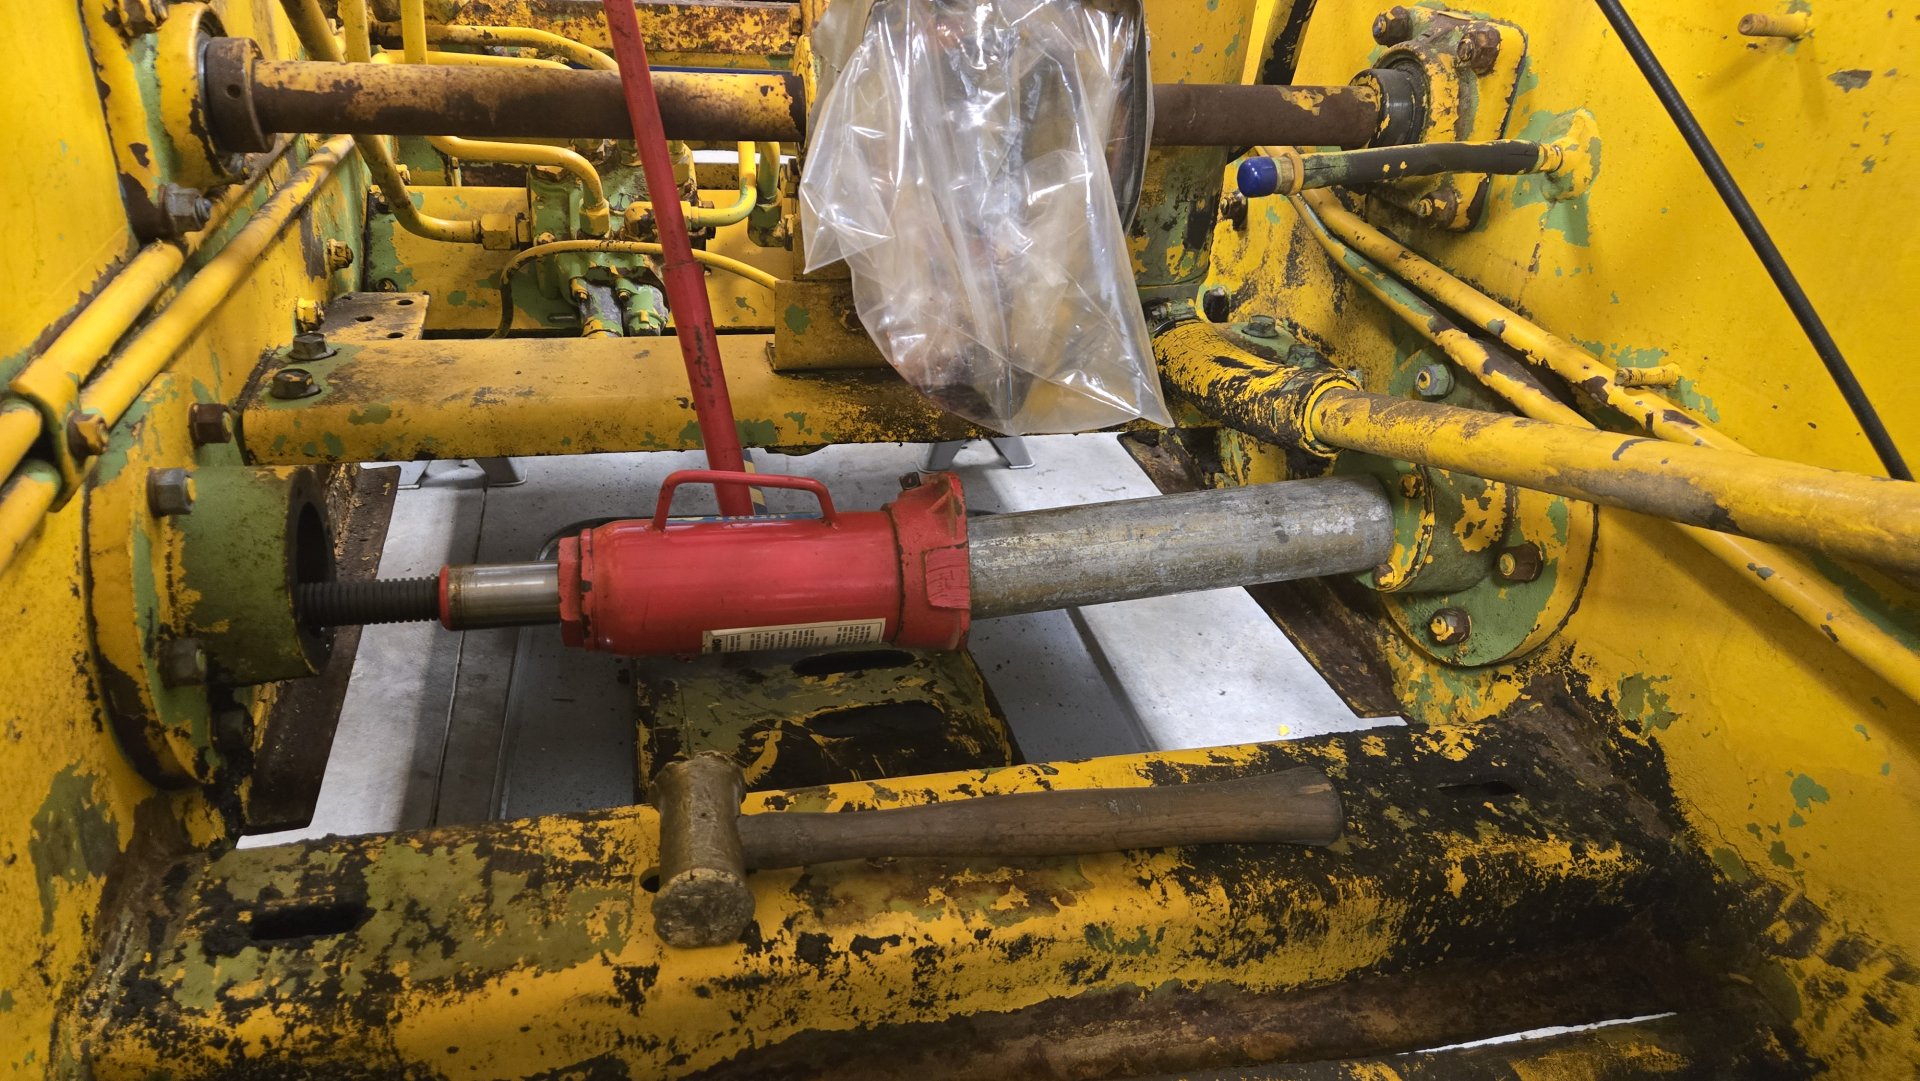
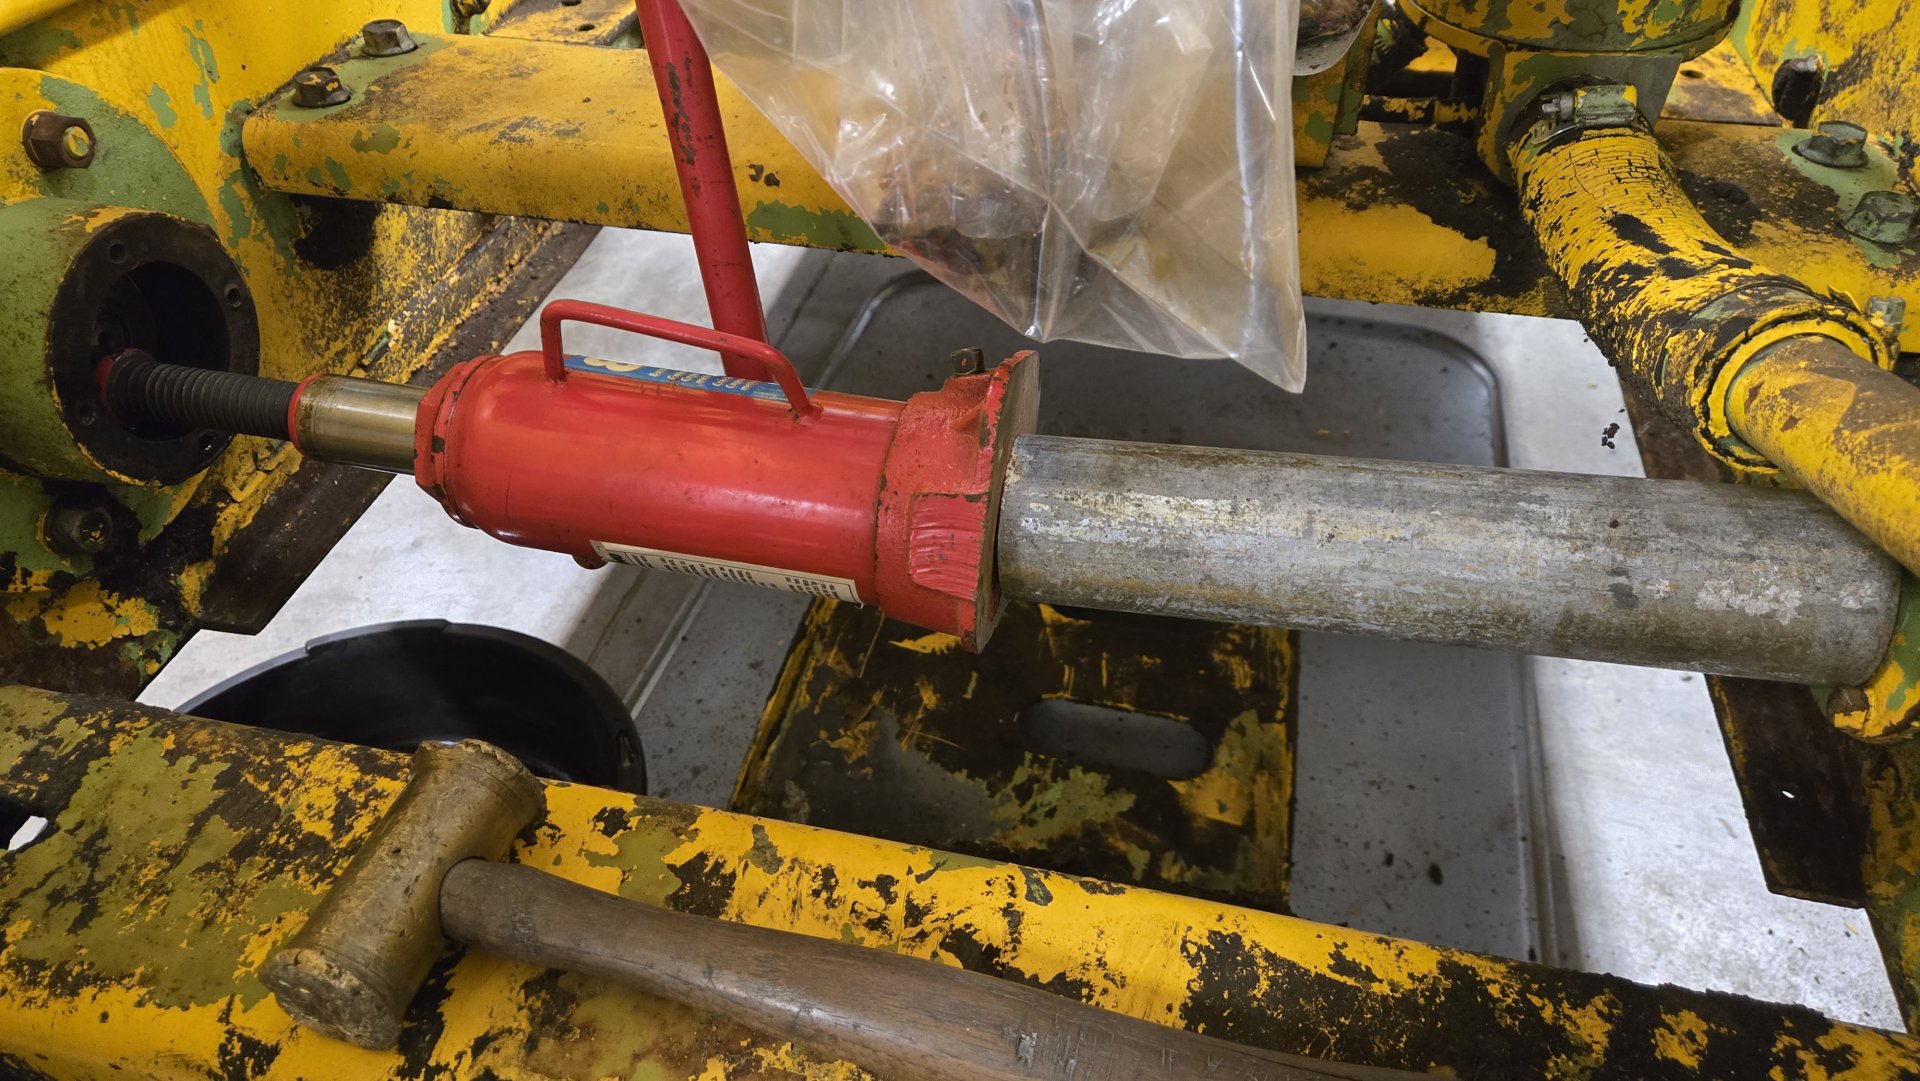
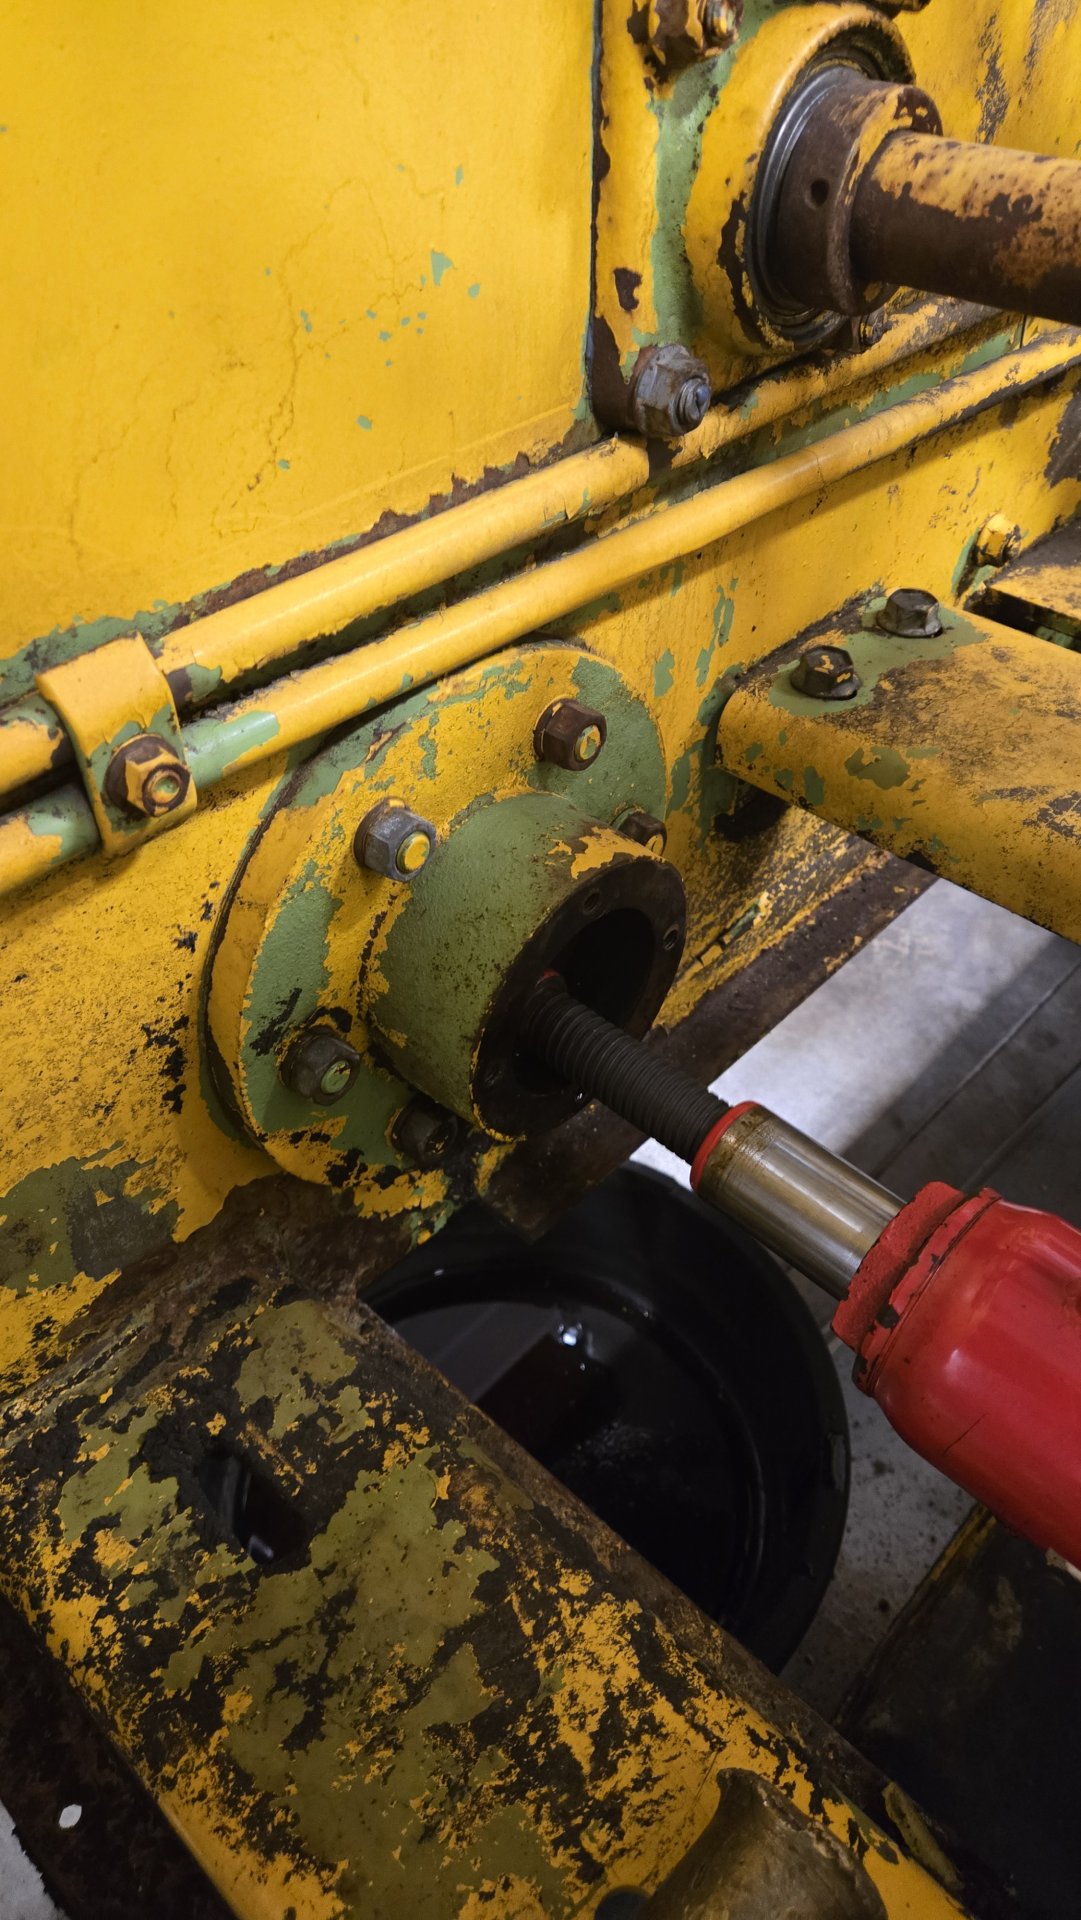
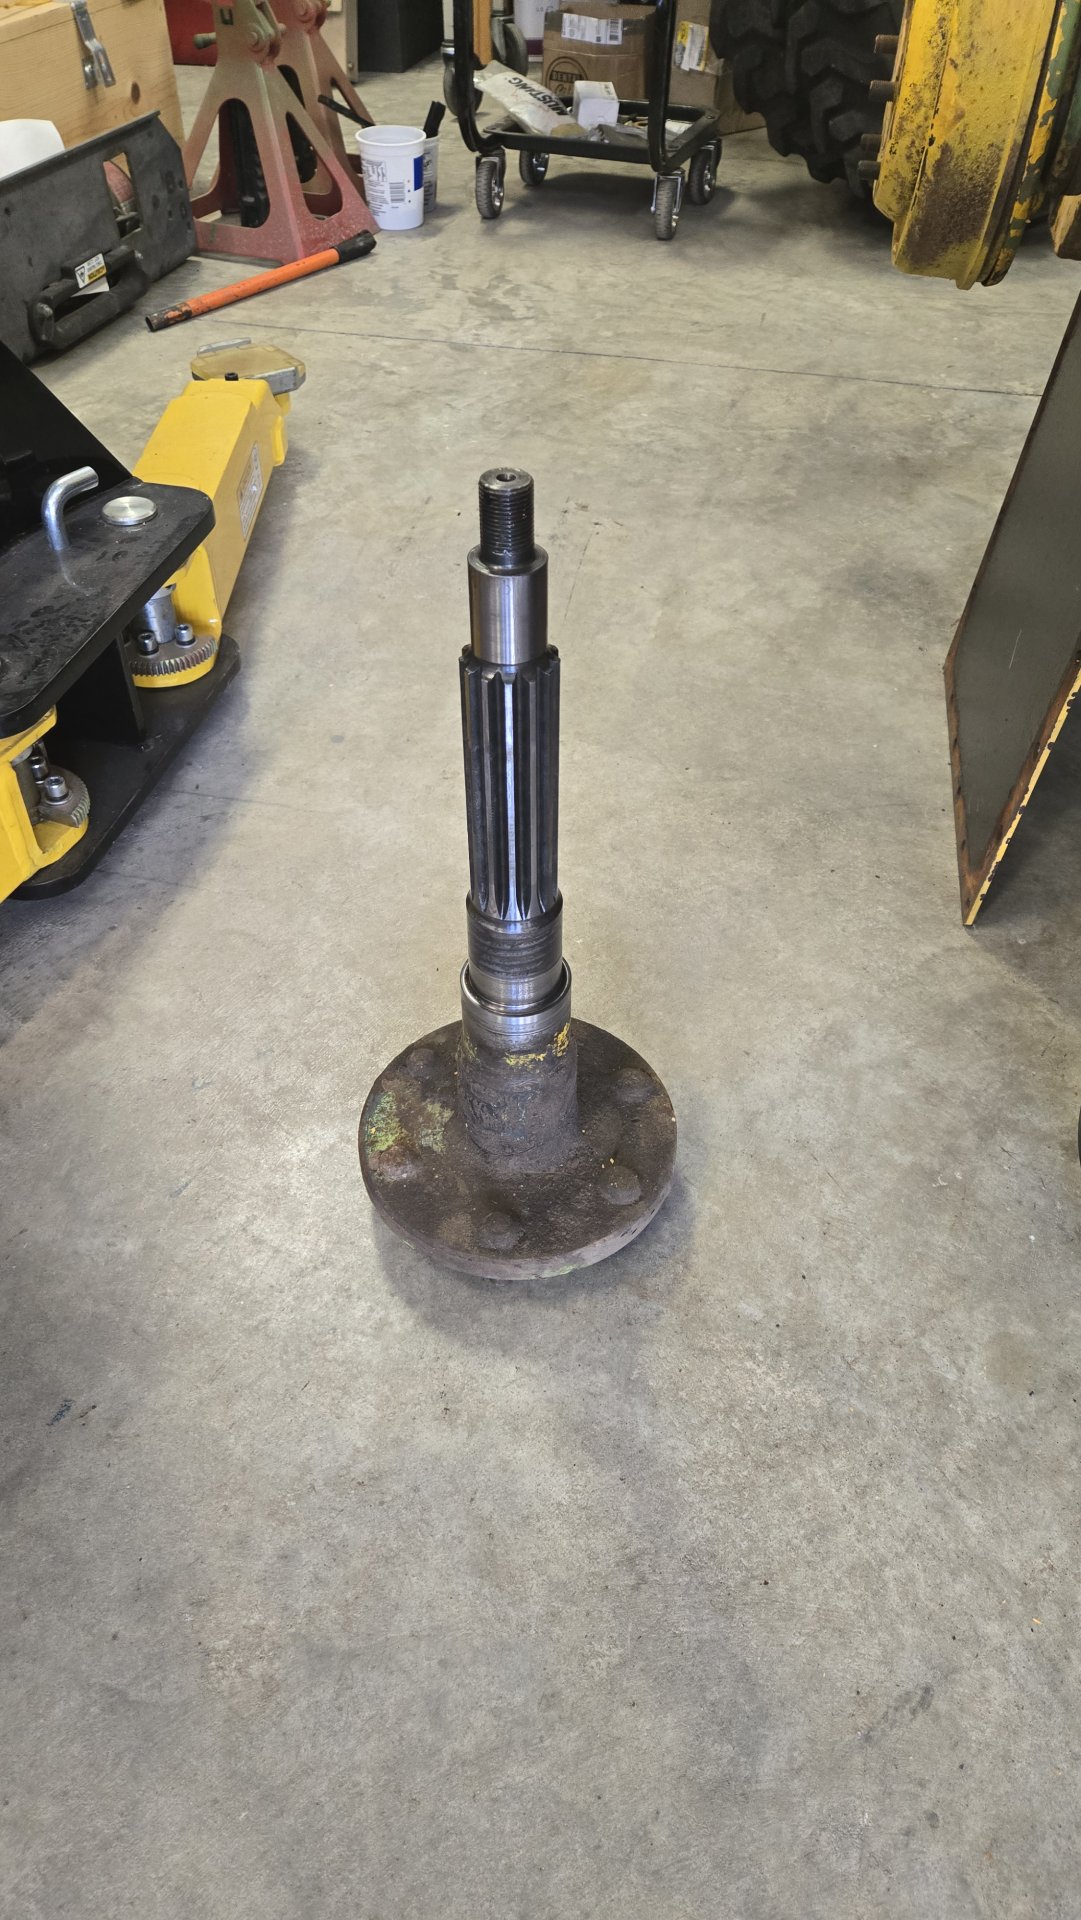
1) I used a small hydraulic jack with a pipe spacer to push the axle shaft out. It takes very little force to push it out. I do not recommend any hammer what-so-ever as the axle is not hardened.

20250209_170933.jpg
20250209_170938.jpg


20250209_170943.jpg


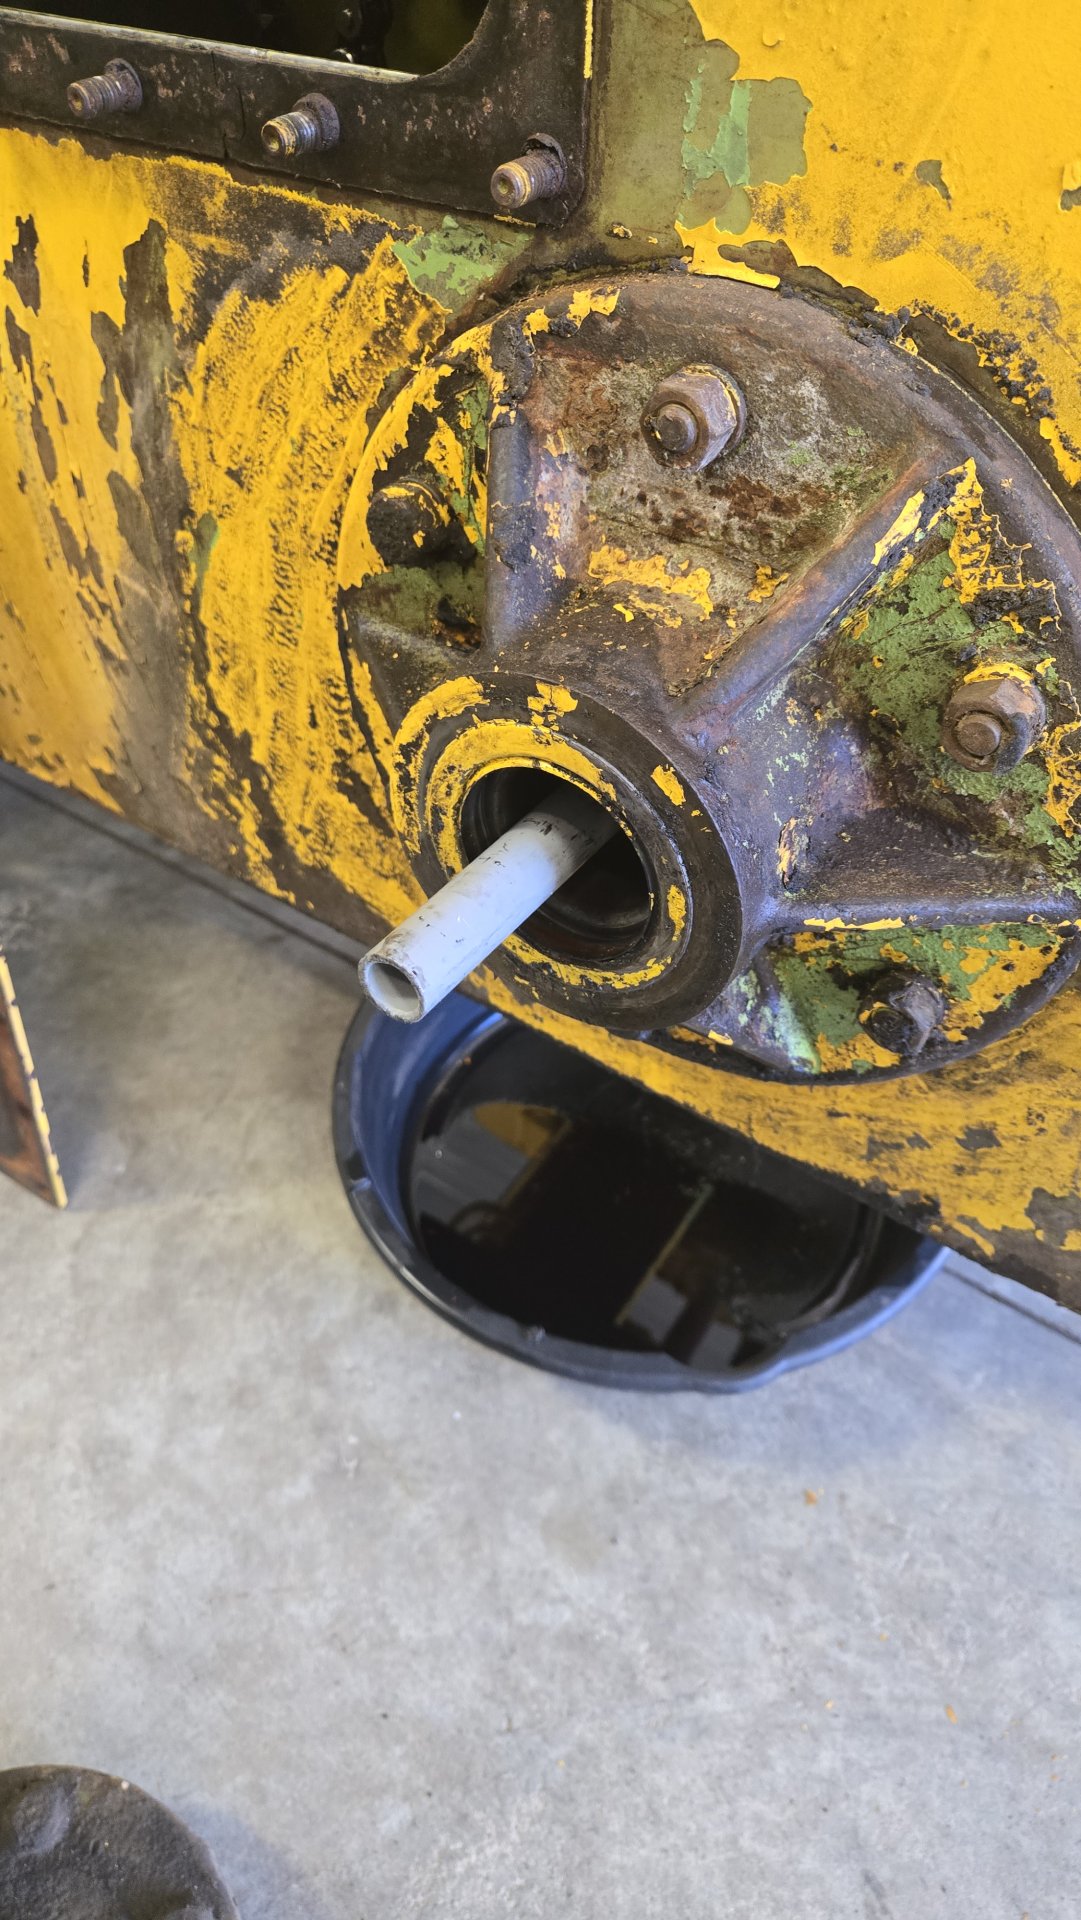
2) I followed the jack with a piece of PVC pipe to keep everything from falling into the final drive compartments and keep things in order. I initially started by not removing the chain.

20250226_150427.jpg
20250226_150431.jpg


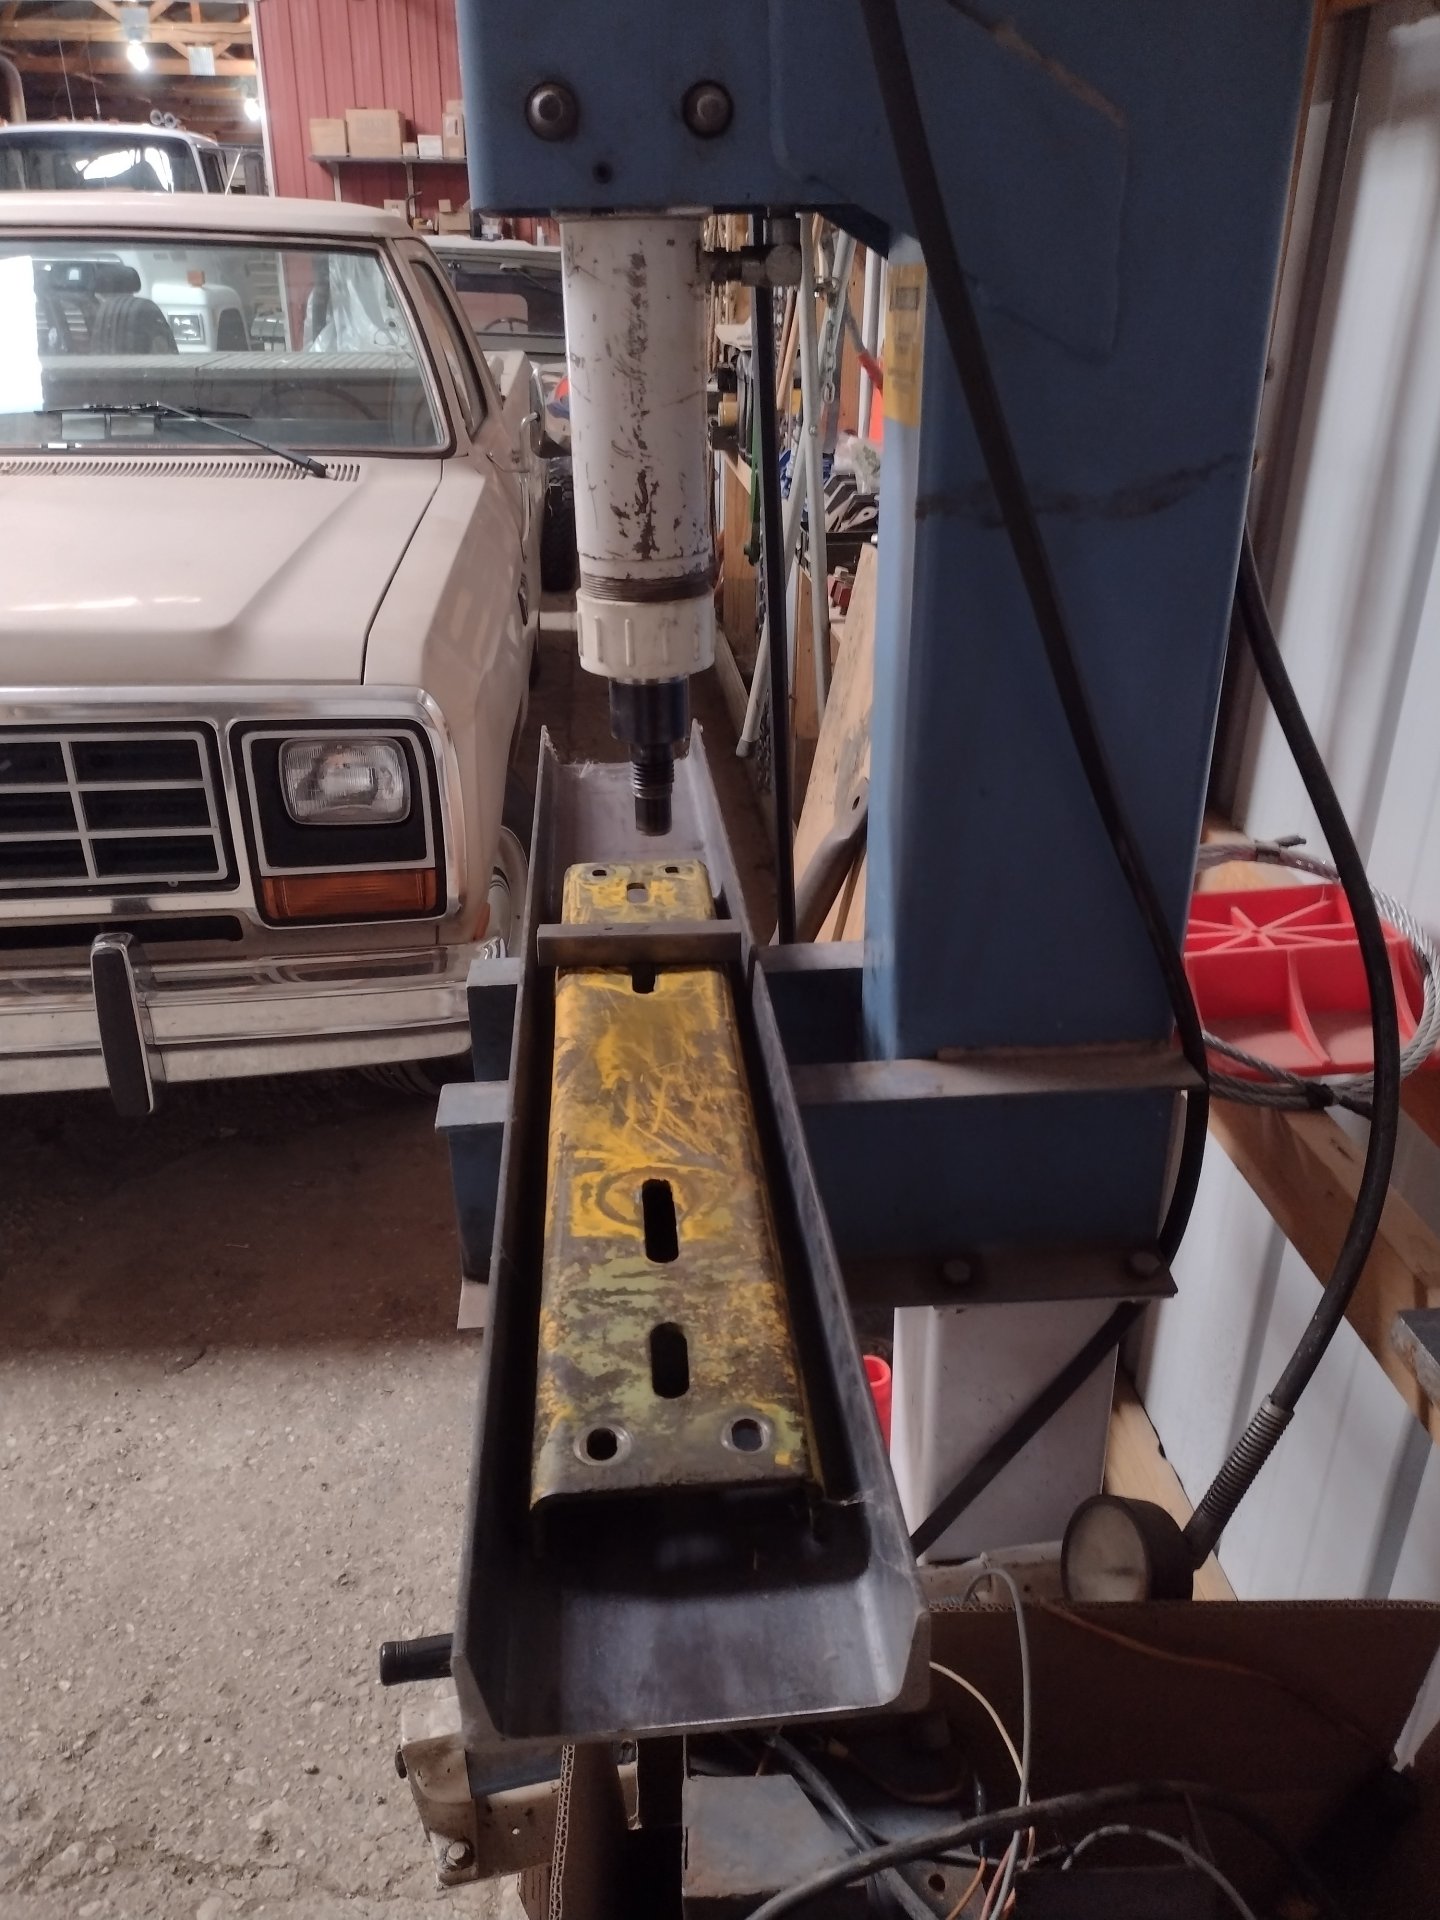
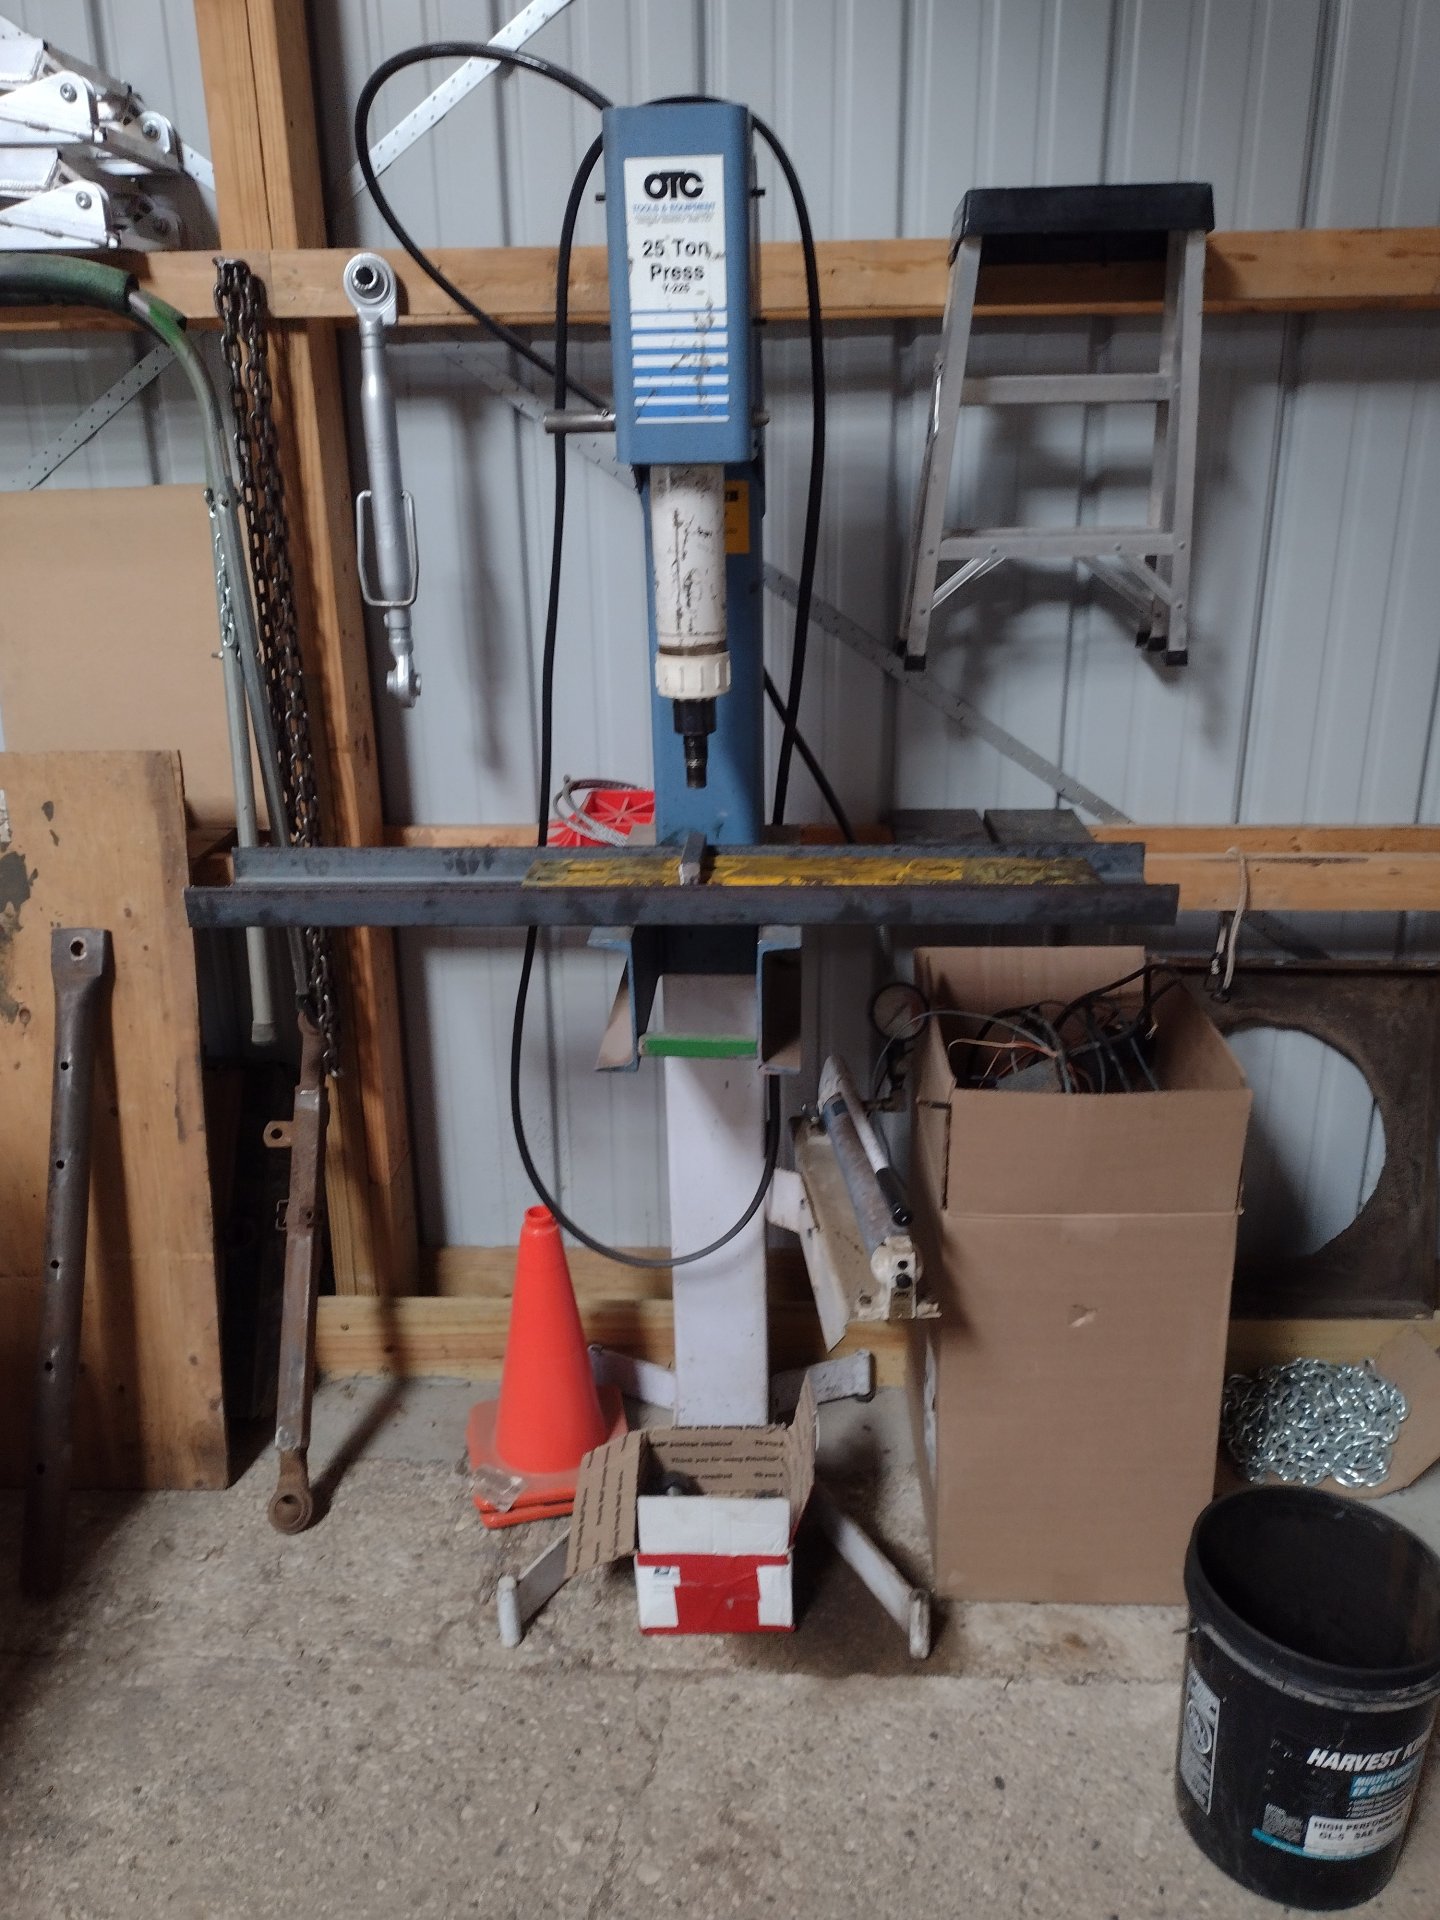
3) Once the shaft was out, I removed the outer bearing in a press and removed the seal.

20250226_150424.jpg


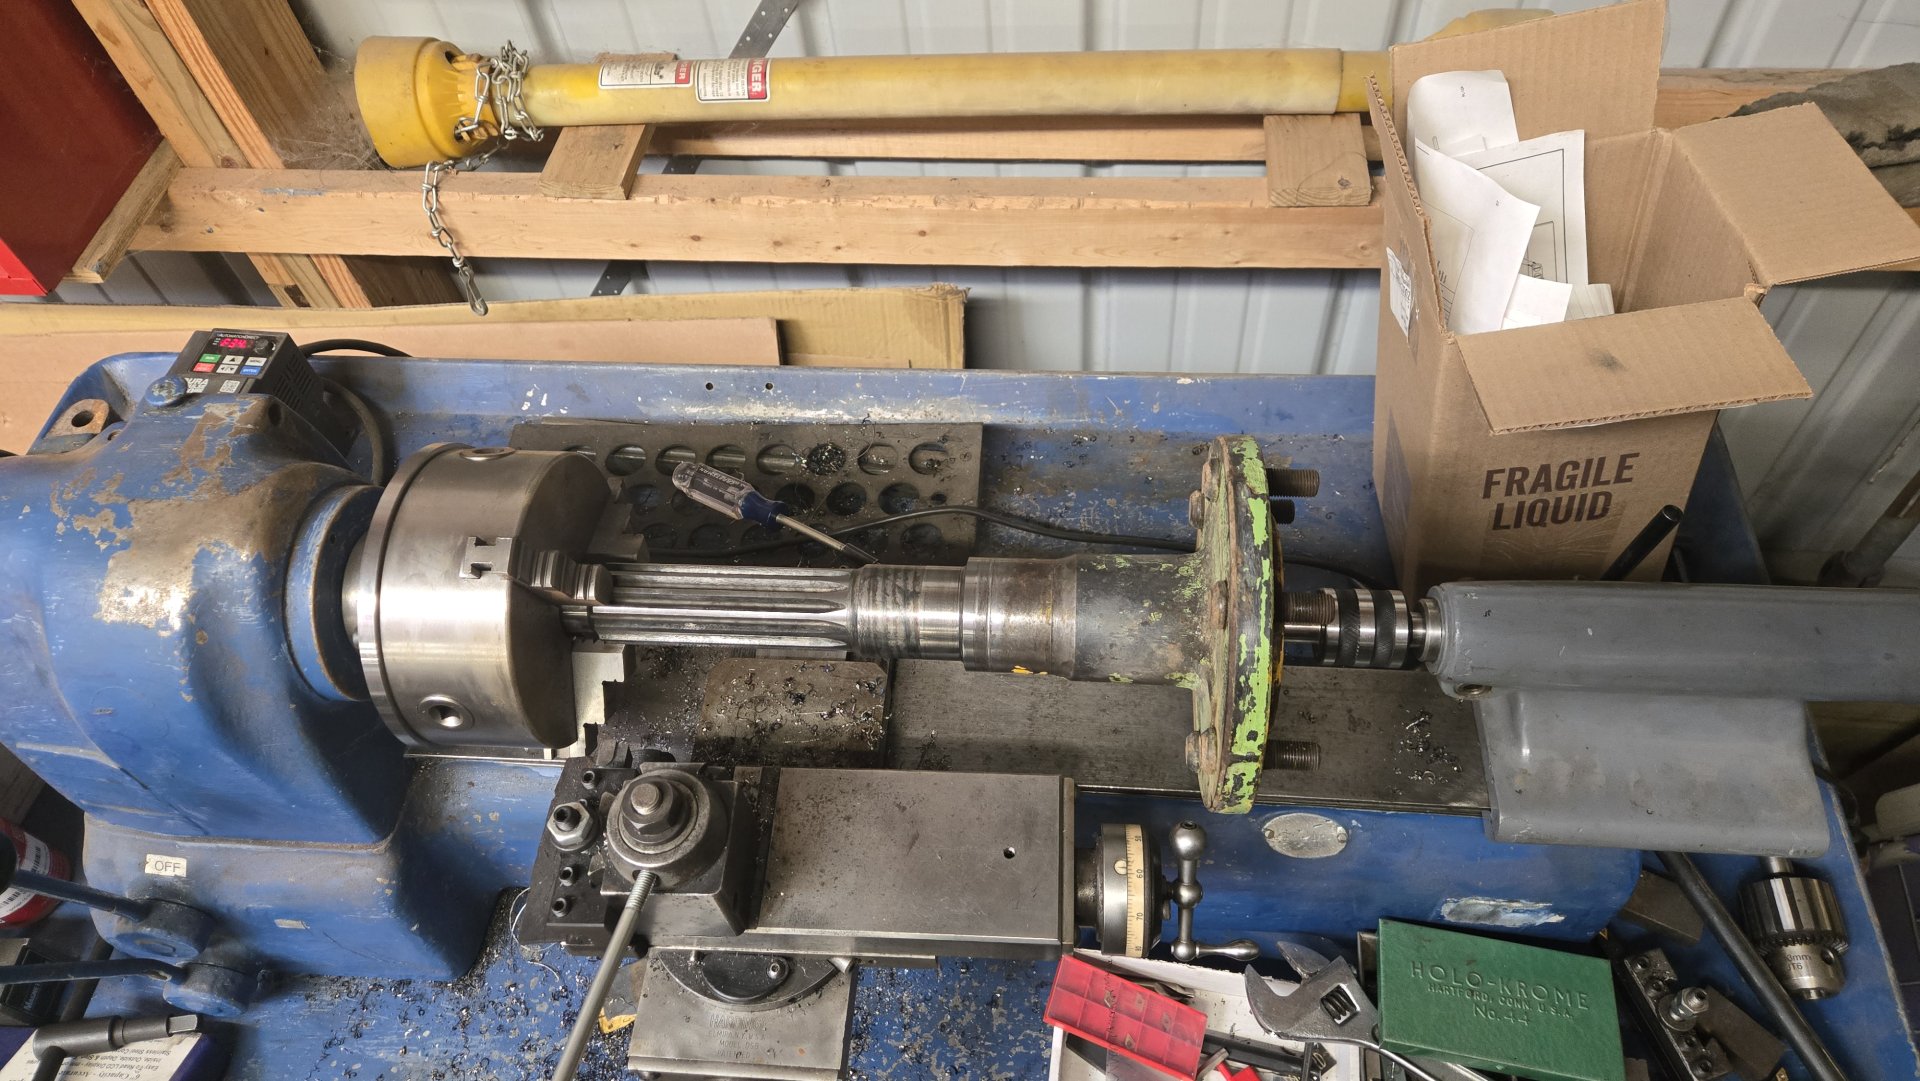
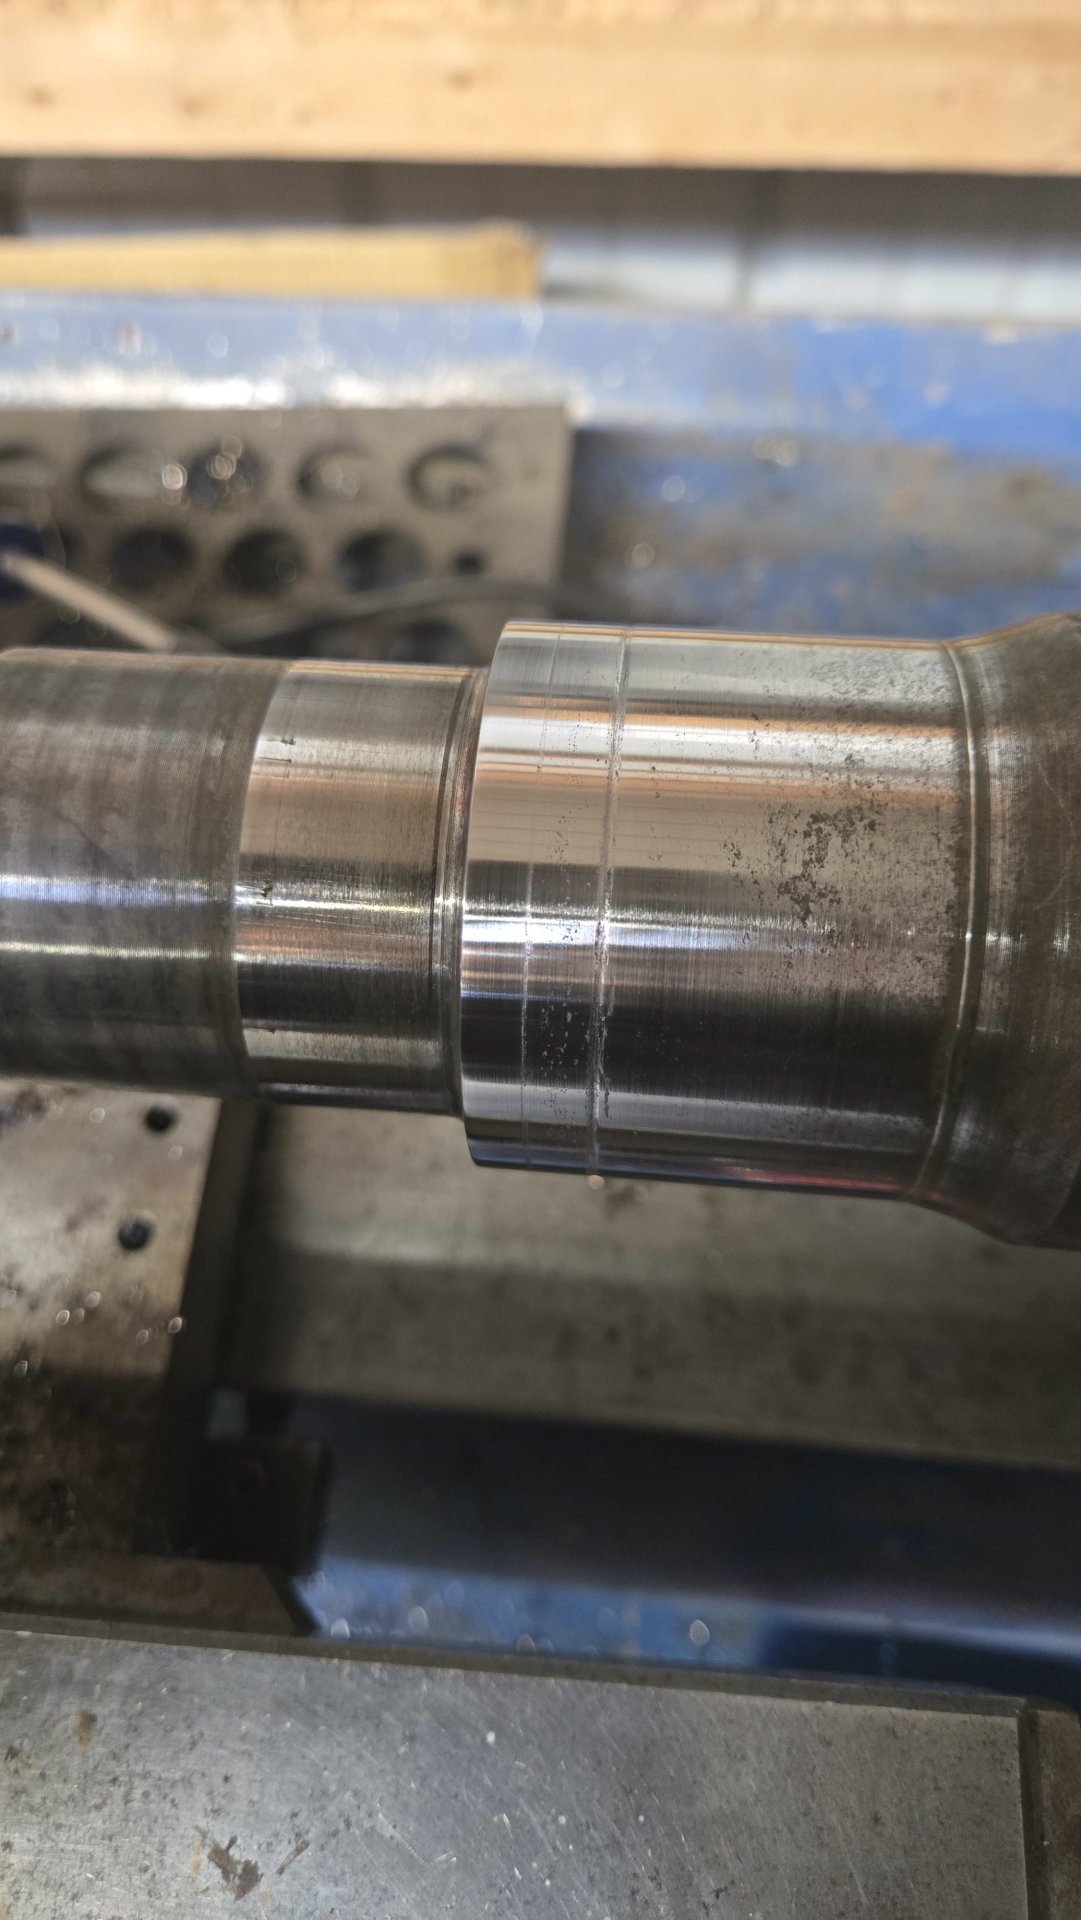
4) My axle seal landing was a bit chowed up, so I put into my lathe to dress and polish it. The original seal was not installed all the way, so I installed the new seal flush with hub to avoid the groove worn in the shaft. IMPORTANT, only use a closed seal, not a "newer" style without a steel backing. It will not survive very long. I have the NAPA part number if you need it - I found them to be of high quality.

20250226_152857.jpg
20250226_153444.jpg


5) I tried to reassemble everything without removing the chain. This proved to be impossible so I removed the chain and everything popped right in. Having a second set of hands helps a lot. Make SURE the inside spacer is oriented correctly. The manuals don't show it very well. You can CARFEULLY tap the axle all the way back to the bearing race, install the inside bearing, washer and castellated nut.

I'm limited to ten photos per post, keep reading in the next post.

Al Jones
 

Attachments

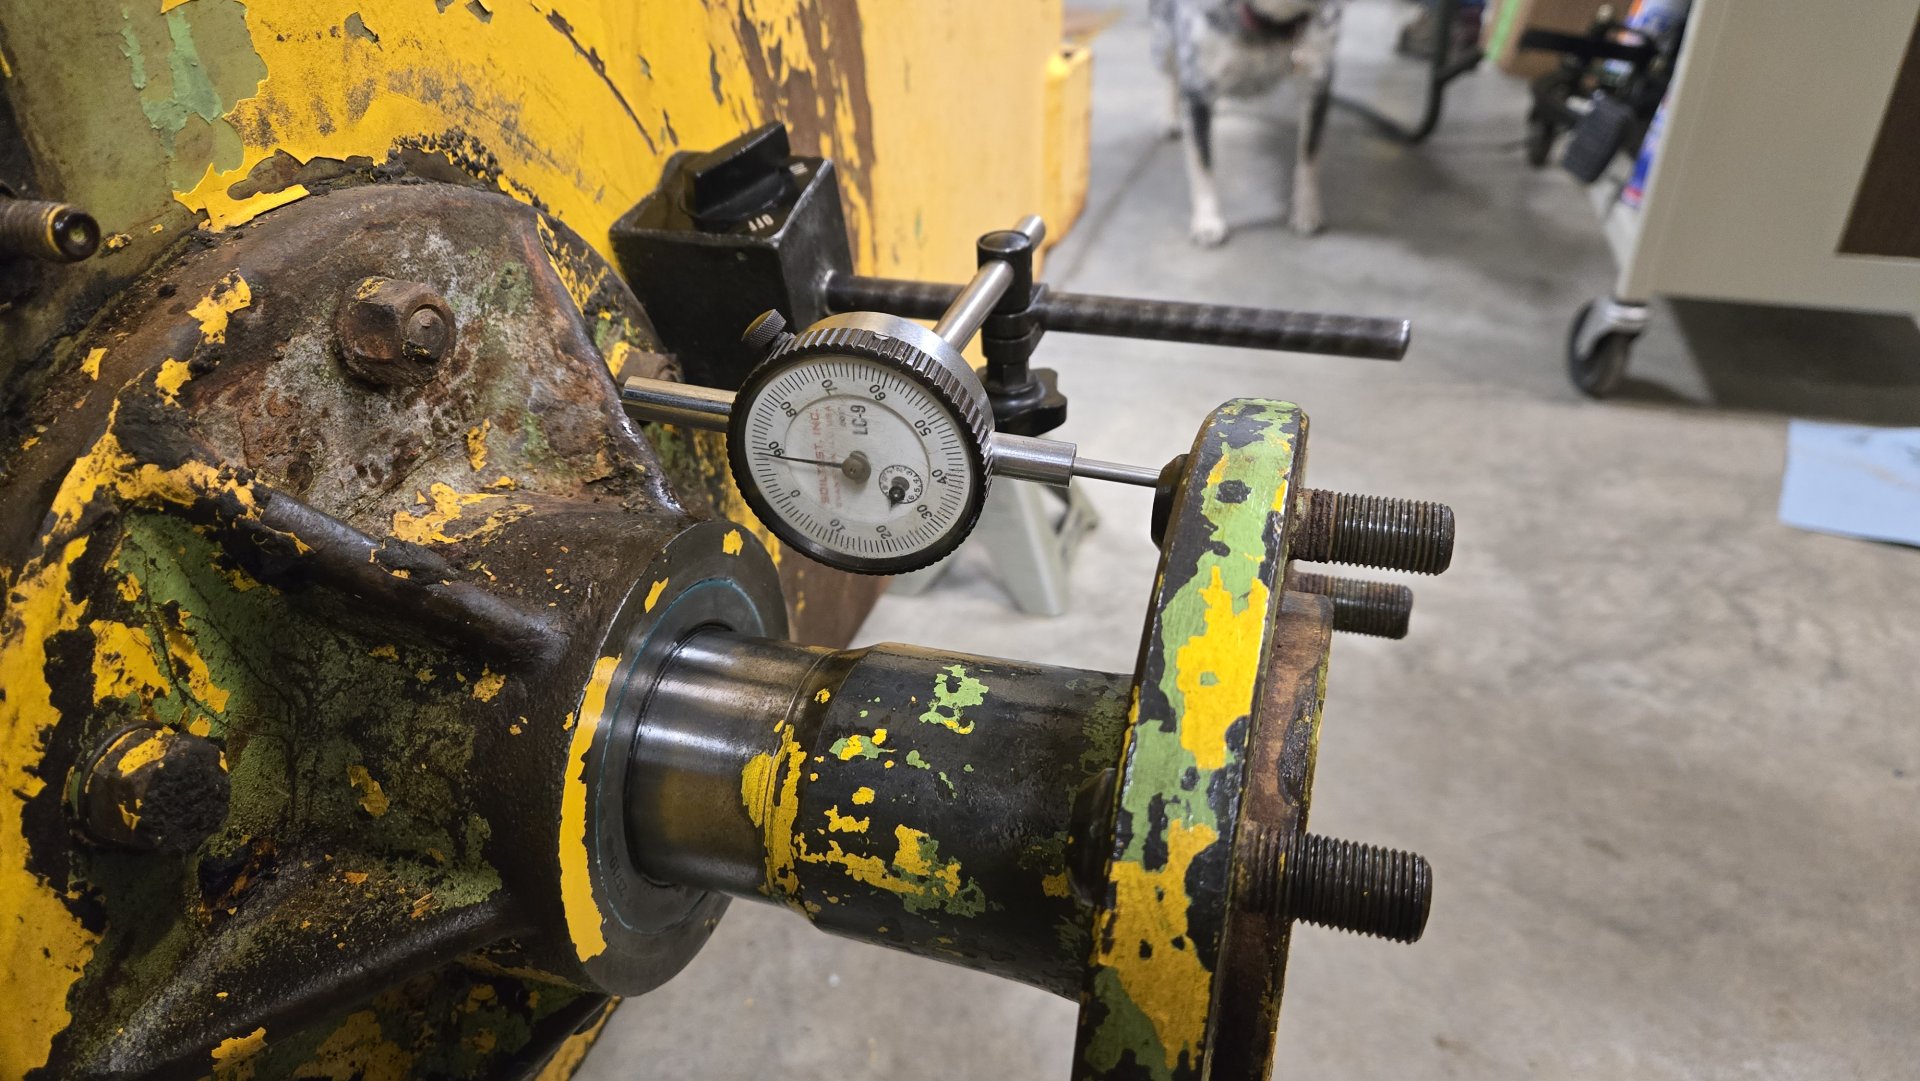
6) The manual calls for zero end play at hub, plus 1/2 turn more.

20250302_125759.jpg
20250302_125811.jpg


If you don't have a dial gauge setup, I recorded the torque valve for the castellated nut when installed per the manual and can forward that. Let me know. It's buried somewhere in the shop. I'm guessing somewhere around 65 ft-lbs (don't quote me on this), not very tight.

Notes:

1) My bearings were in great shape so I reused them

2) I HIGHLY recommend you replace both rear seals regardless of condition. It would be a bear to replace them with the engine in place, so I think $40 in parts plus some labor is well worth it. The front seals are not so bad to wiggle the jack in place to remove the axle shafts.

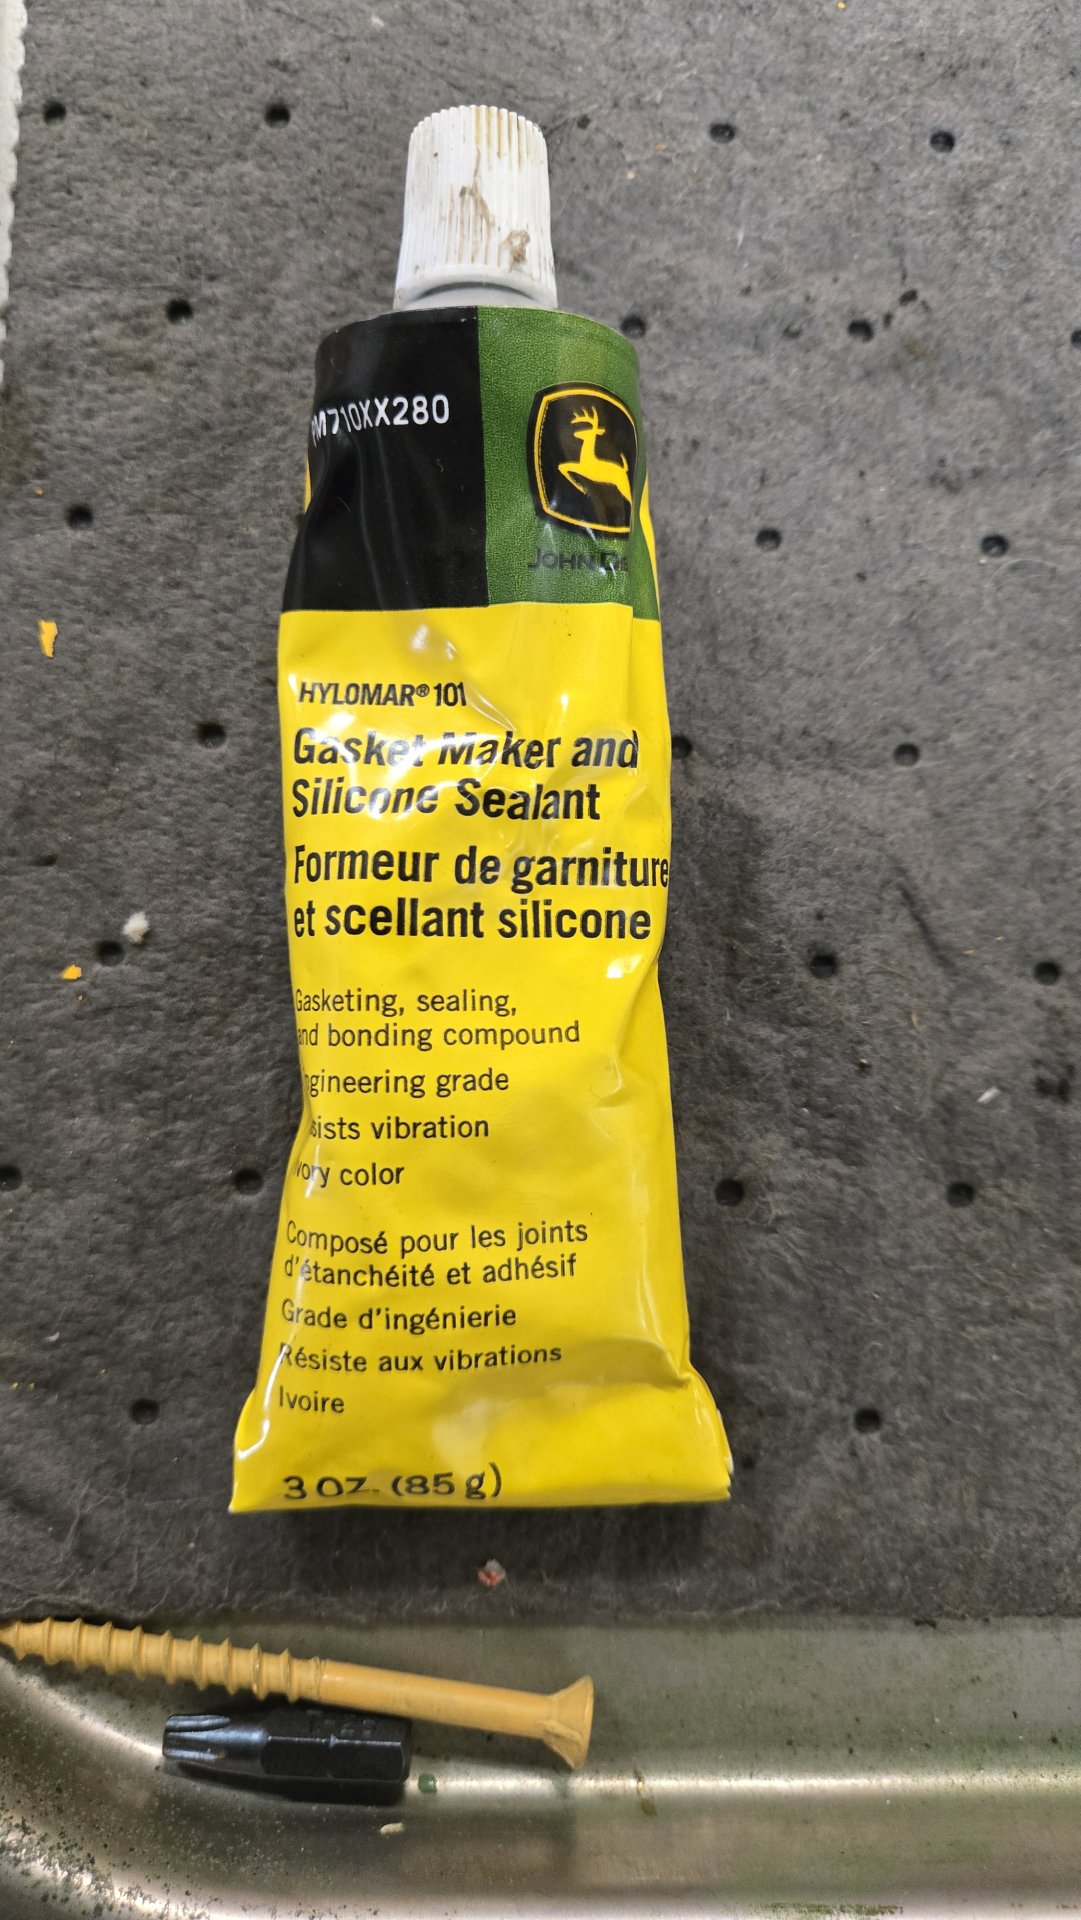
3) I've used Hylomar sealant for the last umpteen years and it performs outstanding. Consider it for your project.

Hylamar.jpg


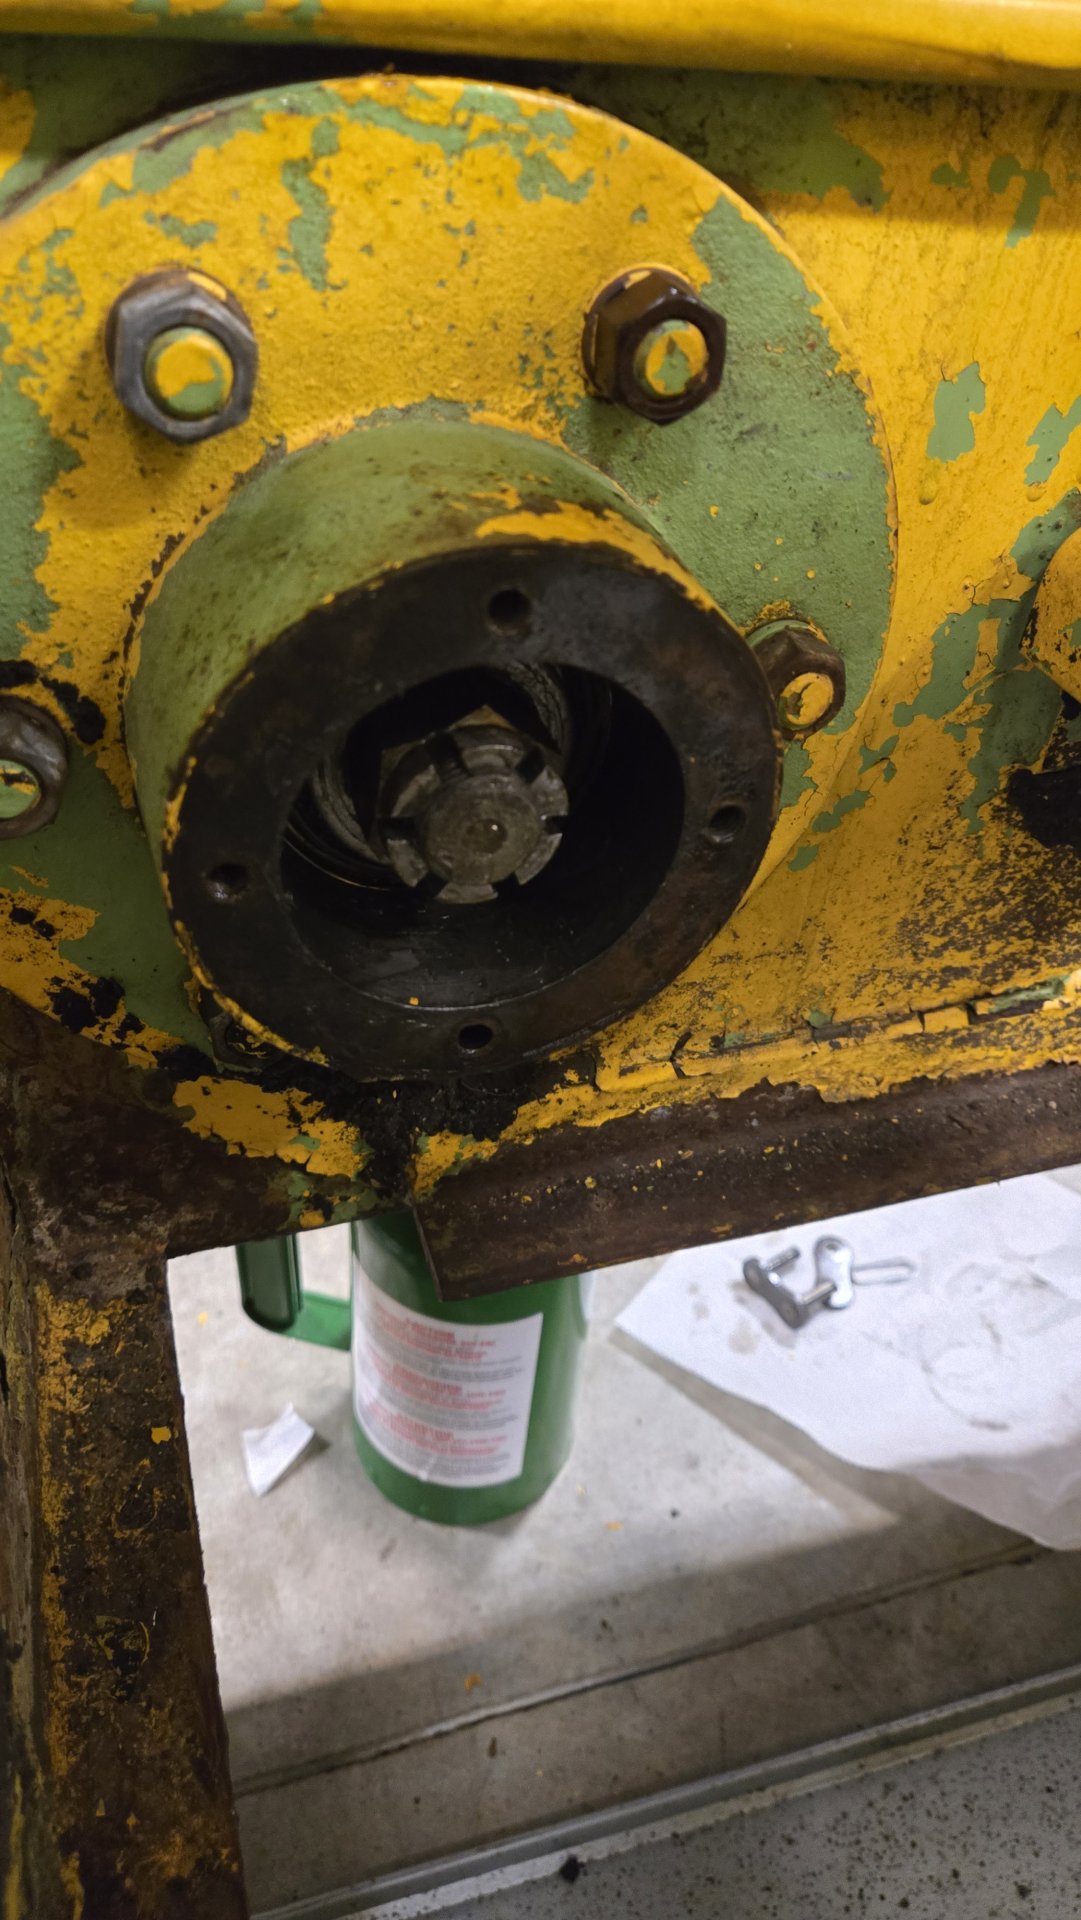
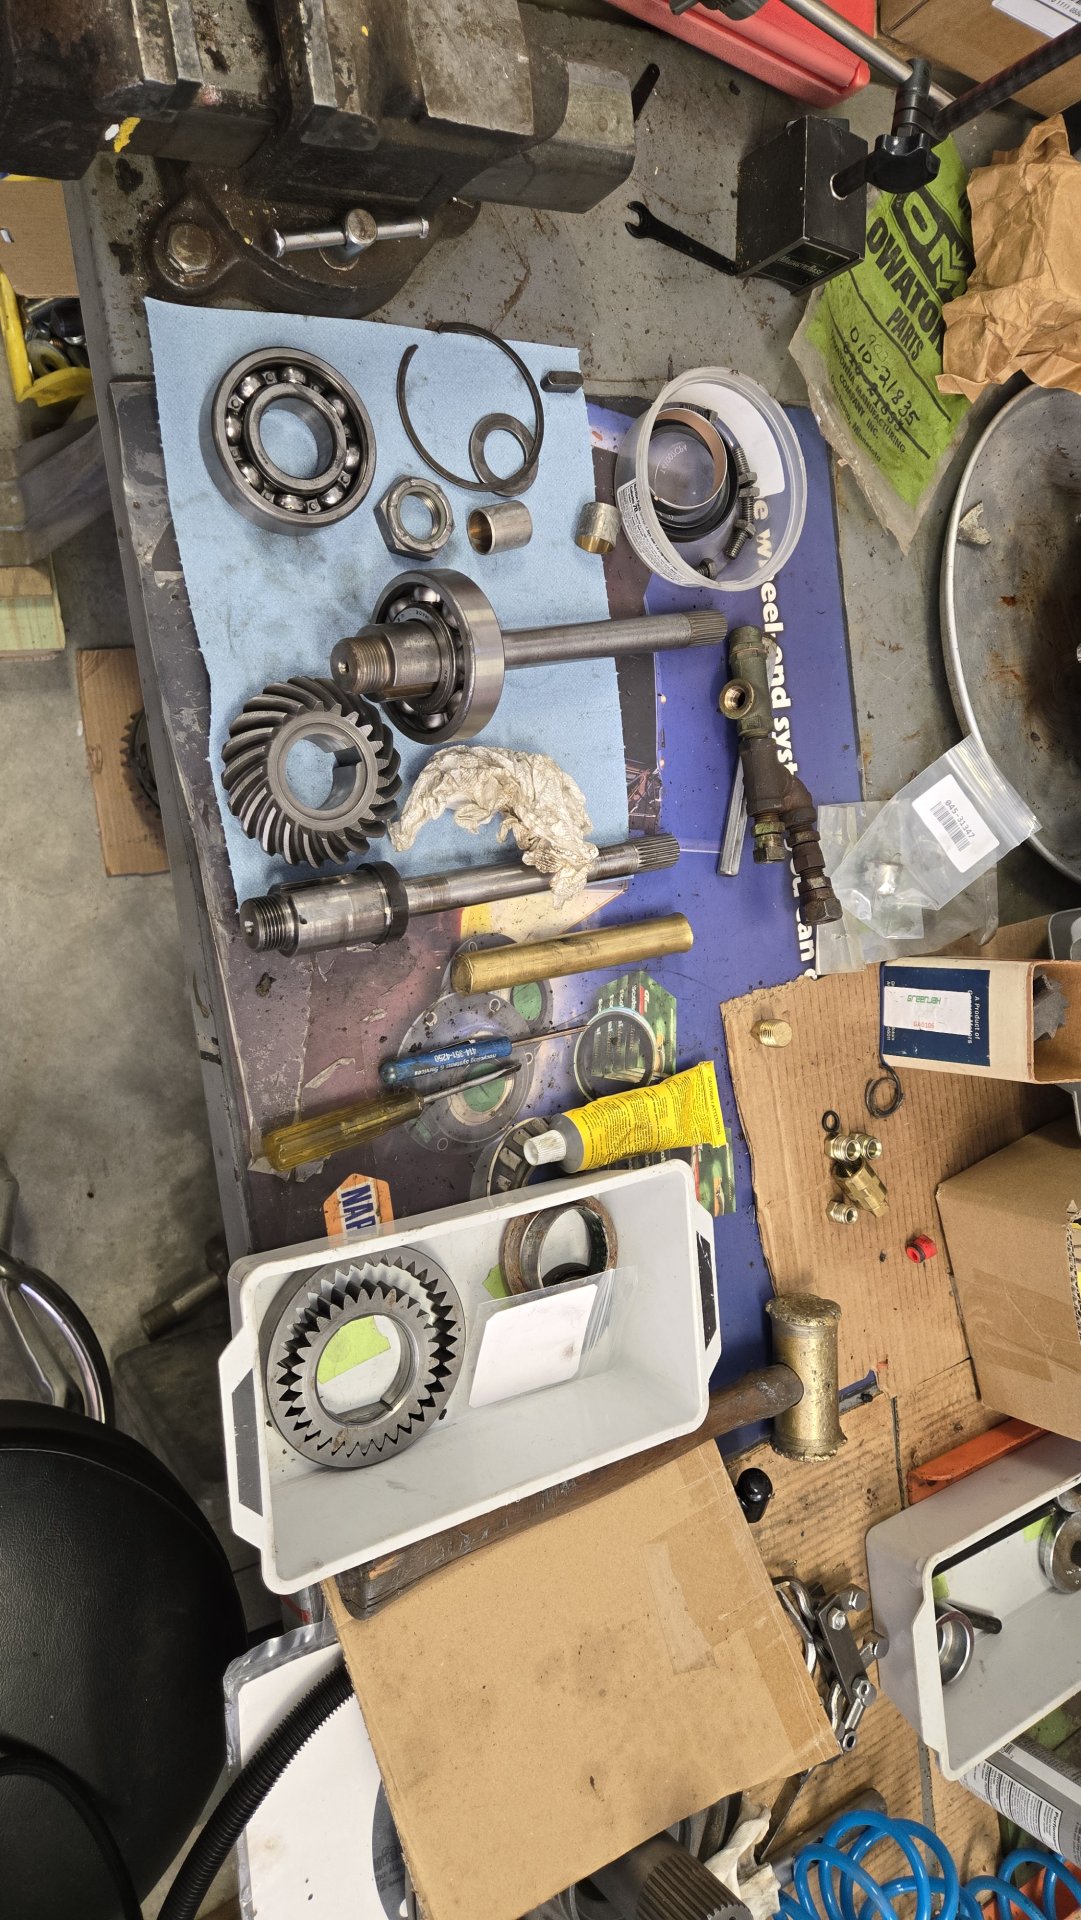
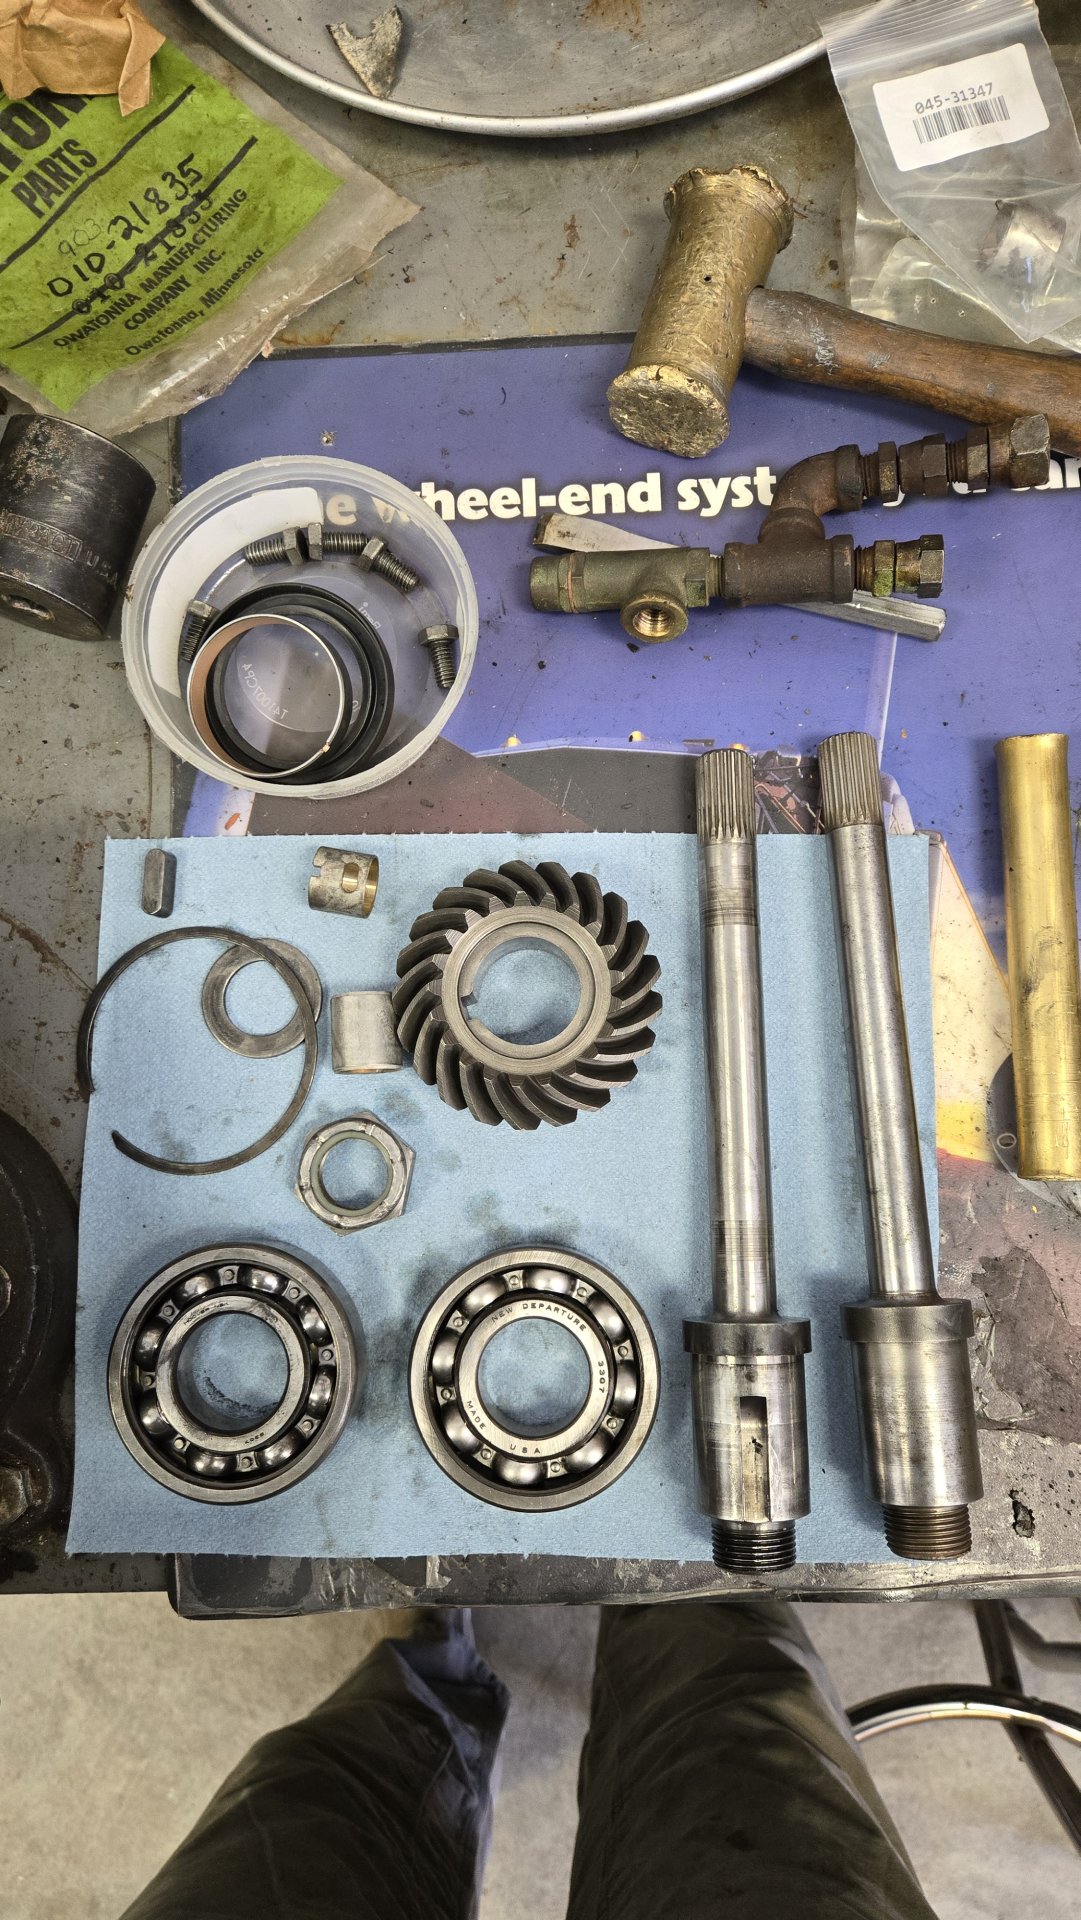
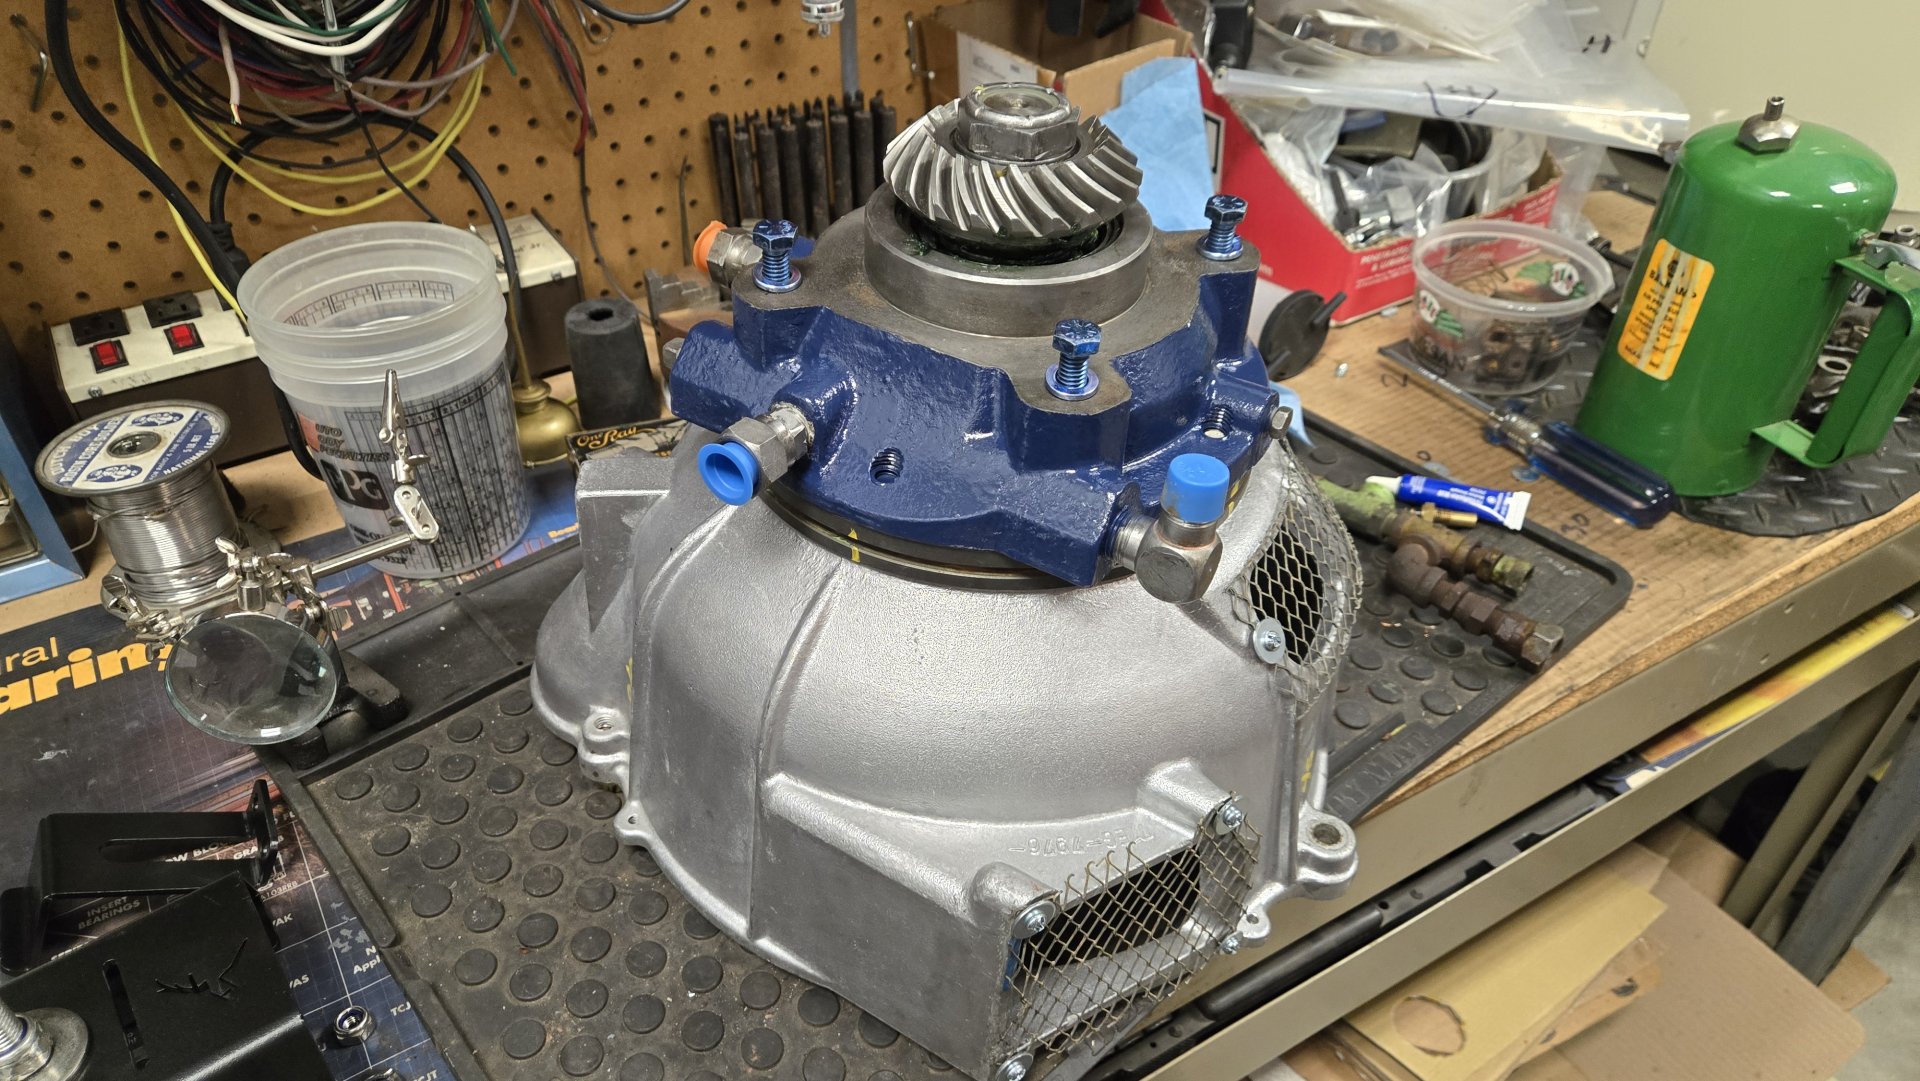
4) Here's a prelude to my next post. Refreshing the charge pump and adapter.

20250327_140439.jpg
20250327_135331.jpg


20250826_172157.jpg


Happy wrenching,
Al Jones
 
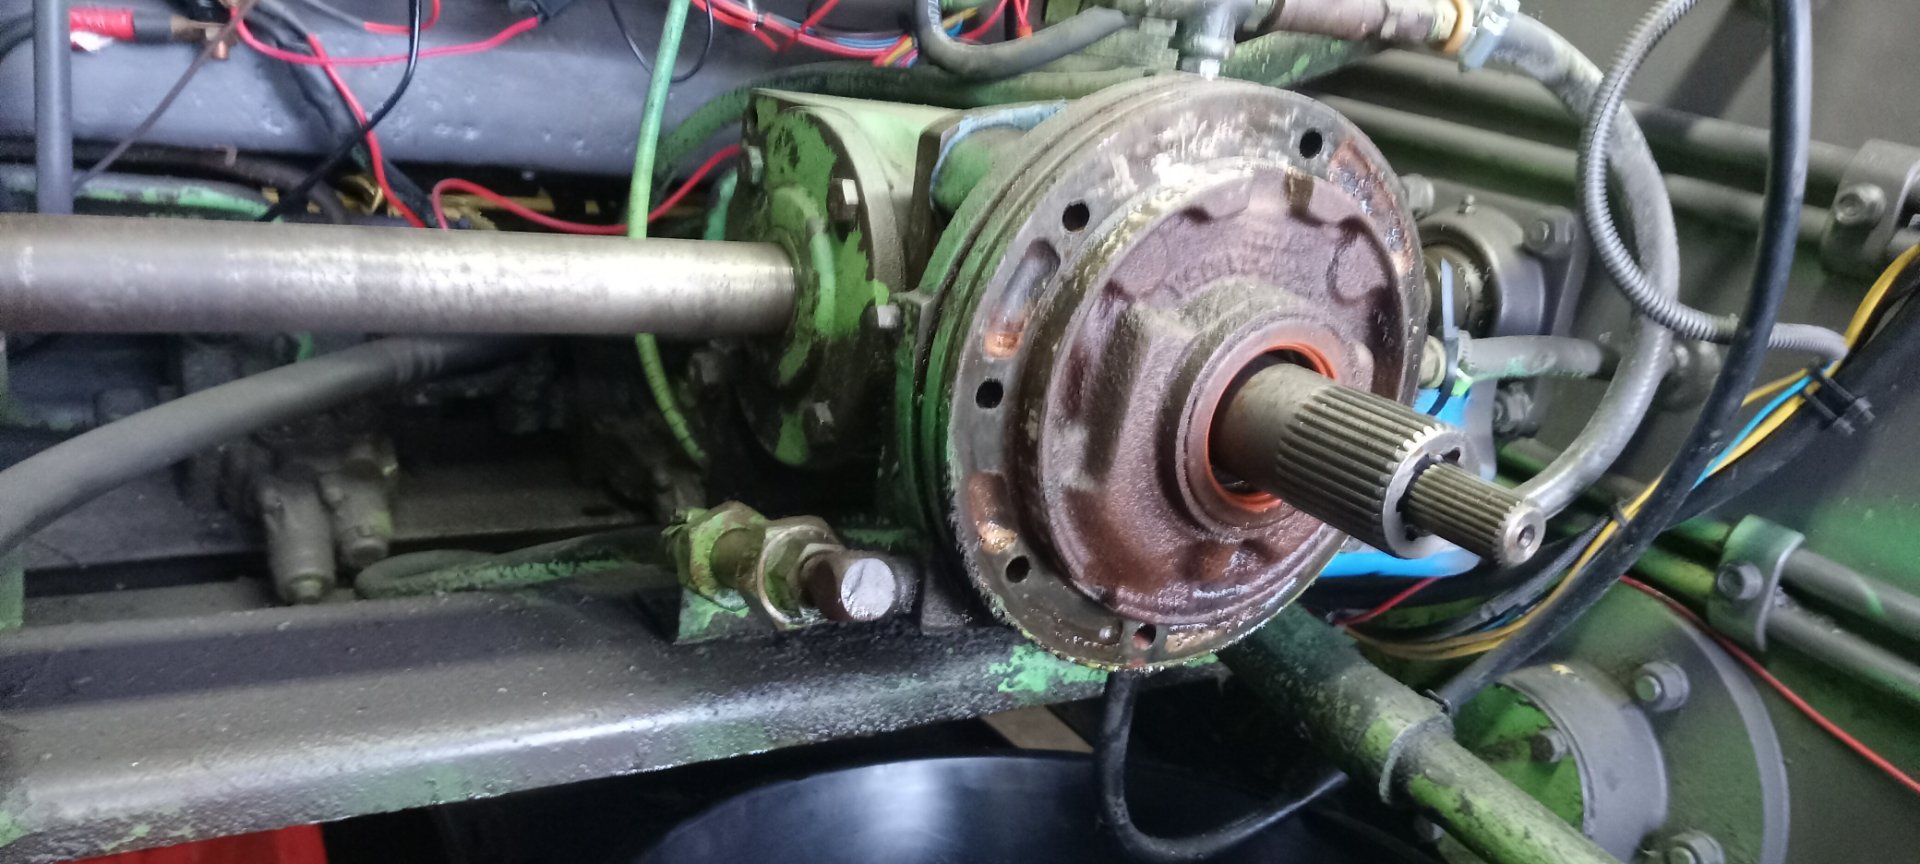
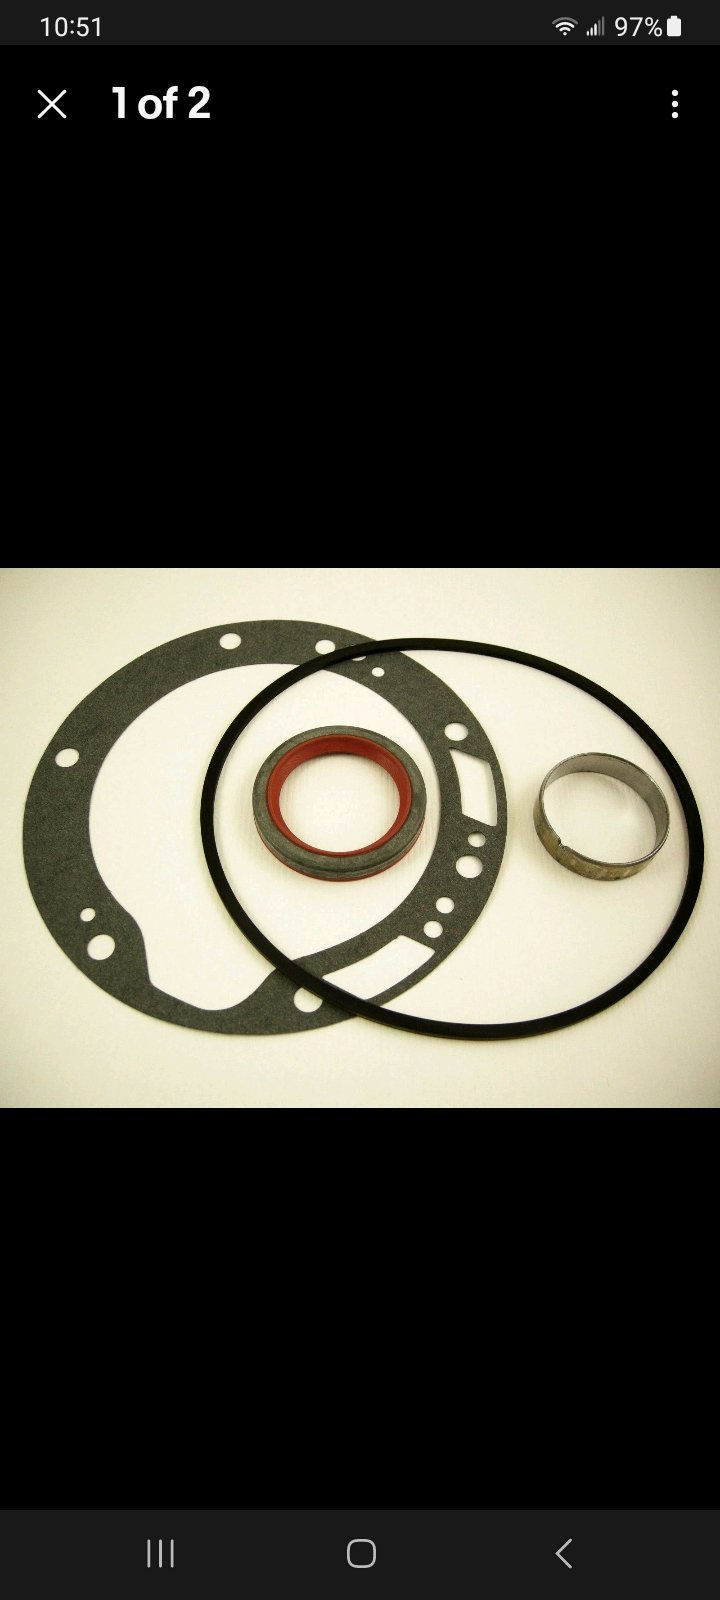
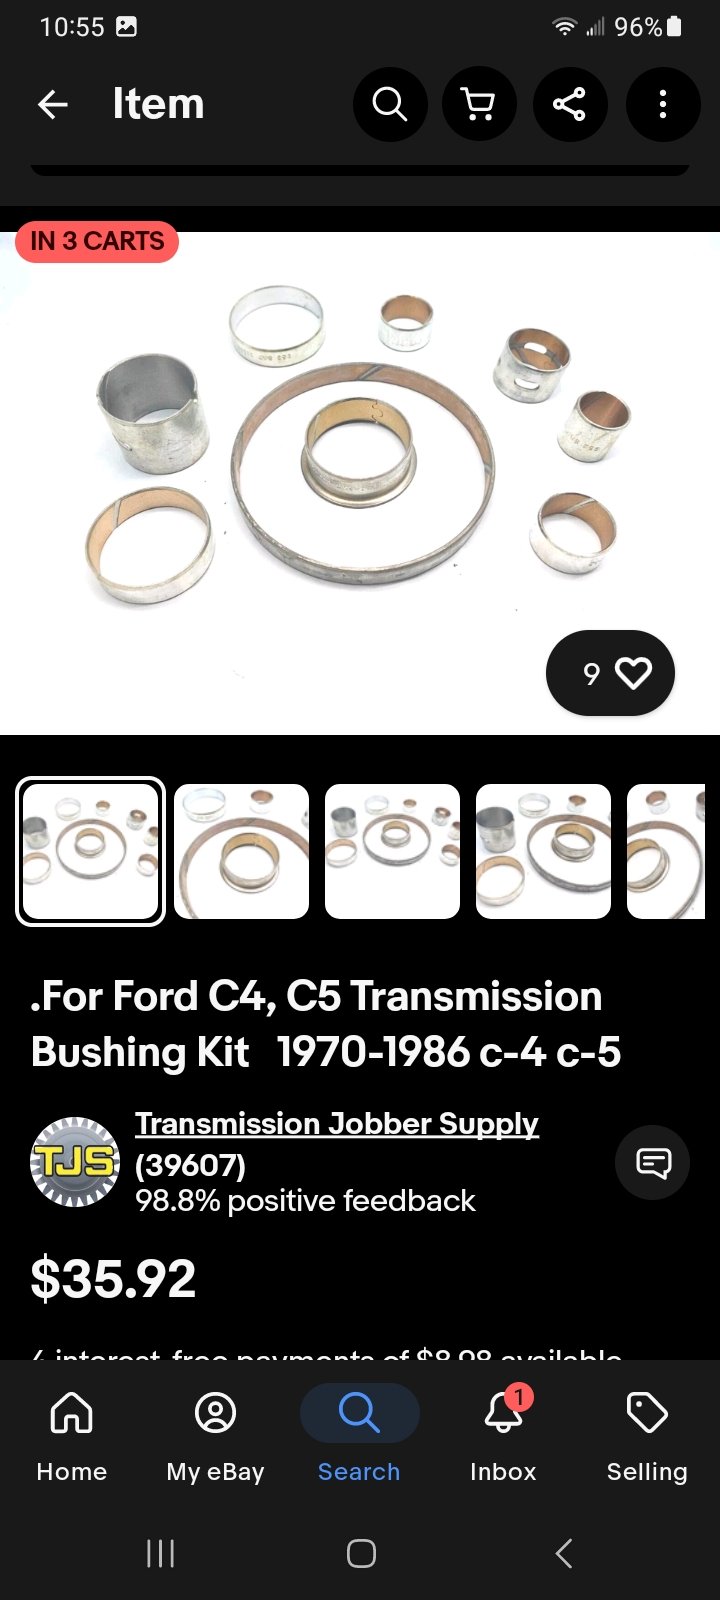
Thank Al you explained that very well but... What I meant was the seals on this axel . See pic. sorry I guess it's more of a drive shaft. The wheel seals in mine are not leaking at the moment so I'll leave them be. Thanks for helping a newbie. . Ps I bought the kit on ebay for the charge pump seals but skipped the kit with replacement gears as mine looked OK. Did you do anything about the charge pump relief valve balls . Steve
 

Attachments

  • 20250916_104559.jpg
    20250916_104559.jpg
    254.8 KB
  • Screenshot_20250920_105123_eBay.jpg
    Screenshot_20250920_105123_eBay.jpg
    75.7 KB
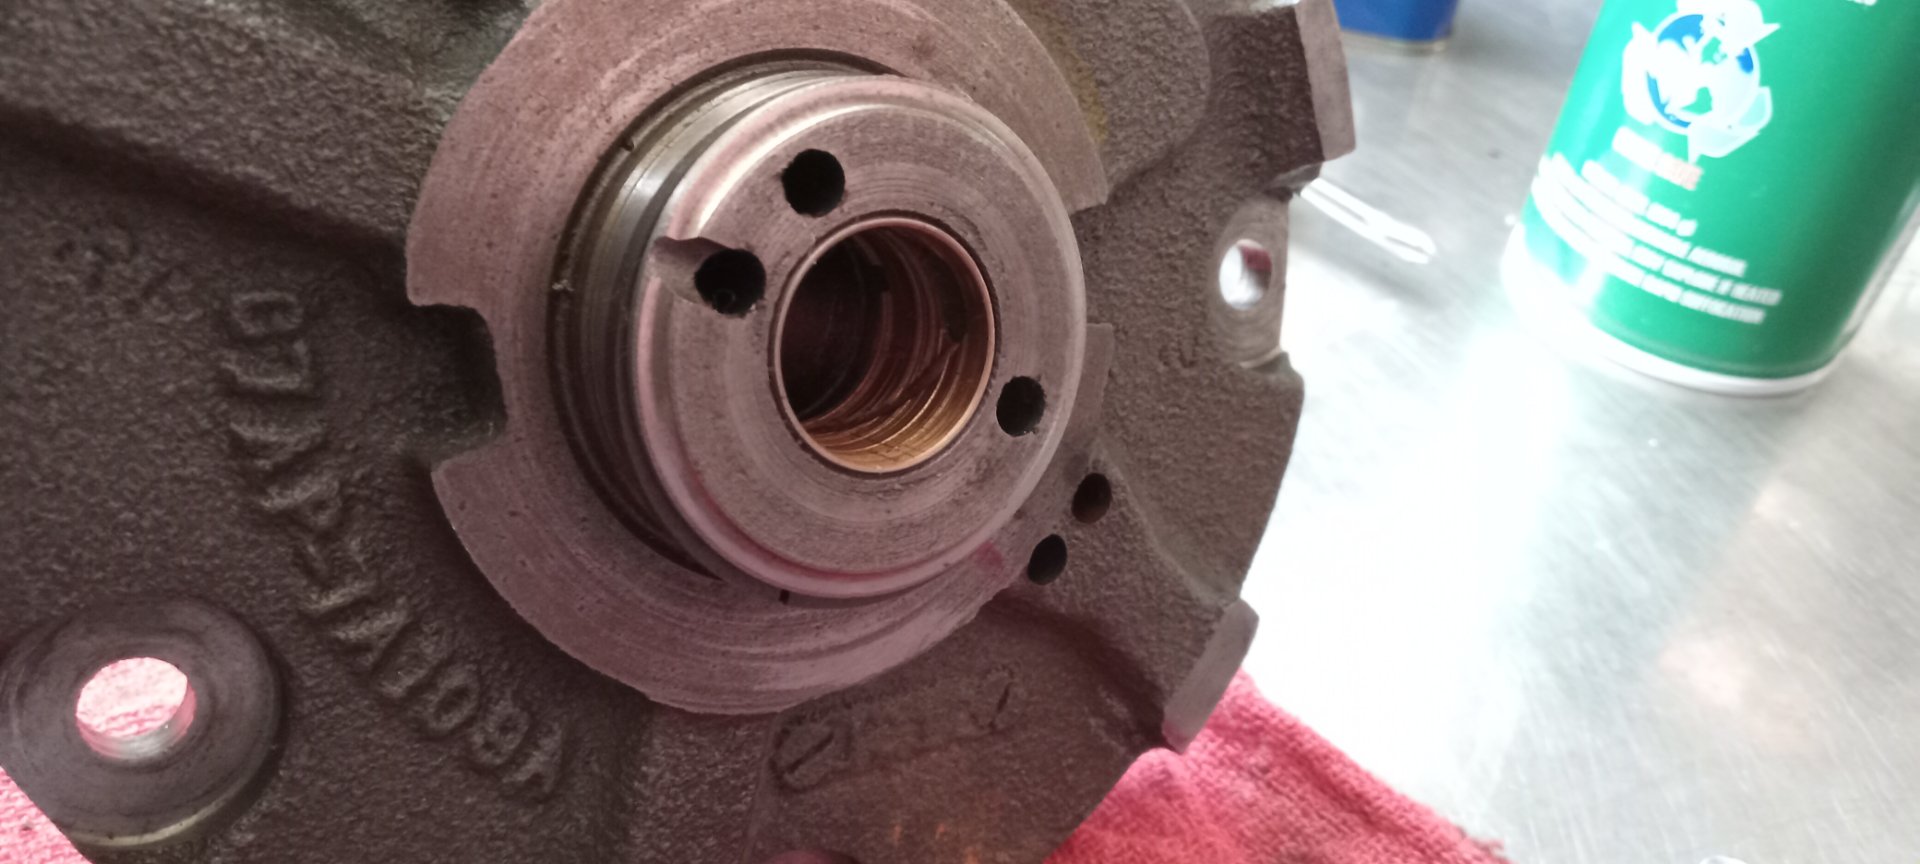
Al, take a look at this sleeve on pump it looks worn or does it? Anyway should I get this sleeve kit. I think it's called a support bushing. Steve
 

Attachments

  • 20250918_181600.jpg
    20250918_181600.jpg
    186 KB
  • Screenshot_20250920_105536_eBay.jpg
    Screenshot_20250920_105536_eBay.jpg
    118.3 KB
Back
Top