722 Bobcat Project

Help Support SkidSteer Forum:

sledesigns

Well-known member
Joined
Jan 23, 2009
Messages
94
I've learned a lot of stuff here & have been motivated by what others have shared. Great info & great bunch of helpful people. I'll try to share my current adventures with a 722 and hopefully pass on something mechanically interesting.
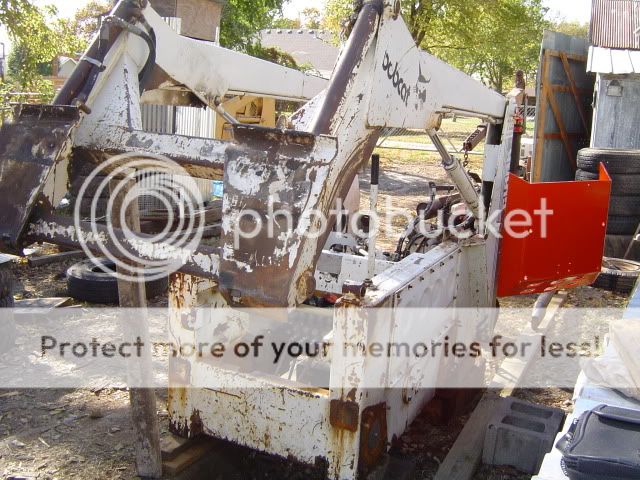
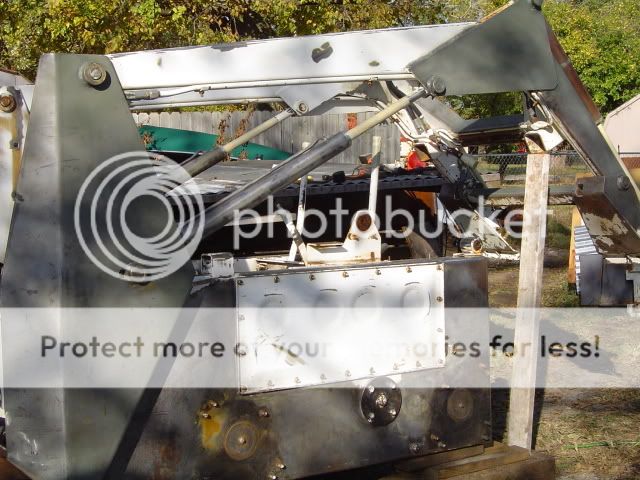
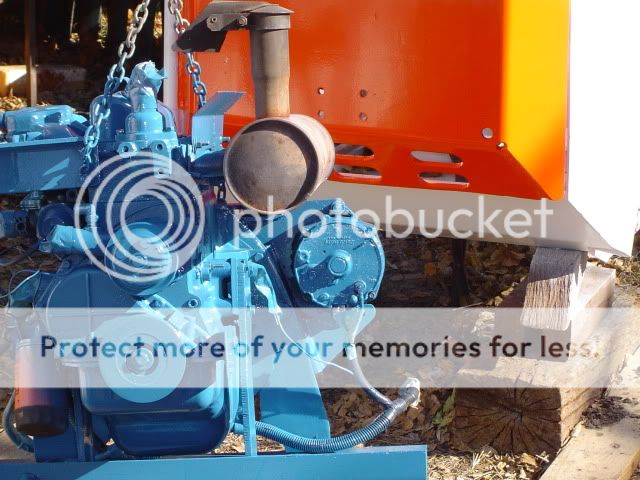
So after looking at a dozen Bobcats in my price range, I found this little Bobcat 722 on the internet. (original pics)

722 Bobcat 001


1284775691-138_jpg_595.jpg

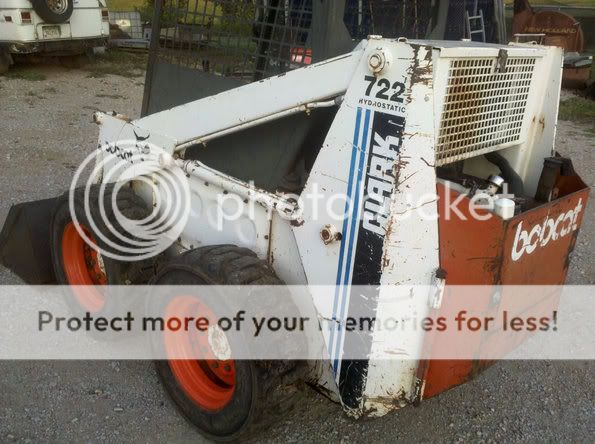
After talking to the owner and seeing decent pictures, the wife and I took her high mpg Diesel to check out this one. Looked it over, only recent leaks were the axle seals. Wiggled the bucket up and down by hand, decent pin wear for an older machine. Gas engine smoked a bit out the breather, but figured adding a PCV would help. It drove nice though the 2 speed didn't function, worn linkage. So, next weekend we picked up our little Bobcat.
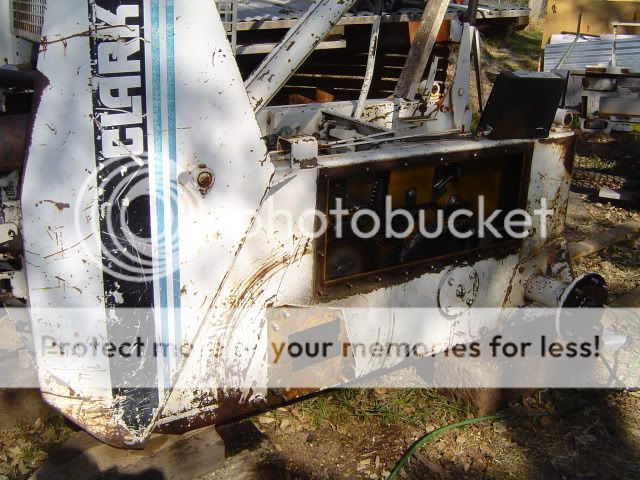
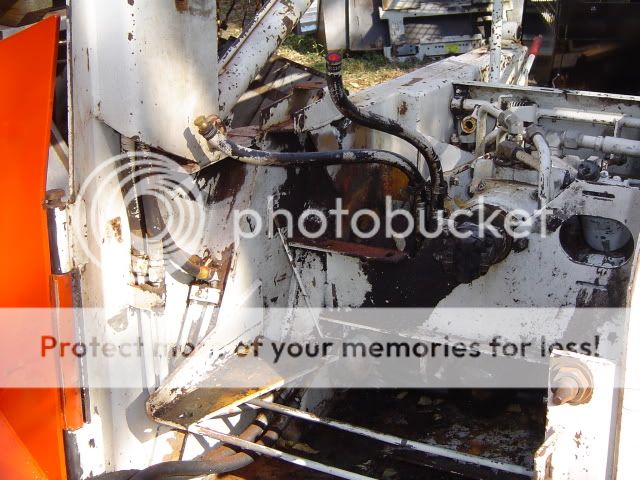
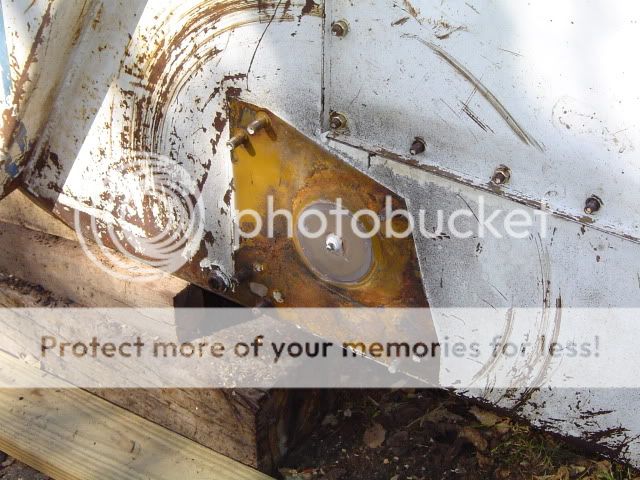
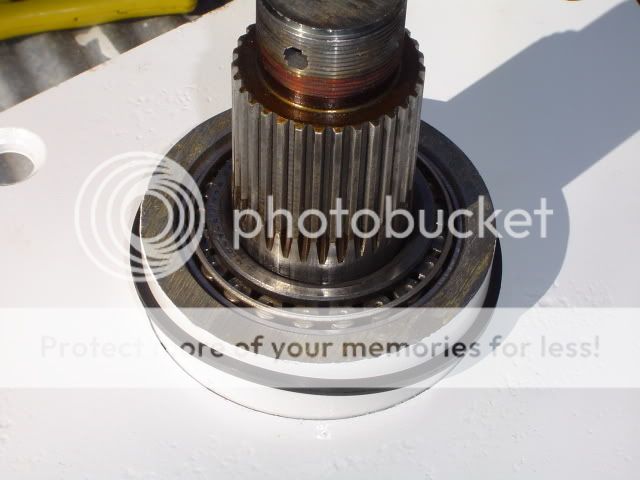
Got it home, didn't even pull it in the shed for a 'quick maintenance' before tackling some fall skidloader projects. Oil, hyd, water, check. They all looked good to go. Jacked it up to check chain tension & bearing slop. Pass, pass, pass, Fail. A rear with the leaky seal had in and out axle slop to the tune of about a quarter of an inch. The bailing twine around that axle apparently cut the seal, let dirt in & poof, bad bearings.
Note: This is the point that I should have put the wheels back on & done this project inside. But, hey, axle seals & bearings wont take long, why spend 15 minutes putting the wheels back on?
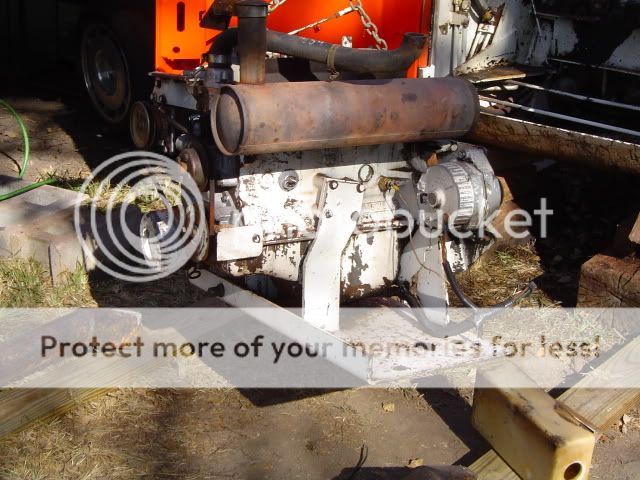
Ordered all seals and bearings, looked at the manual on how to do it (along with info from this site, Excellent!) Book said "Pull engine" friend and I said, naaaa, won't have to.
 
OP
OP
S

sledesigns

Well-known member
Joined
Jan 23, 2009
Messages
94
What to do while waiting on parts? Spiff it up a bit, hammer a couple dents out of the cab, DA it, and give it some nice shiny black.
Bobcat722022.jpg

(Should have had it in the shed now...ahhh....hindsight.)
May as well get down to the front axles & clean off the petrified grease on the pedals.
1284775665-847_jpg_595.jpg 722 Bobcat 001
After pulling the gas tank (below the pedals) there was some nasty, scaley, titanic rust that needed attention. Nothing a coarse twisted wire cupped wheel on an angle grinder can't remove.
722 Bobcat 005

Any job worth doing is worth doing well. Yep, no more rust, shine up that steel, DA it and prep for paint.
 
OP
OP
S

sledesigns

Well-known member
Joined
Jan 23, 2009
Messages
94
What to do while waiting on parts? Spiff it up a bit, hammer a couple dents out of the cab, DA it, and give it some nice shiny black.

(Should have had it in the shed now...ahhh....hindsight.)
May as well get down to the front axles & clean off the petrified grease on the pedals.

After pulling the gas tank (below the pedals) there was some nasty, scaley, titanic rust that needed attention. Nothing a coarse twisted wire cupped wheel on an angle grinder can't remove.

Any job worth doing is worth doing well. Yep, no more rust, shine up that steel, DA it and prep for paint.
Well now, there's that same 'Titanic rust scale' under the axle housing assembly. Tape off, clean up & prep for a spot of paint. After all, its just an old machine right. Don't wanna make it too spiffy then I might not want to dirty it up.
Bobcat722b005.jpg

May as well pop the radiator and hydraulic cooler out and clean off 30 years of gunk. It may even run cooler.
Did I mention, I should have pulled it inside?
Bobcat722b008.jpg
 
OP
OP
S

sledesigns

Well-known member
Joined
Jan 23, 2009
Messages
94
Well now, there's that same 'Titanic rust scale' under the axle housing assembly. Tape off, clean up & prep for a spot of paint. After all, its just an old machine right. Don't wanna make it too spiffy then I might not want to dirty it up.

May as well pop the radiator and hydraulic cooler out and clean off 30 years of gunk. It may even run cooler.
Did I mention, I should have pulled it inside?
Now, prepping for the rears I notice that through the access covers and any contortions of my arms, I cannot scrape the old inner axle cap gaskets completely off with the engine in the machine. A glob of silicon may have worked this time, but down the road that glob may haunt me. Pull the engine.
Bobcat722b010.jpg

And oops, the door accidentally got some dents pounded out and painted.
Bobcat722b011.jpg

Beveled some plugs for the axle housing holes to keep the dirt out while descaling.
Bobcat722b013.jpg

They look like this close up with a silicon seal. (Later found I should have machined stepped plugs out for a seal with an O-ring and no silicon, silicon took a while to clean off)
Bobcat722b014.jpg
 
OP
OP
S

sledesigns

Well-known member
Joined
Jan 23, 2009
Messages
94
Now, prepping for the rears I notice that through the access covers and any contortions of my arms, I cannot scrape the old inner axle cap gaskets completely off with the engine in the machine. A glob of silicon may have worked this time, but down the road that glob may haunt me. Pull the engine.

And oops, the door accidentally got some dents pounded out and painted.

Beveled some plugs for the axle housing holes to keep the dirt out while descaling.

They look like this close up with a silicon seal. (Later found I should have machined stepped plugs out for a seal with an O-ring and no silicon, silicon took a while to clean off)
Well, where to stop? I'd rather spend next summer looking between and climbing over smooth white arms than rusty patched ones.
Bobcat722b015.jpg

Woops got carried away again, down to the metal in places. Now I get to test out some of that self etching primer.
Bobcat722b016.jpg
 

Tazza

Moderator
Staff member
Joined
Dec 7, 2004
Messages
16,837
Now, prepping for the rears I notice that through the access covers and any contortions of my arms, I cannot scrape the old inner axle cap gaskets completely off with the engine in the machine. A glob of silicon may have worked this time, but down the road that glob may haunt me. Pull the engine.

And oops, the door accidentally got some dents pounded out and painted.

Beveled some plugs for the axle housing holes to keep the dirt out while descaling.

They look like this close up with a silicon seal. (Later found I should have machined stepped plugs out for a seal with an O-ring and no silicon, silicon took a while to clean off)
Awesome Job
Yep, the whole part about being in the shed always happens later.
Good to see you decided to do everything that was suspect, nothing like fixing something later that you should have done before.... When access was better.
 
OP
OP
S

sledesigns

Well-known member
Joined
Jan 23, 2009
Messages
94
Awesome Job
Yep, the whole part about being in the shed always happens later.
Good to see you decided to do everything that was suspect, nothing like fixing something later that you should have done before.... When access was better.
Yep, Im happy with it. Thought Id be reworking our front yard now, but this is entertaining too...wife may disagree now. But Im sure she'd rather it not break down, ooze oil, and/or become stranded in the front yard.
After a week of off time prepping, and after a full day of painting most of the little parts look nice.
722 Bobcat 014

722Bobcat015.jpg

722Bobcat016.jpg

Painted up to the seal wear mark on the axles. I'm not fond of rust.
722Bobcat017.jpg

And my 'new idea' square O-rings for sealing the housing to the frame/tanks.
722Bobcat018.jpg

Planning on machining aluminum inner caps for O-rings as well. Should make adjusting or pulling the axles an easy job next time. AKA no pulling the engine.
 
OP
OP
S

sledesigns

Well-known member
Joined
Jan 23, 2009
Messages
94
Yep, Im happy with it. Thought Id be reworking our front yard now, but this is entertaining too...wife may disagree now. But Im sure she'd rather it not break down, ooze oil, and/or become stranded in the front yard.
After a week of off time prepping, and after a full day of painting most of the little parts look nice.


Painted up to the seal wear mark on the axles. I'm not fond of rust.

And my 'new idea' square O-rings for sealing the housing to the frame/tanks.

Planning on machining aluminum inner caps for O-rings as well. Should make adjusting or pulling the axles an easy job next time. AKA no pulling the engine.
Originality not a priority. Everything was blown with white. I thought the little Ford 1.6 Industrial engine should be Ford blue. Eventually a new wiring harness will make it...not blue. hehehe.
722Bobcat019.jpg

Finally some forward momentum. Assembly! (With non original black, but hey I like it)
722Bobcat020.jpg

722Bobcat021.jpg

722Bobcat022.jpg

And now its tarped up for rain & me to machine inner axle covers.
 

siduramaxde

Well-known member
Joined
Nov 15, 2005
Messages
362
Originality not a priority. Everything was blown with white. I thought the little Ford 1.6 Industrial engine should be Ford blue. Eventually a new wiring harness will make it...not blue. hehehe.

Finally some forward momentum. Assembly! (With non original black, but hey I like it)


And now its tarped up for rain & me to machine inner axle covers.
looks great. I wish I had time to make my machine "new again". When I do have time to work on my Bobcat I can't have down for long periods of time due to needing it for work. Right now mine is in the shop ready for a new axle seal.
 

Chill

New member
Joined
Jan 21, 2011
Messages
1
looks great. I wish I had time to make my machine "new again". When I do have time to work on my Bobcat I can't have down for long periods of time due to needing it for work. Right now mine is in the shop ready for a new axle seal.
Awesome Project! Got it all back together now? I'll ship my 722 down to you for some rehab! I also have a 722 that I picked up cheap, it had been run a zillion hours and put away wet. The old Ford industrial 1.6L gave up the ghost, so I'm just starting repowering it with a Kohler Commander 38HP Twin. The stock motor was 30HP! I figure I'll take some pics as I go and maybe post here a bit of a how-to. Although now I'll be really self conscious of how ugly and neglected my 722 is... ;)
 

Tazza

Moderator
Staff member
Joined
Dec 7, 2004
Messages
16,837
Awesome Project! Got it all back together now? I'll ship my 722 down to you for some rehab! I also have a 722 that I picked up cheap, it had been run a zillion hours and put away wet. The old Ford industrial 1.6L gave up the ghost, so I'm just starting repowering it with a Kohler Commander 38HP Twin. The stock motor was 30HP! I figure I'll take some pics as I go and maybe post here a bit of a how-to. Although now I'll be really self conscious of how ugly and neglected my 722 is... ;)
Don't be concerned with the looks, we are more interested in the repowering than commenting on the paint, or lack there of :) As long as it does the job, its all good.
 

Marcus

Member
Joined
Apr 25, 2011
Messages
8
Originality not a priority. Everything was blown with white. I thought the little Ford 1.6 Industrial engine should be Ford blue. Eventually a new wiring harness will make it...not blue. hehehe.

Finally some forward momentum. Assembly! (With non original black, but hey I like it)


And now its tarped up for rain & me to machine inner axle covers.
Sledesigns, how did this project turn out? Lets see some finished pictures!
 

Atilathehun99

Well-known member
Joined
Dec 17, 2011
Messages
111
Originality not a priority. Everything was blown with white. I thought the little Ford 1.6 Industrial engine should be Ford blue. Eventually a new wiring harness will make it...not blue. hehehe.

Finally some forward momentum. Assembly! (With non original black, but hey I like it)


And now its tarped up for rain & me to machine inner axle covers.
I like what you've done. I've got a 722 that could use a similar go-through and would like to pick your brain. Would you be available to talk about that off-line perhaps?
 

Mikefromcny

Well-known member
Joined
Nov 13, 2011
Messages
352
Great set of pictures and storyline. Makes me wish that I liked to paint more than I do.
Thanks for sharing,
John
Would love to see the finished product. My 743 came with new decals when I bought it and cant wait to get it painted when it warms up this spring.
 
Top