Home made grapple conversion

Help Support SkidSteer Forum:

Hotrod1830

Well-known member
Joined
Sep 14, 2010
Messages
513
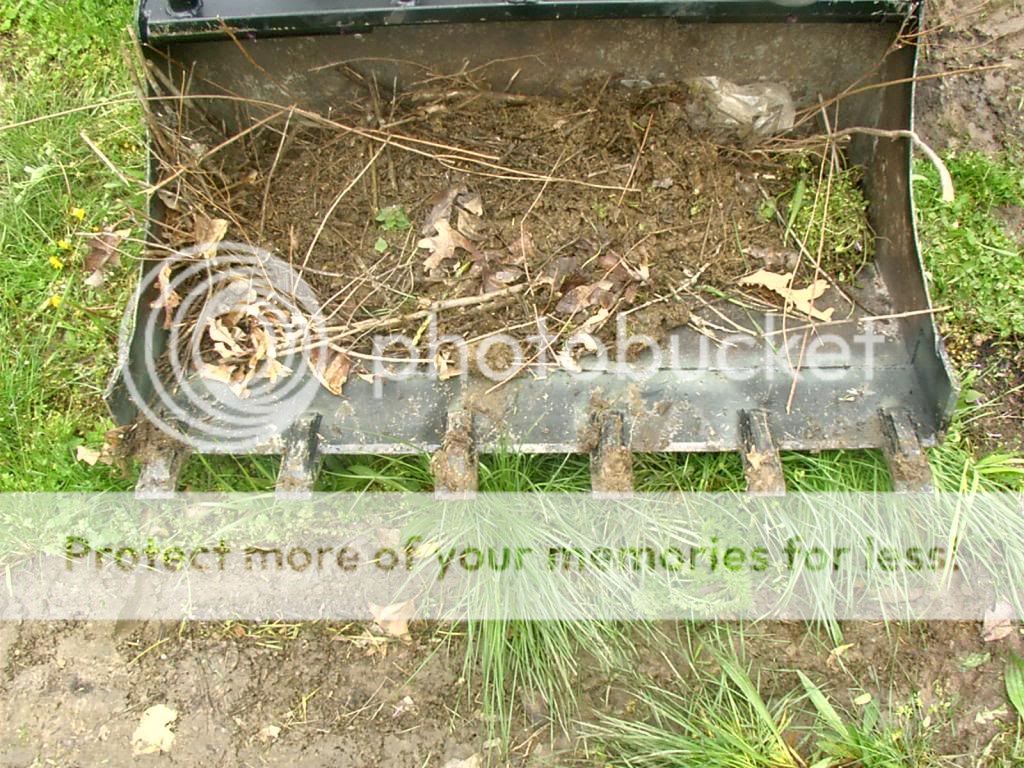
Heres the next project on the list. A grapple conversion. It started life as a OE bobcat 40" bucket that came on the 310. The prior owners tried to fix a cracked bucket by welding on a 1" piece of plate. At some point it had forks welded to it as well. They cut those off. I had to do a little bit of surgery and was able to salvage it. I cut the old cutting edge off and welded on a piece of 3/8"x6" plate, and fabbed some teeth out of the same stock. I cut off the top "lip" and welded in a piece of 2"x1/4" square tubing to mount the grapple to.. The round tubing is 1 1/2" roll bar tubing I had laying around. Bent with a Cheap Harbor frieght bender. The hinges are 3/4" round bar and 3/4" i.d. DOM tubing. Besides the hoses being too short, it works pretty good. Soon as I get some longer hoses, its time to clean out all the junk in the woods.
Enjoy!
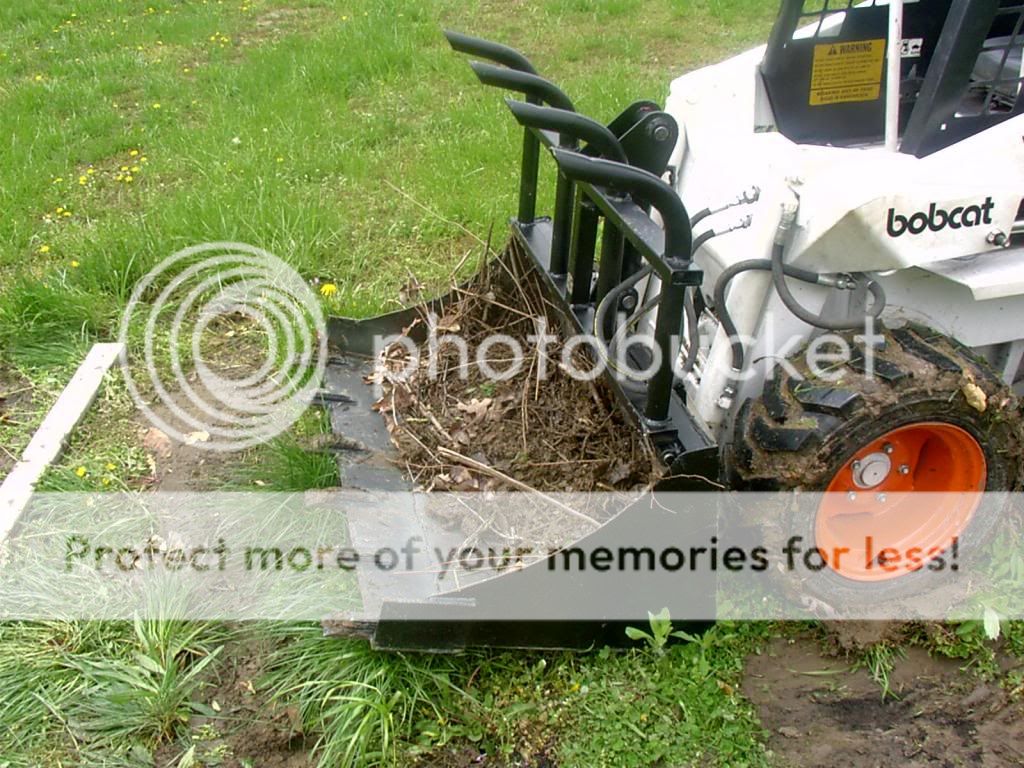
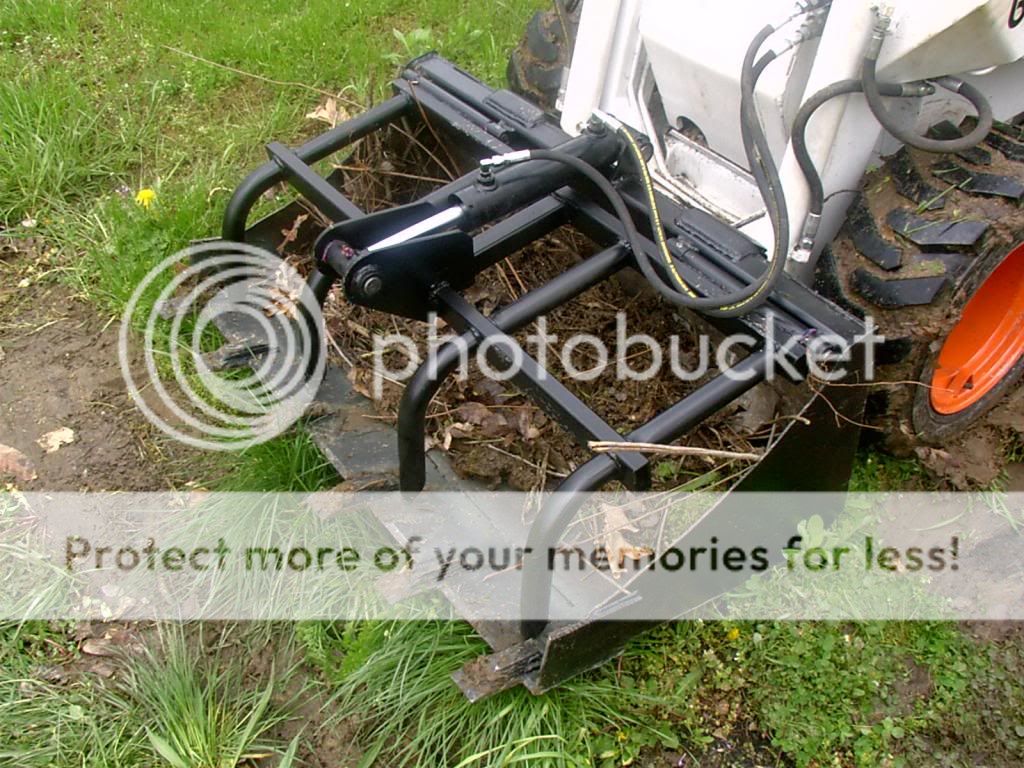
 photo grap1_zps8526a074.jpg

 photo grap3_zpsc61c0f9b.jpg

 photo grap2_zps9ce1f8bf.jpg
 
OP
OP
H

Hotrod1830

Well-known member
Joined
Sep 14, 2010
Messages
513
Almost forgot. I didnt feel like spending $200 on a hydraulic cylinder, So I got the cheapest 2"X6" cylinder surplus center had (had odd pin ends) , cut the ends off and welded my own 1" tubes on. Had to disassemble it first, but only took about an hour in all.
 

Impact-vector

Well-known member
Joined
Aug 19, 2011
Messages
66
Almost forgot. I didnt feel like spending $200 on a hydraulic cylinder, So I got the cheapest 2"X6" cylinder surplus center had (had odd pin ends) , cut the ends off and welded my own 1" tubes on. Had to disassemble it first, but only took about an hour in all.
That is wicked!! I almost cant believe the HF bender worked on something! I had one and sold it because all i got was crimped pipes.
 

Tazza

Moderator
Staff member
Joined
Dec 7, 2004
Messages
16,828
That is wicked!! I almost cant believe the HF bender worked on something! I had one and sold it because all i got was crimped pipes.
Nice job indeed. You don't always need to pull the clinder apart to weld, just ensure you extend the rod first to prevent melting the the seals.
To bend thin wall pipe, pack it tightly with sand before bending, i have seen it done by filling smaller tubes with water and freezing them before bending.
 
OP
OP
H

Hotrod1830

Well-known member
Joined
Sep 14, 2010
Messages
513
Nice job indeed. You don't always need to pull the clinder apart to weld, just ensure you extend the rod first to prevent melting the the seals.
To bend thin wall pipe, pack it tightly with sand before bending, i have seen it done by filling smaller tubes with water and freezing them before bending.
Thanks guys. I got lucky on the bender, and the shoe was actually tight on the tube.
I got the can kinda hot cutting that pin off. I figured it was better safe than sorry.
 

Tazza

Moderator
Staff member
Joined
Dec 7, 2004
Messages
16,828
Thanks guys. I got lucky on the bender, and the shoe was actually tight on the tube.
I got the can kinda hot cutting that pin off. I figured it was better safe than sorry.
It is better safe than sorry. As the cylinder was new, the seals should be fine. With older ones, they harden up and you really need to replace them if they are disturbed or they can leak.
I like how simple the modification is too.
 

ShowMeGuy

Member
Joined
May 22, 2014
Messages
15
It is better safe than sorry. As the cylinder was new, the seals should be fine. With older ones, they harden up and you really need to replace them if they are disturbed or they can leak.
I like how simple the modification is too.
HotRod, How are you engaging your grapple on your 310? I'd like to do something like that on my spare bucket I got on this basketcase 310 I got... ShowMeGuy over in STL... :)
 
OP
OP
H

Hotrod1830

Well-known member
Joined
Sep 14, 2010
Messages
513
HotRod, How are you engaging your grapple on your 310? I'd like to do something like that on my spare bucket I got on this basketcase 310 I got... ShowMeGuy over in STL... :)
I added auxillary hydraulics to it. Your 310 already has the auxillary valve. All you need to do is add the linkage and lines. I can post pictures if you need them.
 

ShowMeGuy

Member
Joined
May 22, 2014
Messages
15
I added auxillary hydraulics to it. Your 310 already has the auxillary valve. All you need to do is add the linkage and lines. I can post pictures if you need them.
Yeah, I did notice that the valve had 3 spools (think that is the right terminology) The one on the far left as from the seat is capped off. My manual shows there being an auxilary pedal between the foot pedals but I'm not sure I want anything else down there.. If that is the only route or likely cheapest however that's likely what I'll do. I'd love to see pics of your lines and how you are actuating the valve.. Thanks!
 
OP
OP
H

Hotrod1830

Well-known member
Joined
Sep 14, 2010
Messages
513
Yeah, I did notice that the valve had 3 spools (think that is the right terminology) The one on the far left as from the seat is capped off. My manual shows there being an auxilary pedal between the foot pedals but I'm not sure I want anything else down there.. If that is the only route or likely cheapest however that's likely what I'll do. I'd love to see pics of your lines and how you are actuating the valve.. Thanks!
 photo PDR_00043_zps455e900f.jpg

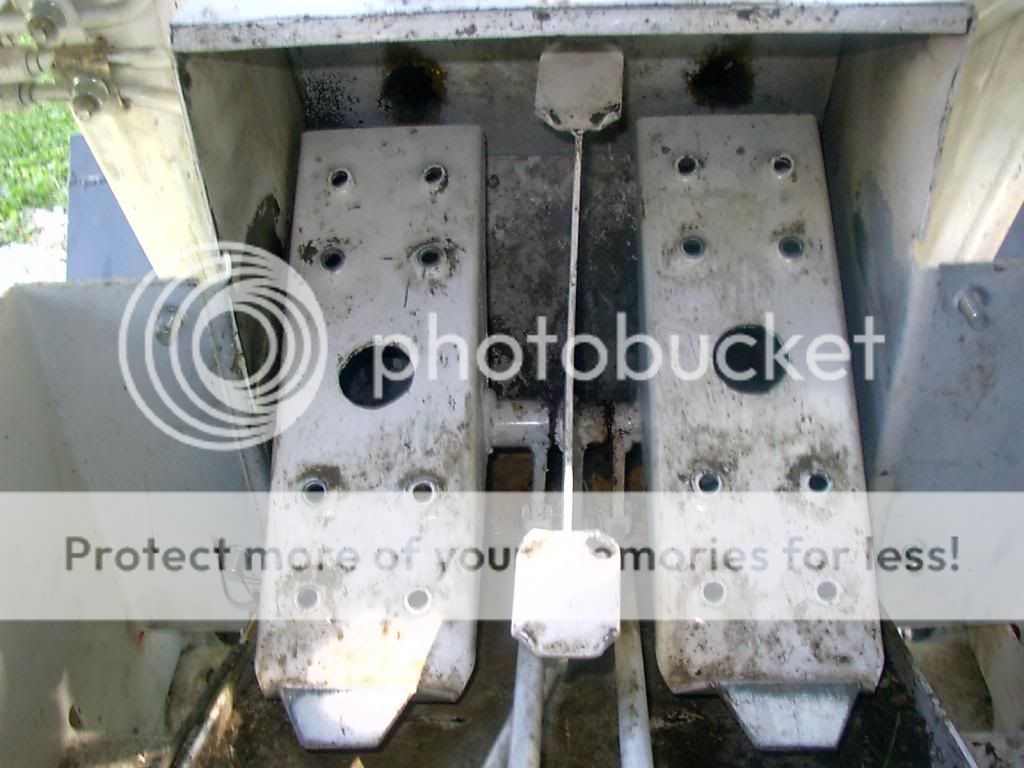
Here are the pedals. A section of the original pedal tube was cut off and replaced with a piece of tube and pedal for the auxillary control.
 photo PDR_00012_zps93d83bc3.jpg

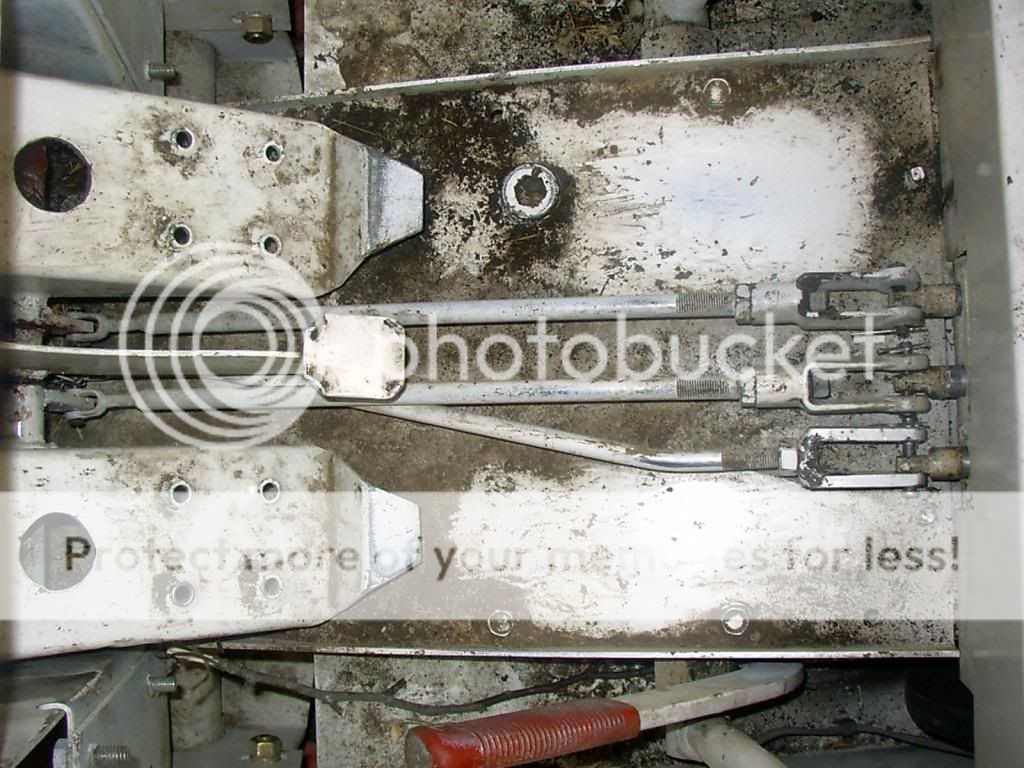
View of the linkage. Clevis' are fabricated. Threaded on one end for adjustment. Rod is 3/8".
 photo PDR_00022_zps5385bef8.jpg

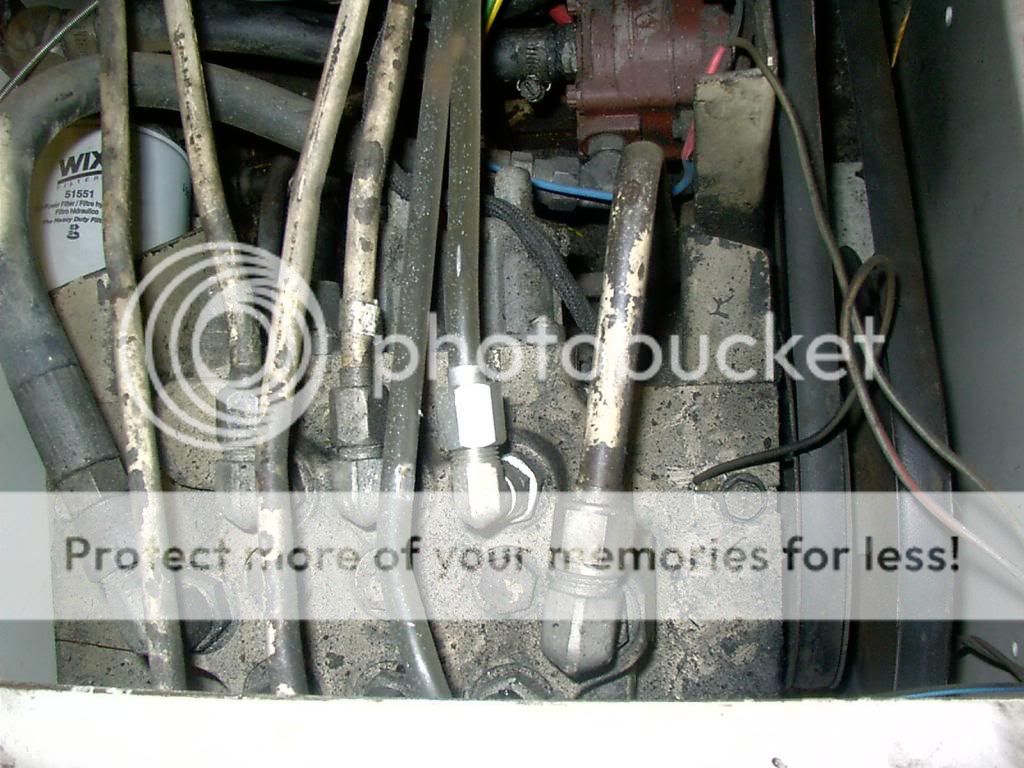
Fittings for the lines going to the spools are SAE 8 o-ring to JIC 6 male 90 degree. All hard line is 3/8 steel with steel tube nut and sleeves. single flared.
 photo PDR_00044_zpse62e35c0.jpg

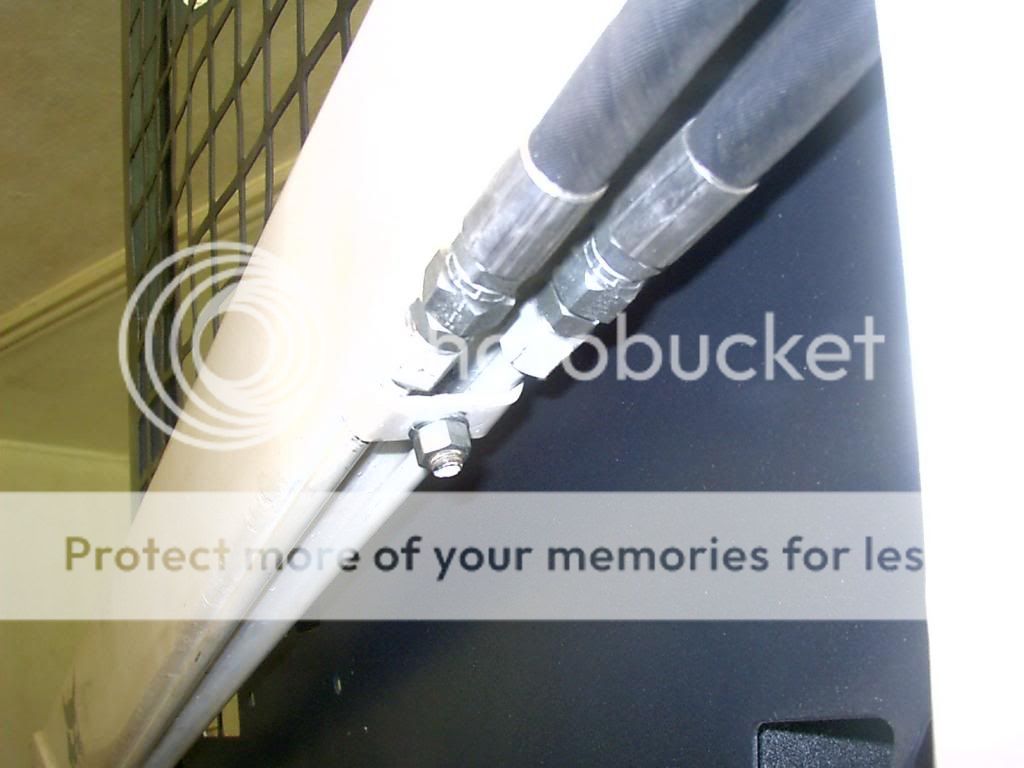
lines going up left lift arm. Hoses are 3/8 JIC 6 female. Cant remember lenght, but I think they are 18" -6 Unions connect to steel line.
 photo PDR_0003_zps726d23ef.jpg

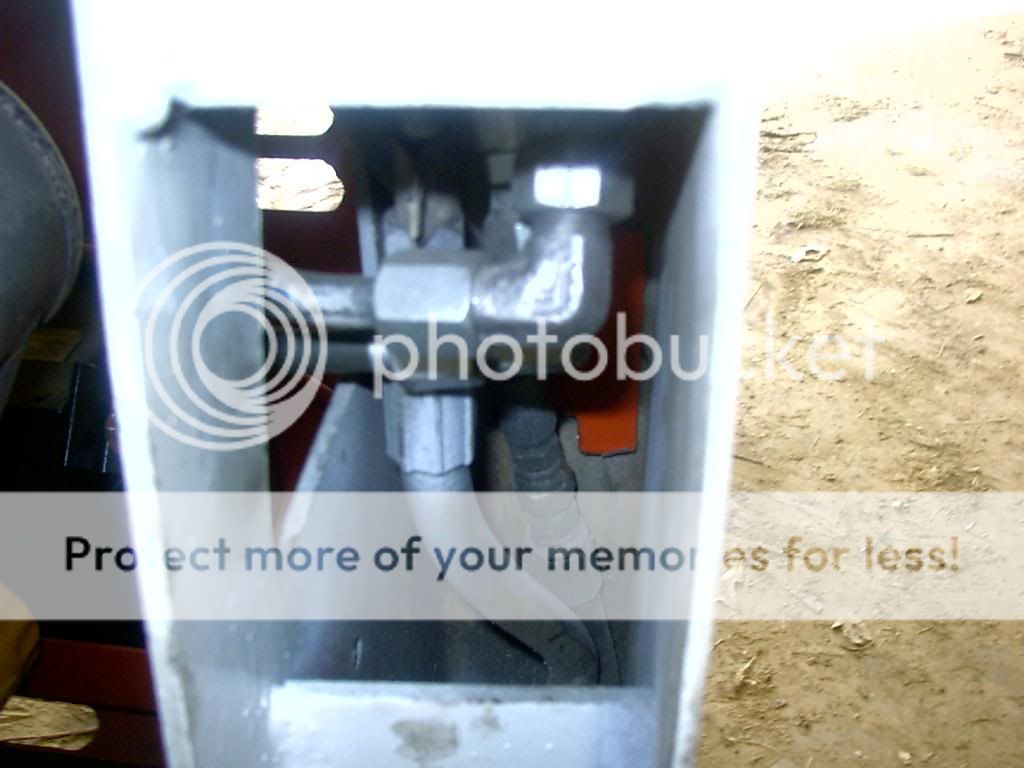
Rubber to hard line connection in left lift tower. 90 degree -6 JIC male union fittings used.
 photo PDR_00052_zpsd4b7368a.jpg

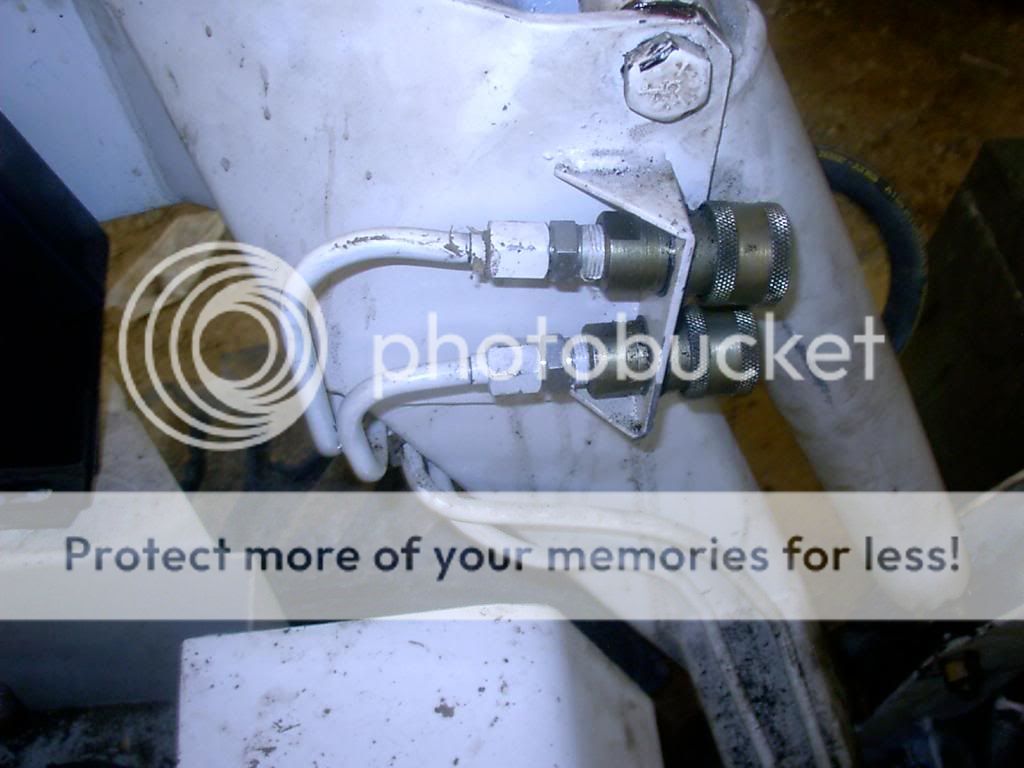
Quick connects on left lift arm. I used 1/2" safeway couplers since I wasnt worried about flow. You can use the flat face connectors, but dont plan on running any modern high flow attatchments. I had to fab and weld the mount to the arm.
 
OP
OP
H

Hotrod1830

Well-known member
Joined
Sep 14, 2010
Messages
513
Here are the pedals. A section of the original pedal tube was cut off and replaced with a piece of tube and pedal for the auxillary control.

View of the linkage. Clevis' are fabricated. Threaded on one end for adjustment. Rod is 3/8".

Fittings for the lines going to the spools are SAE 8 o-ring to JIC 6 male 90 degree. All hard line is 3/8 steel with steel tube nut and sleeves. single flared.

lines going up left lift arm. Hoses are 3/8 JIC 6 female. Cant remember lenght, but I think they are 18" -6 Unions connect to steel line.

Rubber to hard line connection in left lift tower. 90 degree -6 JIC male union fittings used.

Quick connects on left lift arm. I used 1/2" safeway couplers since I wasnt worried about flow. You can use the flat face connectors, but dont plan on running any modern high flow attatchments. I had to fab and weld the mount to the arm.
Almost forgot about the funnest part of this. The cross tube for the pedals was rusted solid. Prior owner just loosened the cross bolt so the pedals would move. Tried heating with a torch but no go. Wound up having to cut the tubes off the pedals and weld new ones on. There is actually a smaller tube inside the pedal tubes, and a long bolt goes thru that. You will notice the big holes in the center of the pedals. I added grease zerks and a way to get to them.
 

Tazza

Moderator
Staff member
Joined
Dec 7, 2004
Messages
16,828
Almost forgot about the funnest part of this. The cross tube for the pedals was rusted solid. Prior owner just loosened the cross bolt so the pedals would move. Tried heating with a torch but no go. Wound up having to cut the tubes off the pedals and weld new ones on. There is actually a smaller tube inside the pedal tubes, and a long bolt goes thru that. You will notice the big holes in the center of the pedals. I added grease zerks and a way to get to them.
You did well, especially repairing the previous owners neglect.
The pedals on my 743 were never greased either, i did like you did, welded new tubes on and installed grease nipples, they ran so smooth!
 

ryantowry_81

Member
Joined
Jul 12, 2016
Messages
24
You did well, especially repairing the previous owners neglect.
The pedals on my 743 were never greased either, i did like you did, welded new tubes on and installed grease nipples, they ran so smooth!
nice work on the Grapple! I have been thinking of using some 1-1/2" tubing i have from rock crawling also. let me know how this one holds up. i am looking at using it on my 530 so not much bigger than your machine.
 
OP
OP
H

Hotrod1830

Well-known member
Joined
Sep 14, 2010
Messages
513
nice work on the Grapple! I have been thinking of using some 1-1/2" tubing i have from rock crawling also. let me know how this one holds up. i am looking at using it on my 530 so not much bigger than your machine.
SO far I havent been able to bend them. The hydraulic cylinder has such a high ratio, it won't apply enough force to bend them trying to crush something, but it has held some pretty big logs, and hasnt bent.
I am making another grapple for my 553 and already have another set of tubes bent up ready to go. I will try and take more pictures this time.
 

ryantowry_81

Member
Joined
Jul 12, 2016
Messages
24
SO far I havent been able to bend them. The hydraulic cylinder has such a high ratio, it won't apply enough force to bend them trying to crush something, but it has held some pretty big logs, and hasnt bent.
I am making another grapple for my 553 and already have another set of tubes bent up ready to go. I will try and take more pictures this time.
sounds good. I look forward to it!
 
Top