2001 753G spool valve removal

Help Support SkidSteer Forum:

lonfu

Active member
Joined
Sep 28, 2014
Messages
27
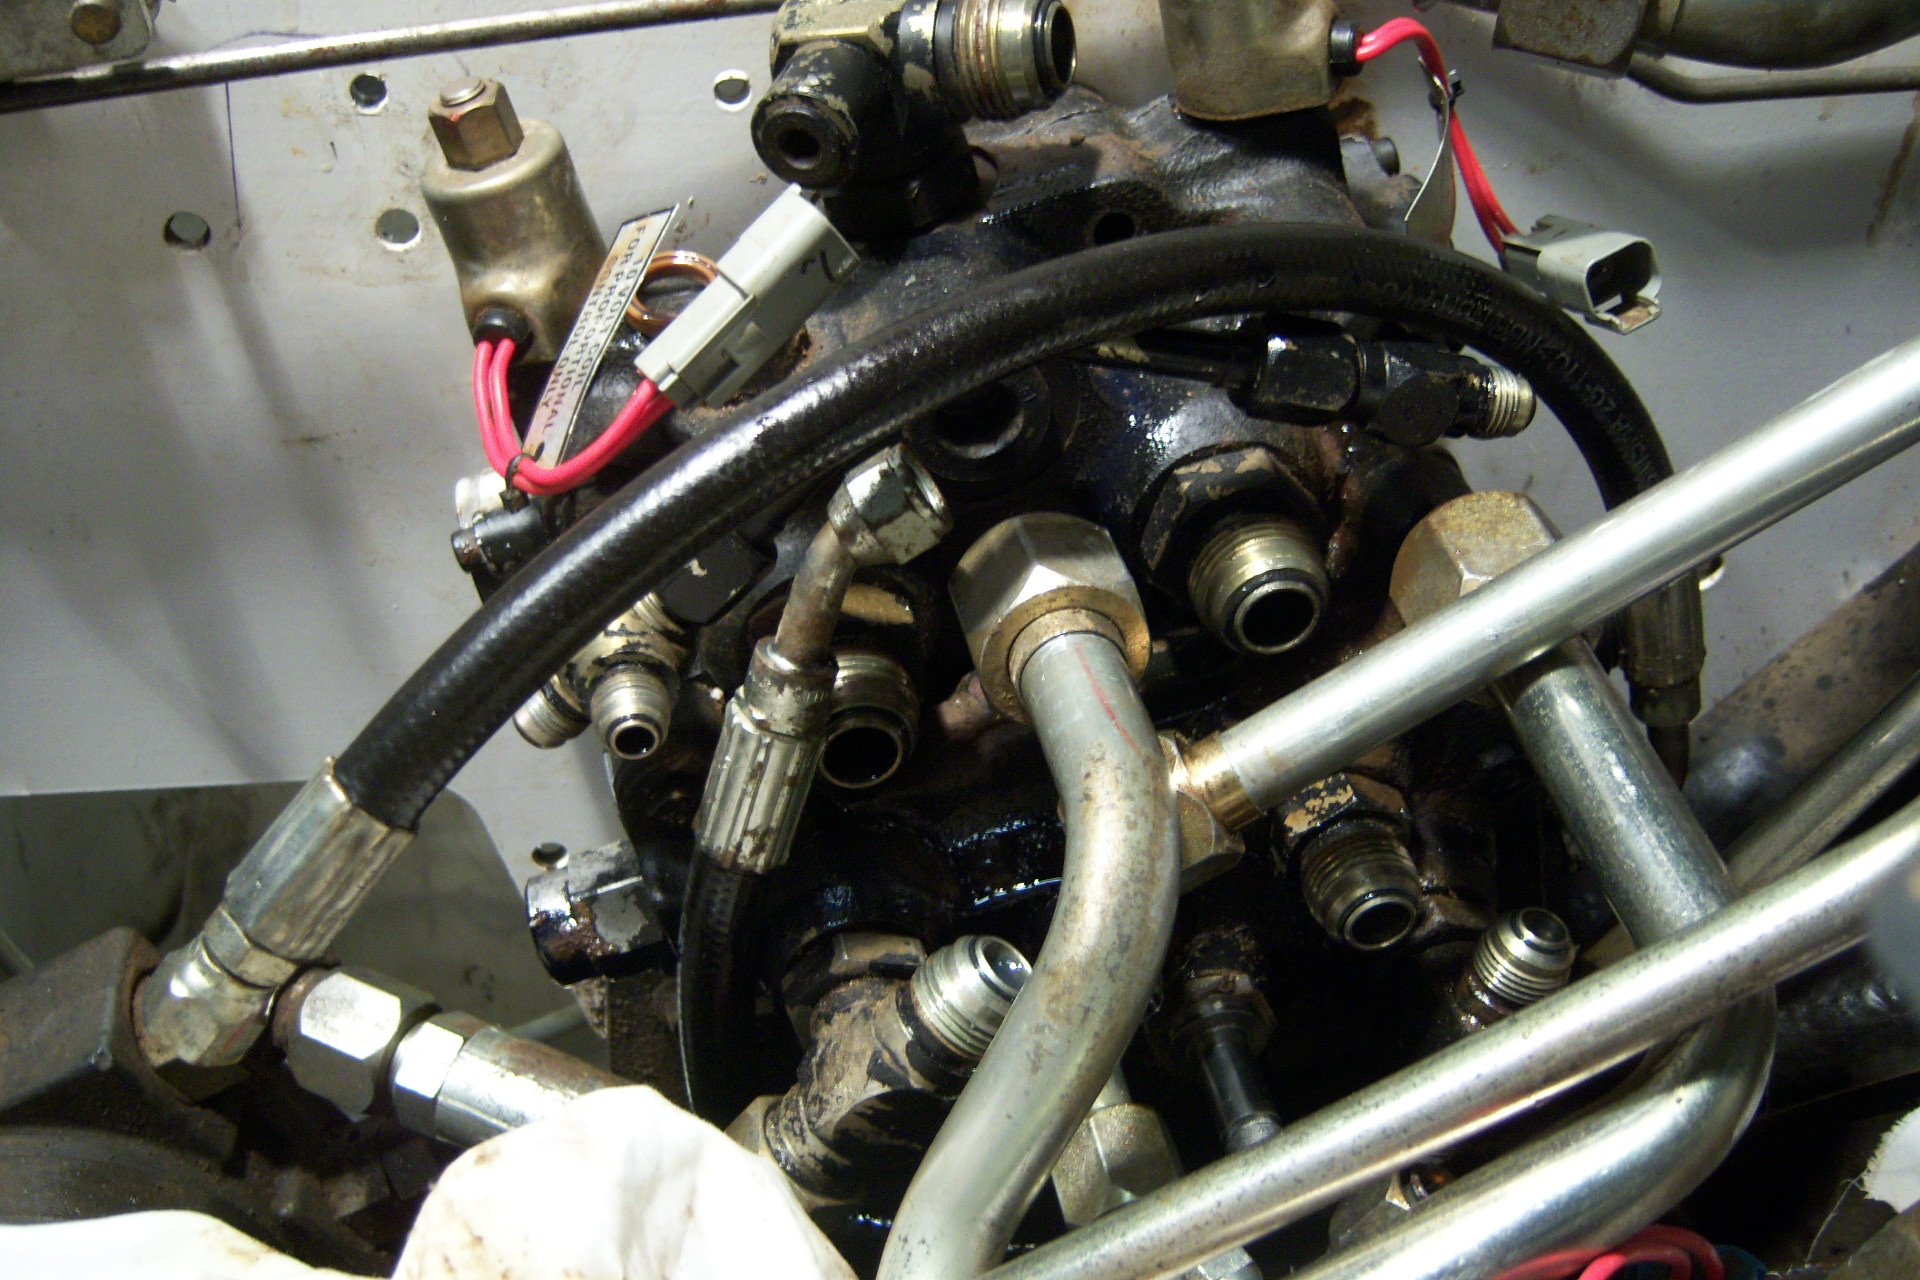
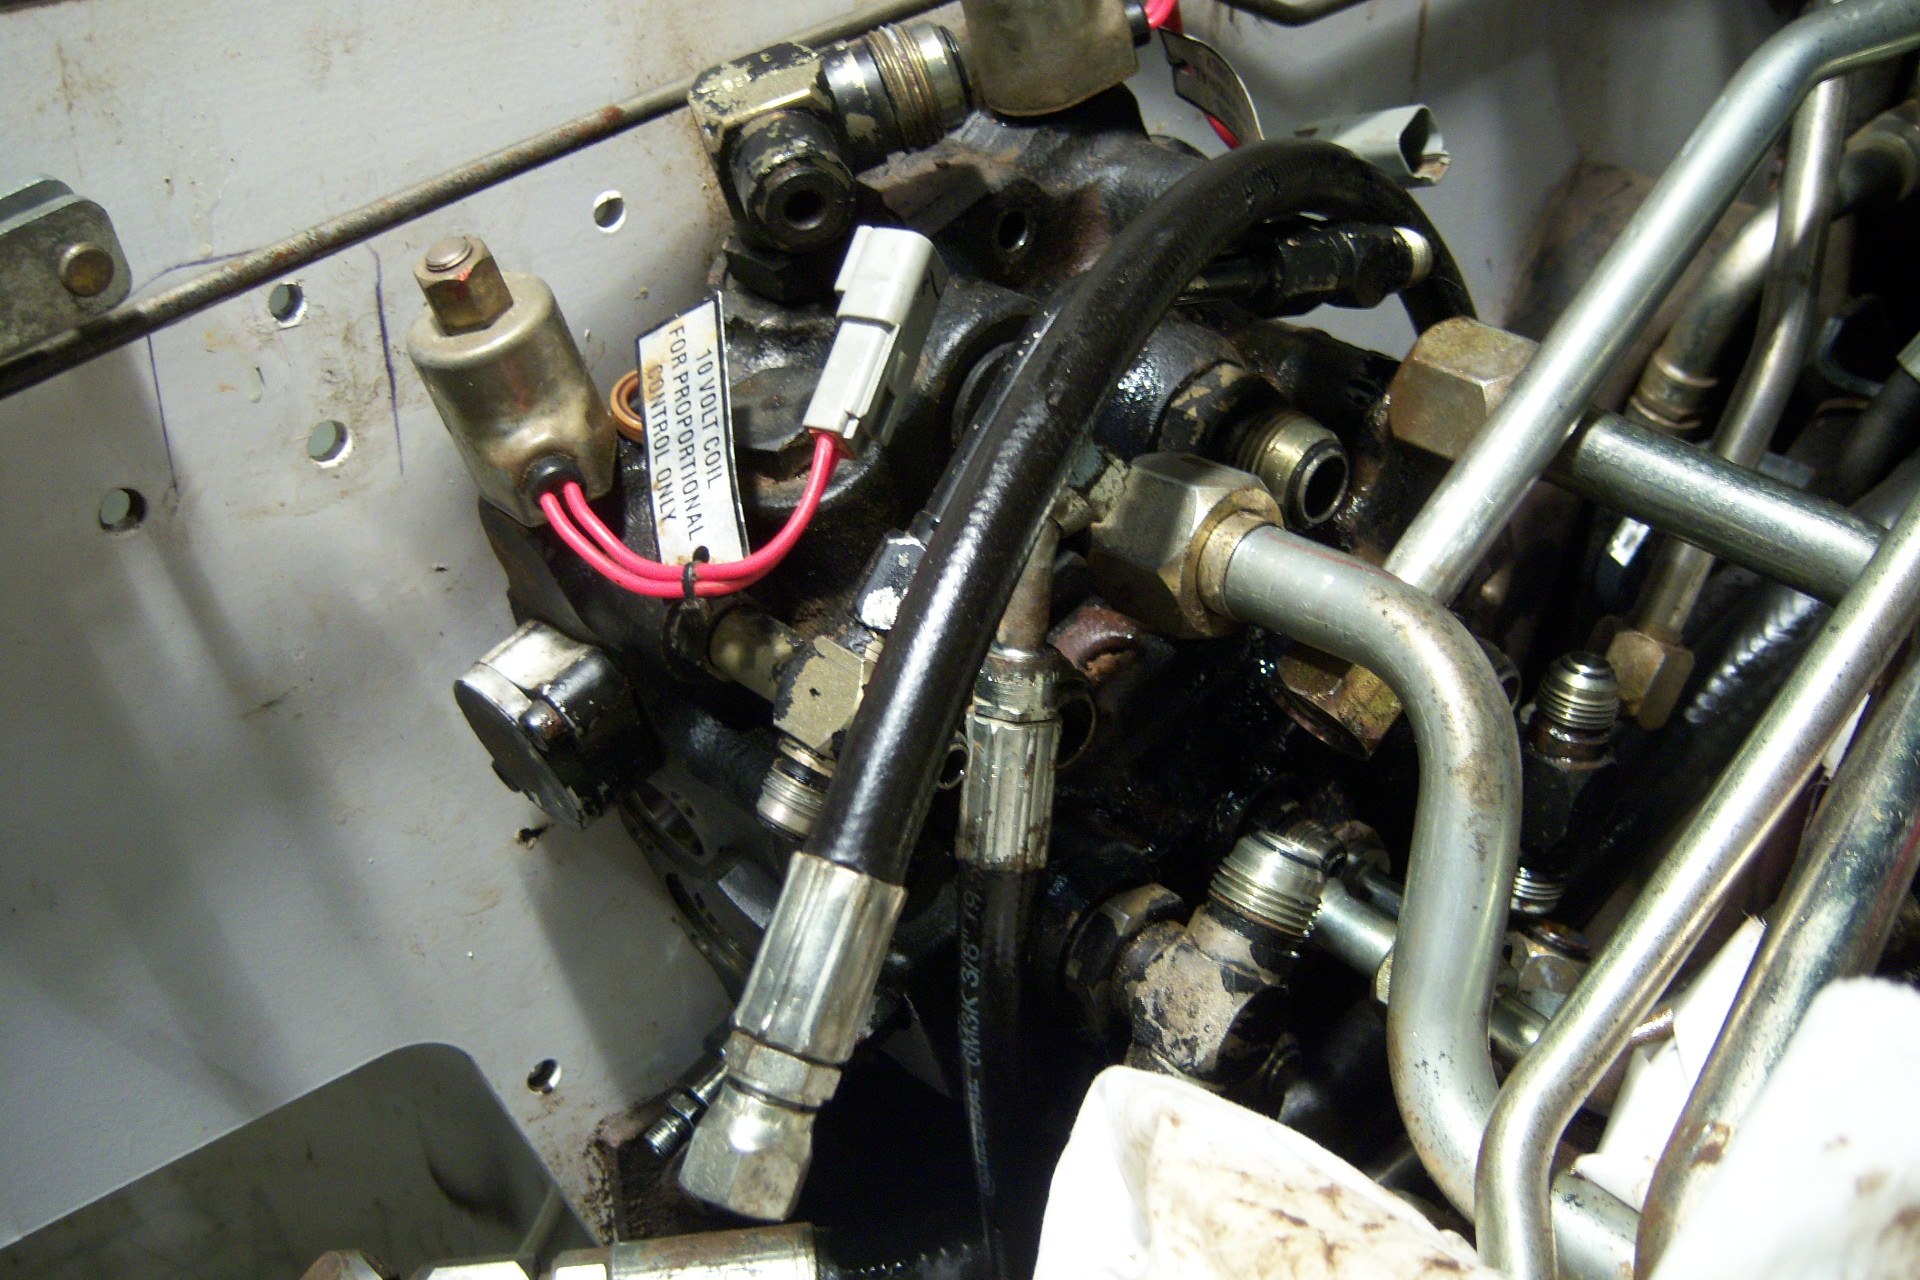
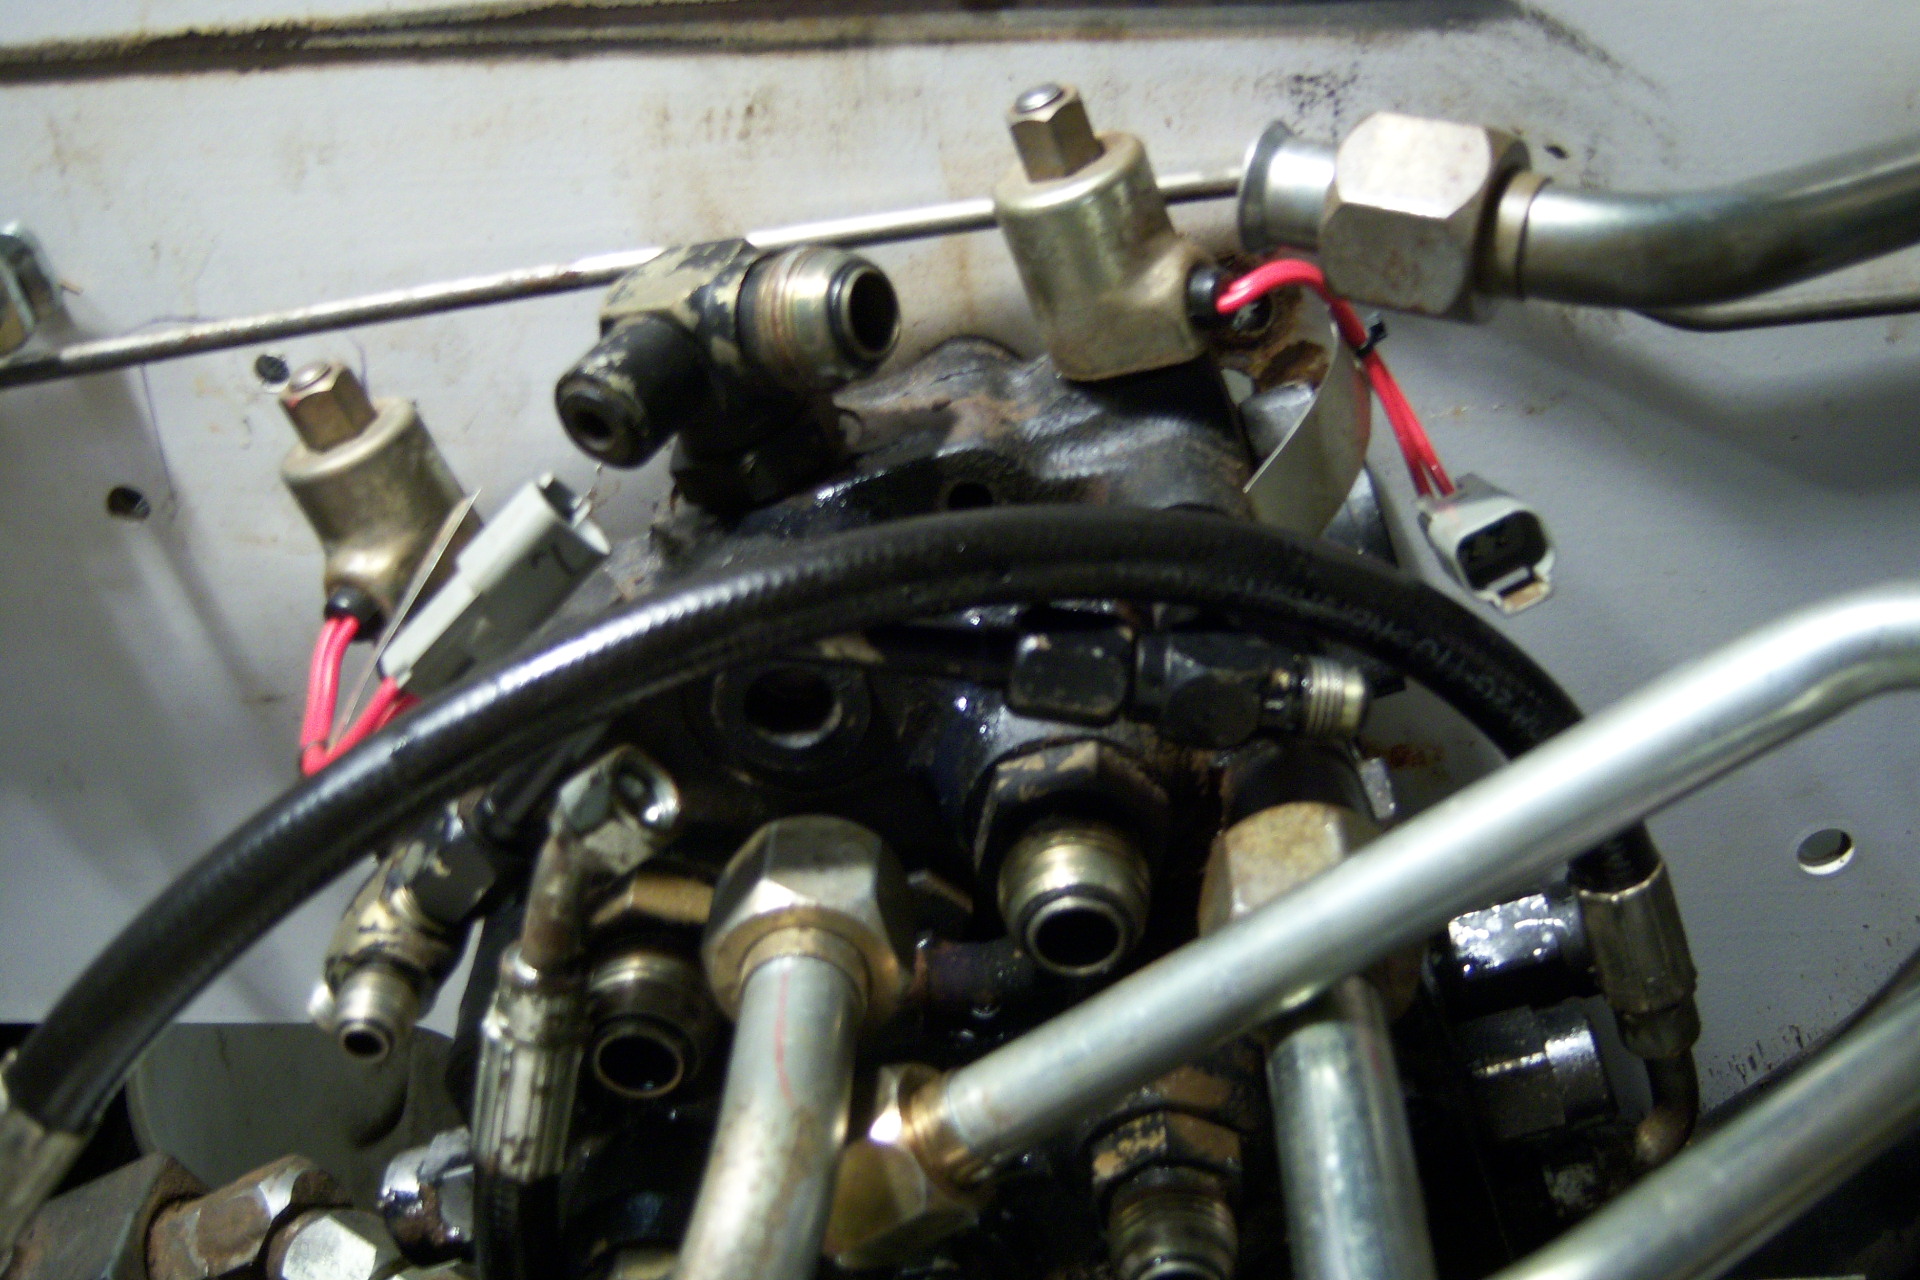
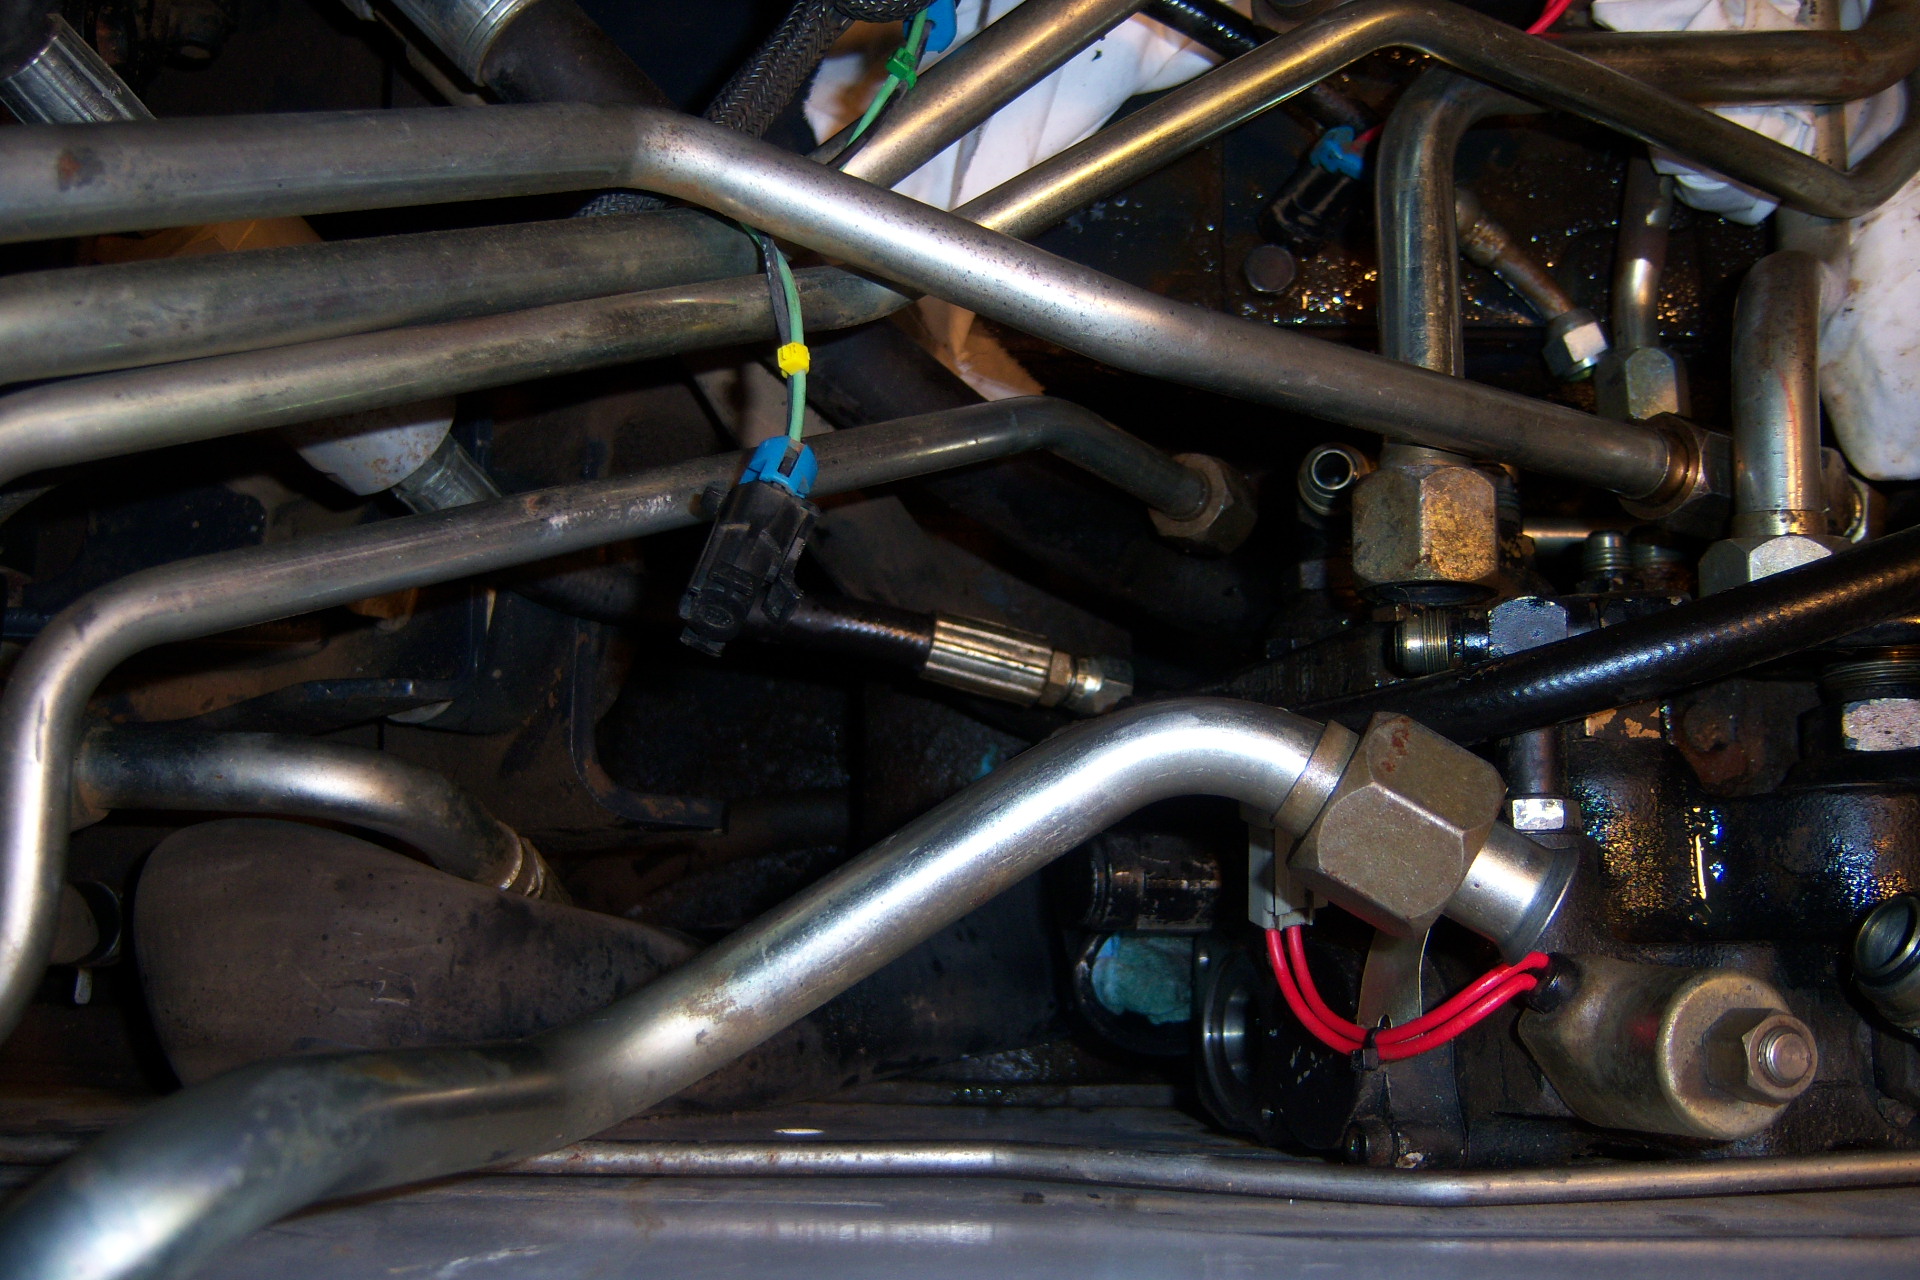
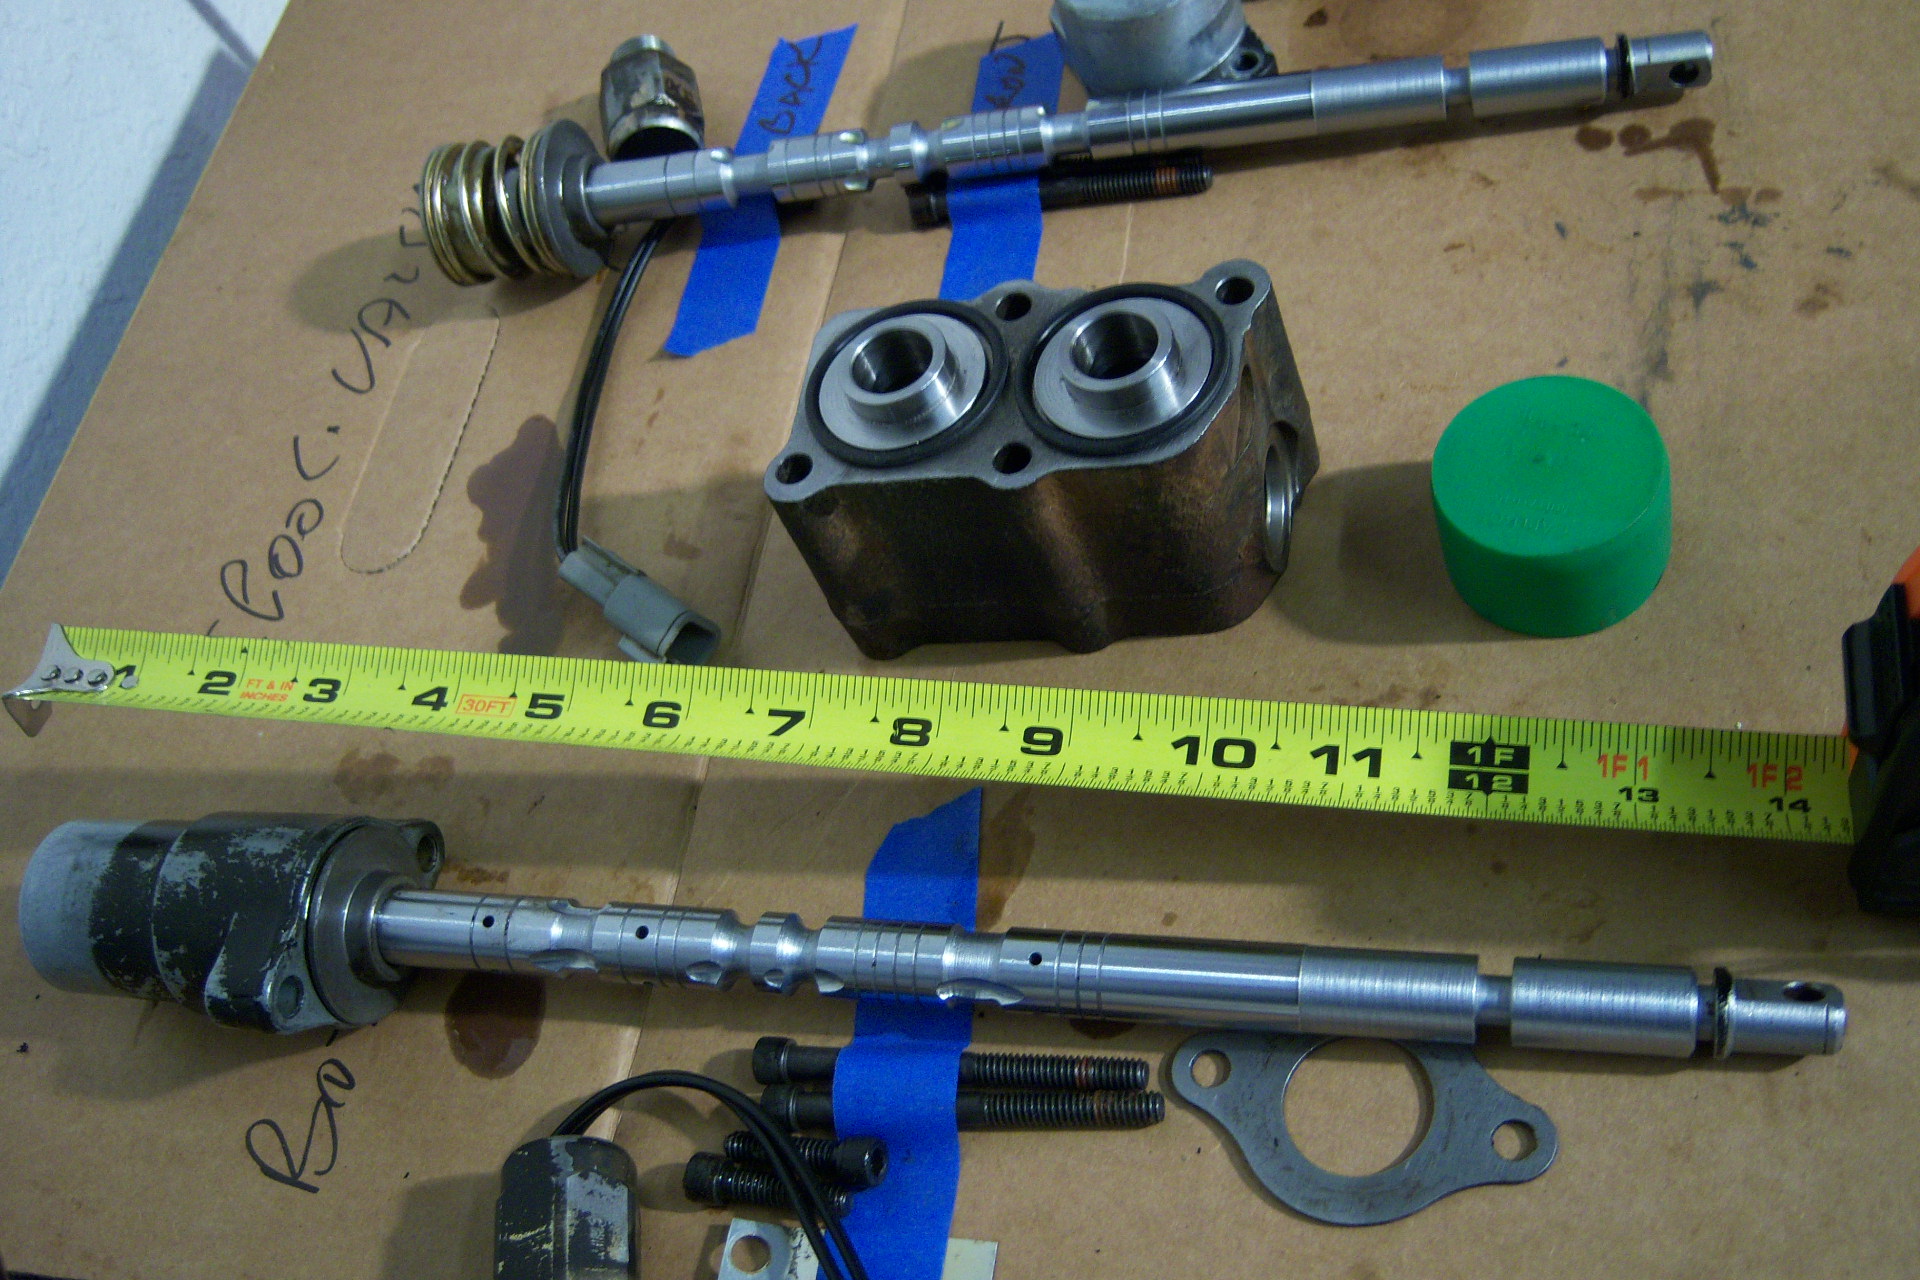
I need to remove the spool valves to replace the leaking spool valve Orings and seals. the tilt and lift are both leaking from the back. I've removed the front linkage, front hold down plates and block with the solenoid locks but there does not seem to be enough room behind the valve control body tor pull the spools out. the fuel fill hose and the tank vent hose are blocking the way. The hose clamp on the bottom of the fill hose is backwards and I cannot reach it from the back to remove the hose. It is impossible to move the hose to the side due to main supply hose to the hydraulic pump. Any one with any experience with this? I could remove the main supply hose and try to move the fuel supply hose and the vent hose to the side to create more clearance but the valves are 12" long and the distance between the valve body and hydraulic pump looks to be about 12". the bottom spool with the cap and ball/springs looks to be about 14" long. my unit does not have auto level, or at least it has never worked since I've had it. I've had it for 20 years. Do I need to remove the hydraulic control valve in this model to remove the spool valves? Has anyone had to do this before???


100_6320.JPG
100_6318.JPG
 
OP
OP
L

lonfu

Active member
Joined
Sep 28, 2014
Messages
27
finally got the spool valves pulled from the bobcat valve body. Had to disconnect all the hydraulic hard lines and tip the entire valve forward about 30 degrees, then tuck the fuel fill hose under the valve body. Had to loosen the hard line hold down hardware on the opposite side of the body. The 3" bolt is a cap bolt that stripped out so had to use vice grips to hold it while loosening. Removed pass side rear tire to give better access to pivot bolt and top valve body bolt. More room the access the valve body for me…. Left bottom valve body bolt in place and removed top one to allow it to pivot forward 30 degrees. Huge PIA to remove 15 hydraulic lines. Only way to remove the spool valves. Hydraulic oil draining into bottom of bobcat then into pan on ground.
 

Attachments

  • 100_6360.JPG
    100_6360.JPG
    748.3 KB · Views: 70
  • 100_6361.JPG
    100_6361.JPG
    750.1 KB · Views: 66
  • 100_6363.JPG
    100_6363.JPG
    749.5 KB · Views: 65
  • 100_6365.JPG
    100_6365.JPG
    755.4 KB · Views: 68
  • 100_6372.JPG
    100_6372.JPG
    738.1 KB · Views: 83
OP
OP
L

lonfu

Active member
Joined
Sep 28, 2014
Messages
27
Was able to rebuild the spool valves with no problem. Did the top valve first, lift spool, didn't remove the spring and bearings in this one, just cleaned and replaced oring square cut seal. Had slightly larger lip on one edge of the seal. Large lip towards valve body. Diff color from original but measured the same. Extra orings in kit for other applications. Used regular grease as prelube for entire project. Cleaned all parts. Then pulled the tilt spool apart, one of the ball bearings were stuck in the end, used a drill to ream out the hole and emery cloth to clean up the ends until they would drop through the hole. Small HF lock joint pliers, ground a grove in the tip of both sides, grease to hold the bearings in place on the pliers while compressing them into the spool valve. Slipped the cover over the 2nd time I tried it. New oring large edge towards the valve body. Then installed the spool valves into the valve body with no problems, had to turn them back and forth to get the seals to seat into the valve body correctly. Nice tight fit. Reassembled the rest of the valve parts, I used the original screws as I had cleaned them rather than the ones in the kit. Unfolded the fuel fill hose and rotated the valve body back into place, tightened up mounting bolts. Small plate in the bottom is worthless, too small to get a wrench in to remove bottom hose. To replace that hose need either a special wrench, make the hole bigger or pull the entire hose and valve body out. Reinstalled the fuel fill top with a regular hose clamp. Pulled what I believe are called the "case filters", a copper, pebble kind of filter for large particles. First side no problem, found about 6 tiny pieces of metal, looks like start up crapola from machining. Cleaned then reassembled. Pulled 2nd side that is hooked to the hydraulic pump and a huge dump of hydraulic fluid came out and hit the floor. What a mess…. Cleaned that filter too and it had perhaps 3 little scraps of metal in it. I've never cleaned or changed these in the 20 years that I've owned the machine. Again looked like machine particles from when it was made. Re-installed all the hard lines onto the valve body. I sprayed each with carb cleaner to clean the dirt particles from the orings. Each hard line unit had tiny little O-ring in the compression fitting tip. I didn't replace any of them. Will be surprised if a couple of them don't leak. So, cleaned each one with carb cleaner and then re-installed all lines to valve body, huge PIA. Trick was to loosen the hard line hold down bracket on the drive side of the machine. It allowed just enough movement to pull the lines off the valve body to allow rotation to remove the spool valves. I had to use a lock washer under the 3" cap bolt, hold down bracket, so I could lock it in place with vice grips while tightening the nut, cheesy engineering. Didn't have a new hex bolt in house to replace old one.
100_6360.JPG
100_6364.JPG
100_6366.JPG
 

hoardac

Member
Joined
Oct 13, 2009
Messages
13
I have got to replace mine on a 553 probably similar problems it is a 1997. Thanks for any knowledge that I can use from this. Unless you want to have a go at it and do it for me?
 

WVRoger

Member
Joined
Oct 2, 2022
Messages
15
I have got to replace mine on a 553 probably similar problems it is a 1997. Thanks for any knowledge that I can use from this. Unless you want to have a go at it and do it for me?
I just completed the seal replacement on a 99 751 and we rebuilt it in place. I had to unlock the hydraulic feed hose coming down to the tank, otherwise a minimum of disassemble. Took less than two hours. Tight quarters of course but if the problem is seals leaking you should be good!
 
Top