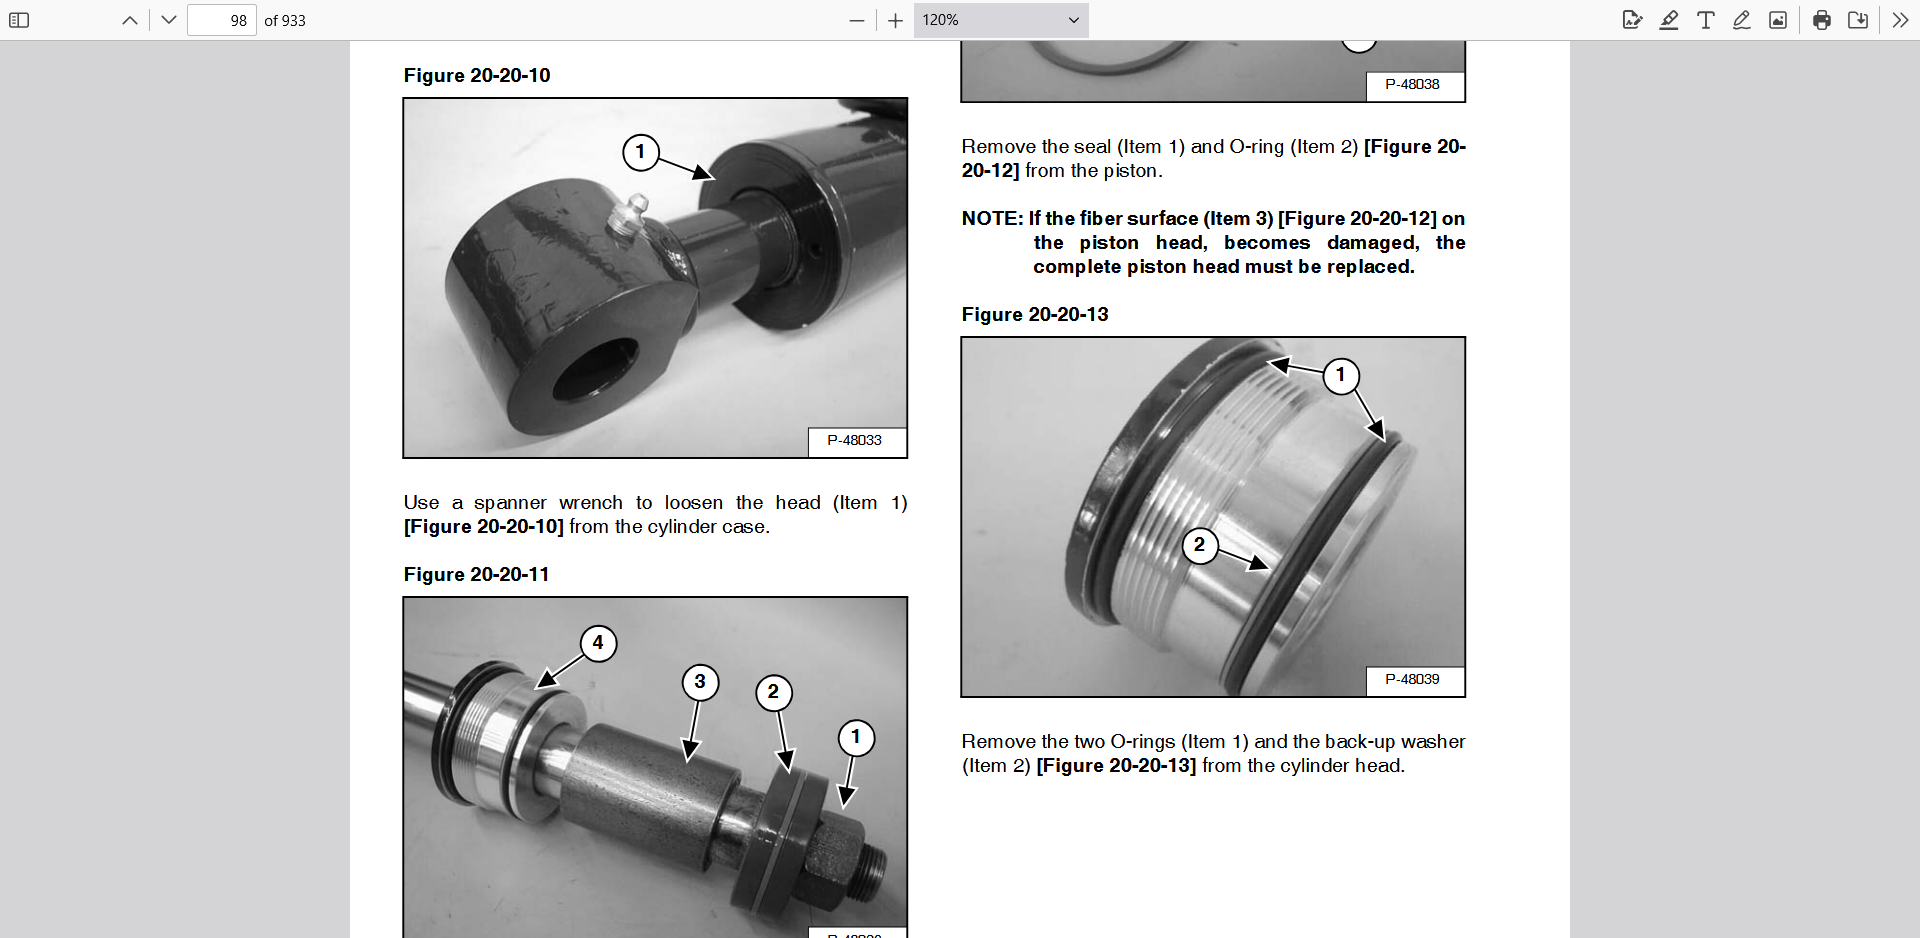
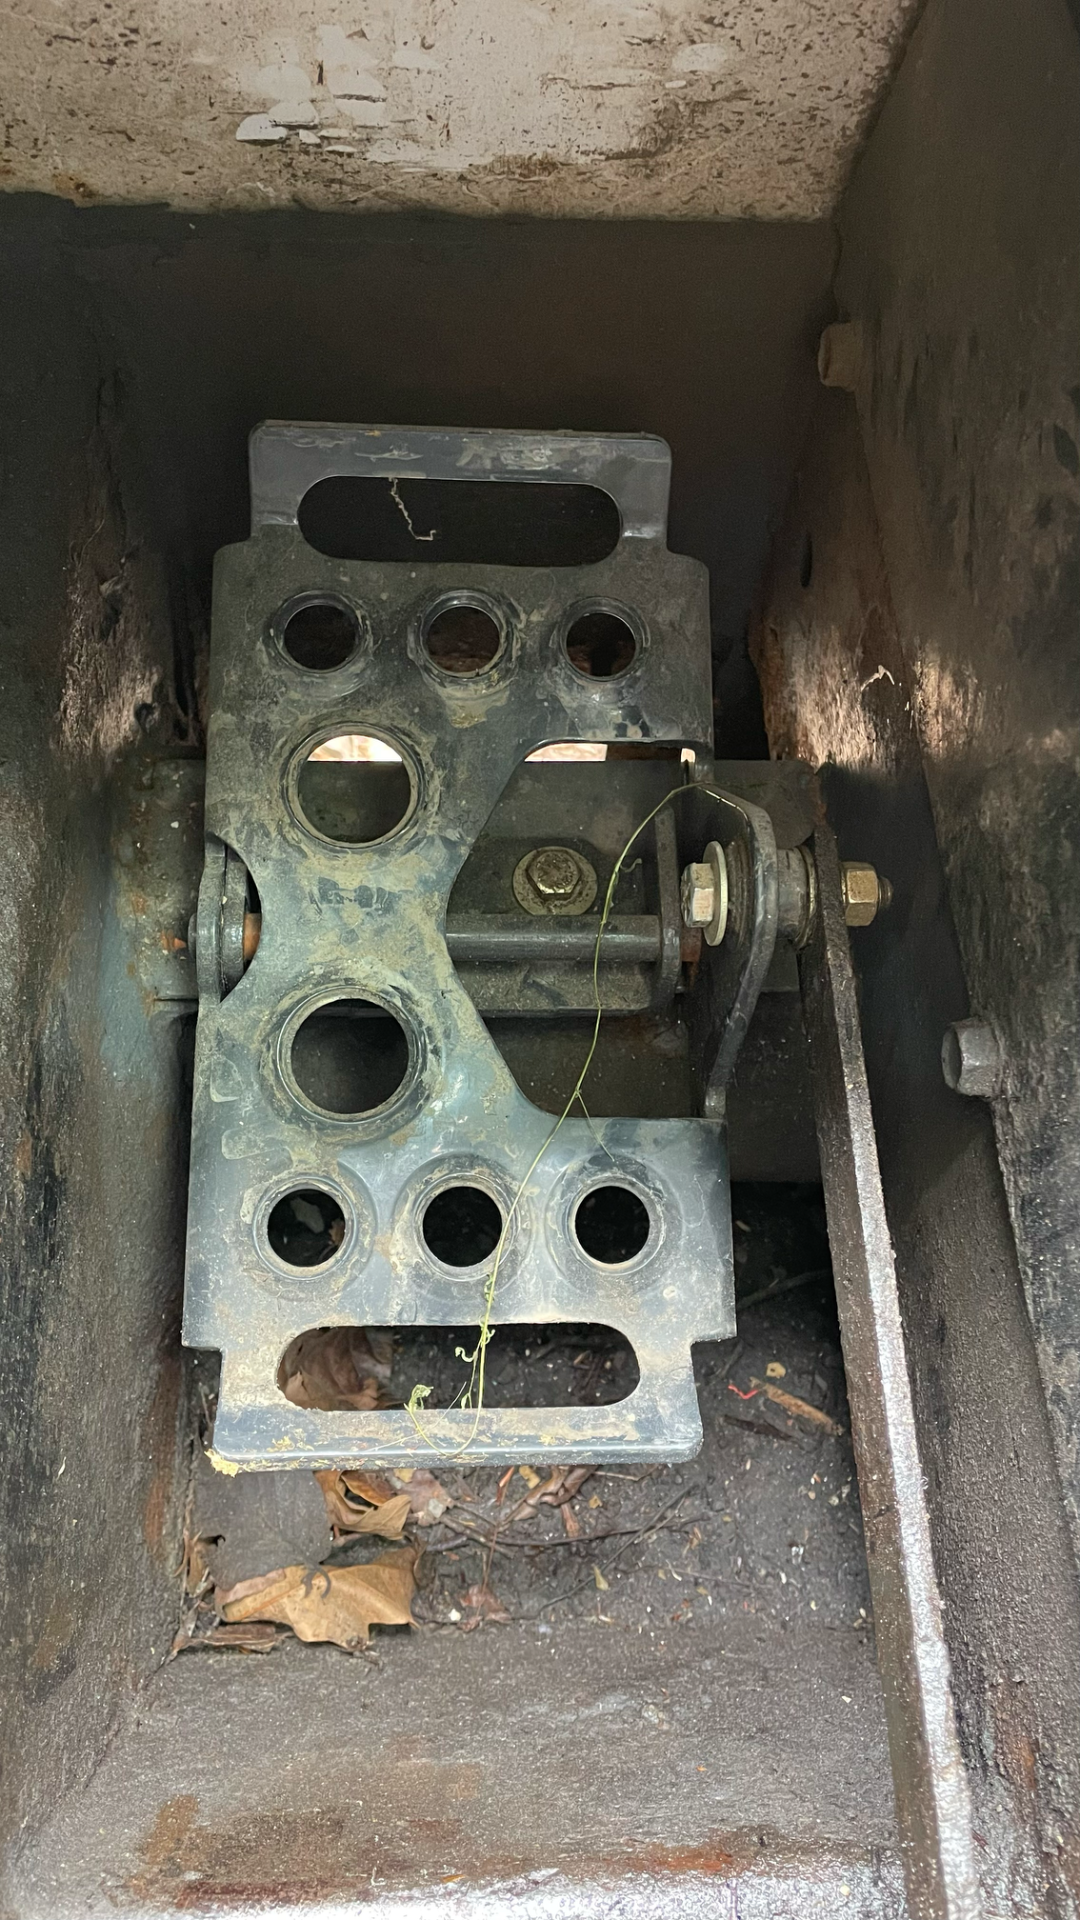
With regard to the the pedal issue:
I recently had to replace both foot pedals in my S175. This included fabricating a new mounting plate for each and welding them in place. This was all due to the prior owner not fixing the leaky roof window and front door seal, which caused excessive corrosion of the pedals and mounts, which finally broke loose.
It's tight in there, but workable. Working from both above and below the pedal, and reaching in from the front opening (there is an opening on both sides when the arms are raised and supported out of the way) to the space below and in front of the pedals, I was able to install and adjust both pedals. I did this alone, and found that I was able from above to wedge a wrench against the sidewall of the cab space around the pedal to hold the bolt while I went in through the lower front opening with a wrench and was then able to tighten the nut. This should work in reverse to remove the bolts. Keep in mind that the adjustment for the pedal location must be perfectly aligned so that you have full range of motion on the pedal. Otherwise, you may not have full flow when toeing/heeling the pedal. Mine was off enough at first that I could not dump the bucket.
It's not the most fun I've had working on this machine, but the redesigned pedal makes it somewhat easier to do. See photo of the right hand foot pedal


![Pampers Sensitive Baby Wipes, Clinically Proven, Fragrance Free, Unscented, Water Based, Hypoallergenic, Multi-Use, Hand Wipes 336 Wipes Total (6X Flip-Top Packs) [Packaging May Vary]](https://m.media-amazon.com/images/I/41KLBHu9CAL._SL500_.jpg)