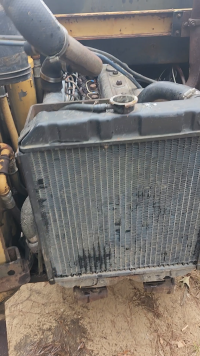
CL45 injection pump

Skidsteer Forum - Bobcat, New Holland, Case, John Deere

Help Support Skidsteer:

hotshot

Member
Joined
Oct 15, 2025
Messages
5
Hi I just got a CL45 and I have found that the injection pump is not sending fuel to the injectors. I have started to take the pump off and so far have gotten the timing cover off to realize there are only 2 timing marks on the crank gear and I can only get the 2 marks to line up with the cam not the pump. Would anyone know how to go about this. Thanks
 
I would get the engine manf. and model of that engine and do a search on the net,you might get lucky. even check you tube.
 
I would get the engine manf. and model of that engine and do a search on the net,you might get lucky. even check you tube.
I tried, I believe its a Shibaura LEP854A.
went ahead and pulled the pump off and took the back and side cover off and shure enough the shutoff valve was stuck tight. I worked it back and forth with the wooden handel of a hammer and got it moving. Ran out of daylight once I got the pump back together so ill put it back on tomorrow evening and hope it's fixed.🤞
 
I figured it out! I decided to bite the bullet and just tare into it, the shutoff valve was indeed stuck. I taped it with the handle of my hammer and got it moving. But it together and it's hard to get started but after that runs great.
 

Attachments

  • 20251018_151923.mp4
    20251018_151923.mp4
    5.9 MB
I figured it out! I decided to bite the bullet and just tare into it, the shutoff valve was indeed stuck. I taped it with the handle of my hammer and got it moving. But it together and it's hard to get started but after that runs great.
I'm wondering if your glow plugs may be burnt out? My CL45 starts up really easily after a 3 to 5 second key in heat position. Although I crank the engine over until I get oil pressure with the throttle in the off position when the engine is cold, then I increase the throttle a little bit, turn the key to heat for the 3 to 5 seconds, (3 seconds is usually long enough) turn the key to start and it fires right up. I do have to push a chrome button over my head, above my left shoulder when I turn the key to start for the engine to turn over. I believe this button overrides any safety switches that do not work on my loader. Check continuity to ground on the glow plugs. You may want to take the bus bar off that connects all the glow plugs together and test each one to ground separately. I would recommend not to use starting fluid! It's a good idea to grease the two universal joints that connect the engine to the hydraulic pumps, people tend not to grease them, then the u-joints fail and it's a big job at that point. It may be easiest just to take the seat pan out to get to the grease fitting.
 
As an Amazon Associate we earn from qualifying purchases. Product prices and availability are accurate as of the date/time indicated and are subject to change.
I'm wondering if your glow plugs may be burnt out? My CL45 starts up really easily after a 3 to 5 second key in heat position. Although I crank the engine over until I get oil pressure with the throttle in the off position when the engine is cold, then I increase the throttle a little bit, turn the key to heat for the 3 to 5 seconds, (3 seconds is usually long enough) turn the key to start and it fires right up. I do have to push a chrome button over my head, above my left shoulder when I turn the key to start for the engine to turn over. I believe this button overrides any safety switches that do not work on my loader. Check continuity to ground on the glow plugs. You may want to take the bus bar off that connects all the glow plugs together and test each one to ground separately. I would recommend not to use starting fluid! It's a good idea to grease the two universal joints that connect the engine to the hydraulic pumps, people tend not to grease them, then the u-joints fail and it's a big job at that point. It may be easiest just to take the seat pan out to get to the grease fitting.
I'm still figuring it out, just glad I got it running. My glow plugs have wires connecting them though not a bar, It may just need to run for a while to though, the injection pump was kinda dirty inside and I don't think the previous owner even knew it had oil in it. The left drive chain was also super loose and the oil in the chain box was like jello and wouldn't even stick to your finger. Haven't got to check the right side yet. Im just looking to get it working good and Im gonna grease everything i can find that moves. Not to worried about the little stuff like hours meter and all tha though.

P.S I texted you a video of it running.
Thanks, James
 
I'm still figuring it out, just glad I got it running. My glow plugs have wires connecting them though not a bar, It may just need to run for a while to though, the injection pump was kinda dirty inside and I don't think the previous owner even knew it had oil in it. The left drive chain was also super loose and the oil in the chain box was like jello and wouldn't even stick to your finger. Haven't got to check the right side yet. Im just looking to get it working good and Im gonna grease everything i can find that moves. Not to worried about the little stuff like hours meter and all tha though.

P.S I texted you a video of it running.
Thanks, James
Glow plugs have a resistance of one ohm, higher resistance indicates trouble. The final drive issue, I wonder how badly the chains are worn from lack of lubrication. I use chainsaw bar oil in my final drives, it has the tack additive that keeps the oil on the chain as it revolves, I believe it was a gallon and a half per final drive case. I drilled a hole at the front of the final drive case at the bottom facing forward and installed a magnetic drain plug, half inch, fine thread, (use a nylon washer and silicone the plug in place between oil changes), compensate for the thickness of the metal in the bottom of the chain case and measure up to drill your hole for your new drain. Back the rear wheels up on something so that everything runs down toward the front of the loader, that way you can clean out the chain cases well, it can take a lot of scrubbing, diesel fuel might make a good solvent. It's a lot easier to change the final drive oil with the new drain plugs in the front. You might want to run some solvent or diesel fuel to clean the old Chains before you add clean oil. Adjusting the chains on the top of the chain case, loosen the three nuts on the top of the adjuster, just a little bit, loosen the lock nut, the one toward the rear of the machine a way back on the threads, slowly tighten the nut that tightens then chain, the one toward the bucket, checking the chain as you do it, it tightens up really fast. If you ever have the tops of the chain adjuster off, they say to use number two form a gasket, the stuff that never sets up completely. But the chain adjuster would fall down into the chain case so you probably don't want to do that right now. Later to check the chain tension you can use the bucket to lift the front of the loader up in the air so that all the oil goes to the back of the chain case and pull out one of the plugs under the inspection cover between the wheels, I don't remember if it was the drain plug or the level plug but then stick a steel rod in the hole and push up and down on the bottom of the chain to tell it's tightness. You don't want it overly tight, but if it's too loose you'll hear it banging on the bottom of the chain case, that's definitely too loose. If you get a service manual do not use what they tell you to adjust the chains, by rocking the front wheel back and forth when it's off the ground. When they were new you could do that, but the wear on the axles where the keys are that hold the sprockets to the axles become worn and you will over tighten the chain if you use that wheel play as described in the manual. Most of the old axles actually break a chunk out of the axle between the two 1/2 inch keys. I got new axles and sprockets years ago from Thomas. The width of the key ways was right on the money in both the axles and sprockets but there was a space on top that I had to shim so that the key would not wear and rock and try to break the key way out again. Three out of four of my original axles were broken between the key ways at 12:00 and 3:00 o'clock. The new axles had keyways at 12:00 and 5:00 o'clock I believe .The way you can tell if you got the new axles in your machine is the end of the axle in the center of the wheel is smooth, the original axles had a circular weld the diameter of the actual axle where the other piece that had the wheel studs was welded on. The chains in the final drive are number 100 chain. A 10 ft length will do one side, but the other side is longer and you have to get a few more links
 
Glow plugs have a resistance of one ohm, higher resistance indicates trouble. The final drive issue, I wonder how badly the chains are worn from lack of lubrication. I use chainsaw bar oil in my final drives, it has the tack additive that keeps the oil on the chain as it revolves, I believe it was a gallon and a half per final drive case. I drilled a hole at the front of the final drive case at the bottom facing forward and installed a magnetic drain plug, half inch, fine thread, (use a nylon washer and silicone the plug in place between oil changes), compensate for the thickness of the metal in the bottom of the chain case and measure up to drill your hole for your new drain. Back the rear wheels up on something so that everything runs down toward the front of the loader, that way you can clean out the chain cases well, it can take a lot of scrubbing, diesel fuel might make a good solvent. It's a lot easier to change the final drive oil with the new drain plugs in the front. You might want to run some solvent or diesel fuel to clean the old Chains before you add clean oil. Adjusting the chains on the top of the chain case, loosen the three nuts on the top of the adjuster, just a little bit, loosen the lock nut, the one toward the rear of the machine a way back on the threads, slowly tighten the nut that tightens then chain, the one toward the bucket, checking the chain as you do it, it tightens up really fast. If you ever have the tops of the chain adjuster off, they say to use number two form a gasket, the stuff that never sets up completely. But the chain adjuster would fall down into the chain case so you probably don't want to do that right now. Later to check the chain tension you can use the bucket to lift the front of the loader up in the air so that all the oil goes to the back of the chain case and pull out one of the plugs under the inspection cover between the wheels, I don't remember if it was the drain plug or the level plug but then stick a steel rod in the hole and push up and down on the bottom of the chain to tell it's tightness. You don't want it overly tight, but if it's too loose you'll hear it banging on the bottom of the chain case, that's definitely too loose. If you get a service manual do not use what they tell you to adjust the chains, by rocking the front wheel back and forth when it's off the ground. When they were new you could do that, but the wear on the axles where the keys are that hold the sprockets to the axles become worn and you will over tighten the chain if you use that wheel play as described in the manual. Most of the old axles actually break a chunk out of the axle between the two 1/2 inch keys. I got new axles and sprockets years ago from Thomas. The width of the key ways was right on the money in both the axles and sprockets but there was a space on top that I had to shim so that the key would not wear and rock and try to break the key way out again. Three out of four of my original axles were broken between the key ways at 12:00 and 3:00 o'clock. The new axles had keyways at 12:00 and 5:00 o'clock I believe .The way you can tell if you got the new axles in your machine is the end of the axle in the center of the wheel is smooth, the original axles had a circular weld the diameter of the actual axle where the other piece that had the wheel studs was welded on. The chains in the final drive are number 100 chain. A 10 ft length will do one side, but the other side is longer and you have to get a few more links
Thanks for the info
 
Thanks for the info
I may have been wrong about the chain length for the CL45 final drive. The Thomas T133 parts manual from serial number LE002183 to LE006074 says that the left hand final drive chain is 103 links including the connector (Google says that equals 10 ft 8.75 inches) the right hand final drive chain is 113 links including connector (Google says 11 ft 9.25 in) both are RS100 chain. RS I found out means roller standard. Ford's serial numbers are different than Thomas. The above Thomas parts manual matches up pretty good with my CL45, it's serial number is YG 01119, the aluminum plate on the inside of the fuel tank to your right when you open up the cover for the engine also gives a unitu number, mine is 5 E 01, this means it was manufactured in 1985, May (count the letters from A up to get the month) 01 is the day of the month. If your final drives had no oil, I would check the idler sprocket on the chain adjuster, if you can reach in and wiggle it more than a little bit, that might mean that the roller bearing is bad. Thomas part numbers for the cage roller bearing is 22950, for The idler shaft, is 19813 and The idler sprocket 10T. is 22302. You may have to add zeros to the front of these part numbers to make them six digits long, Thomas started doing that at a certain date. The guys that took over the Thomas parts still have some parts, check with them, now with the tariffs, I don't know about the prices. But in the past if you checked with Ford or New Holland they still list some of the parts but they cost three times as much at least in the past they did. Ford has its own part numbers for the CL45, so your local dealer can look it up for you.
 

Latest posts

Back
Top