M700 rebuild and restore project

Help Support SkidSteer Forum:

OP
OP
HanSolo

HanSolo

Well-known member
Joined
Sep 11, 2012
Messages
299
Working load 1200 lbs. Tipping load 2500 lbs. 30 hp. air cooled Wisconsin VH4D engine. Weight 4230 lbs.
Update - Last weekend I had a buddy weld the crack under the right hand boom up. He did a great job and I'm confident that will hold for a long time. I did notice some smaller cracks where the diagonal cross-section at the end of the boom joins. Those certainly could be caused by uneven stress (prying a stump with the corner of the bucket for example). Those cracks are very small but I'm thinking I'll address them when I replace the tilt hoses on both sides which are pretty toasty. Access to those areas will be much better with those hoses off. The only other issues to report is the carb began seeping fuel after running the machine hard for several hours. I found the four screws holding the bowl on were loose so hopefully tightening those will solve that issue. I'd like to rebuild the carb but one of the bolts securing it to the intake manifold is pretty frozen. I'd have to cut off the muffler to get to it and I know that OEM muffler doesn't exist anymore.
 

Tazza

Moderator
Staff member
Joined
Dec 7, 2004
Messages
16,839
Update - Last weekend I had a buddy weld the crack under the right hand boom up. He did a great job and I'm confident that will hold for a long time. I did notice some smaller cracks where the diagonal cross-section at the end of the boom joins. Those certainly could be caused by uneven stress (prying a stump with the corner of the bucket for example). Those cracks are very small but I'm thinking I'll address them when I replace the tilt hoses on both sides which are pretty toasty. Access to those areas will be much better with those hoses off. The only other issues to report is the carb began seeping fuel after running the machine hard for several hours. I found the four screws holding the bowl on were loose so hopefully tightening those will solve that issue. I'd like to rebuild the carb but one of the bolts securing it to the intake manifold is pretty frozen. I'd have to cut off the muffler to get to it and I know that OEM muffler doesn't exist anymore.
I think cracks there are pretty normal, the arms on my 743 were horrible when i got them, i did a few metres of welding to fix them all after gouging with a plasma.....
That's generally how it goes, you get it all back together then things begin to leak. Hopefully the screws is all it needed.
As for the carb, if it runs sweet still, why bother kitting it? I'd run a can or two of carby cleaner through it if you are concerned. If it was running pooly i'd totally be with you on the rebuild.
 
OP
OP
HanSolo

HanSolo

Well-known member
Joined
Sep 11, 2012
Messages
299
I think cracks there are pretty normal, the arms on my 743 were horrible when i got them, i did a few metres of welding to fix them all after gouging with a plasma.....
That's generally how it goes, you get it all back together then things begin to leak. Hopefully the screws is all it needed.
As for the carb, if it runs sweet still, why bother kitting it? I'd run a can or two of carby cleaner through it if you are concerned. If it was running pooly i'd totally be with you on the rebuild.
Tightening the screws on the carb did stop the fuel weeping. I like those kind of fixes! Yesterday I replaced all four bucket tilt hoses. Of course it started snowing as soon as I got started but I keep everything covered and sealed so no hydraulic contamination. But when I was starting the machine up later - I noticed some sparks arcing from the choke nob to the ROPS. That's right over the wire harness to the control panel so I guess I've got a short. As I've been working on this machine, I've noticed that most of the wires are REALLY degraded. UV hasn't been kind to those 40 year old wires. So I'm going to re-wire the whole machine to avoid big problems (as in FIRE!). Shouldn't really be hard. I've already charted out the harness and individual wires color codes and connections. These early machines don't have a whole lot of electrical components. I'm going to document the process so other 600/700 series owners can benefit.
 

Tazza

Moderator
Staff member
Joined
Dec 7, 2004
Messages
16,839
Tightening the screws on the carb did stop the fuel weeping. I like those kind of fixes! Yesterday I replaced all four bucket tilt hoses. Of course it started snowing as soon as I got started but I keep everything covered and sealed so no hydraulic contamination. But when I was starting the machine up later - I noticed some sparks arcing from the choke nob to the ROPS. That's right over the wire harness to the control panel so I guess I've got a short. As I've been working on this machine, I've noticed that most of the wires are REALLY degraded. UV hasn't been kind to those 40 year old wires. So I'm going to re-wire the whole machine to avoid big problems (as in FIRE!). Shouldn't really be hard. I've already charted out the harness and individual wires color codes and connections. These early machines don't have a whole lot of electrical components. I'm going to document the process so other 600/700 series owners can benefit.
When i got my 743 it was burnt, the wiring went with it. I think it took a total if 12 wires from engine to dash, yours will probably be even less. Should be a nice and easy repair.
I'm totally with you on the no fire wanted. So much work has been done, you don't want that going up in a cloud of smoke.
 
OP
OP
HanSolo

HanSolo

Well-known member
Joined
Sep 11, 2012
Messages
299
When i got my 743 it was burnt, the wiring went with it. I think it took a total if 12 wires from engine to dash, yours will probably be even less. Should be a nice and easy repair.
I'm totally with you on the no fire wanted. So much work has been done, you don't want that going up in a cloud of smoke.
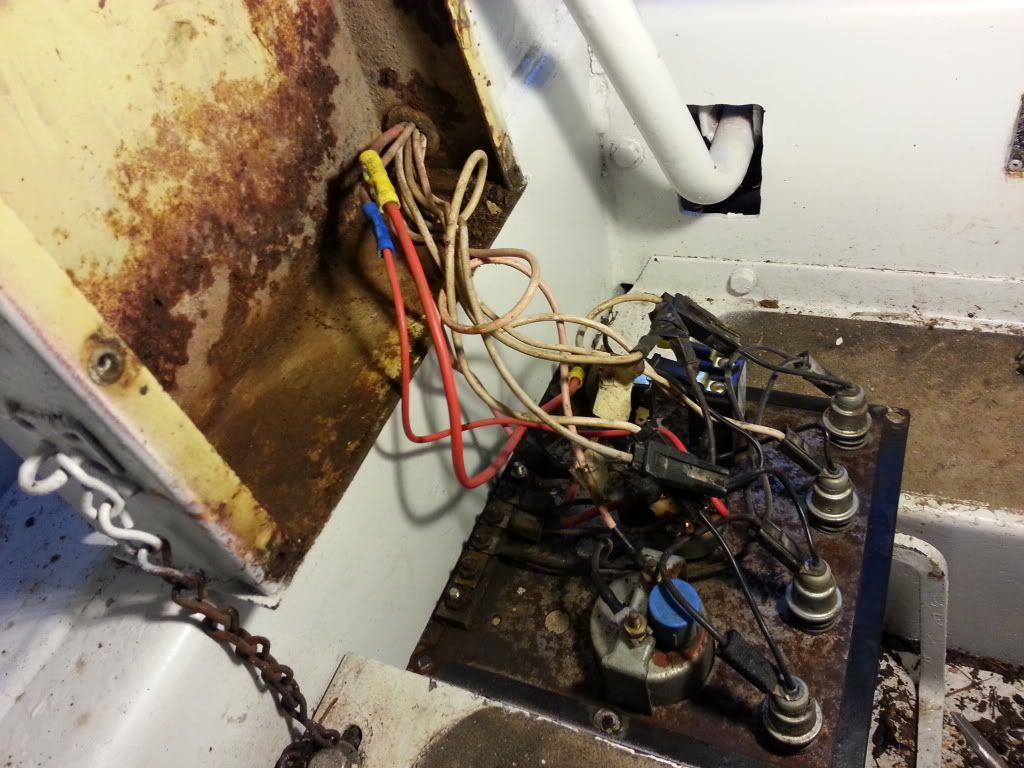
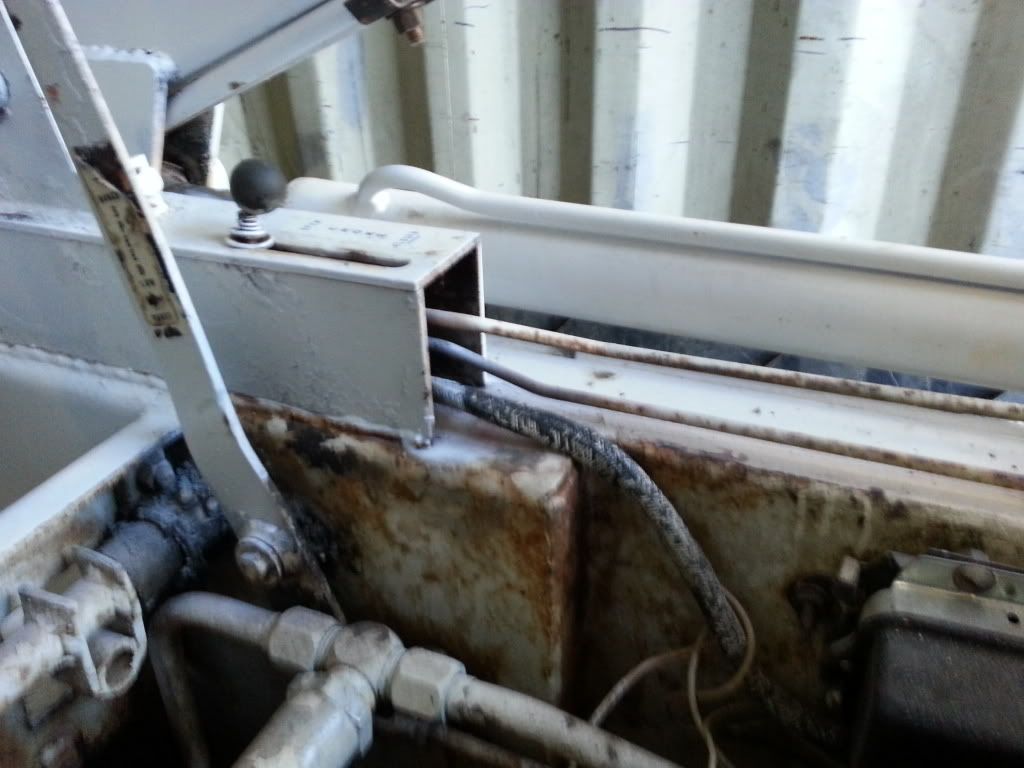
This is the area where I suspect there's a short. When starting a spark was observed from the chock lever to the ROPS.
20130204_164425_zps5b90230c.jpg
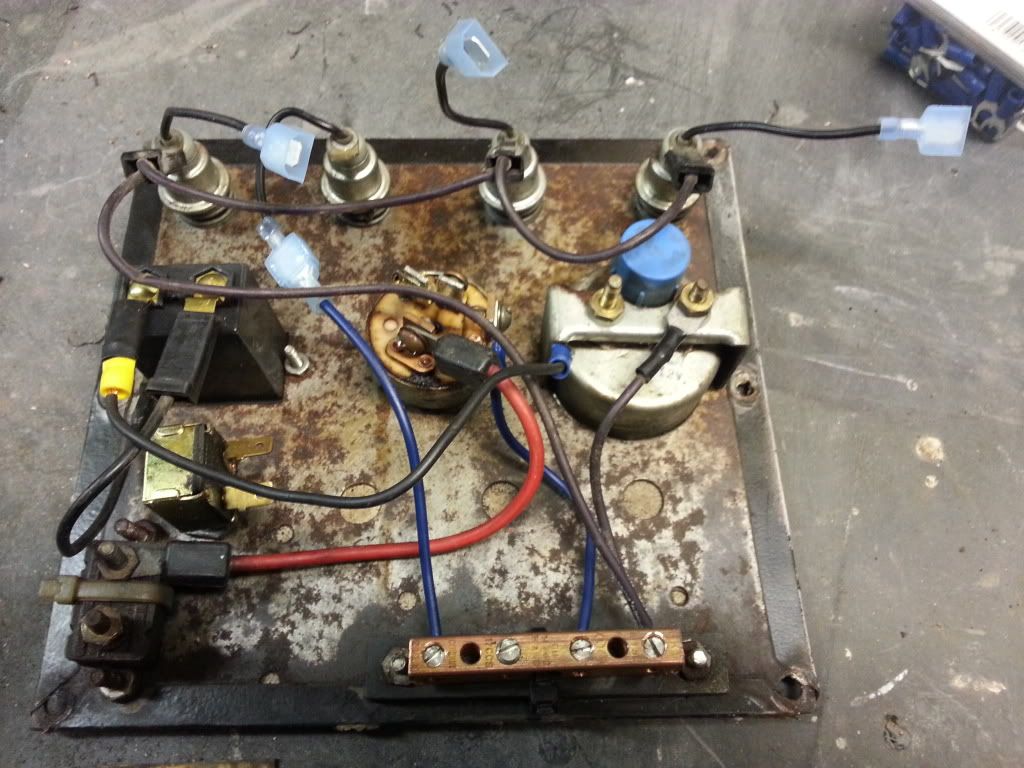
When I opened up the control panel (which I've been into several times before) there's no cracked insulation. There's a few splices by the previous owner and I re-routed the new hour meter to the starter switch. I also tested all the indicator lamps early in the re-buils to confirm good bulbs. Note heavy surface rust in the compartment that will need to be addressed.
20130204_170208_zps7543d0c1.jpg
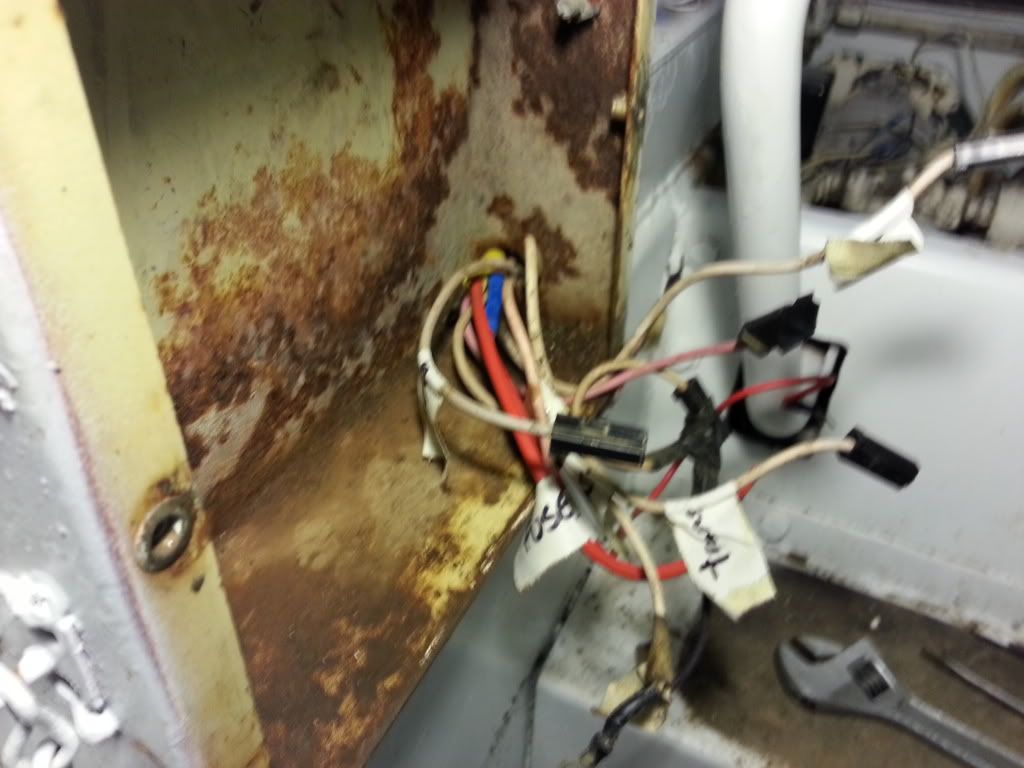
Next step was to label both ends of each wire because the color codes are degraded. Then disconnect fropm the panel and connected parts.
20130204_172134_zps24c45ca6.jpg
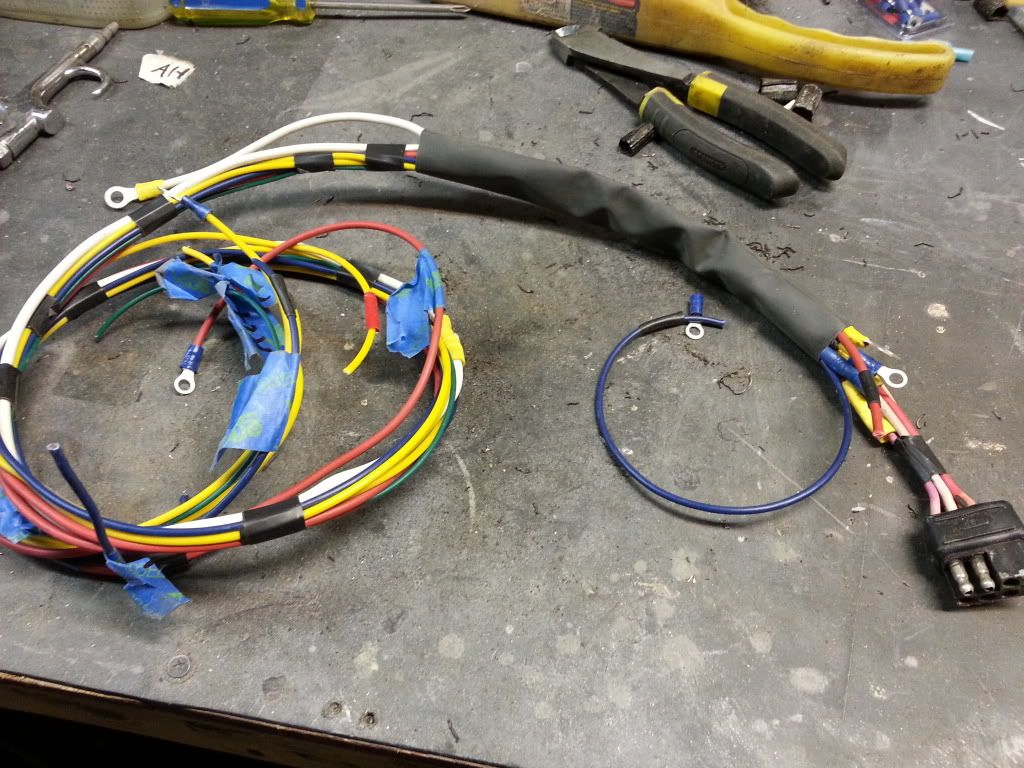
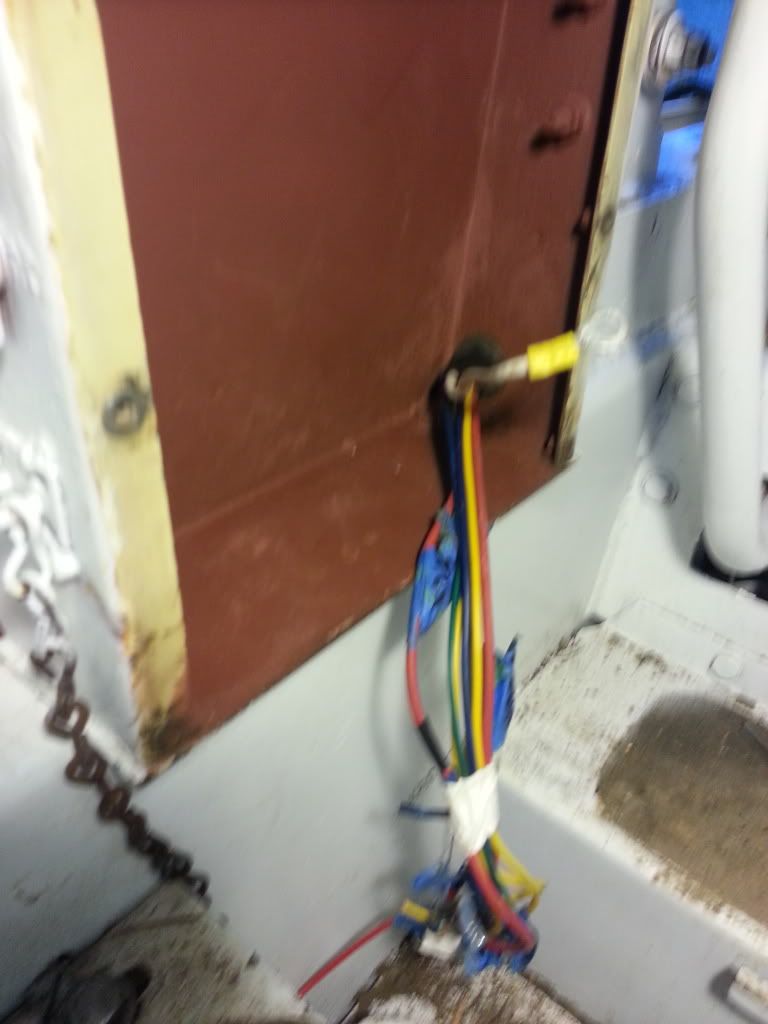
I then pulled the old harness out of the control box and disconnected at the multi-connector in the engine compartment. That multi-connector is in fairly good shape so I'm going to slice back into it until I can source an appropriate replacement. When I replace the harness on the other side (connector to engine components) I'll make sure there's extra length for the connector replacement. I took the old harness to my work bench and began stripping the outer sleeve. I noted that the color coding was much better under the sleeve but still doesn't quite match the service manual. I'm glad I made a chart to keep track of what connects to what. I'll also add notes of the new color wire to that (I couldn't source all the OEM color cable at local auto parts). So I'm basically stripping out one by one the old wires and matching the new wires length. After I'm done with all - then I begin by wrapping the new bundle with electrical tape every 6" or so. When I've got the bundle "tamed down" I then start slidding on heat shrink tubing.
20130204_193819_zps889cf92a.jpg
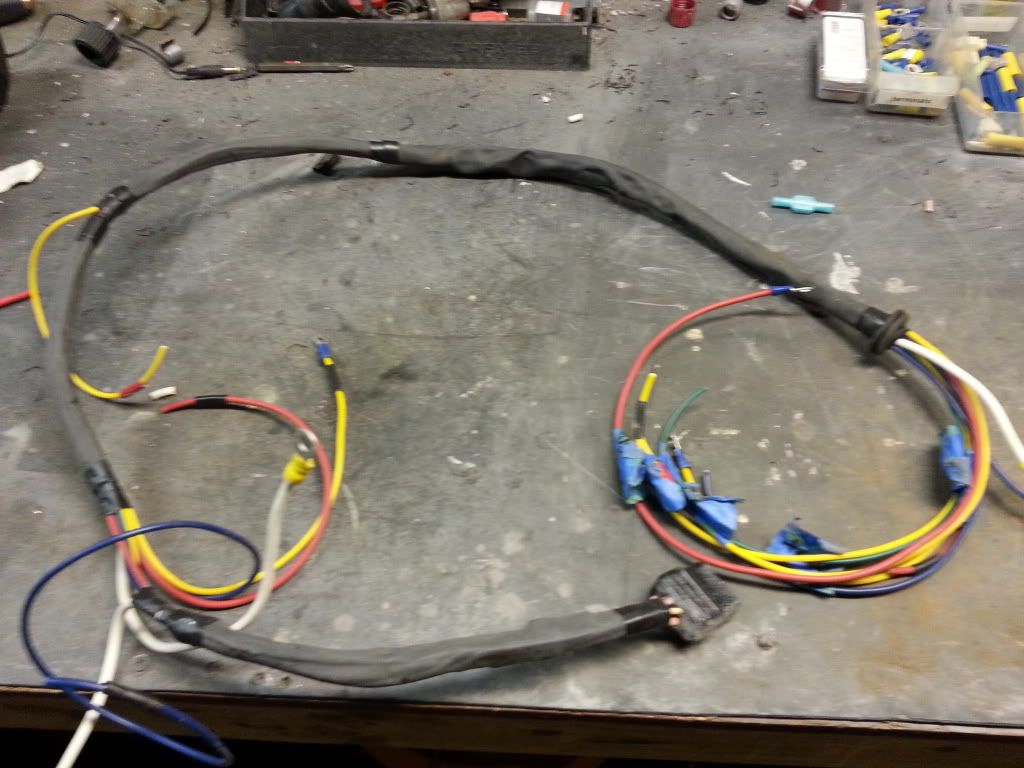
Properly bundled.
20130204_200222_zps9bb806b9.jpg
Next step was to clean up the control panel and install the correct connectors on the wires. There's a bus bar that was really corroded so I found a copper replacement and mounted that in the same position (after grinding off the corroded terminals of the old). I replaced most of the connectors on the indicator lights, cleaned the terminals on the starter switch and fuseable link.
20130206_193531_zpsf84a4501.jpg
I'm not going to address to corrosion on the back side of the front panel. It's surface and I'm concerned that removing all the lights, meters, switch - will actually be more trouble than it's worth. Probably break more stuff in doing so... So just liberal application of PB Blaster. Tonight I'll install the new harness.
 

Tazza

Moderator
Staff member
Joined
Dec 7, 2004
Messages
16,839
This is the area where I suspect there's a short. When starting a spark was observed from the chock lever to the ROPS.

When I opened up the control panel (which I've been into several times before) there's no cracked insulation. There's a few splices by the previous owner and I re-routed the new hour meter to the starter switch. I also tested all the indicator lamps early in the re-buils to confirm good bulbs. Note heavy surface rust in the compartment that will need to be addressed.

Next step was to label both ends of each wire because the color codes are degraded. Then disconnect fropm the panel and connected parts.

I then pulled the old harness out of the control box and disconnected at the multi-connector in the engine compartment. That multi-connector is in fairly good shape so I'm going to slice back into it until I can source an appropriate replacement. When I replace the harness on the other side (connector to engine components) I'll make sure there's extra length for the connector replacement. I took the old harness to my work bench and began stripping the outer sleeve. I noted that the color coding was much better under the sleeve but still doesn't quite match the service manual. I'm glad I made a chart to keep track of what connects to what. I'll also add notes of the new color wire to that (I couldn't source all the OEM color cable at local auto parts). So I'm basically stripping out one by one the old wires and matching the new wires length. After I'm done with all - then I begin by wrapping the new bundle with electrical tape every 6" or so. When I've got the bundle "tamed down" I then start slidding on heat shrink tubing.

Properly bundled.

Next step was to clean up the control panel and install the correct connectors on the wires. There's a bus bar that was really corroded so I found a copper replacement and mounted that in the same position (after grinding off the corroded terminals of the old). I replaced most of the connectors on the indicator lights, cleaned the terminals on the starter switch and fuseable link.

I'm not going to address to corrosion on the back side of the front panel. It's surface and I'm concerned that removing all the lights, meters, switch - will actually be more trouble than it's worth. Probably break more stuff in doing so... So just liberal application of PB Blaster. Tonight I'll install the new harness.
Very nice write up.
With mine, i used cable ties and split tubing. I also cheated and used the same colour wire and used a meter to work out what goes where on the dash, didn't take very long.
I too couldn't find a connector between the dash and engine bay, i ended up getting two smaller ones and using them, i couldn't get a single one with enough connectors.
 
OP
OP
HanSolo

HanSolo

Well-known member
Joined
Sep 11, 2012
Messages
299
Very nice write up.
With mine, i used cable ties and split tubing. I also cheated and used the same colour wire and used a meter to work out what goes where on the dash, didn't take very long.
I too couldn't find a connector between the dash and engine bay, i ended up getting two smaller ones and using them, i couldn't get a single one with enough connectors.
I got it all back together last night. Pulling the new harness through and getting the replacement grommet back in place was the most troublesome. I shouldn't have put the terminals on the panel end of the harness because it just made it harder to pull through. Another note - the bus bar is hot so you want to insulate that with some electrical tape due to close proximedity to the metal encloser. I only took one photo due to time. I also replaced the ground wire from the alternator to voltage regulator mount point. In fact, that may have been the spark generator from the beginning! Next step will be to replace the other end of the harness from the multi-connector to coil, starter, etc.
20130207_170857_zps7b324adf.jpg
 

CaptKismet

New member
Joined
Feb 21, 2013
Messages
1
Wow! You sure were put through the paces. I bought an M-700 in late 2005 for $2k from a retired guy moving to Florida, but I was a bit luckier than you. The engine oil seal on the flywheel end was shot and the impeller would spray oil under the engine shrouds. I though the cylinder gaskets were gone. After I pulled the engine and cleaned it up and the cleaned the rest of the machine up (it took two weeks). I discovered and fixed the seal, replaced the u-joints, replaced the plugs, cap, point, condenser, wires and the engine was good to go. Later I hade a problem with the regulator, but it was just connection problems, easy fix. I've since added a headlight, low oil pressure alarm, voltmeter and DC receptical for a heated seat. Since then my M-700 has been a very good to me. I use it mostly for snow removal. During a storm about two weeks ago a ran for seven hours straight while I helped my neighbors out. What a machine! I was told to run 15W-40 High Detergent oil in the Wisconson engine. I use straight 30W oil as the hydraulic oil. I have a small leak at the left rear. I assume it is a wheel seal, but I'm not sure. You've been much nicer to you machine, I painted the wheels Bobcat orange only because it had a good combination of white paint and rust spots that made it blend into the scenery during winter storms. I was scared I was going to get hit some day by a snow plow. I have only one speed and I never really looked into why that is. I assume the problem is in the linkage from the control lever. It has never really been an issue fo me, but a couple of day ago I drove it a quarter mile away to dig out the local Boy Scout camp. It took me twenty minutes to get there. Any ideas? Congratulation!
 
OP
OP
HanSolo

HanSolo

Well-known member
Joined
Sep 11, 2012
Messages
299
Wow! You sure were put through the paces. I bought an M-700 in late 2005 for $2k from a retired guy moving to Florida, but I was a bit luckier than you. The engine oil seal on the flywheel end was shot and the impeller would spray oil under the engine shrouds. I though the cylinder gaskets were gone. After I pulled the engine and cleaned it up and the cleaned the rest of the machine up (it took two weeks). I discovered and fixed the seal, replaced the u-joints, replaced the plugs, cap, point, condenser, wires and the engine was good to go. Later I hade a problem with the regulator, but it was just connection problems, easy fix. I've since added a headlight, low oil pressure alarm, voltmeter and DC receptical for a heated seat. Since then my M-700 has been a very good to me. I use it mostly for snow removal. During a storm about two weeks ago a ran for seven hours straight while I helped my neighbors out. What a machine! I was told to run 15W-40 High Detergent oil in the Wisconson engine. I use straight 30W oil as the hydraulic oil. I have a small leak at the left rear. I assume it is a wheel seal, but I'm not sure. You've been much nicer to you machine, I painted the wheels Bobcat orange only because it had a good combination of white paint and rust spots that made it blend into the scenery during winter storms. I was scared I was going to get hit some day by a snow plow. I have only one speed and I never really looked into why that is. I assume the problem is in the linkage from the control lever. It has never really been an issue fo me, but a couple of day ago I drove it a quarter mile away to dig out the local Boy Scout camp. It took me twenty minutes to get there. Any ideas? Congratulation!
Thanks for the comments Capt! I believe the M700 is a good machine for what was Bobcat's first shot at hydrostatic drive. I found out that the VH4D Wisconsin is a work horse in all types of industrial, commercial and construction equipment. A good engine that will last decades if serviced regularly. Regarding the two speed issue - my lever was a bit sticky the first time I tried to put it in high. But after a couple of speed changes it loosened up nicely. I'd take a close look at the linkage and lubricate well. My experience so far is the hydraulic components on these machines is very robust but will stiffen up if the machine sits for long periods.
 
OP
OP
HanSolo

HanSolo

Well-known member
Joined
Sep 11, 2012
Messages
299
Thanks for the comments Capt! I believe the M700 is a good machine for what was Bobcat's first shot at hydrostatic drive. I found out that the VH4D Wisconsin is a work horse in all types of industrial, commercial and construction equipment. A good engine that will last decades if serviced regularly. Regarding the two speed issue - my lever was a bit sticky the first time I tried to put it in high. But after a couple of speed changes it loosened up nicely. I'd take a close look at the linkage and lubricate well. My experience so far is the hydraulic components on these machines is very robust but will stiffen up if the machine sits for long periods.
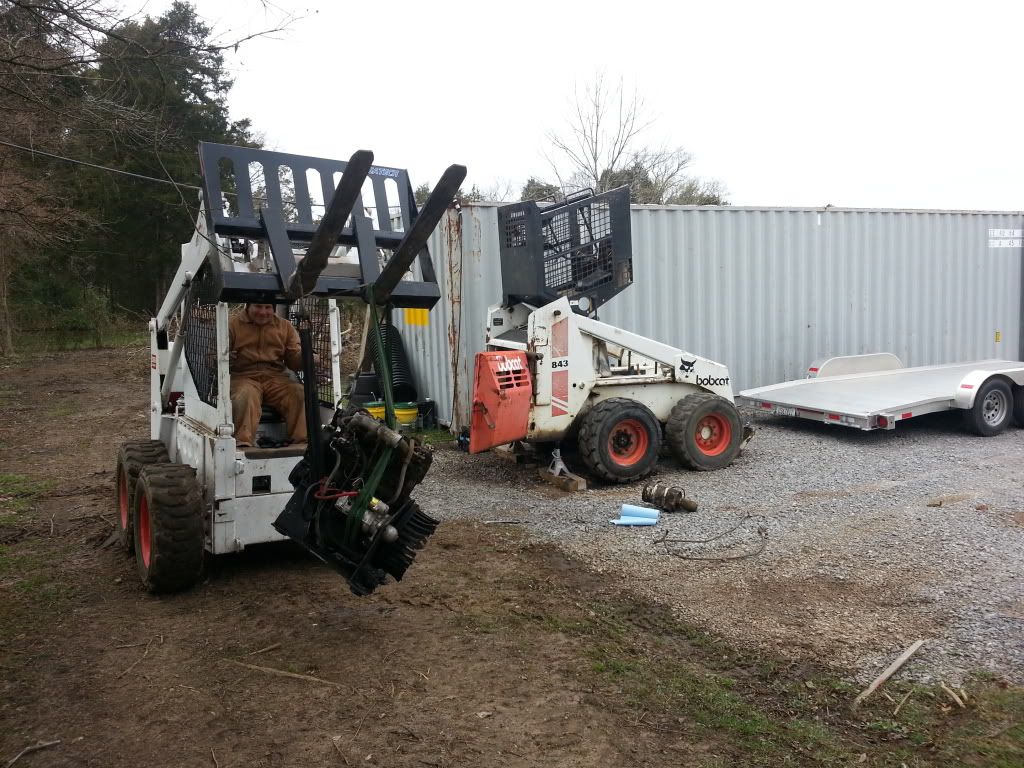
Ha! M700 with forks is a great way to pull the engine from it's big brother!
 photo 20130323_141705_zps6814d439.jpg
 

Tazza

Moderator
Staff member
Joined
Dec 7, 2004
Messages
16,839
Ha! M700 with forks is a great way to pull the engine from it's big brother!
I haven't pulled an engine with another machine, but i did remove the ROPS, and chassis with another machine with a 4 in 1 bucket. Great way to move the heavy parts around for sand blasting too :)
 
OP
OP
HanSolo

HanSolo

Well-known member
Joined
Sep 11, 2012
Messages
299
I haven't pulled an engine with another machine, but i did remove the ROPS, and chassis with another machine with a 4 in 1 bucket. Great way to move the heavy parts around for sand blasting too :)
Another project comes to a good ending. I delivered this machine to a very pleasant couple yesterday evening. They have a gravel driveway about 1/4 mile long that follows a creek lined with natural gravel. This is the perfect machine for them to keep their property dressed. I learned many useful mechanical skills while restoring the M700. It's gone to a good home and now I can concentrate on my 843!
 

Zorack

Well-known member
Joined
May 27, 2007
Messages
123
Another project comes to a good ending. I delivered this machine to a very pleasant couple yesterday evening. They have a gravel driveway about 1/4 mile long that follows a creek lined with natural gravel. This is the perfect machine for them to keep their property dressed. I learned many useful mechanical skills while restoring the M700. It's gone to a good home and now I can concentrate on my 843!
Big thumbs up on this project,and love the pictures you posted with it :)
 
OP
OP
HanSolo

HanSolo

Well-known member
Joined
Sep 11, 2012
Messages
299
Glad to hear it went to a good home. I think more of these old bobcats end up getting saved then scrapped :)
Thanks guys. It turned out to be a good little machine and I learned a TON of new mechanical skills working on it.
 

Latest posts

Top