M700 rebuild and restore project

Help Support SkidSteer Forum:

Tazza

Moderator
Staff member
Joined
Dec 7, 2004
Messages
16,839
I did the right hand lift cylinder rebuild this morning. Not too bad. The cap was pretty crusty and it took a pipe wrench to get loose. I purchased a spanner that was pretty much useless. Too short, not enough leverage. Local Bobcat sold me the wrong seal kits (for tilt) so I had to make an extra trip by there. But now I've got seal kits for all the cylinders because you know they're all going to fail sooner than later. I also had to have a hydraulic hose made for that lift cylinder. The original was splitting but not leaking yet. I'll speculate that was part reason the seals failed with rubber particles migrating into the cylinder. The inner most seal was completely shoot and came out in a bunch of ragged pieces. But... now I've got a pretty solid loader and I loaded my first piece of equipment with the new fork attachment. This thing is going to save a lot of wear and tear on my back!
They aren't as hard as some people may think. Some times the glad is so tight, you cause a lot of damage removing it, glad you got it off.
Age and heat make the seals fall apart, isn't it geat when they don't leak down on their own after a rebuild?
 
OP
OP
HanSolo

HanSolo

Well-known member
Joined
Sep 11, 2012
Messages
299
They aren't as hard as some people may think. Some times the glad is so tight, you cause a lot of damage removing it, glad you got it off.
Age and heat make the seals fall apart, isn't it geat when they don't leak down on their own after a rebuild?
"isn't it geat when they don't leak down on their own after a rebuild?" Yeah, and they're running much smoother. I would image the failed seals could pull air into the system causing jerkiness.
 
OP
OP
HanSolo

HanSolo

Well-known member
Joined
Sep 11, 2012
Messages
299
"isn't it geat when they don't leak down on their own after a rebuild?" Yeah, and they're running much smoother. I would image the failed seals could pull air into the system causing jerkiness.
I think I've come to the realization that this machine will need an engine rebuild. The Wisconsin VH4D runs fairly well when first started. It will smoke some when you load up the machine. It also bogs down when you load up (bucket full, traveling either direction). It's burning some oil and I found oil one cylinder four plug the other day. That was while I was checking compression which was 70, 70, 50, 70 PSI. I can't really back-drag any material without almost stalling. So I'm clearing out a spot in my unattached two car garage/shop to park it during the rebuild. The trick will be finding a spot between the roof joists to raise the ROPS. I made a rolling engine stand/table out of a road case this morning which matches the elevation of the engine just right. Hopefully I'll be able to pull that joker right on to it. I spoke with the owner of Rock Creek Consulting which specializes in Wisconsin parts and it looks like parts will be in the $400-$500 range. This will be my first engine rebuild so wish me luck guys!
 

SkidRoe

Well-known member
Joined
Dec 10, 2009
Messages
1,885
I think I've come to the realization that this machine will need an engine rebuild. The Wisconsin VH4D runs fairly well when first started. It will smoke some when you load up the machine. It also bogs down when you load up (bucket full, traveling either direction). It's burning some oil and I found oil one cylinder four plug the other day. That was while I was checking compression which was 70, 70, 50, 70 PSI. I can't really back-drag any material without almost stalling. So I'm clearing out a spot in my unattached two car garage/shop to park it during the rebuild. The trick will be finding a spot between the roof joists to raise the ROPS. I made a rolling engine stand/table out of a road case this morning which matches the elevation of the engine just right. Hopefully I'll be able to pull that joker right on to it. I spoke with the owner of Rock Creek Consulting which specializes in Wisconsin parts and it looks like parts will be in the $400-$500 range. This will be my first engine rebuild so wish me luck guys!
Wishing you luck!! If ROPS clearance is an issue, why not take it off outside, then drive it in the shed? It will make access a lot easier with it right out of the way. Take lots of pictures of the process, and let us know what you find in there. Cheers!
 
OP
OP
HanSolo

HanSolo

Well-known member
Joined
Sep 11, 2012
Messages
299
Wishing you luck!! If ROPS clearance is an issue, why not take it off outside, then drive it in the shed? It will make access a lot easier with it right out of the way. Take lots of pictures of the process, and let us know what you find in there. Cheers!
That sounds like a good plan Skid. I'll borrow my neighbors Case backhoe a lift the ROPS off before I drive the M700 into the shop. This will be a great time to paint the ROPS. I noticed that most of the M700s I've seen on the used equipment sites have white structure with black mesh. Mine apperars to have white factory paint under a flat blact over-spray.
 

SkidRoe

Well-known member
Joined
Dec 10, 2009
Messages
1,885
That sounds like a good plan Skid. I'll borrow my neighbors Case backhoe a lift the ROPS off before I drive the M700 into the shop. This will be a great time to paint the ROPS. I noticed that most of the M700s I've seen on the used equipment sites have white structure with black mesh. Mine apperars to have white factory paint under a flat blact over-spray.
My $0.02:
I vote for a black ROPS. White looks silly to me. Needs some contrast.
 
OP
OP
HanSolo

HanSolo

Well-known member
Joined
Sep 11, 2012
Messages
299
I second the black.
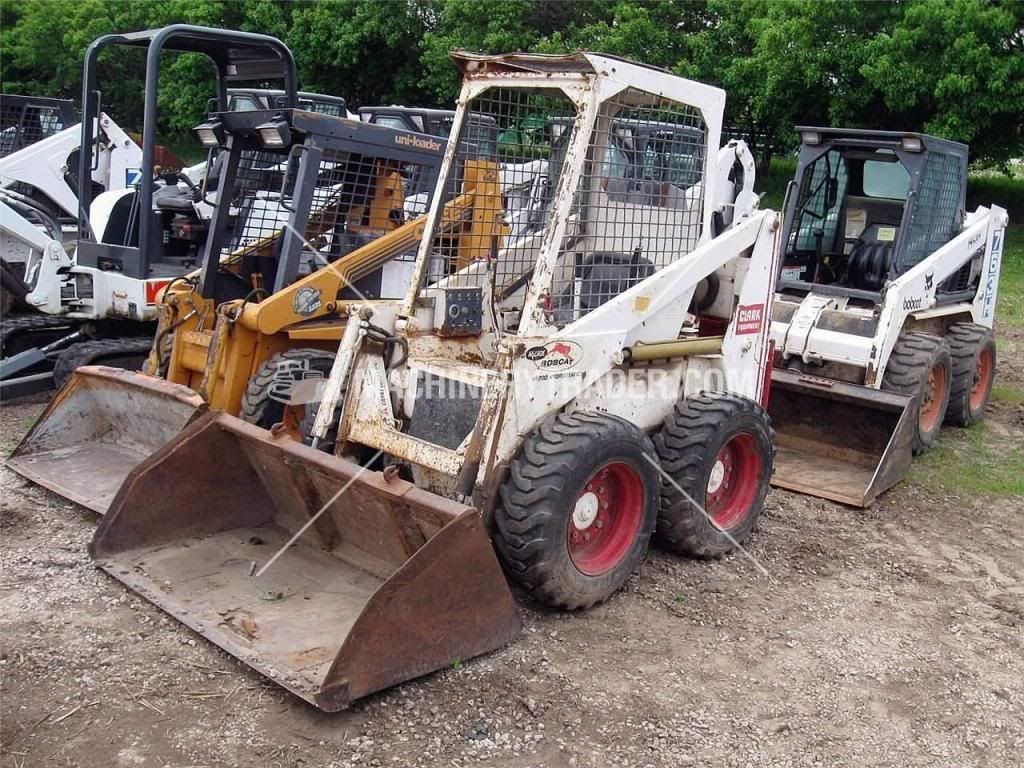
Here's a M700 with what appears to factory paint...
 M700decals1.jpg
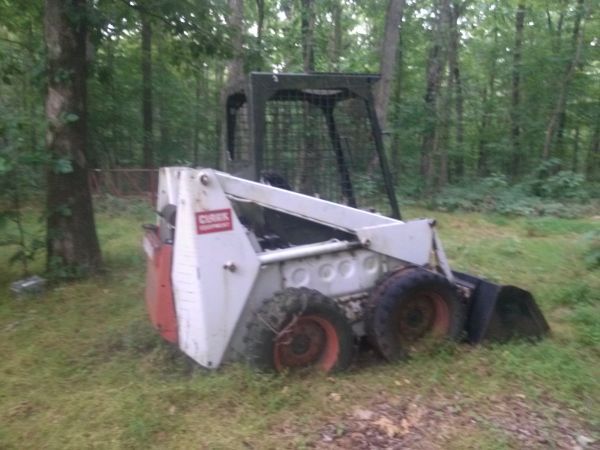
And here's the Craigslist photo of mine...

 M700craigslist1.jpg
I'm curious a what point Bobcat changed the paint on the ROPS? Or if some other owner decided to go with the flat black? OBTW - I had some reproduction Melroe Bobcat pouncing bobcat logos made. They look really good and I'll get them installed when I repaint the arms.
 
OP
OP
HanSolo

HanSolo

Well-known member
Joined
Sep 11, 2012
Messages
299
Here's a M700 with what appears to factory paint...


And here's the Craigslist photo of mine...


I'm curious a what point Bobcat changed the paint on the ROPS? Or if some other owner decided to go with the flat black? OBTW - I had some reproduction Melroe Bobcat pouncing bobcat logos made. They look really good and I'll get them installed when I repaint the arms.
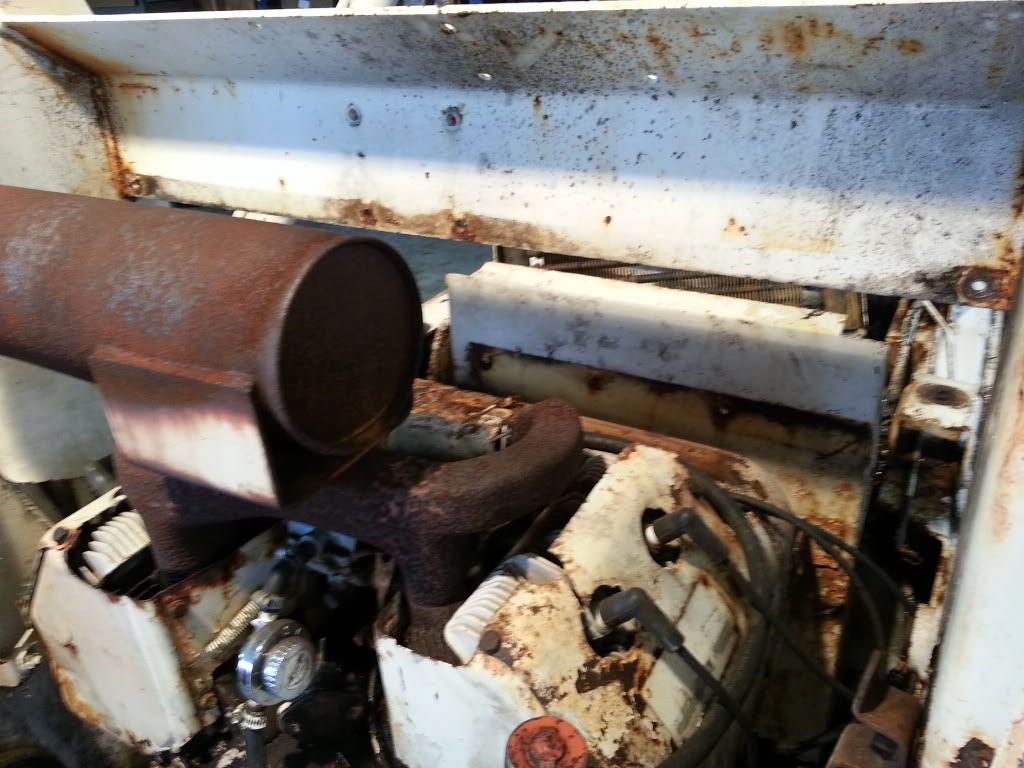
Alrighty, here's the progress I made over the weekend. First was rwmoval of the ROPS, parking in the shop, blocking up the arms, removing the wheels with the machine on jack stands.

 20121027_130302.jpg
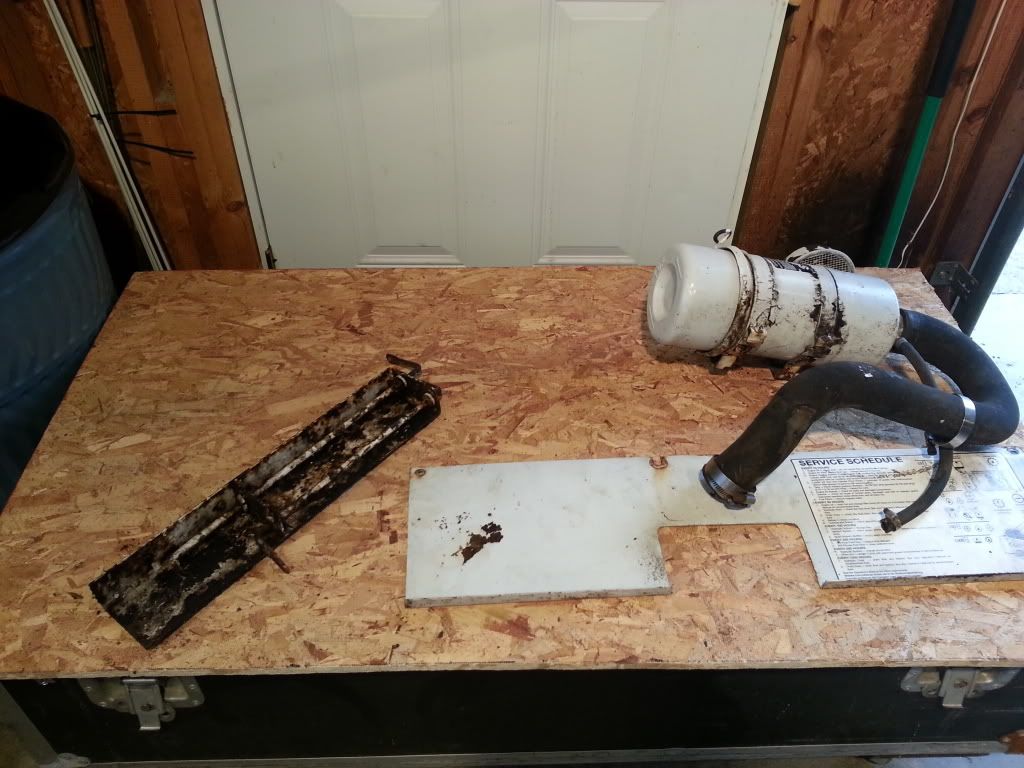
Next I removed the air cleaner and the plate below.

 20121027_135214.jpg
Although not really required, I removed the throttle and choke linkage assemble for refurbishment and painting.
 20121027_135224.jpg
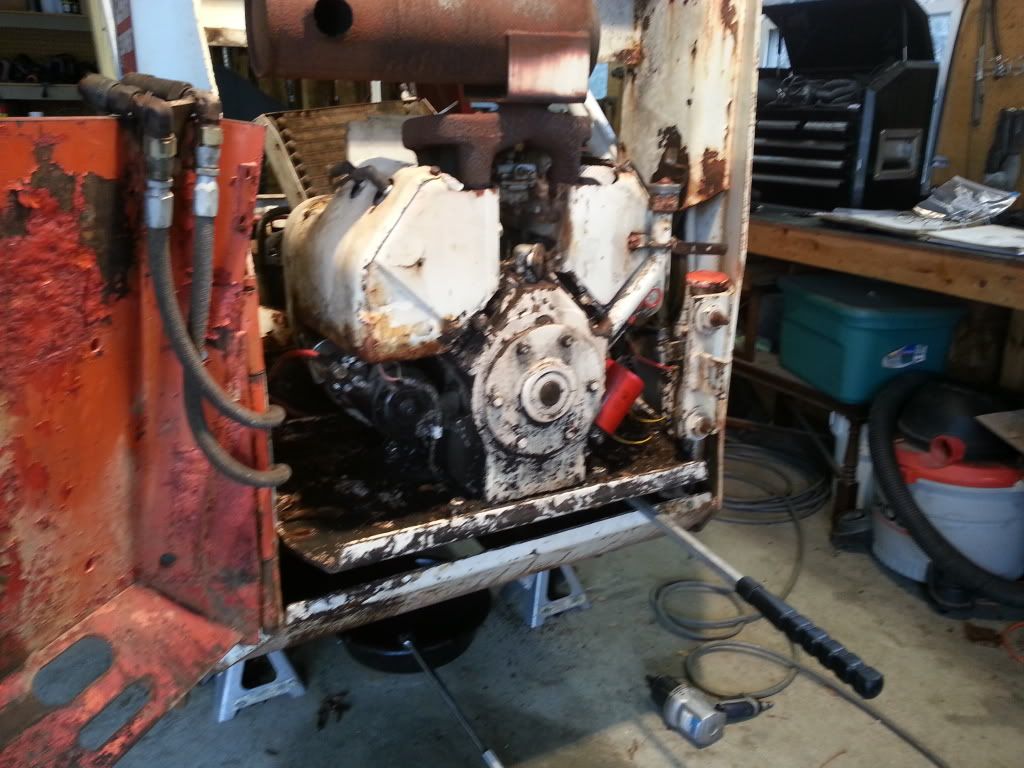
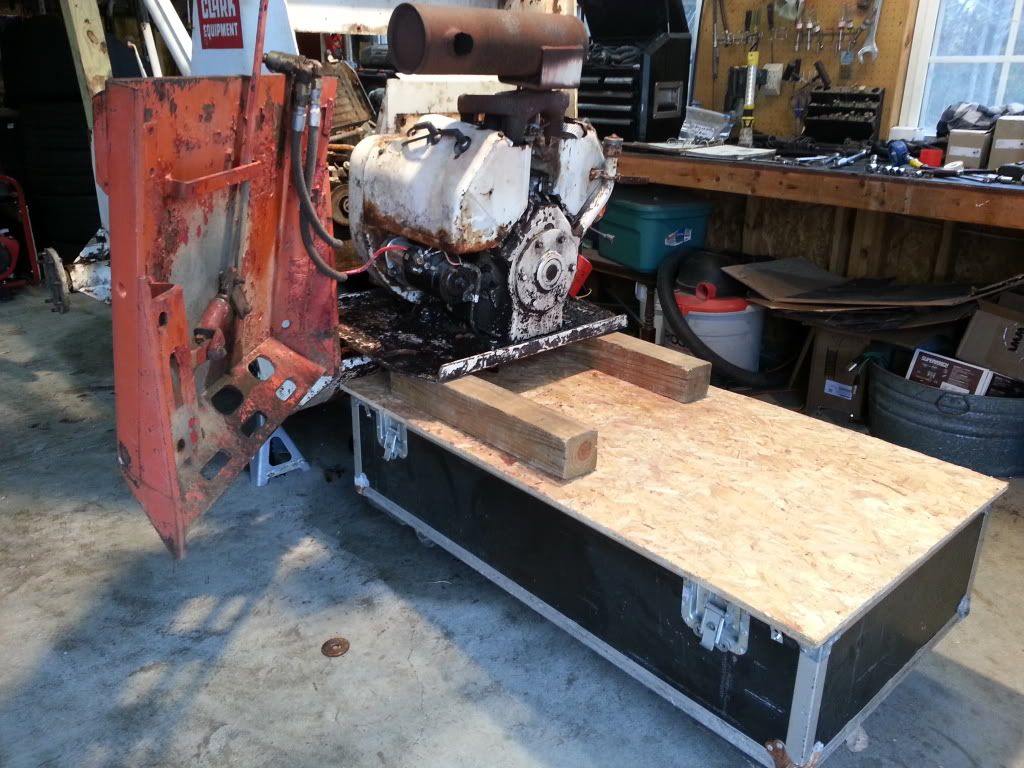
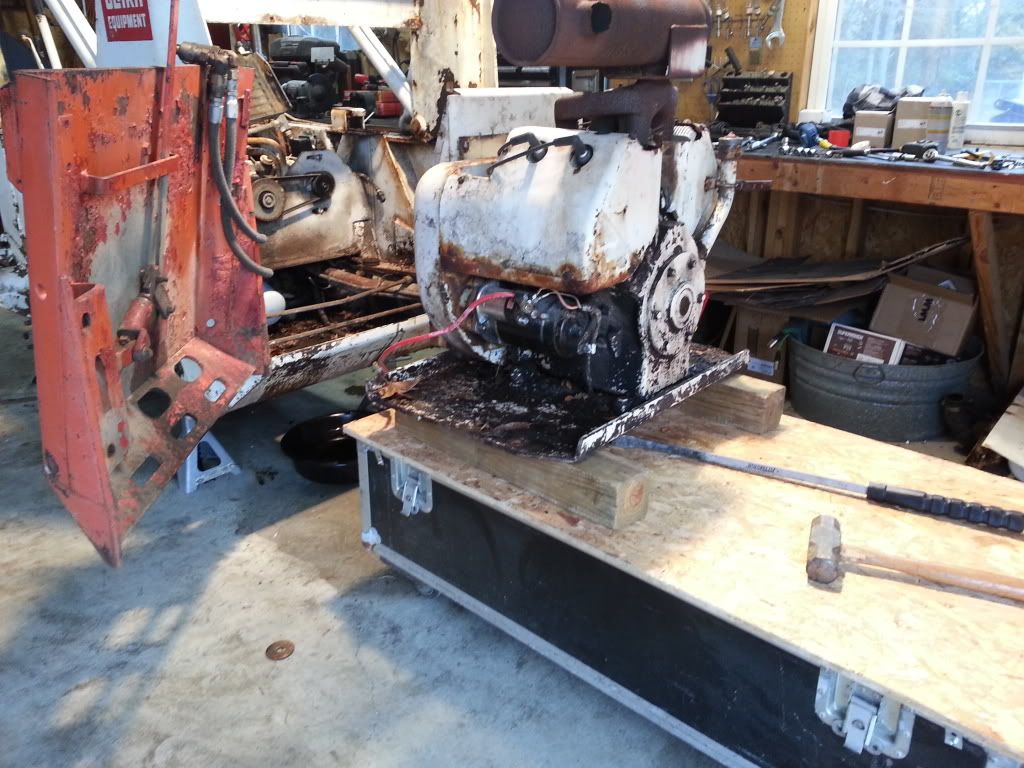
The service manual discribes taking the engine out by loosing the engine bolts and lifting -but I decided to slide it out on the mounting plate. There's four bolts passing through rubber mounts that are a bit though to get to. Once those were out, I was able to use a long pry bar to walk the plate with engine mounted out the back and on to a work platform.
 20121027_145047.jpg

 20121027_150736.jpg
 20121027_151106.jpg
Next I began removing all the engine shrouds, distributor, starter, wiring harness, oil fill tube and intake/exhaust manifold (with carburator attached).

 20121028_071603.jpg
That was all done Saturday. Sunday's progress was much slower. I soaked the head bolts overnight with PB Blaster. I'd already broken one off attemting to re-torque so I knew I was in for trouble. Oddly, all the left side bolts came out fairly easy but the right side - six broke off. So I got a kit with exctractors and reverse bits. Also bought the badly needed extractor handle and 5/16" tap. I got five off the studs out fairly cleanly but the sixth one kicked my butt! I broke off several drill bits and an extractor in the hole. Mostly clean now but I'll have to tap that one 3/8" and put a healy coil in it. The bolt holes on the head have some extra room so I think that will work. The pistons appear to be a little loose in the cylinders. You can see the rings but there's no visable scaring. The valves all look decent but will need cleaning up. Aside from the one head bolt hole being buggered - I think I have a decent block for re-build.
 

Mikefromcny

Well-known member
Joined
Nov 13, 2011
Messages
352
Alrighty, here's the progress I made over the weekend. First was rwmoval of the ROPS, parking in the shop, blocking up the arms, removing the wheels with the machine on jack stands.


Next I removed the air cleaner and the plate below.


Although not really required, I removed the throttle and choke linkage assemble for refurbishment and painting.


The service manual discribes taking the engine out by loosing the engine bolts and lifting -but I decided to slide it out on the mounting plate. There's four bolts passing through rubber mounts that are a bit though to get to. Once those were out, I was able to use a long pry bar to walk the plate with engine mounted out the back and on to a work platform.


Next I began removing all the engine shrouds, distributor, starter, wiring harness, oil fill tube and intake/exhaust manifold (with carburator attached).


That was all done Saturday. Sunday's progress was much slower. I soaked the head bolts overnight with PB Blaster. I'd already broken one off attemting to re-torque so I knew I was in for trouble. Oddly, all the left side bolts came out fairly easy but the right side - six broke off. So I got a kit with exctractors and reverse bits. Also bought the badly needed extractor handle and 5/16" tap. I got five off the studs out fairly cleanly but the sixth one kicked my butt! I broke off several drill bits and an extractor in the hole. Mostly clean now but I'll have to tap that one 3/8" and put a healy coil in it. The bolt holes on the head have some extra room so I think that will work. The pistons appear to be a little loose in the cylinders. You can see the rings but there's no visable scaring. The valves all look decent but will need cleaning up. Aside from the one head bolt hole being buggered - I think I have a decent block for re-build.
Keep up the good work..Engine rebuilds arent too bad, and theres nothing better than hearing your own engine fire up for the first time. I've never done a wisconsin but it looks fairly simple. Hopefully your crank will polish up without needing a turning and your cylinders won't have a tall ridge at the top.
 

SkidRoe

Well-known member
Joined
Dec 10, 2009
Messages
1,885
Alrighty, here's the progress I made over the weekend. First was rwmoval of the ROPS, parking in the shop, blocking up the arms, removing the wheels with the machine on jack stands.


Next I removed the air cleaner and the plate below.


Although not really required, I removed the throttle and choke linkage assemble for refurbishment and painting.


The service manual discribes taking the engine out by loosing the engine bolts and lifting -but I decided to slide it out on the mounting plate. There's four bolts passing through rubber mounts that are a bit though to get to. Once those were out, I was able to use a long pry bar to walk the plate with engine mounted out the back and on to a work platform.


Next I began removing all the engine shrouds, distributor, starter, wiring harness, oil fill tube and intake/exhaust manifold (with carburator attached).


That was all done Saturday. Sunday's progress was much slower. I soaked the head bolts overnight with PB Blaster. I'd already broken one off attemting to re-torque so I knew I was in for trouble. Oddly, all the left side bolts came out fairly easy but the right side - six broke off. So I got a kit with exctractors and reverse bits. Also bought the badly needed extractor handle and 5/16" tap. I got five off the studs out fairly cleanly but the sixth one kicked my butt! I broke off several drill bits and an extractor in the hole. Mostly clean now but I'll have to tap that one 3/8" and put a healy coil in it. The bolt holes on the head have some extra room so I think that will work. The pistons appear to be a little loose in the cylinders. You can see the rings but there's no visable scaring. The valves all look decent but will need cleaning up. Aside from the one head bolt hole being buggered - I think I have a decent block for re-build.
Great write up. Love the pics's!! Keep them coming, and I echo Mike's sentiments: Let's pray the carnage is limited to the top end. A Wisconsin is a pretty good candidate for your first overhaul, relatively straight forward motor. About your busted head bolt: buy your Helicoil kit before drilling out your hole any larger. It will give you the recommended tap drill size that is intended, and sometimes will include the drill bit as well. Good Luck!!
 

Tazza

Moderator
Staff member
Joined
Dec 7, 2004
Messages
16,839
Great write up. Love the pics's!! Keep them coming, and I echo Mike's sentiments: Let's pray the carnage is limited to the top end. A Wisconsin is a pretty good candidate for your first overhaul, relatively straight forward motor. About your busted head bolt: buy your Helicoil kit before drilling out your hole any larger. It will give you the recommended tap drill size that is intended, and sometimes will include the drill bit as well. Good Luck!!
Hopefully the bolts will drill out easily too. One hint that may help, if you are using a LH drill bit, whack the stub with a hammer to try and loosen it's grip. If you have a stub sitting above the top of the block, you may be able to weld a nut to the top and un-do it without needing to drill it out.
Looking forward to seeing more piccies of the rebuild
 

mahans7

Well-known member
Joined
Aug 22, 2012
Messages
317
Great write up. Love the pics's!! Keep them coming, and I echo Mike's sentiments: Let's pray the carnage is limited to the top end. A Wisconsin is a pretty good candidate for your first overhaul, relatively straight forward motor. About your busted head bolt: buy your Helicoil kit before drilling out your hole any larger. It will give you the recommended tap drill size that is intended, and sometimes will include the drill bit as well. Good Luck!!
Glad the rebuild is going well. You're making this look easy. Hopefully more pictures/captions?
 
OP
OP
HanSolo

HanSolo

Well-known member
Joined
Sep 11, 2012
Messages
299
Glad the rebuild is going well. You're making this look easy. Hopefully more pictures/captions?
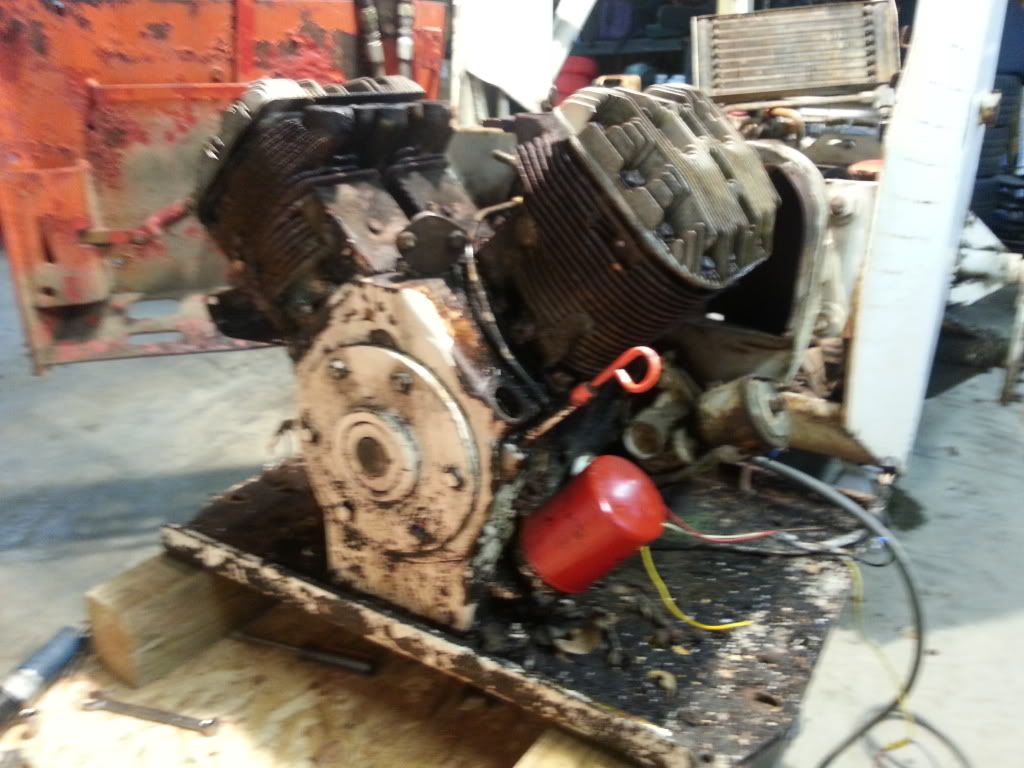
Thanks for the encouragement and tips gentlemen. I had some more time this morning to continue removing parts. I got the governer, distributor mount, oil filter mount and oil pressure sender off. You can see the offending head bolt hole in the picture below.

 20121030_095412.jpg
I've about decided I'm going to get a rebuilt long block. Spoke to a fellow that specializes in the VH4D motor rebuild. Basically I'd send him my core (he pays for that shipping) and he ships a rebuild (I pay for that shipping). That will have cylinders bored and honed 3 over. New pistons, rings, strengthned rods, connecting sleeves, crank turned, valves ground and new valve guilds. $1800 plus shipping. He'll make sure that the rebuild has the correct crank and timing cover for Bobcat application. He sounds extremely knowledgable about these engines and I think this is the best route for me. By the time I buy the rebuild kit, have the cylinders bored and honed, have the crank turned, I'll probably be close to that cost anyway. Time wise - going with the rebuilt long block is going to be much quicker.
 

Tazza

Moderator
Staff member
Joined
Dec 7, 2004
Messages
16,839
Thanks for the encouragement and tips gentlemen. I had some more time this morning to continue removing parts. I got the governer, distributor mount, oil filter mount and oil pressure sender off. You can see the offending head bolt hole in the picture below.


I've about decided I'm going to get a rebuilt long block. Spoke to a fellow that specializes in the VH4D motor rebuild. Basically I'd send him my core (he pays for that shipping) and he ships a rebuild (I pay for that shipping). That will have cylinders bored and honed 3 over. New pistons, rings, strengthned rods, connecting sleeves, crank turned, valves ground and new valve guilds. $1800 plus shipping. He'll make sure that the rebuild has the correct crank and timing cover for Bobcat application. He sounds extremely knowledgable about these engines and I think this is the best route for me. By the time I buy the rebuild kit, have the cylinders bored and honed, have the crank turned, I'll probably be close to that cost anyway. Time wise - going with the rebuilt long block is going to be much quicker.
That price doesn't sound too bad to me. About 7 years ago my dad got my Kubota engine machined at his work, the machining was free, i just paid for parts. Parts alone were 1k, pistons, rings bearings, head gasket etc. So to get it done today at a shop i think it would be over 2k with machining.
What about the heads? do you have to get them machined too? you want them flattened and new head gaskets. What about crack testing? no idea if they are prone to cracking or not.
 

Mikefromcny

Well-known member
Joined
Nov 13, 2011
Messages
352
That price doesn't sound too bad to me. About 7 years ago my dad got my Kubota engine machined at his work, the machining was free, i just paid for parts. Parts alone were 1k, pistons, rings bearings, head gasket etc. So to get it done today at a shop i think it would be over 2k with machining.
What about the heads? do you have to get them machined too? you want them flattened and new head gaskets. What about crack testing? no idea if they are prone to cracking or not.
$1800 doesnt sound bad considering the work involved in rebuilding one, Plus you can bolt on your goodies and know 100% its good to go. Cylinder heads can be checked with a straight edge, maybe face them off with a piece of fine grit sandpaper on a piece of glass. You may want to ask the guy after he gets your core to tear it down and see what he finds wrong..I always wanna know the specifics :)
 

Fishfiles

Well-known member
Joined
Feb 8, 2007
Messages
1,698
$1800 doesnt sound bad considering the work involved in rebuilding one, Plus you can bolt on your goodies and know 100% its good to go. Cylinder heads can be checked with a straight edge, maybe face them off with a piece of fine grit sandpaper on a piece of glass. You may want to ask the guy after he gets your core to tear it down and see what he finds wrong..I always wanna know the specifics :)
I think it is very important to try and figure out what went wrong with the old engine before cranking up the new one , you might still have the same problem and sure don't want to dust or fry a new one
 
OP
OP
HanSolo

HanSolo

Well-known member
Joined
Sep 11, 2012
Messages
299
I think it is very important to try and figure out what went wrong with the old engine before cranking up the new one , you might still have the same problem and sure don't want to dust or fry a new one
The rebuilder said that price does include refinishing the mating surfaces. Regarding symptoms the loader was exhiting - the lose of power when loaded up can be discribed as a "tired" engine. I did note that this engine has original pistons. No telling how many hours. The hour meter broke at 700+. That was probably in the late 70s!
 

mahans7

Well-known member
Joined
Aug 22, 2012
Messages
317
The rebuilder said that price does include refinishing the mating surfaces. Regarding symptoms the loader was exhiting - the lose of power when loaded up can be discribed as a "tired" engine. I did note that this engine has original pistons. No telling how many hours. The hour meter broke at 700+. That was probably in the late 70s!
Hard to believe but I can't wait for you to get your rebuild back. You're gonna have this up and running strong real soon.
 
OP
OP
HanSolo

HanSolo

Well-known member
Joined
Sep 11, 2012
Messages
299
Hard to believe but I can't wait for you to get your rebuild back. You're gonna have this up and running strong real soon.
Next is removing the flywheel. It's held on by a 1 11/16' nut. A quick trip to Northern Tool and I've got an impact socket that'll fit that. Several shots of PB Blaster and some impact action - it's off.
 20121101_082248.jpg
 
Top