Retaining Walls and Terraces

Help Support SkidSteer Forum:

skidsteer.ca

Well-known member
Joined
Jan 20, 2006
Messages
3,853
I have a customer that want to terrace a especially steep part of his property. I have done considerable work for him over the past several years. All of it hourly, which I prefer, but he would like a quote on this one.
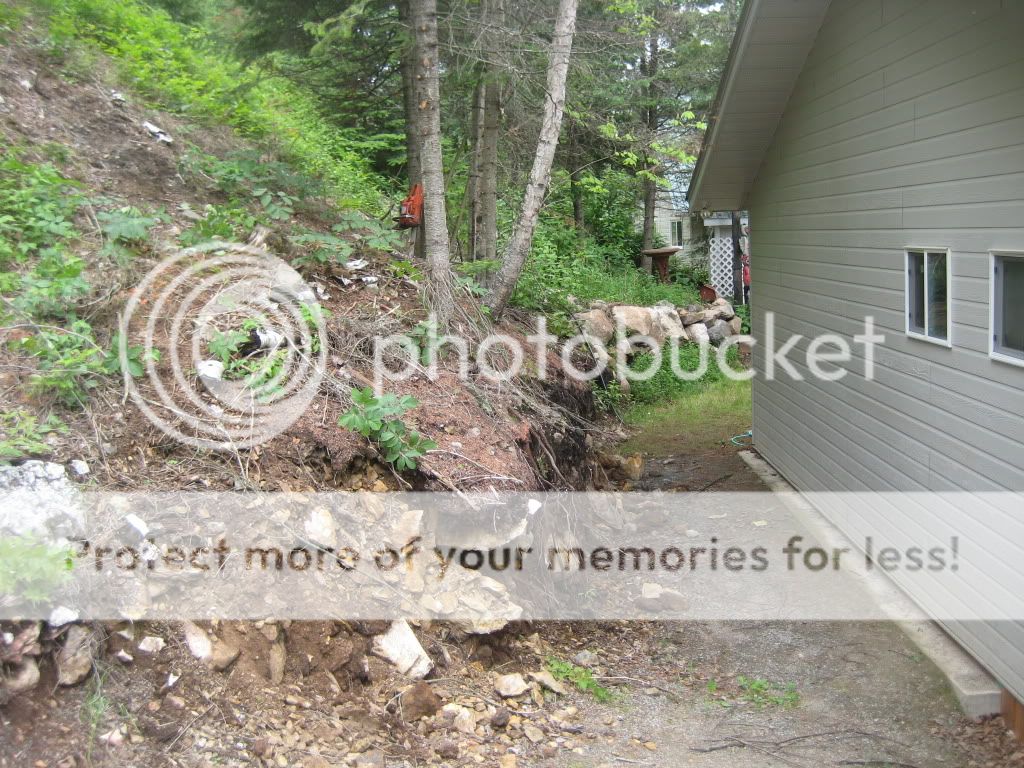
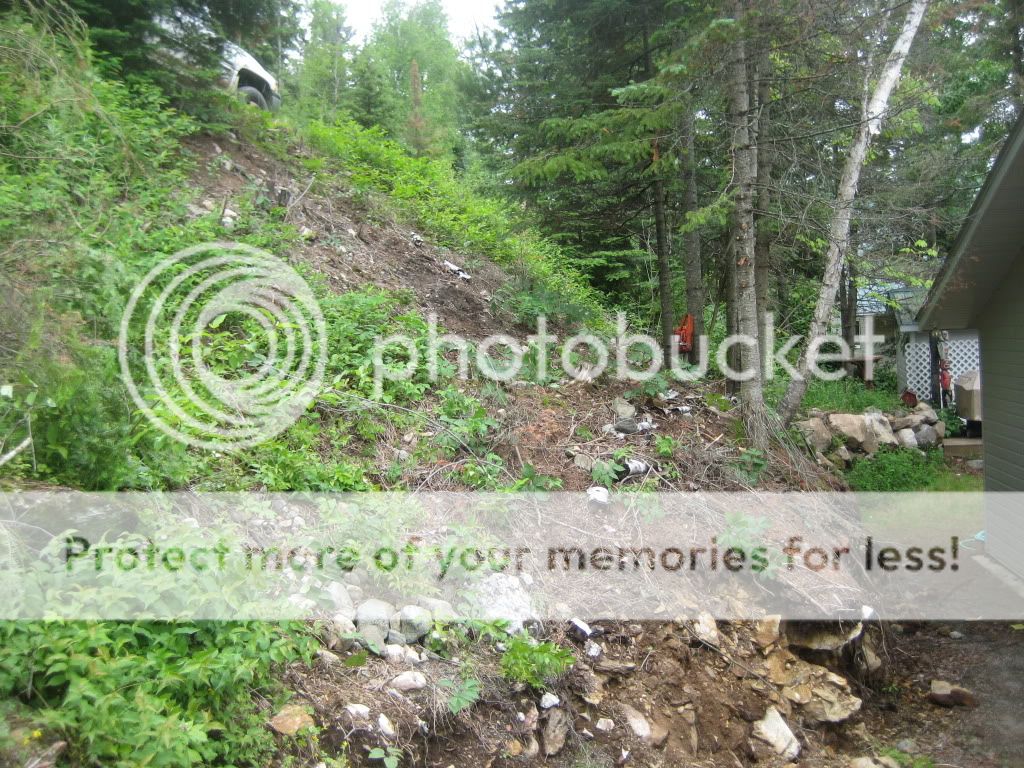
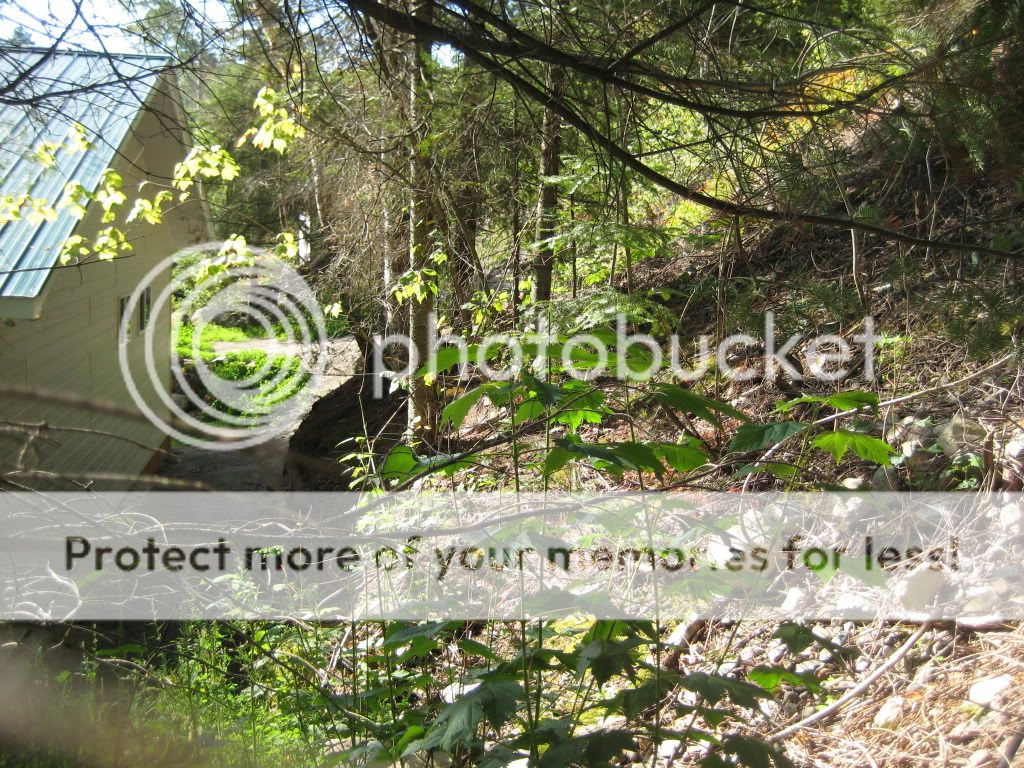
In the extreme top left of this photo is the edge of his car drive way, going down slope away from the point of view (not the atv/bobcat road you see in front of the cabin) at that point your feet are 7 to 6 feet above the peak, and measuring down the slope, 43' you are at the corner footing of the cabin.
The driveway is the nearest point you can get any large machine into.
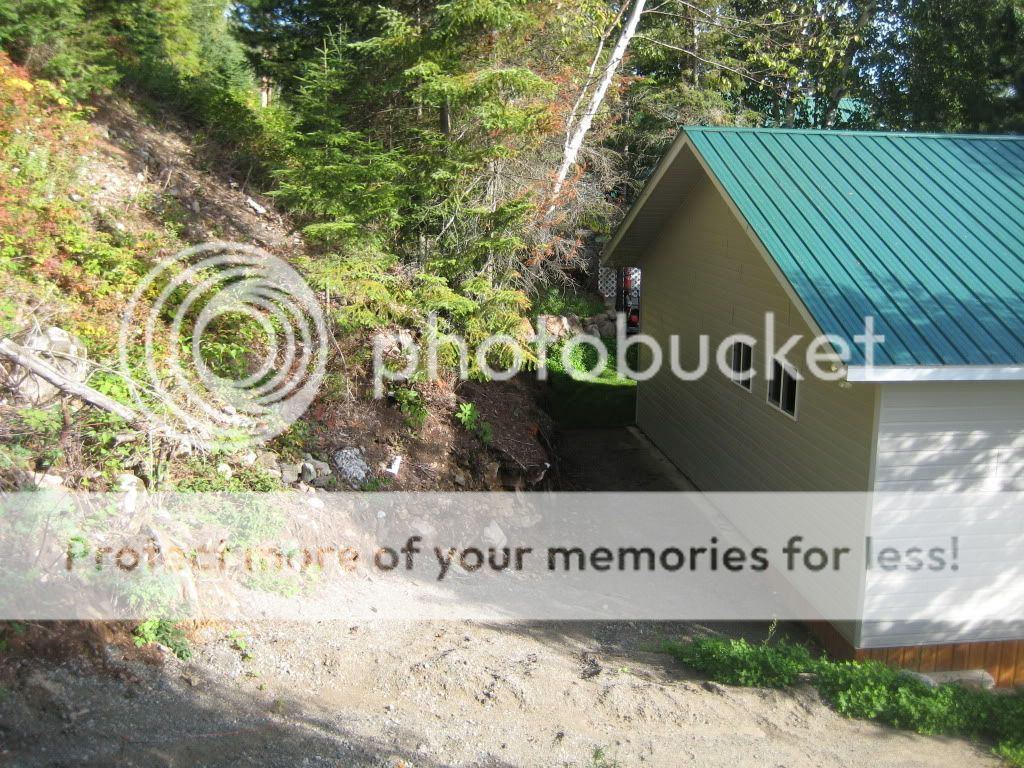
IMG_1667.jpg 1.1 picture by beyondupnorth


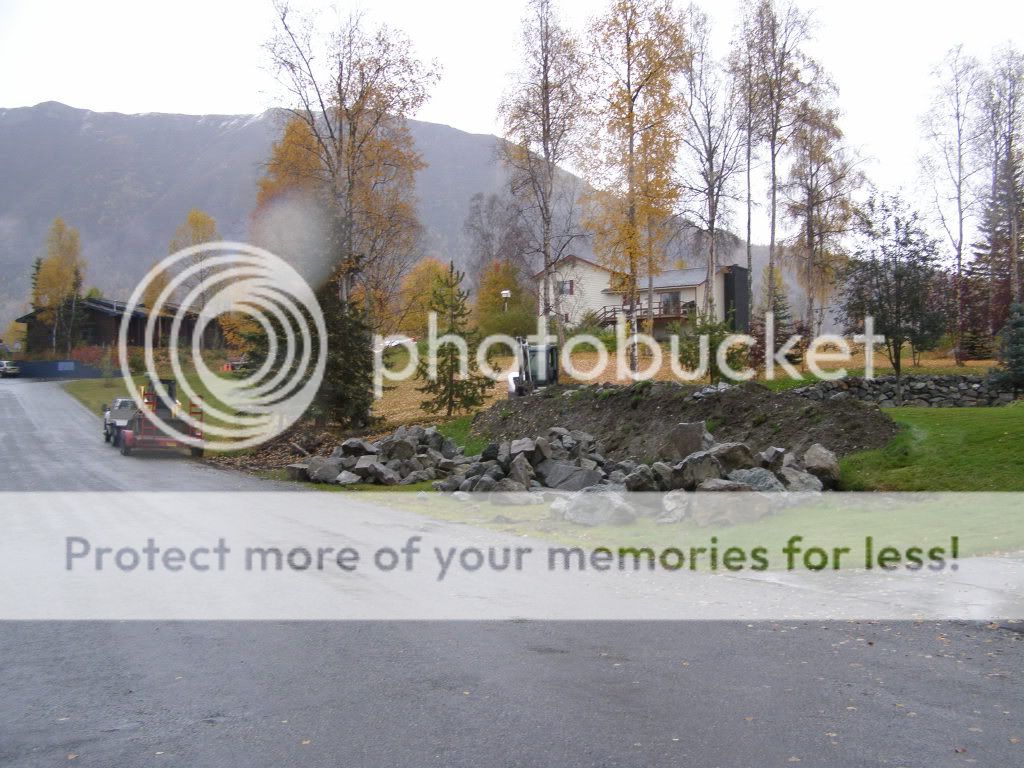
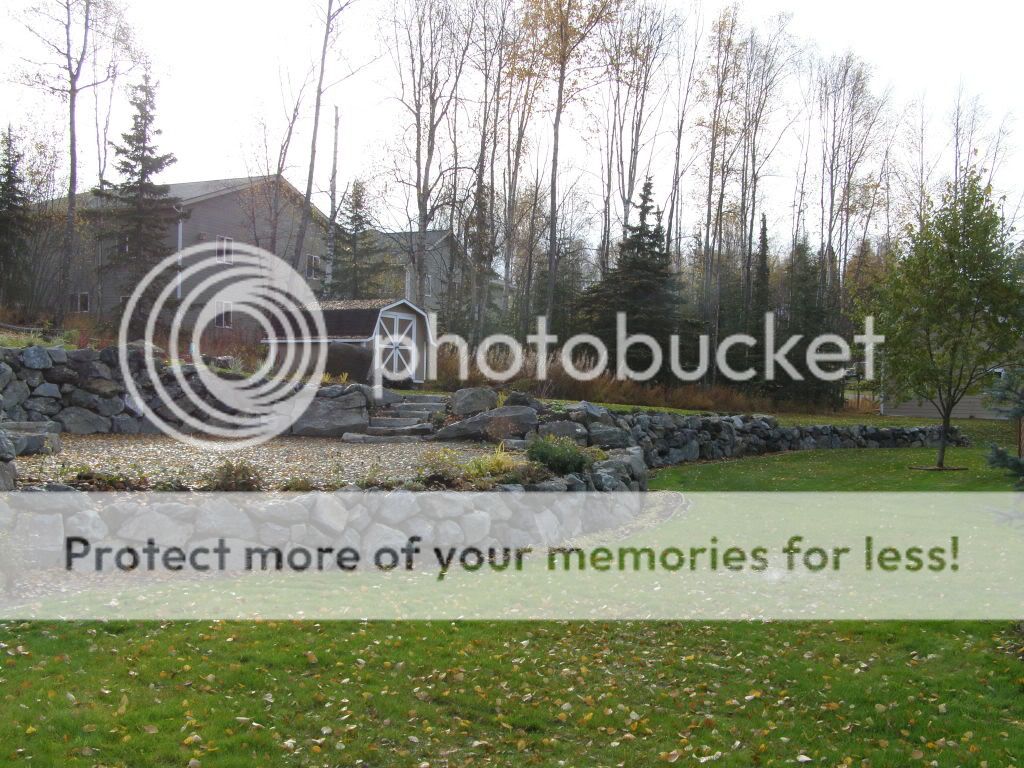
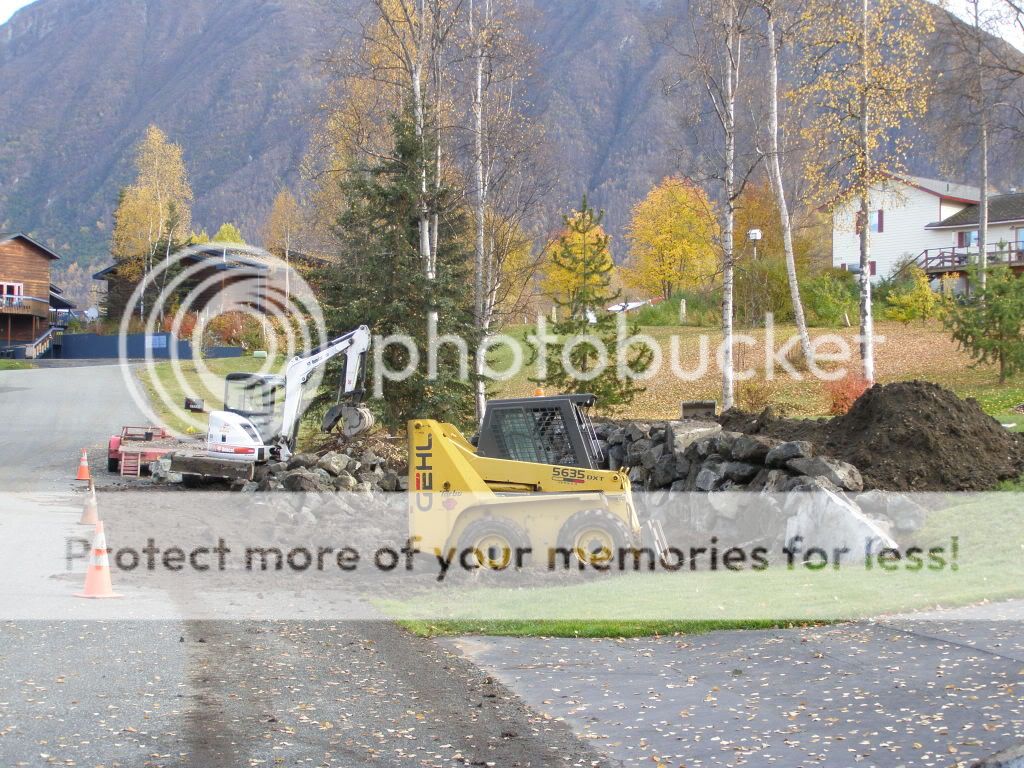
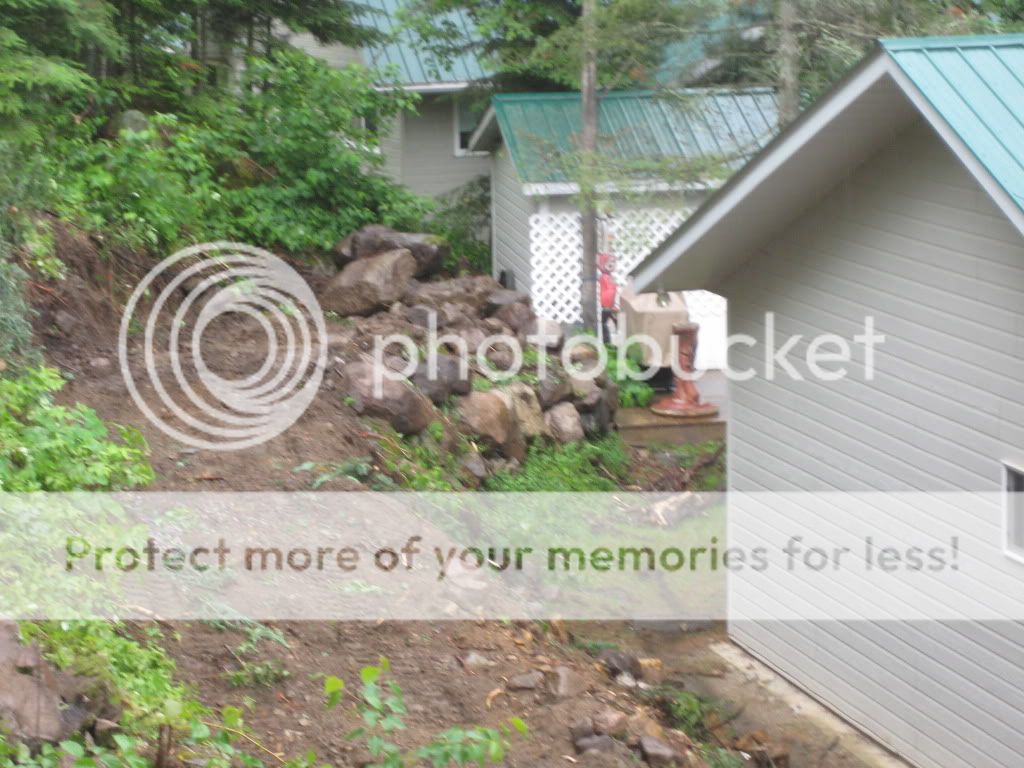
Last year I prepared the spot for this cabin, then this spring I excavated the hill side back to allow a 6' walk way behind the cabin. The material is 90 % boulders, which we used to build a "atv turn around terrace" in the bottom right of the photo so he could tun his atv there. We just stacked the rocks leaning a few degrees up hill.
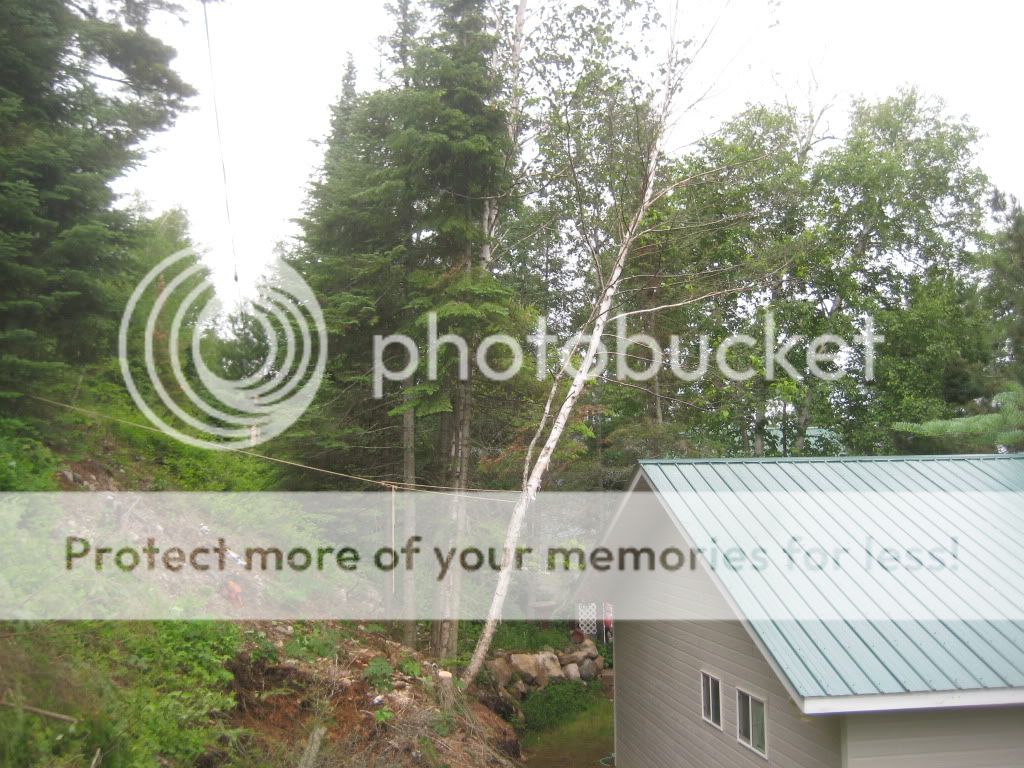
Terrace shown here, note the drop in slope on the sidewall of the cabin and the lake below and the peak of the boathouse to the right of the trees. Slopes on this property from 30 to 45% .
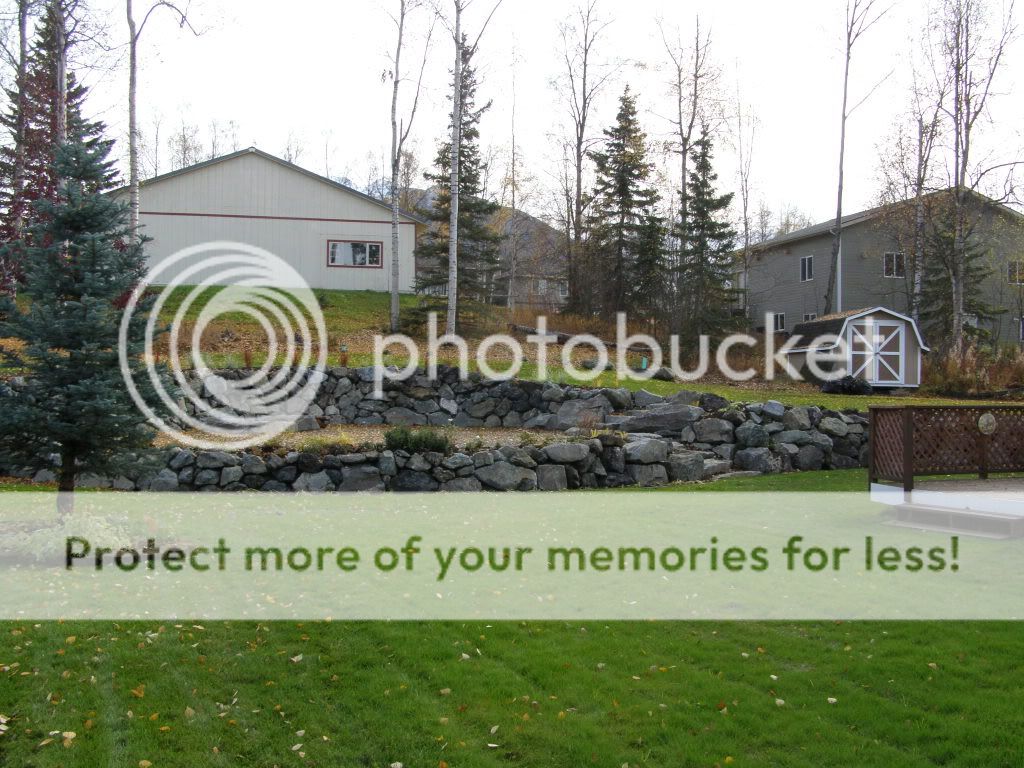
Atv terrace is about 15 ft high on the lake side, bigger then it looks, he has let the vegitation grow all summer to prevent errozion, it wll be wipper snipped later. Makes the area look smaller then it really is. It is also 6 ft igher then the footter on the cabin.
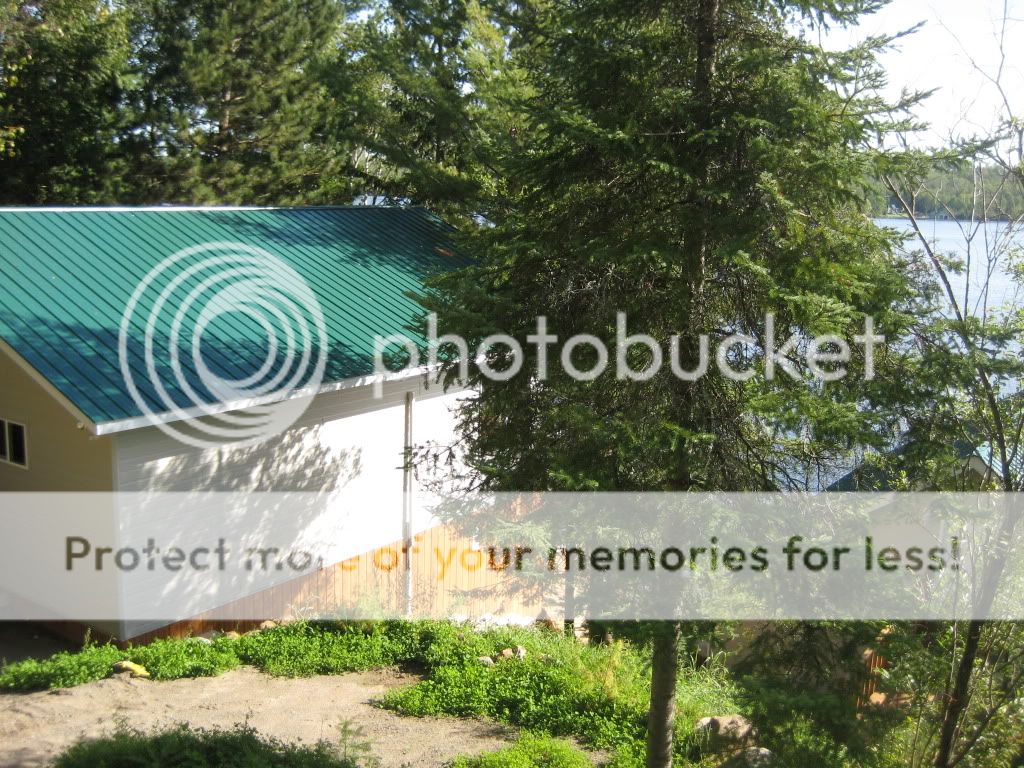
IMG_1693.jpg 1 picture by beyondupnorth

Now he would like to build a wall behind the cabin and terrace the next level up for a perennial garden.
It is going to involve removing the trees, (power line is up hill parallel to the cabin = tight falling quarters) digging into the hillside and hopefully not encounter any rock bigger then a mini ex or a 709 hoe can move and placing then in wall along the low side, and hopefully getting a 8 to 10 ft wide area, with another wall extending up from there.
I can already see on rock 7 by 4 by 1 ft that needs to go downhill 10ft and be stood on edge.
I'm wishing I had a hammer to bust that baby, and there may be others when I begin to dig.

If it is like the material behind the cabin below , most will be good size for rock walls, however I may have to haul some shot rock in and pack it down the 30% slope of a road that I built last year to get concrete material in there.

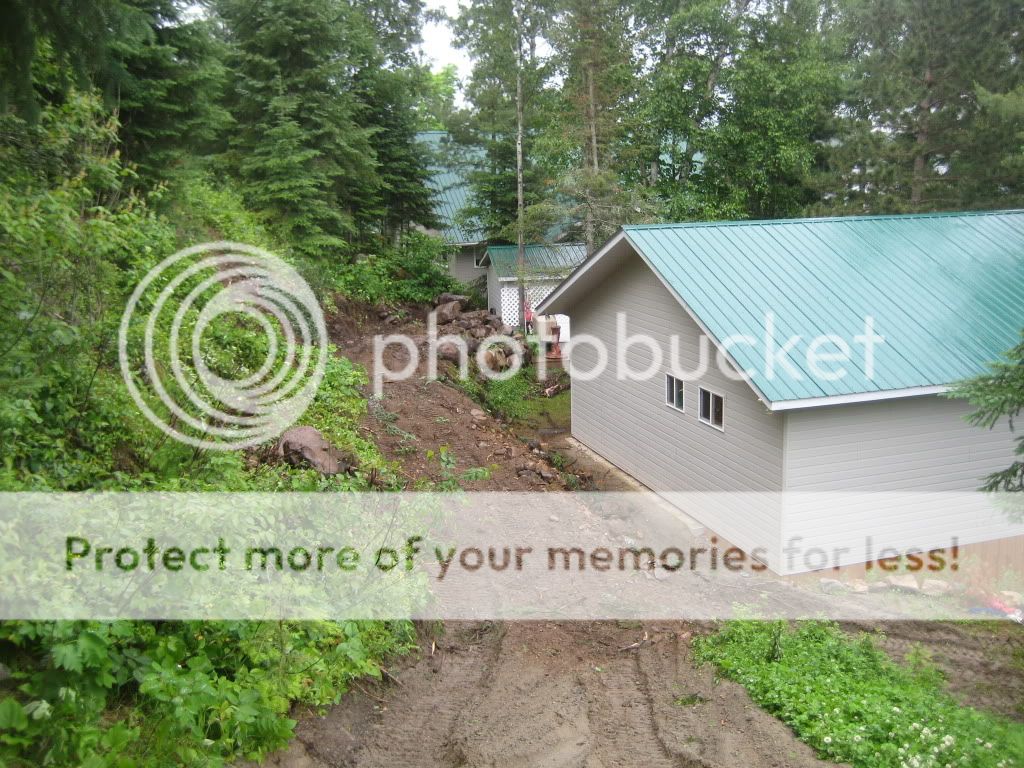
Here is a view from the other side at the bottom.
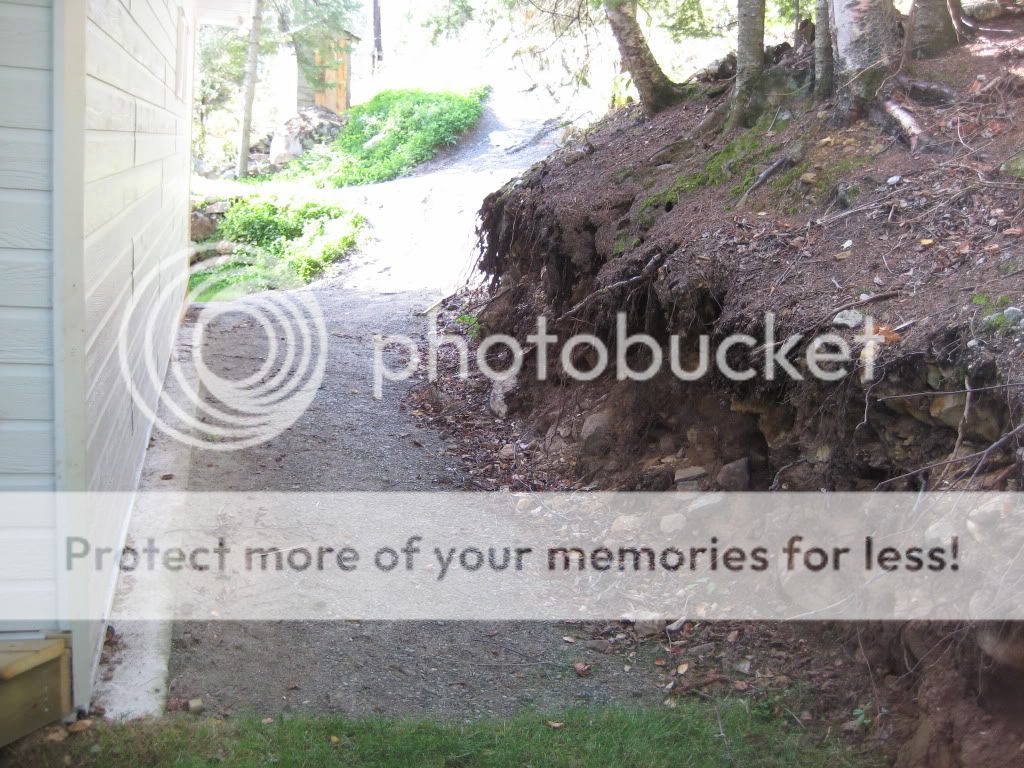
IMG_1678.jpg 3 picture by beyondupnorth


I think the top 6" of dirt an roots will have to come off, to make room for larger rock to shore up the hill.

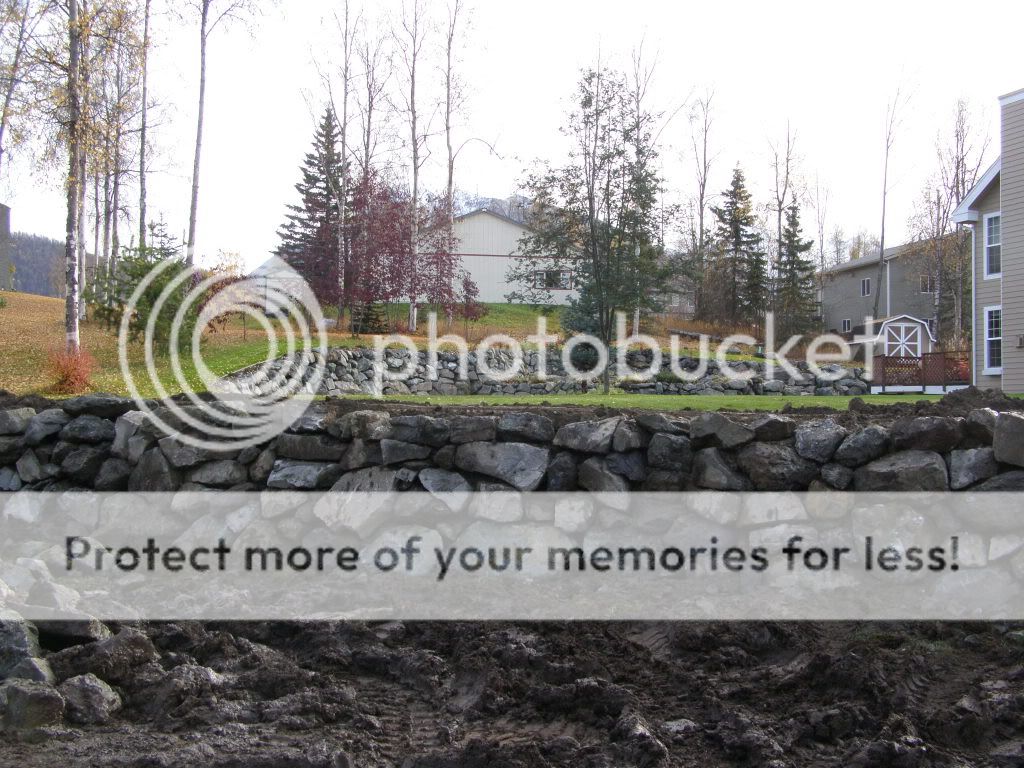
This next one is looking back also, foreground show the terrace we build last spring by excavating the boulder from the lawn area below and stacking them ito a wall (which is 3 to 4 ft high, then where the trees are is the area to be terraced now and in the background is the atv road going up the hill.
The new terrace will reach 6 to 7 ft high behind the cabin. Unfortunately the area behind the cabin is too narrow (7ft wide) to turn and work on the new wall with anything but a hoe, or mini ex.
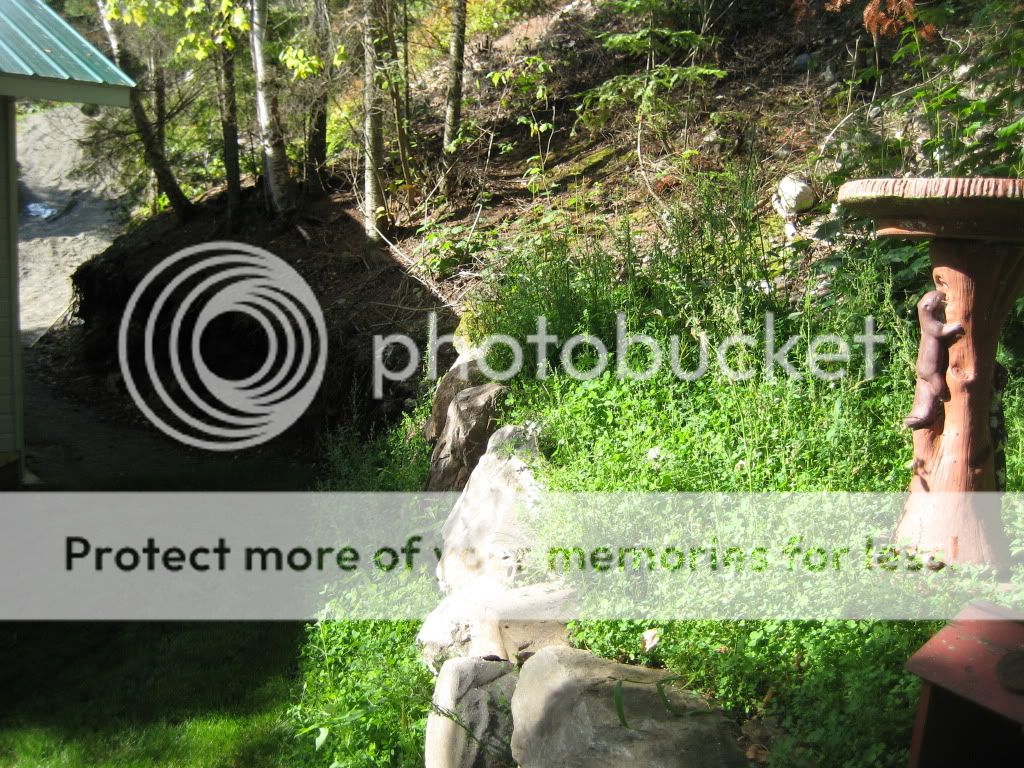
IMG_1680.jpg 22 picture by beyondupnorth


View from higher up, standing in the existing terrace. This is the level the area behind the cabin will need to be dug down too and sideslope removed
IMG_1682.jpg 24 picture by beyondupnorth


More pics and video here http://s406.photobucket.com/albums/pp142/beyondupnorth/Cottage Terrace/ incase your interested.
So what are your thoughts on breaking granite boulders with a hammer? If I can't handle them, that's the only other option. I'm thinking it is going to take a couple weeks to dig through that 85 feet of side hill, after I remove the trees. Some of the excavated material is going to have to be staged 150 ft away up the atv road, until it is needed for back filling behind the wall. In the end it will all be covered with black dirt to get the vegetation coming.
Any thoughts?
Ken
 

Land-Tech

Well-known member
Joined
May 13, 2008
Messages
160
I think you should be able to do the job pretty easily.Once you grub out all the trees, it will open the area up a lot more. Most of the walls I do that are substantial I order the rock from a pit and it's shot rock. I looks like pretty good access except for the grade. The rocks that I get from the pit break pretty well but I think it's softer than granite. I've used my 331 with a breaker and it works ok. A breaker on a skid would probably do as well.I don't have time to post pics tonight and since this is a late post the job may already done. If not I can help you with estimated quanities,that how many tons of rock for certain size wall. I will post some pic anyway if you like. Scott
 
OP
OP
skidsteer.ca

skidsteer.ca

Well-known member
Joined
Jan 20, 2006
Messages
3,853
I think you should be able to do the job pretty easily.Once you grub out all the trees, it will open the area up a lot more. Most of the walls I do that are substantial I order the rock from a pit and it's shot rock. I looks like pretty good access except for the grade. The rocks that I get from the pit break pretty well but I think it's softer than granite. I've used my 331 with a breaker and it works ok. A breaker on a skid would probably do as well.I don't have time to post pics tonight and since this is a late post the job may already done. If not I can help you with estimated quanities,that how many tons of rock for certain size wall. I will post some pic anyway if you like. Scott
Scott
I would be happy to see any info you have. I have not got the go ahead on this one so I suspect it may be on hold until spring.
Ken
 

Land-Tech

Well-known member
Joined
May 13, 2008
Messages
160
Scott
I would be happy to see any info you have. I have not got the go ahead on this one so I suspect it may be on hold until spring.
Ken
Hey I finally got a rainy day,not really it's been raining for a week but am fed up so I'll stay inside today.
Ken,I went looking through my pics and did not have very many good examples so I made some on a small wall I finished yesterday.I'm rusty on posting pics,so bear with me if I have to make multiple posts.
035.jpg pre install 42 tons picture by LANDTEKK

This pic is pre-installation and shows what 42 tons of rock looks like. This wall will be approx 5 or 6 feet tall and fifty feet long. each load is about 14 tons but it is a shot rock and lighter than the native sedimentry rock. Lighter by probably 25%. It's also has sharp edges and does not look as natural as the more worn and rounded rock. But it is cost effective.
045.jpg walls with steps 1 picture by LANDTEKK

This is what i'm trying to match, I did this in Aug and the home owner did his own thing with the plantings. He didn't want large bed so we kept them just large enough to make a transition to the grass
042.jpg picture by LANDTEKK

The terrace has a simple firepit and a large enough area to have a large party . Front wall is about 3' high with the back wall about 6'. Large slabs for steps to each level It looks rough but is easy to access.
043.jpg tapered wall picture by LANDTEKK

This a wing wall that tapers with the slope. some people like to have level wall and flat terraces but it usually will double the materiel and labor cost. This takes care of the slope problem and I think the form looks kinda cool.
037.jpg picture by LANDTEKK

This is what I got done by noon the next day.I place the rocks with the forks and prefer to use the forks because it's faster when you can access from the front.The piles of rock should have been dumped at one end or the other but the driver didn't get the message so I had to work around the piles. The mud is mostly the topsoil in the lawn so the base was hard and traction was ok. When its wet cleaning up the mess you make is a substantial time and cost factor not to mention the local muni curb cops. So I try to keep things contained. A machine with tires keeps the mess down .
039.jpg picture by LANDTEKK

This is a view from the front and shows the angular rock. A good mason and bit of hand picking can make this stuff look really good . I kinda make the top go with the flow so its not perfectly level which makes it easier to finish.Just stacking the rock for this thing took me maybe twelve hour with both machines on site and if the the rock had been dumped correctly and it was not muddy, it would have been faster
The back walls I did in Aug took about 100 tons and a week and a half to complete including the landscaping. Much more complicated than a simple wall. The only compaction other than the pad was with the excavator bucket.The terrace I took a plate compactor to and caped with a crush rock 3/4 minus
Walls that are load bearing or have a large backslope are built different than these in the pics. these are more ornamental and I find when you build them higher than 6' you need more mass to retain things.
 
OP
OP
skidsteer.ca

skidsteer.ca

Well-known member
Joined
Jan 20, 2006
Messages
3,853
Hey I finally got a rainy day,not really it's been raining for a week but am fed up so I'll stay inside today.
Ken,I went looking through my pics and did not have very many good examples so I made some on a small wall I finished yesterday.I'm rusty on posting pics,so bear with me if I have to make multiple posts.
This pic is pre-installation and shows what 42 tons of rock looks like. This wall will be approx 5 or 6 feet tall and fifty feet long. each load is about 14 tons but it is a shot rock and lighter than the native sedimentry rock. Lighter by probably 25%. It's also has sharp edges and does not look as natural as the more worn and rounded rock. But it is cost effective.

This is what i'm trying to match, I did this in Aug and the home owner did his own thing with the plantings. He didn't want large bed so we kept them just large enough to make a transition to the grass

The terrace has a simple firepit and a large enough area to have a large party . Front wall is about 3' high with the back wall about 6'. Large slabs for steps to each level It looks rough but is easy to access.

This a wing wall that tapers with the slope. some people like to have level wall and flat terraces but it usually will double the materiel and labor cost. This takes care of the slope problem and I think the form looks kinda cool.

This is what I got done by noon the next day.I place the rocks with the forks and prefer to use the forks because it's faster when you can access from the front.The piles of rock should have been dumped at one end or the other but the driver didn't get the message so I had to work around the piles. The mud is mostly the topsoil in the lawn so the base was hard and traction was ok. When its wet cleaning up the mess you make is a substantial time and cost factor not to mention the local muni curb cops. So I try to keep things contained. A machine with tires keeps the mess down .

This is a view from the front and shows the angular rock. A good mason and bit of hand picking can make this stuff look really good . I kinda make the top go with the flow so its not perfectly level which makes it easier to finish.Just stacking the rock for this thing took me maybe twelve hour with both machines on site and if the the rock had been dumped correctly and it was not muddy, it would have been faster
The back walls I did in Aug took about 100 tons and a week and a half to complete including the landscaping. Much more complicated than a simple wall. The only compaction other than the pad was with the excavator bucket.The terrace I took a plate compactor to and caped with a crush rock 3/4 minus
Walls that are load bearing or have a large backslope are built different than these in the pics. these are more ornamental and I find when you build them higher than 6' you need more mass to retain things.
Well its spring and I'm back at this finally.
Here is a short vid looking down from above.
<embed width="600" height="361" type="application/x-shockwave-flash" allowFullscreen="true" allowNetworking="all" wmode="transparent" src="http://static.photobucket.com/playe...42/beyondupnorth/Cottage Terrace/MVI_2315.mp4">
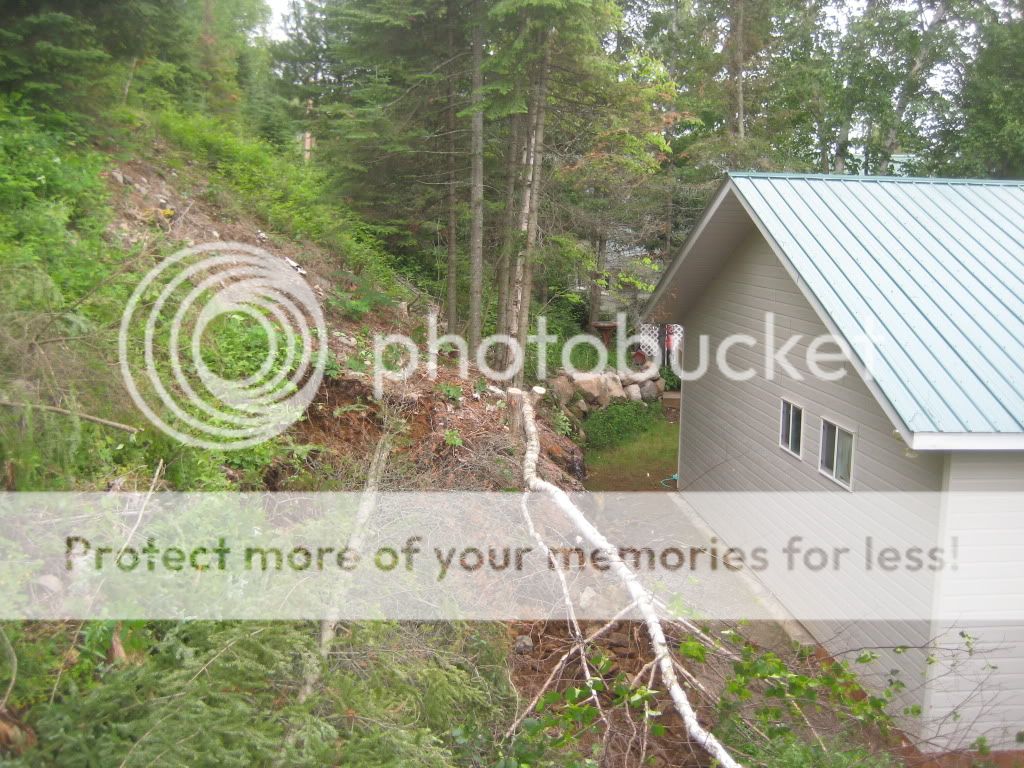
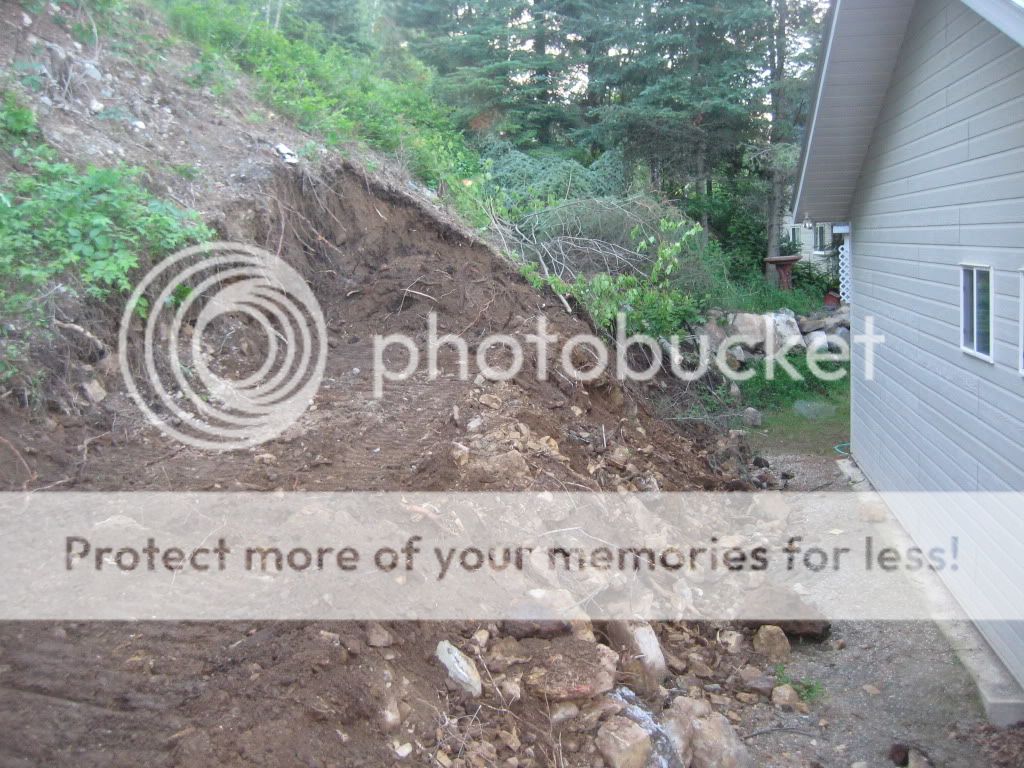
Today we removed a few trees and began to cut the side slope,so far the boulders are fewer between then the level below right behind the cabin.
The plan now calls for a wood timber crib bolted down to a concrete footing and fill with rocks to protect the cabin. Higher level is supposed to maintain skidsteer and atv access.
Below
Understory trees gone, now the real slope can be seen. Fasten you seat belt!
IMG_2321.jpg

Truck in top left going down driveway hill to main cabin to the north.
IMG_2322.jpg


1 tree down 4 to go, note power line in top left, in case the cabin is not enough to watch out for...:)
IMG_2325.jpg


Leaner is gone. Started a little grubbing with the backhoe, and no bed rock, (Yay) then I got rained out.
IMG_2327.jpg

334 ex with thumb, coming in Am weather permitting.
Ken
 
OP
OP
skidsteer.ca

skidsteer.ca

Well-known member
Joined
Jan 20, 2006
Messages
3,853
Well its spring and I'm back at this finally.
Here is a short vid looking down from above.
<embed width="600" height="361" type="application/x-shockwave-flash" allowFullscreen="true" allowNetworking="all" wmode="transparent" src="http://static.photobucket.com/player.swf?file=http://vid406.photobucket.com/albums/pp142/beyondupnorth/Cottage%20Terrace/MVI_2315.mp4">
Today we removed a few trees and began to cut the side slope,so far the boulders are fewer between then the level below right behind the cabin.
The plan now calls for a wood timber crib bolted down to a concrete footing and fill with rocks to protect the cabin. Higher level is supposed to maintain skidsteer and atv access.
Below
Understory trees gone, now the real slope can be seen. Fasten you seat belt!

Truck in top left going down driveway hill to main cabin to the north.


1 tree down 4 to go, note power line in top left, in case the cabin is not enough to watch out for...:)


Leaner is gone. Started a little grubbing with the backhoe, and no bed rock, (Yay) then I got rained out.

334 ex with thumb, coming in Am weather permitting.
Ken
Progress report.
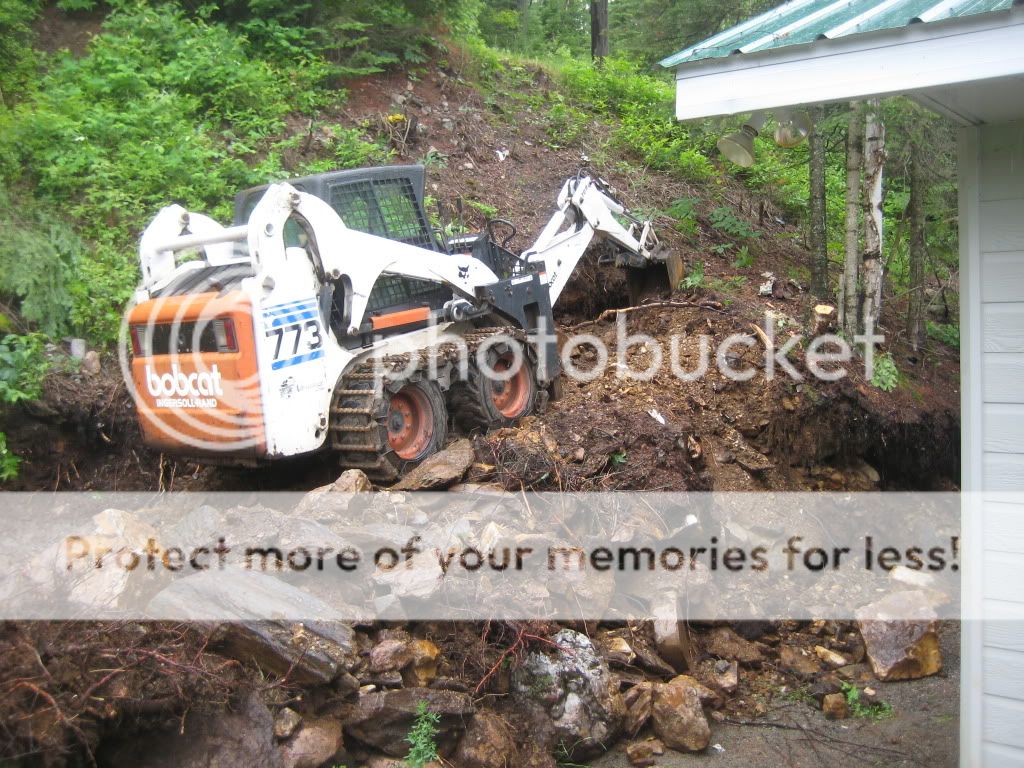
Some scraping with the backhoe determined that this was mostly loose rock and dirt.
However I quickly ran out or room to pile material.
IMG_2332.jpg picture by beyondupnorth


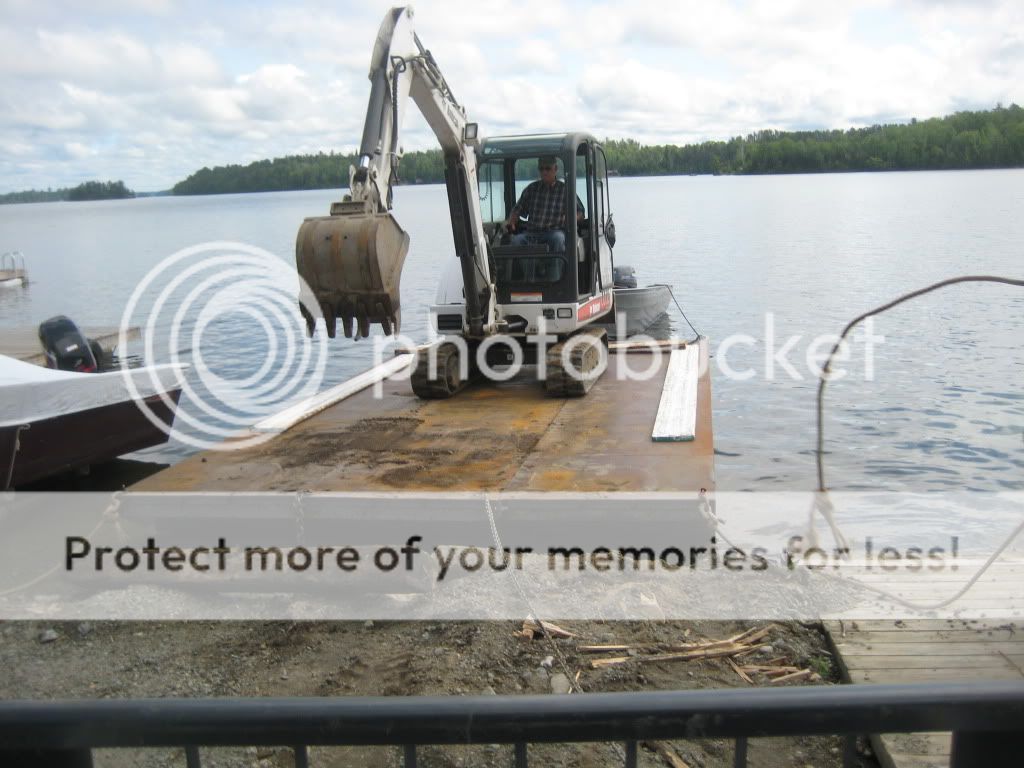
After a hunt for a mini ex with a thumb, one was found 3/4 a mile away, across a lake though.
Here is a pic of the barge ride.
IMG_2345.jpg picture by beyondupnorth

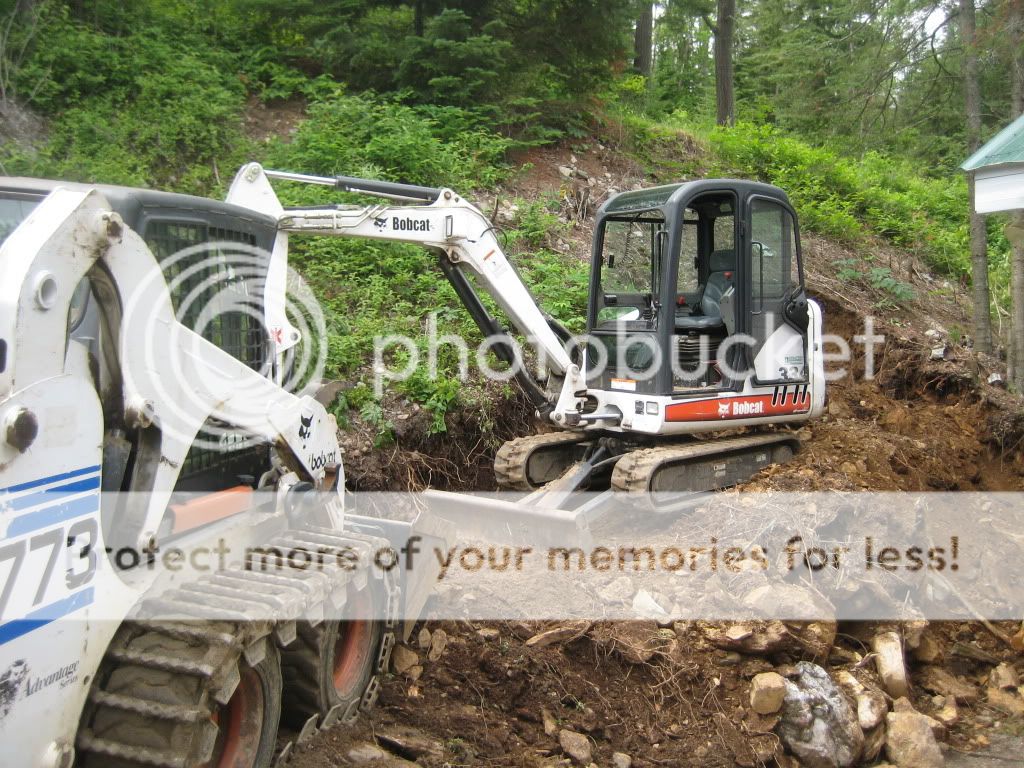
Loading spoil in the skidsteer bucket to haul away.
IMG_2350.jpg picture by beyondupnorth

IMG_2358.jpg picture by beyondupnorth

Made it to the far end with only one bedrock out crop and a couple over size boulders.
Anyone know how good a hyd breaker works on granite?
IMG_2367.jpg picture by beyondupnorth

IMG_2366.jpg picture by beyondupnorth
 

Tazza

Moderator
Staff member
Joined
Dec 7, 2004
Messages
16,835
Progress report.
Some scraping with the backhoe determined that this was mostly loose rock and dirt.
However I quickly ran out or room to pile material.


After a hunt for a mini ex with a thumb, one was found 3/4 a mile away, across a lake though.
Here is a pic of the barge ride.

Loading spoil in the skidsteer bucket to haul away.


Made it to the far end with only one bedrock out crop and a couple over size boulders.
Anyone know how good a hyd breaker works on granite?
The fun sure will begin when you need to crack your way through grannite! I thought the clay/shale we have at home is bad, the excivator attachment just scrapes over the top with a horrible grind and very little digging happens.
Keep the piccies coming
 
OP
OP
skidsteer.ca

skidsteer.ca

Well-known member
Joined
Jan 20, 2006
Messages
3,853
The fun sure will begin when you need to crack your way through grannite! I thought the clay/shale we have at home is bad, the excivator attachment just scrapes over the top with a horrible grind and very little digging happens.
Keep the piccies coming
A lot of the loose rock is crumbly, the hoe breaks the pieces when I grab them with the thumb. However some boulders are not, and a couple I can't handle, barely slide. A rental hammer is 4 hours away, wish I could try one out before I buy. The bedrock however is not going anywhere easy.
I know another fellow that hammers it with a 320 cat hoe, but thats a lot more machine and won't fit in here.
Ken
 

TriHonu

Well-known member
Joined
Apr 15, 2007
Messages
486
A lot of the loose rock is crumbly, the hoe breaks the pieces when I grab them with the thumb. However some boulders are not, and a couple I can't handle, barely slide. A rental hammer is 4 hours away, wish I could try one out before I buy. The bedrock however is not going anywhere easy.
I know another fellow that hammers it with a 320 cat hoe, but thats a lot more machine and won't fit in here.
Ken
Do you have access to a rotary hammer? If so, you could try DEXPAN to break those boulders.
I know it is available in the US and they even sell it on Ebay.
Can you get the boulder up on a car hood or something so you could skid them out?
Another way is to fab a mover from an axle. Picture an axle with a support pointing straight up. On top of the upright, aligned with the rolling path of the axle, weld on a beam. Basket chain the boulder with the basket attached to the beam. Lift the other end of the beam with the loader bucket to pick up the boulder. If the boulder is in the center of the beam, the loader is only supporting half the boulders weight. Its kind of like a hand truck for the loader where the load is primarily supported by the hand truck wheels.
 

TriHonu

Well-known member
Joined
Apr 15, 2007
Messages
486
Do you have access to a rotary hammer? If so, you could try DEXPAN to break those boulders.
I know it is available in the US and they even sell it on Ebay.
Can you get the boulder up on a car hood or something so you could skid them out?
Another way is to fab a mover from an axle. Picture an axle with a support pointing straight up. On top of the upright, aligned with the rolling path of the axle, weld on a beam. Basket chain the boulder with the basket attached to the beam. Lift the other end of the beam with the loader bucket to pick up the boulder. If the boulder is in the center of the beam, the loader is only supporting half the boulders weight. Its kind of like a hand truck for the loader where the load is primarily supported by the hand truck wheels.
I assumed the mini-ex is no longer available. Did you try pinching the boulders between the backfill blade and bucket and raising both of them to just pick the rock off the ground? I know it is a common maneuver with the larger hoes, I just don't know how much weight the mini will handle.
I've used my backhoe attachment to pull/roll things that I couldn't pick up with the loader. Not fast but can get stuff out of the way.
 
OP
OP
skidsteer.ca

skidsteer.ca

Well-known member
Joined
Jan 20, 2006
Messages
3,853
I assumed the mini-ex is no longer available. Did you try pinching the boulders between the backfill blade and bucket and raising both of them to just pick the rock off the ground? I know it is a common maneuver with the larger hoes, I just don't know how much weight the mini will handle.
I've used my backhoe attachment to pull/roll things that I couldn't pick up with the loader. Not fast but can get stuff out of the way.
I did manage to drag them out to where I could get them with my pallet forks. Good tip on the dexpan, and the blade trick. still have the mini ex, but being new to me I never though of that one.
It was tipping me when I picked it and I had no room to put the blade down where needed for stability.
The only advantage to breaking it now would be to reuse it for the rock wall on the upper level.
Today we got three rows of 6 by 6 treated timbers down on the lower level and found bedrock to tie the wall back with stainless cable, in most places. We still intend to crib the wall to. More pics to come.
Ken
 

shadwarr1

Member
Joined
Mar 6, 2010
Messages
19
I did manage to drag them out to where I could get them with my pallet forks. Good tip on the dexpan, and the blade trick. still have the mini ex, but being new to me I never though of that one.
It was tipping me when I picked it and I had no room to put the blade down where needed for stability.
The only advantage to breaking it now would be to reuse it for the rock wall on the upper level.
Today we got three rows of 6 by 6 treated timbers down on the lower level and found bedrock to tie the wall back with stainless cable, in most places. We still intend to crib the wall to. More pics to come.
Ken
I tried my hyd. breaker on a 4 ft diameter boulder with no luck. I kept it on there for about a minute, and saw no cracks at all. I just gave up. You might have better luck as this thing was still buried in a hill side, but you would think it would have done something other then break off a 3 inch chunk after a minute, lol! -Zak
 
OP
OP
skidsteer.ca

skidsteer.ca

Well-known member
Joined
Jan 20, 2006
Messages
3,853
I tried my hyd. breaker on a 4 ft diameter boulder with no luck. I kept it on there for about a minute, and saw no cracks at all. I just gave up. You might have better luck as this thing was still buried in a hill side, but you would think it would have done something other then break off a 3 inch chunk after a minute, lol! -Zak
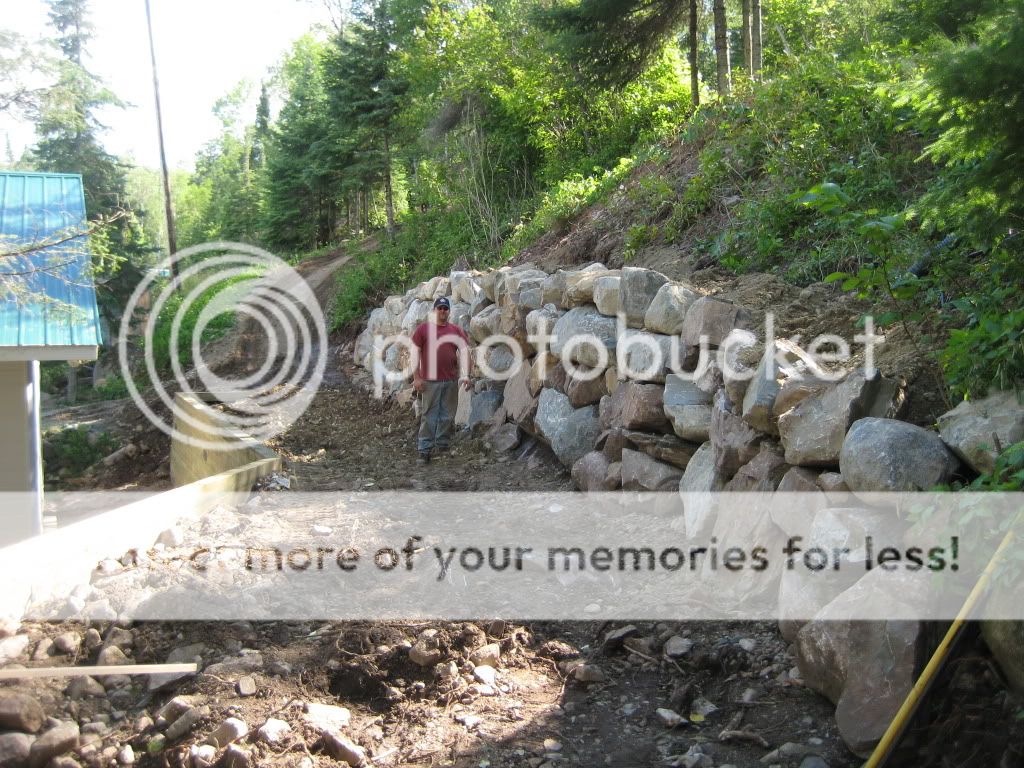
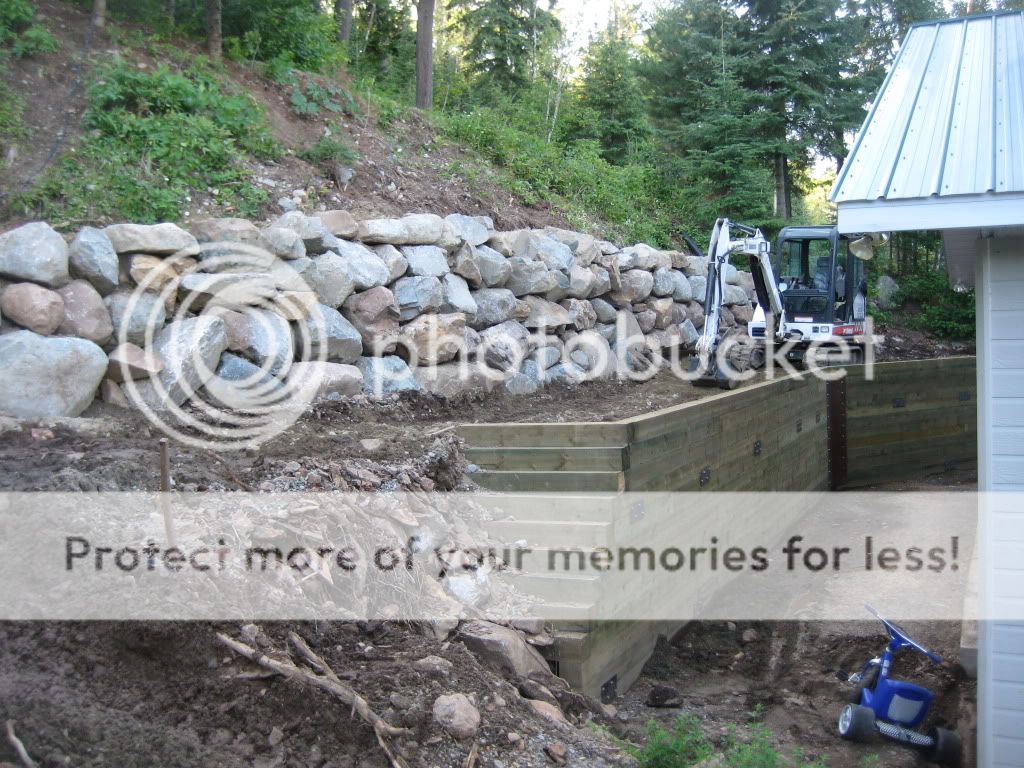
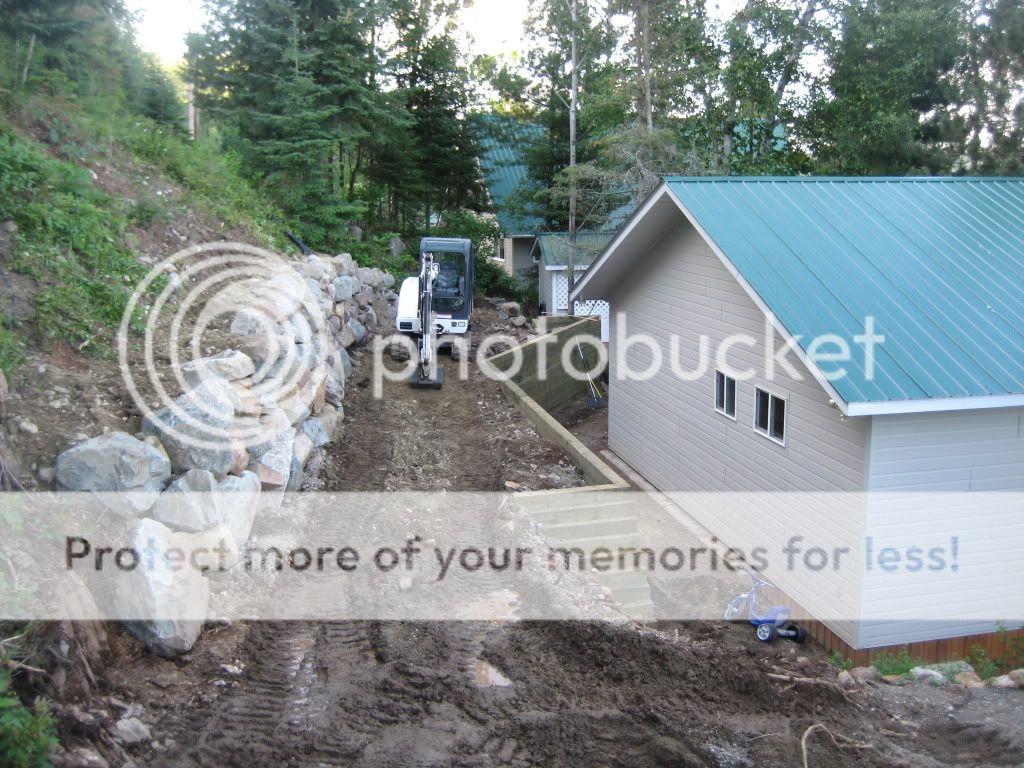
Well we are getting there. 6"x 6 treated wood wall up 7' then approx 7' rock wall up, now just some black dirt and a little maintenance on the rest of the property, grade roads and trim some trees. Rip rap a spill way along the drive where erosion is a problem. Construct a larger parking area up the hill at the garage.
No thats not me in the photo, but a good friend who is helping and standing in for perspective.
IMG_2438.jpg picture by beyondupnorth

IMG_2439.jpg picture by beyondupnorth

IMG_2441.jpg picture by beyondupnorth
 

Tazza

Moderator
Staff member
Joined
Dec 7, 2004
Messages
16,835
Well we are getting there. 6"x 6 treated wood wall up 7' then approx 7' rock wall up, now just some black dirt and a little maintenance on the rest of the property, grade roads and trim some trees. Rip rap a spill way along the drive where erosion is a problem. Construct a larger parking area up the hill at the garage.
No thats not me in the photo, but a good friend who is helping and standing in for perspective.
Looks great!
How do you tie the fasteners in to the ground behind the wall so it doesn't move? i have seen pinning done before, but that was for concrete. They can use compressed air and shoot rods into the bed rock/dirt as a key for the concrete to hold on to and not seperate if water got behind it. I do like the look of no posts to hold the wall back. The walls i have done needed posts. I made concrete railway sleeper sized slabs, they each weigh 150kg which is about the limit of what two people can handle.
 
OP
OP
skidsteer.ca

skidsteer.ca

Well-known member
Joined
Jan 20, 2006
Messages
3,853
Looks great!
How do you tie the fasteners in to the ground behind the wall so it doesn't move? i have seen pinning done before, but that was for concrete. They can use compressed air and shoot rods into the bed rock/dirt as a key for the concrete to hold on to and not seperate if water got behind it. I do like the look of no posts to hold the wall back. The walls i have done needed posts. I made concrete railway sleeper sized slabs, they each weigh 150kg which is about the limit of what two people can handle.
In the second last pic, if you notice all the metal plates at the bottom and 2/3 the way up the 6" by 6" wall, each of those plates sandwich the timbers from the back side too. Then one of the 1/2" bolts is fastened to a turn buckle and then on too a 1/2" concrete anchor drilled into the bedrock.
Also there are cribs laged to the back side of the wall and filled with rock.
Ken
 

nobull1

Well-known member
Joined
Jan 4, 2007
Messages
196
In the second last pic, if you notice all the metal plates at the bottom and 2/3 the way up the 6" by 6" wall, each of those plates sandwich the timbers from the back side too. Then one of the 1/2" bolts is fastened to a turn buckle and then on too a 1/2" concrete anchor drilled into the bedrock.
Also there are cribs laged to the back side of the wall and filled with rock.
Ken
Nice job Ken. Did you have a problem finding enough flat face rocks?

Brian
 
OP
OP
skidsteer.ca

skidsteer.ca

Well-known member
Joined
Jan 20, 2006
Messages
3,853
Nice job Ken. Did you have a problem finding enough flat face rocks?

Brian
Not really Brian. It is just pit run boulders, overs that would not go through the crusher.
We brought them down a few at a time, from our staging area duo to space limitations below. Eye balled them up and plunked them in. A few had to be swapped out here and there as we went because they just did not fit. However 90+ % went in the first try.
The boom swing on the mini ex was a real asset allowing us to rotate the rocks. A little bar work and the majority could be made to sit tight with the center of gravity pulling them back towards the bank. Fill with gravel behind and keep piling. We were mostly limited by the reach of the mini and what it could lift. I asked for 18 to 30" material, but we ended up with a few in the 40" plus range, that we could not handle. Also the higher we went the less the mini can lift and running out of stroke on the main boom was a problem. I had to lift over the blade and use it to tilt the house to extend my reach.
 
OP
OP
skidsteer.ca

skidsteer.ca

Well-known member
Joined
Jan 20, 2006
Messages
3,853
Not really Brian. It is just pit run boulders, overs that would not go through the crusher.
We brought them down a few at a time, from our staging area duo to space limitations below. Eye balled them up and plunked them in. A few had to be swapped out here and there as we went because they just did not fit. However 90+ % went in the first try.
The boom swing on the mini ex was a real asset allowing us to rotate the rocks. A little bar work and the majority could be made to sit tight with the center of gravity pulling them back towards the bank. Fill with gravel behind and keep piling. We were mostly limited by the reach of the mini and what it could lift. I asked for 18 to 30" material, but we ended up with a few in the 40" plus range, that we could not handle. Also the higher we went the less the mini can lift and running out of stroke on the main boom was a problem. I had to lift over the blade and use it to tilt the house to extend my reach.
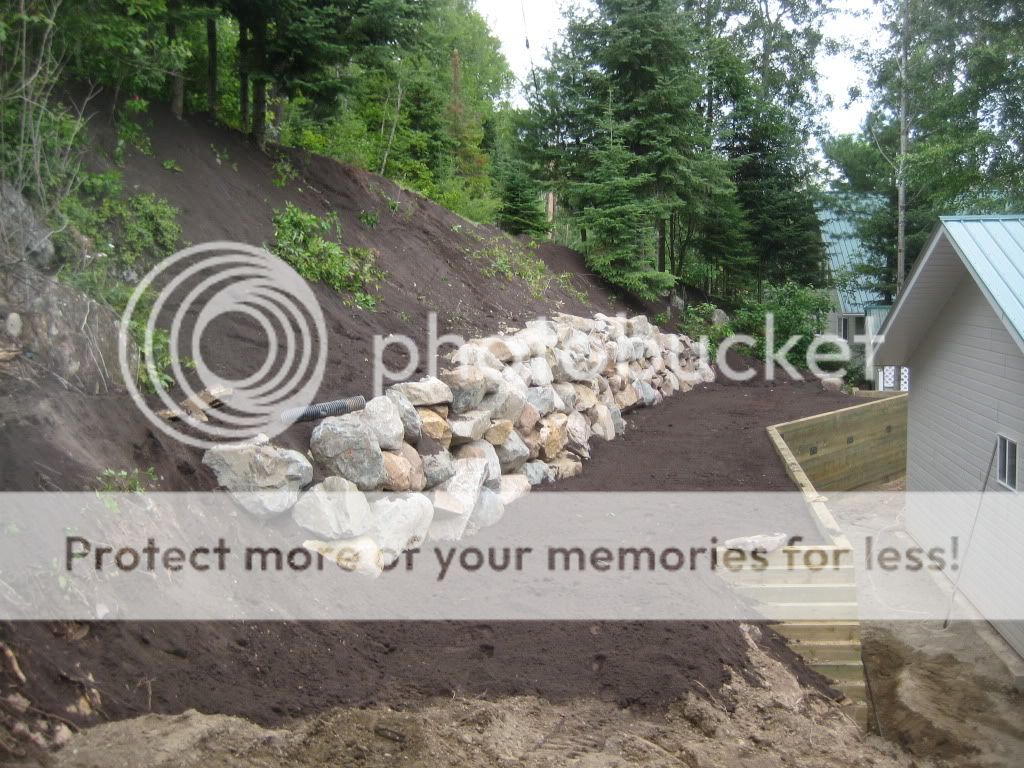
Ready for seed, praying for light rains.
IMG_2443.jpg picture by beyondupnorth

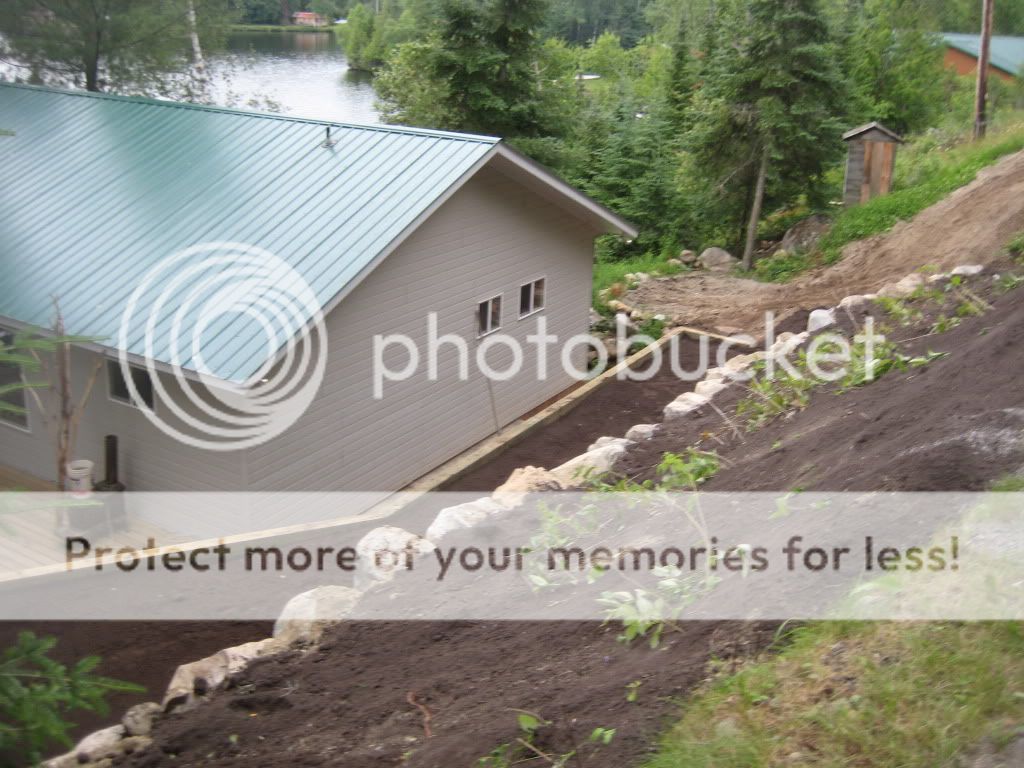
Looking down from the main driveway, wood wall looks like its 2 feet in the pic, instead of 6 ft.
IMG_2445.jpg picture by beyondupnorth

We left most of the vegitation on the slope above the rock wall and run top soil over it, and seeded, hopefully with the shade gone it grows quickly.
Ken
 

KevinCuellar

Member
Joined
Dec 19, 2011
Messages
5
Ready for seed, praying for light rains.

Looking down from the main driveway, wood wall looks like its 2 feet in the pic, instead of 6 ft.

We left most of the vegitation on the slope above the rock wall and run top soil over it, and seeded, hopefully with the shade gone it grows quickly.
Ken
Retaining walls are built in order to hold back ground which would otherwise move downwards. Their purpose is to stabilise slopes and provide useful areas at different elevations, e.g. terraces for agriculture, buildings, roads and railways.
 
Top