Ster1 said it with his comment above, plus, as said above, shorten those studs a bit. I had to tap my flanges with a fair size hammer until I got them flat, then used a file to touch them up and make sure the surface was flat. In a home shop, a file is probably as good of a straight edge as you will have or need to make sure you have done a good job... I also drilled my manifold a bit bigger so I did not have to force it on the studs. Double gaskets will continue to blow out and I fear your liquid repair will do likewise. I hate being a "Debby Downer" but thats how I see it. Best of luck.
You are using an out of date browser. It may not display this or other websites correctly.
You should upgrade or use an alternative browser.
You should upgrade or use an alternative browser.
Help Support SkidSteer Forum:
cdmccul
Well-known member
- Joined
- Jun 18, 2013
- Messages
- 504
I too think the filler will burn out. Or does ok on automotive mufflers, but right at the manifold flanges, it won't last very long. Shouldn't cause harm, but won't be a long fix.
OP
OP
bobcatzack
Well-known member
- Joined
- Oct 16, 2022
- Messages
- 122
Completely understand. I will take the approach you and Ster1 have suggested. ThanksSter1 said it with his comment above, plus, as said above, shorten those studs a bit. I had to tap my flanges with a fair size hammer until I got them flat, then used a file to touch them up and make sure the surface was flat. In a home shop, a file is probably as good of a straight edge as you will have or need to make sure you have done a good job... I also drilled my manifold a bit bigger so I did not have to force it on the studs. Double gaskets will continue to blow out and I fear your liquid repair will do likewise. I hate being a "Debby Downer" but thats how I see it. Best of luck.
Now on a home made stand .. starting to look more like an engine : )
Attachments

Last edited:
Completely understand. I will take the approach you and Ster1 have suggested. Thanks
Now on a home made stand .. starting to look more like an engine : )
That is looking great. You are certainly getting there! I am waiting for the time when you reinstall the engine. I found a way to get it done but curious of advice you will get. I may have done it the hard way, I have no idea. Make sure you grease that coupler between the engine and pump while things are apart.
OP
OP
bobcatzack
Well-known member
- Joined
- Oct 16, 2022
- Messages
- 122
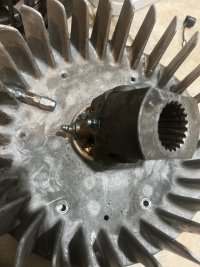
Engine and transmission? Upon your reminder, greased these two spots ..That is looking great. You are certainly getting there! I am waiting for the time when you reinstall the engine. I found a way to get it done but curious of advice you will get. I may have done it the hard way, I have no idea. Make sure you grease that coupler between the engine and pump while things are apart.
Attachments
Last edited:
OP
OP
bobcatzack
Well-known member
- Joined
- Oct 16, 2022
- Messages
- 122
A quick update -It looks to me like the flanges are bent under the studs. You could just take them off again and straighten them with a hammer and a vice. Also, to make getting that exhaust on/off easier, drill those flanges out one size bigger. For some reason, the holes in the flanges don't line up well, and when you make em a tad bigger, that job becomes MUCH easier.
Wanted to tackle removal/fixing/reinstall of the exhaust manifold at a later stage.
For now I was able to put the parts together, connected the wiring, figured a way to provide power to the coil for ignition (with a switch), pulled the engine back out to the garage, extended the fuel line and connected to fuel pump, connected the battery and tried to see if it starts. Unfortunately, there is something going on that I cannot figure out - it cranks and wants to start, but just wouldn't (video posted below). I must have messed around for couple hours tinkering with the distributor position (rotating slightly either ways) thinking the timing must be off, but to no avail. Fuel line was extended with a pipe joint, perhaps not enough fuel is being pumped? I did inadvertently tinker with the idle speed screw on the carburetor, wonder if that is causing it to not continue to run? The carburetor is dripping quite a lot of gas from the air intake opening. Also when I had installed the piston rings, I had forgotten to check if the rings gaps were not lining up on top of each other, would that cause it to not start? I checked for spark in all the plugs - looks like good spark in each. Oil is good level - I don't see any leakage, except slightly around the camshaft cover. Would the valves need adjusting? I do see slightly dark smoke that comes out the exhaust .. oil burning? Any ideas or thoughts or suggestions would be highly appreciated!!
* tomorrow morning I will also get the compressor readings on all four cylinders and post it here.
Last edited:
Oh boy so close now! So a couple thoughts, if gas is dripping out, that's a float valve problem. You might get lucky just tapping the carburetor with a screwdriver or something you can get in there. Maybe that will get the float to seat. That's no likely, but worth a try. Otherwise that carb has to come back off and the float valve cleaned or replaced. You're going to want to take care of that leak before trying to start it again. The volume of fuel is going to be ok. So let's talk timing! You got your internal timing set? Your crankshaft gear and camshaft gear timing marks line up? I can't remember if you took the engine that far apart… maybe you didn't. With cylinder 1 (the one closest to the water pump) on TDC compression, the distributor rotor points to the lead for the #1 cylinder. Bring the engine to to TDC 1, take off the cap and make sure the rotor is pointing to the wire that goes to 1. Firing order of this engine is not normal. Normally a 4 banger will be 1,3,4,2 but the Kent is different at 1,2,4,3. This would be in your manual, which I'm sure you've combed over. Open up that throttle a little, and don't be afraid of giving her a little ether on that first start. With oil and stuff in there, those plugs sometimes have a hard time firing that first time. It's going to smoke at first. Alot. Don't sweat that, it'll clear up. Be ready to disconnect that coil should the rpm's shoot up for some reason. It's cranking fast, so compression looks good from here.
OP
OP
bobcatzack
Well-known member
- Joined
- Oct 16, 2022
- Messages
- 122
Removing the carburetor when the engine is out is quite easy. Will take it out and tap it, then see if I can hear a clicking noise if I turn it up/down .. hopefully that's a good test that the float is free?Oh boy so close now! So a couple thoughts, if gas is dripping out, that's a float valve problem. You might get lucky just tapping the carburetor with a screwdriver or something you can get in there. Maybe that will get the float to seat. That's no likely, but worth a try. Otherwise that carb has to come back off and the float valve cleaned or replaced. You're going to want to take care of that leak before trying to start it again. The volume of fuel is going to be ok. So let's talk timing! You got your internal timing set? Your crankshaft gear and camshaft gear timing marks line up? I can't remember if you took the engine that far apart… maybe you didn't. With cylinder 1 (the one closest to the water pump) on TDC compression, the distributor rotor points to the lead for the #1 cylinder. Bring the engine to to TDC 1, take off the cap and make sure the rotor is pointing to the wire that goes to 1. Firing order of this engine is not normal. Normally a 4 banger will be 1,3,4,2 but the Kent is different at 1,2,4,3. This would be in your manual, which I'm sure you've combed over. Open up that throttle a little, and don't be afraid of giving her a little ether on that first start. With oil and stuff in there, those plugs sometimes have a hard time firing that first time. It's going to smoke at first. Alot. Don't sweat that, it'll clear up. Be ready to disconnect that coil should the rpm's shoot up for some reason. It's cranking fast, so compression looks good from here.
Timing - manual says firing order is 1-2-3-4 but RandyL had suggested try 1-2-4-3 which worked perfectly batter I had converted it to solid state. So it is still set at that. I do have a timing gun and was able set the timing quite right last time I had tried (but the engine has to be running at an idle first to do that right?) also adjustments were made at higher rpm.
I will try the carb route first and see if that makes a difference.
Thanks!
I seems to me that there might be a electrical problem too , like you have voltage to the coil in the start position and it runs ,but when you go to the run position you lose voltage to the coil and the engine quits. just something to check as this is just a observation of the video. I think you are getting close to sucess.
OP
OP
bobcatzack
Well-known member
- Joined
- Oct 16, 2022
- Messages
- 122
Thanks for the observation! I would have no idea how to check if the voltage is lost when the engine tries to run. Or to attempt another method of mimicking the ignition process.I seems to me that there might be a electrical problem too , like you have voltage to the coil in the start position and it runs ,but when you go to the run position you lose voltage to the coil and the engine quits. just something to check as this is just a observation of the video. I think you are getting close to sucess.
This morning spent another 4 hours trying various combination of distributor settings, carb settings (which no longer leaks now), plenty of starter fluid (interesting observation .. too much started fluid makes the engine not even attempt to start), also noted the throttle needs to be in full position for the engine to attempt to start otherwise it does not even try to start. I really think I got the timing pretty well set (I have spent days and days trying to figure out the timing settings before pulling the engine .. so at this point I think I have fairly good idea of getting close to setting it right). I tinkered with the idle adjuster in the rear of the carb at many positions to see if that made any difference, it did not.
Here's a bummer, I have to leave town for 1 week so it would be that I cannot get back to the bobcat to diagnose it any further : (
Your observation on a potential electronic issue is encouraging. I might not be correctly getting the power to coil (it is currently direct from the positive terminal to the positive side of the coil, with an on/off switch in the middle). Any new wiring ideas will be welcome! Will have to try when I am back in a week.
Thanks everyone!!
Last edited:
OP
OP
bobcatzack
Well-known member
- Joined
- Oct 16, 2022
- Messages
- 122
Good thinking there!! Before leaving town for the week, I went back real quick and removed the on/off switch to the coil ..tried starting and guess what? The thing fired up!! The switch was defective all along! Wasted tons of time .. thank you for diverting my mind from the carb and timing!I seems to me that there might be a electrical problem too , like you have voltage to the coil in the start position and it runs ,but when you go to the run position you lose voltage to the coil and the engine quits. just something to check as this is just a observation of the video. I think you are getting close to sucess.
To ALL members helping me all along, a BIG thanks!!!!
I am not out of the water yet though .. even though it started, it seems to be coughing from the carburetor intake, additionally the exhaust manifold got really hot in no time! Any observations/comments/advise on making it run better will be highly appreciated!
MANY THANKS TO EVERYONE AGAIN!!!

Last edited:
Good thinking there!! Before leaving town for the week, I went back real quick and removed the on/off switch to the coil ..tried starting and guess what? The thing fired up!! The switch was defective all along! Wasted tons of time .. thank you for diverting my mind from the carb and timing!
To ALL members helping me all along, a BIG thanks!!!!
I am not out of the water yet though .. even though it started, it seems to be coughing from the carburetor intake, additionally the exhaust manifold got really hot in no time! Any observations/comments/advise on making it run better will be highly appreciated!
MANY THANKS TO EVERYONE AGAIN!!!
check your timing Z - it can 'cough back' and run hot. i had an old saab v4 that used to cough - aka backfire and shoot flames back out the carb. Timing had slipped too far off. she would run, but spit back badly.
OP
OP
bobcatzack
Well-known member
- Joined
- Oct 16, 2022
- Messages
- 122
Got it, I will try my best to set the timing when I get back home in a week, I do have a timing gun and have used it before so sort of understand how timing is set. Thank you!check your timing Z - it can 'cough back' and run hot. i had an old saab v4 that used to cough - aka backfire and shoot flames back out the carb. Timing had slipped too far off. she would run, but spit back badly.
Once you get the timing set, lock it down and don't move it again unless you put the light on it and see it as not correct. Follow the manufacturers timing procedure, if it has a vacuum line it probably needs to be disconnected and plugged during adjustment.
The way it runs, it sounds like it either has late timing or a lean running condition.
When setting up a motor there are certain items that should be done in order because they should not be variables.
1st would be basic mechanical condition, you have already been inside the motor if all is good the compression should be equal +or - no more than 10% from highest to lowest reading cylinder. Valve adjustment would be next and would also be reflected by compression readings being off if not correct.
2nd would be base ignition timing. As discussed above, follow manufacturers spec and procedure.
3rd would be fuel adjustments. Be sure there are no vacuum leaks, all the intake manifold fitting are connected, good gaskets and not missing broken hoses. Fuel dripping out of the carb is a problem. You could have a needle seat issue from moving the carb around or tipping it...this is can be a topic unto itself, but idle and mixture adjustments can only be made after all these items are set correctly.
Great work getting this far with it.
OP
OP
bobcatzack
Well-known member
- Joined
- Oct 16, 2022
- Messages
- 122
Thank you for all the practical points! Will follow through with your advise on setting the timing correctly.Once you get the timing set, lock it down and don't move it again unless you put the light on it and see it as not correct. Follow the manufacturers timing procedure, if it has a vacuum line it probably needs to be disconnected and plugged during adjustment.
The way it runs, it sounds like it either has late timing or a lean running condition.
When setting up a motor there are certain items that should be done in order because they should not be variables.
1st would be basic mechanical condition, you have already been inside the motor if all is good the compression should be equal +or - no more than 10% from highest to lowest reading cylinder. Valve adjustment would be next and would also be reflected by compression readings being off if not correct.
2nd would be base ignition timing. As discussed above, follow manufacturers spec and procedure.
3rd would be fuel adjustments. Be sure there are no vacuum leaks, all the intake manifold fitting are connected, good gaskets and not missing broken hoses. Fuel dripping out of the carb is a problem. You could have a needle seat issue from moving the carb around or tipping it...this is can be a topic unto itself, but idle and mixture adjustments can only be made after all these items are set correctly.
Great work getting this far with it.
Similar threads
- Replies
- 9
- Views
- 2K
- Replies
- 14
- Views
- 830