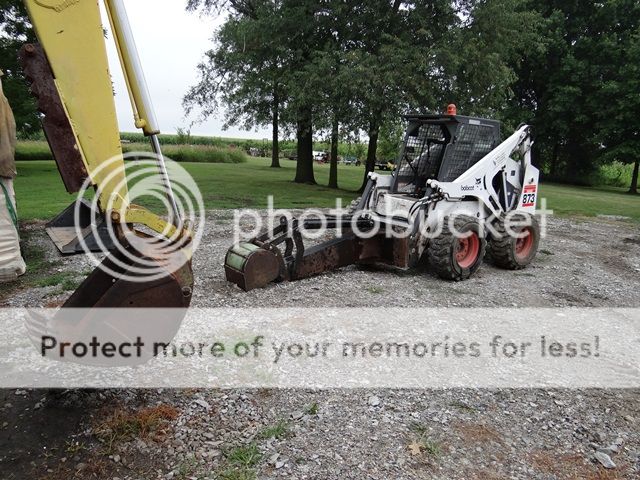
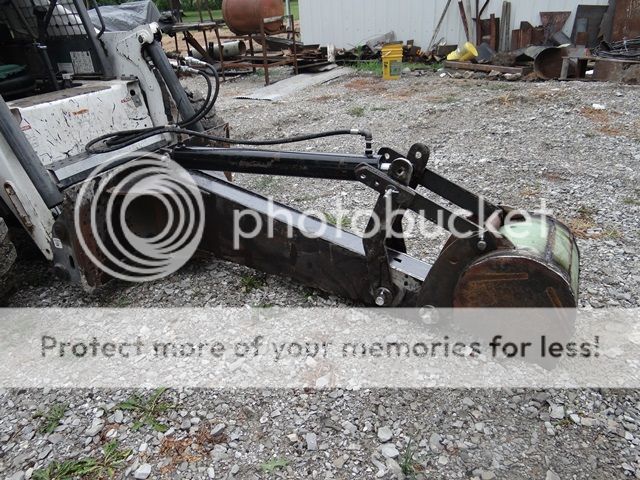
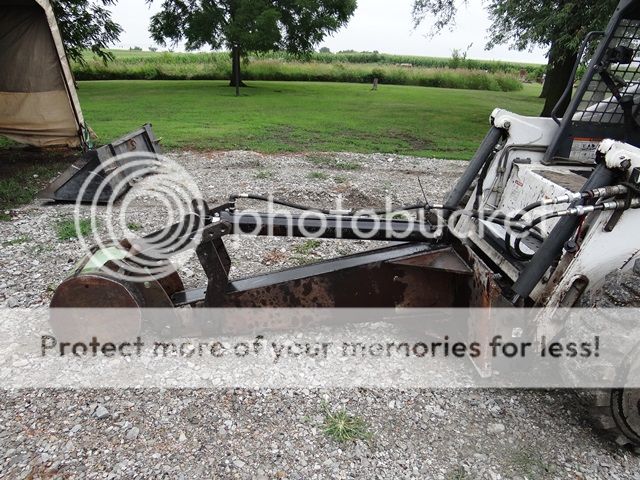
Well i can say this project should be all done today , I have never had a project take so long to complete . i had to build a 16 inch bucket for this hoe , as i had a 10 , 20 , and 36 buckets but one was to small or either too large for this hoe , everything on this was made from either flat stock or bar stock , it's a solid hoe fully welded , all construction was 1/2 inch steel , pens were 1, 1 1/4 , 1 1/2 , the cylinder i used was over the top but i had no other plans for this cylinder 45X4.5 bore X 2 inch rod , how do i post pics as the last time i posted it was a hot link to the photo's , i must be gettin too damn old to remember these things . 1 of U
Congrats 1 of U !! I'm sure I'm not the only one here who can relate to taking waaay longer than you originally expected than you thought it would.
Pictures are a bit complicated for this site because of the old software. First, you have to be able to use the HTML tab at the bottom to use the code which will show it in the post. To do this, you can't be using Chrome or Firefox without special add-ons, you have to use a compatible version of Internet Explorer. That will work, or you can add the extension for your non-IE browser to mimic IE which is what I've been doing. I use Chrome and I've installed IE-Tab
(link) in it which opens a tab to do things sensitive to IE and it works OK. So do that first. If you have a compatible browser, you'll see this:
Instead of this:

Note at the bottom of the second picture that the HTML text just sits next to the "Design" text. Neither are actually tabs, so they aren't enabled to choose one or the other.
Once that is worked out, you need to link to the photo in the HTML code. You don't need to know HTML but the photo file needs to be uploaded out there somewhere on the internet for the post to link to it. I upload mine to photobucket. It's free and it has links to copy the proper HTML code so you can then pase it into your post (on the HTML tab).
I know it's not simple and my post may not be as clear as a guy would need to get walked through it. But that's all I know to do.
In summary it's three steps. 1) have a compatible IE browser 2) upload your picture somewhere 3) paste the code on the HTML tab for it to be displayed. Note that you can preview your post before committing to it (the button on the lower right).
Good luck with the pictures, and congrats again on the project. I'm looking forward to seeing photos of it.


")