A 743 in pieces

Help Support SkidSteer Forum:

OP
OP
T

Tazza

Moderator
Staff member
Joined
Dec 7, 2004
Messages
16,836
ALL the seals inside my control block are black....
There are 2 quad rings on each spool which my seal shop didn't have the same width, but we both agreed that using a backup ring on the non pressure side would take up the rest, all the other seals are standard O rings and backup rings of a standard size. I will however need to buy genuine boots that cover the exposed part of the spool.
Well, the chaincase is back together. I managed to paint it today, the weather held long enough to get it all done. Here is a pic.
http://users.tpg.com.au/tazza_/bobcat/121_2112.JPG
You will notice on the supports for the axle housings there is pitting all over them and the side of the chain case, there was a heap of flakey rust on here. I think it was from mud that had been sitting on there, both front supports have the same problem. I did remove as much rust as i could with a buffing wheel and a scabbler, i then put rust converter on. I put a really thick coat on these parts to hopefully prevent it from getting worse. It hase all been done in 2 pack paint which should give me a nice tough coat. It looks awfully white! but when together it will not last long, it will soon be all brown and grubby looking.
 

Tigerotor77W

Well-known member
Joined
Apr 29, 2004
Messages
268
Well, the chaincase is back together. I managed to paint it today, the weather held long enough to get it all done. Here is a pic.
http://users.tpg.com.au/tazza_/bobcat/121_2112.JPG
You will notice on the supports for the axle housings there is pitting all over them and the side of the chain case, there was a heap of flakey rust on here. I think it was from mud that had been sitting on there, both front supports have the same problem. I did remove as much rust as i could with a buffing wheel and a scabbler, i then put rust converter on. I put a really thick coat on these parts to hopefully prevent it from getting worse. It hase all been done in 2 pack paint which should give me a nice tough coat. It looks awfully white! but when together it will not last long, it will soon be all brown and grubby looking.
Tazza, I'm downright impressed... first, because I've never seen any SSL without its engine; and second, because your doing that job in itself is commedable.

And don't tell me you've been able to undo and are going to re-put back together that 743 *on your own*?
 

Eric

Well-known member
Joined
Jan 19, 2005
Messages
169
Tazza, I'm downright impressed... first, because I've never seen any SSL without its engine; and second, because your doing that job in itself is commedable.

And don't tell me you've been able to undo and are going to re-put back together that 743 *on your own*?
Looking good! Looks professional.
121_2112.JPG
 
OP
OP
T

Tazza

Moderator
Staff member
Joined
Dec 7, 2004
Messages
16,836
Looking good! Looks professional.
I must admit, i haven't done ALL the work myself, i have had the help of my dad and my trusty 731 bobcat (seen in a few pics) to remove bits and pieces, some of these bits are damn heavy!!!!
I got the machining of the engine done at my dad's work (engine re-co joint) but i assembled it myself, its really not all that hard with a book on the engine. The only work i will need others to do is hydraulic hoses and getting a buddy to drill out the bushings on the back of the tilt rams so i can insert a re-newable wear sleeve.
All in all, these machines are really quite simple. The only major equipment you will need is a lathe. Making new pins and bushings yourself is alot cheaper than bought ones, and you can make them oversize if needed.
The next part i am working on now is the chassis, i have removed the 8 bushings for the lift arms and rams (geez that was NOT fun) so i can make new ones, the old ones were quite worn. I will keep posting piccies.
Eric - how did you get the picture to show up in the post? i can't work the rotten thing out.
 

Tigerotor77W

Well-known member
Joined
Apr 29, 2004
Messages
268
I must admit, i haven't done ALL the work myself, i have had the help of my dad and my trusty 731 bobcat (seen in a few pics) to remove bits and pieces, some of these bits are damn heavy!!!!
I got the machining of the engine done at my dad's work (engine re-co joint) but i assembled it myself, its really not all that hard with a book on the engine. The only work i will need others to do is hydraulic hoses and getting a buddy to drill out the bushings on the back of the tilt rams so i can insert a re-newable wear sleeve.
All in all, these machines are really quite simple. The only major equipment you will need is a lathe. Making new pins and bushings yourself is alot cheaper than bought ones, and you can make them oversize if needed.
The next part i am working on now is the chassis, i have removed the 8 bushings for the lift arms and rams (geez that was NOT fun) so i can make new ones, the old ones were quite worn. I will keep posting piccies.
Eric - how did you get the picture to show up in the post? i can't work the rotten thing out.
Absolutely post more pics! It looks like a nice little hobby I can try to pick up in twenty years, when I'm freed from education.

And Eric is certainly the person to ask for photos. :) He's pretty good at it!
 

Eric

Well-known member
Joined
Jan 19, 2005
Messages
169
I must admit, i haven't done ALL the work myself, i have had the help of my dad and my trusty 731 bobcat (seen in a few pics) to remove bits and pieces, some of these bits are damn heavy!!!!
I got the machining of the engine done at my dad's work (engine re-co joint) but i assembled it myself, its really not all that hard with a book on the engine. The only work i will need others to do is hydraulic hoses and getting a buddy to drill out the bushings on the back of the tilt rams so i can insert a re-newable wear sleeve.
All in all, these machines are really quite simple. The only major equipment you will need is a lathe. Making new pins and bushings yourself is alot cheaper than bought ones, and you can make them oversize if needed.
The next part i am working on now is the chassis, i have removed the 8 bushings for the lift arms and rams (geez that was NOT fun) so i can make new ones, the old ones were quite worn. I will keep posting piccies.
Eric - how did you get the picture to show up in the post? i can't work the rotten thing out.
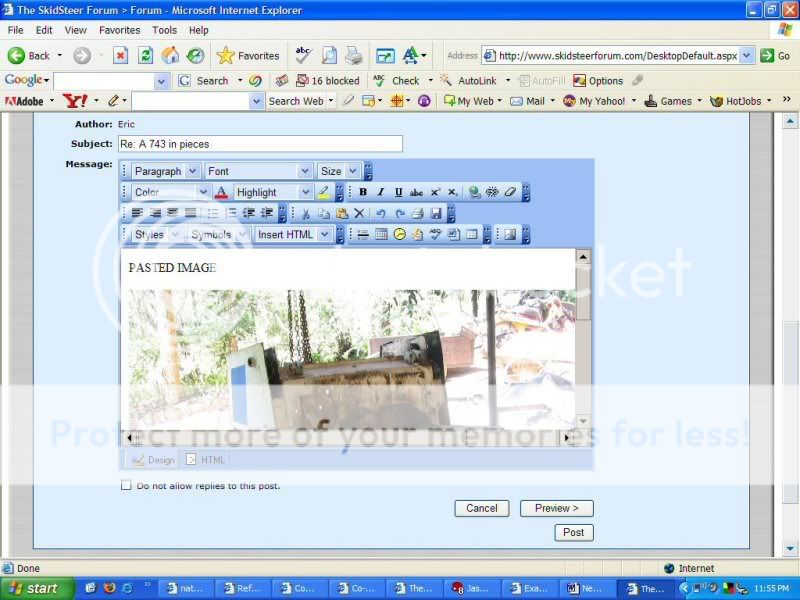
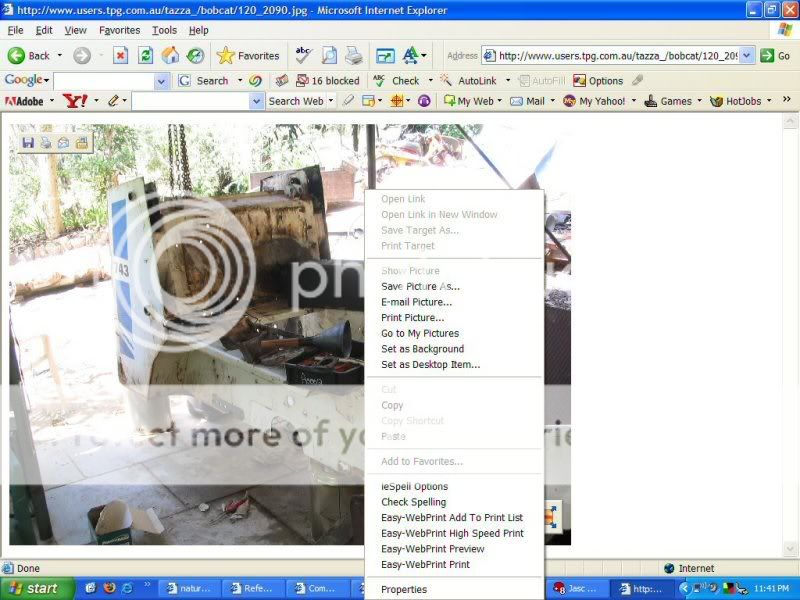
Ok, this is the way you have to do it for this site. First the image needs to be hosted or existing somewhere on the internet. For example your site. You have your pictures hosted at http://www.users.tpg.com.au/tazza_/bobcat/ . Then simply find the photo you wish to post. Then you must right click (with the mouse) on the picture to pop up the command menu. Select copy. You are actually copying and pasting the actual image from where it is located on the internet to the window where you type your message to post.
This is what it looks like when you are copying an image.
Image6.jpg

This is what it will look like after you paste it in the message posting area.
Image7.jpg
Then just post your message. I hope this helps everyone to start posting some photos of their stuff, parts they are trying to describe, jobs they are on, or whatever. A picture speaks a thousand words.
 
OP
OP
T

Tazza

Moderator
Staff member
Joined
Dec 7, 2004
Messages
16,836
Ok, this is the way you have to do it for this site. First the image needs to be hosted or existing somewhere on the internet. For example your site. You have your pictures hosted at http://www.users.tpg.com.au/tazza_/bobcat/ . Then simply find the photo you wish to post. Then you must right click (with the mouse) on the picture to pop up the command menu. Select copy. You are actually copying and pasting the actual image from where it is located on the internet to the window where you type your message to post.
This is what it looks like when you are copying an image.


This is what it will look like after you paste it in the message posting area.

Then just post your message. I hope this helps everyone to start posting some photos of their stuff, parts they are trying to describe, jobs they are on, or whatever. A picture speaks a thousand words.
Bob%202.0%20Back%20Burnt.jpg

AH HA! so it does work!
This is a before picture, we think it was deliberatly burnt, as the cylinder head had at least 4 cracks we could see without putting a tester on it, it had been cracked for some time as the head showed signs of lots water detonation.
 

Mcharley

Member
Joined
Jan 8, 2006
Messages
13
AH HA! so it does work!
This is a before picture, we think it was deliberatly burnt, as the cylinder head had at least 4 cracks we could see without putting a tester on it, it had been cracked for some time as the head showed signs of lots water detonation.
Hey Tazza, So is that what a barbie looks like?? Where do you hang the shrimp?? When you close the door does it become a smoker to make jerky?? Sorry, I couldn't help myself. Have a good day. mcharley
 
OP
OP
T

Tazza

Moderator
Staff member
Joined
Dec 7, 2004
Messages
16,836
Hey Tazza, So is that what a barbie looks like?? Where do you hang the shrimp?? When you close the door does it become a smoker to make jerky?? Sorry, I couldn't help myself. Have a good day. mcharley
I should take a picture of a REAL babry, the one that you put wood in, not the one you plug into a gas bottle.
Honestly, i don't think anyone cooks shrimp on the babry much, my uncle did it a few years back and stunk the place up as the shells burnt on the plate, was nasty indeed!.
I have only ever heard of jerky in american movies, i have never seen it in the shops unless we call it something else.
 

Mcharley

Member
Joined
Jan 8, 2006
Messages
13
I should take a picture of a REAL babry, the one that you put wood in, not the one you plug into a gas bottle.
Honestly, i don't think anyone cooks shrimp on the babry much, my uncle did it a few years back and stunk the place up as the shells burnt on the plate, was nasty indeed!.
I have only ever heard of jerky in american movies, i have never seen it in the shops unless we call it something else.
Hey Tazza, Well I learned quite a few things in the last couple of hours. #1) You Guys Down Under do have a sense of humor. #2) That I am able to send "yaroo" email, And it gets there pretty quick. #3) It seems that what ever lanquage it is you folks speak there. It is in english on my end after it goes thru the automatic "yaroo" translator attachment. It must be a High Flow unit. #4) That it is "Babry" and not "Barbie". DAMN, And I was having these fantasies about a Long Legged, Hot Blooded & Bodied, Blonde Beauty Aussie Girl that did not know the word NO. And hand fed me shrimp and chocolate covered strawberries. Oh, and by the way jerky here is "ANYTYPE" of meat that is smoked and salted and has a shelf life of dirt. (kinda tastes like it too) Also "ANYTYPE" means just about anything. Regards, mcharley
 

ajwgator

Well-known member
Joined
Oct 12, 2005
Messages
58
Hey Tazza, Well I learned quite a few things in the last couple of hours. #1) You Guys Down Under do have a sense of humor. #2) That I am able to send "yaroo" email, And it gets there pretty quick. #3) It seems that what ever lanquage it is you folks speak there. It is in english on my end after it goes thru the automatic "yaroo" translator attachment. It must be a High Flow unit. #4) That it is "Babry" and not "Barbie". DAMN, And I was having these fantasies about a Long Legged, Hot Blooded & Bodied, Blonde Beauty Aussie Girl that did not know the word NO. And hand fed me shrimp and chocolate covered strawberries. Oh, and by the way jerky here is "ANYTYPE" of meat that is smoked and salted and has a shelf life of dirt. (kinda tastes like it too) Also "ANYTYPE" means just about anything. Regards, mcharley
Well Tazza I've tried all the automotive stores here in Lexington KY and no luck finding an eight or nine pin connector. I went on and disassembled what was left of the smashed connectors on my 843 and discovered that they are made by Deutsch. An online search for Deutsch led me to a couple of places. One was MSD Ignitions and the other was Ladd Industries. Ladd, (www.laddinc.com) is the sole U.S. distributor for Deutsch IPD. MSD Ignitions sells the eight pin Deutsch connector under it's own part number. I ordered a couple from one of MSD's distributors here in Lexington but have not recieved it yet. For shits and grins I emailed Ladd and asked about getting a couple. I got a call from their sales department the day after and learned they deal in minimum quantities and large orders. But the guy said he would send out a "sample" for me..... Well hell, the next day UPS delievered two sets of plugs, connectors, pins, and locks! I about fell over because they are exactly the same as what are on my 843. Can't beat that! I guess I'll have an extra set now once the ones I ordered from MSD's distributor come in. I have already installed the ones Ladd sent me and they work just great! By the way, your rebuild project looks Great!
 
OP
OP
T

Tazza

Moderator
Staff member
Joined
Dec 7, 2004
Messages
16,836
Well Tazza I've tried all the automotive stores here in Lexington KY and no luck finding an eight or nine pin connector. I went on and disassembled what was left of the smashed connectors on my 843 and discovered that they are made by Deutsch. An online search for Deutsch led me to a couple of places. One was MSD Ignitions and the other was Ladd Industries. Ladd, (www.laddinc.com) is the sole U.S. distributor for Deutsch IPD. MSD Ignitions sells the eight pin Deutsch connector under it's own part number. I ordered a couple from one of MSD's distributors here in Lexington but have not recieved it yet. For shits and grins I emailed Ladd and asked about getting a couple. I got a call from their sales department the day after and learned they deal in minimum quantities and large orders. But the guy said he would send out a "sample" for me..... Well hell, the next day UPS delievered two sets of plugs, connectors, pins, and locks! I about fell over because they are exactly the same as what are on my 843. Can't beat that! I guess I'll have an extra set now once the ones I ordered from MSD's distributor come in. I have already installed the ones Ladd sent me and they work just great! By the way, your rebuild project looks Great!
ooh wow, not many places will do that!
That makes for some really good PR for Ladd, so few places actually care about the "little people"
I will have more piccies up in the next few days, i am in the process of preping the chassis for painting, after i cut all the old bushings off and welded new ones on (a horrible job). I had plans of laying really nice welds on it, but the welder had other ideas...... If all goes well, i will have the chassis installed on monday/tuesday and then i can start installing the spool vavle and tube lines. My next problem is i will need to wait for hydraulic hoses as the guy i get them off is interstate.
 

Mcharley

Member
Joined
Jan 8, 2006
Messages
13
ooh wow, not many places will do that!
That makes for some really good PR for Ladd, so few places actually care about the "little people"
I will have more piccies up in the next few days, i am in the process of preping the chassis for painting, after i cut all the old bushings off and welded new ones on (a horrible job). I had plans of laying really nice welds on it, but the welder had other ideas...... If all goes well, i will have the chassis installed on monday/tuesday and then i can start installing the spool vavle and tube lines. My next problem is i will need to wait for hydraulic hoses as the guy i get them off is interstate.
Hey Tazza, Did you get my post as to what Beef Jerky was
 
OP
OP
T

Tazza

Moderator
Staff member
Joined
Dec 7, 2004
Messages
16,836
Yeah, i saw it in your post a few days ago, and NO you can't make any inside my poor burnt bobcat :)
Ok, chassis before painting, poor BOB has some pink on him from the spray putty i put on, but i'm sure he will forgive me.
121_2125.jpg

Now after. And yes, there is a reflection on the botton left of another bobcat, ooh so shiny! but knowing me, it won't last long...
121_2129.jpg

Don't be fooled, those pieces are damn heavy! I had this bit attached by a chain from the ROPS pivot pins to a tooth on my 731 from , it was very light on its toes. Mind you, there was alot of weight sitting out the front.
Now comes the fun part..... i need to lift the chassis and move the chain case into pisition and bolt them up WITHOUT scratching all my paint to death, it will sure be interesting. No doubt there will be alot of swearing, and hissy fits and no doubt a pot of paint with a paint brush for all the scratches. I think i will leave it dry a few days, even though its 2 pack paint, it seems to take a few days to get really strong. Its dry within a few hours, but still its a bit soft for a few days.
 
OP
OP
T

Tazza

Moderator
Staff member
Joined
Dec 7, 2004
Messages
16,836
Ok, chassis before painting, poor BOB has some pink on him from the spray putty i put on, but i'm sure he will forgive me.
Now after. And yes, there is a reflection on the botton left of another bobcat, ooh so shiny! but knowing me, it won't last long...

Don't be fooled, those pieces are damn heavy! I had this bit attached by a chain from the ROPS pivot pins to a tooth on my 731 from , it was very light on its toes. Mind you, there was alot of weight sitting out the front.
Now comes the fun part..... i need to lift the chassis and move the chain case into pisition and bolt them up WITHOUT scratching all my paint to death, it will sure be interesting. No doubt there will be alot of swearing, and hissy fits and no doubt a pot of paint with a paint brush for all the scratches. I think i will leave it dry a few days, even though its 2 pack paint, it seems to take a few days to get really strong. Its dry within a few hours, but still its a bit soft for a few days.
Just a quick update, the chain case and chassis are both back together, the control block has had all the seals replaced and a new set of boots that protect the spools from getting dirt into it and a coat of paint. It has been installed, i have attached all the tube lines. Hopefully over the weekend i will get a fair amount of stuff installed. I am currently painting small parts like peddles and linkages.
Still waiting on hydaulic hoses, hopefully i will have them in the next few weeks.
THEN the fun starts with the lift arms, need to cut out the weld that someone did then straighten it all and re-weld, oh and re-bush it.
I just want to get most of it done then i can at least run it so i know the hdrostatics are all working as they should, thats my only worry as i haven't had it working well enough to test it. All i did was had it running on idle (no throttle linkages attached) and no lift arm rams as the hydro hoses were burnt off, oil spewing out. i did move it around a littel and got the wheels to spin while it was idling so i do think it will be ok.... *crosses fingers and toes*
Pictures will follow when i get a chance, i have had other projects pop up while i was doing this and now i'm back at work..... I loved my holidays, just wish they were longer!
 

skidsteer.ca

Well-known member
Joined
Jan 20, 2006
Messages
3,853
Just a quick update, the chain case and chassis are both back together, the control block has had all the seals replaced and a new set of boots that protect the spools from getting dirt into it and a coat of paint. It has been installed, i have attached all the tube lines. Hopefully over the weekend i will get a fair amount of stuff installed. I am currently painting small parts like peddles and linkages.
Still waiting on hydaulic hoses, hopefully i will have them in the next few weeks.
THEN the fun starts with the lift arms, need to cut out the weld that someone did then straighten it all and re-weld, oh and re-bush it.
I just want to get most of it done then i can at least run it so i know the hdrostatics are all working as they should, thats my only worry as i haven't had it working well enough to test it. All i did was had it running on idle (no throttle linkages attached) and no lift arm rams as the hydro hoses were burnt off, oil spewing out. i did move it around a littel and got the wheels to spin while it was idling so i do think it will be ok.... *crosses fingers and toes*
Pictures will follow when i get a chance, i have had other projects pop up while i was doing this and now i'm back at work..... I loved my holidays, just wish they were longer!
Looks good. I did my 553c, but it was'nt burnt, and I never separated the chaincase from the frame, left the motor and hydros in it to. But the cab and boom was completely torn down. 553 has no bushings on the loader, I had to weld in new bosses to the frame and loader arms, and made all new pins from chrome cylinder shafting, except the bobtach to boom pins are OEM It had farely bad rust and I welded in new steel around the top and rear window, new headliner, seat, seatback insulation, repacked cyclinders, new floor in bucket, new rims, new tires. New paint and decals. The engine and hydros had been rebuilt by the previous owner. again great job, any idea on how many hours you have into it? Ken
 
OP
OP
T

Tazza

Moderator
Staff member
Joined
Dec 7, 2004
Messages
16,836
Looks good. I did my 553c, but it was'nt burnt, and I never separated the chaincase from the frame, left the motor and hydros in it to. But the cab and boom was completely torn down. 553 has no bushings on the loader, I had to weld in new bosses to the frame and loader arms, and made all new pins from chrome cylinder shafting, except the bobtach to boom pins are OEM It had farely bad rust and I welded in new steel around the top and rear window, new headliner, seat, seatback insulation, repacked cyclinders, new floor in bucket, new rims, new tires. New paint and decals. The engine and hydros had been rebuilt by the previous owner. again great job, any idea on how many hours you have into it? Ken
Nice, thats still no small job to have done!
Well, the bushings aren't bushings as such, as you said they are bosses, with no replaceable bushings inside them. I have changed the ones i welded to te frame a bit as to hopefully prevent the pin from being able to move at all to make it so it will only wear on the correct part. I will replace the bosses on the lift arms and rams and machine them so i can make some press fit hardened bushings so when it wears i just knock it out and replace the bushing and pin.
A time frame is hard to say, the engine took me a few months as i had to get the machining done at my dads work when they could fit it in. Then re-assembly didn't take all that long, but i went slowly as to get it all rite. So i would say a day or a day and a half on the engine, thats taking into account cleaning all the old parts before re-assembly. I got about 4 weeks off over x-mas and really got stuck into it. But again, you do a heap then you have to wait on other things. The new bosses i made for the chassis took me a day to make 8 of the rotten things. I chose the worst steel possible, i think it was induction hardened chrome bar. The outer skin is a hard as diamonds it was a nightmare but i did get through it. So, all up it really has taken a long time as i have made alot of small things for it that all take time like new ram sticks that need threading etc. New pistons for the rams and new gland nuts. I'm glad i'm not charging myself by the hour! but its a good little project it keeps me busy. I hope to have it all finished in the next few months, time allowing of course.
 
OP
OP
T

Tazza

Moderator
Staff member
Joined
Dec 7, 2004
Messages
16,836
Nice, thats still no small job to have done!
Well, the bushings aren't bushings as such, as you said they are bosses, with no replaceable bushings inside them. I have changed the ones i welded to te frame a bit as to hopefully prevent the pin from being able to move at all to make it so it will only wear on the correct part. I will replace the bosses on the lift arms and rams and machine them so i can make some press fit hardened bushings so when it wears i just knock it out and replace the bushing and pin.
A time frame is hard to say, the engine took me a few months as i had to get the machining done at my dads work when they could fit it in. Then re-assembly didn't take all that long, but i went slowly as to get it all rite. So i would say a day or a day and a half on the engine, thats taking into account cleaning all the old parts before re-assembly. I got about 4 weeks off over x-mas and really got stuck into it. But again, you do a heap then you have to wait on other things. The new bosses i made for the chassis took me a day to make 8 of the rotten things. I chose the worst steel possible, i think it was induction hardened chrome bar. The outer skin is a hard as diamonds it was a nightmare but i did get through it. So, all up it really has taken a long time as i have made alot of small things for it that all take time like new ram sticks that need threading etc. New pistons for the rams and new gland nuts. I'm glad i'm not charging myself by the hour! but its a good little project it keeps me busy. I hope to have it all finished in the next few months, time allowing of course.
I have a few more piccies, it still looks awfully bare in there but i should have the blower housing tomorrow if all goes well, then i can thrown more bits in. I will need to plug the ram pipes as i am not ready to attach these yet, i need to work on the lift arms. But i can make sure the hydrostats are ok.
121_2143.jpg


And the front, not a very good pic but it shows a bit.
121_2142.jpg
 

ajwgator

Well-known member
Joined
Oct 12, 2005
Messages
58
I have a few more piccies, it still looks awfully bare in there but i should have the blower housing tomorrow if all goes well, then i can thrown more bits in. I will need to plug the ram pipes as i am not ready to attach these yet, i need to work on the lift arms. But i can make sure the hydrostats are ok.


And the front, not a very good pic but it shows a bit.
Looks awlful GOOD to me Tazza! I really like the pump color. I've never pulled an engine yet and am wondering how hard it is to connect the drive coupling back up to the pumps as the engine is going back in. Not much room in the back to guide it back together as it goes in I "assume". Wondering if it takes two people, one up front and the other in the back.
And by the way, it looks like the html button you told me about does the trick for paragraphs! Thanks.
 
Top