Bushing/Pins replacement in 331 - tell'n show

Help Support SkidSteer Forum:

melli

Well-known member
Joined
Mar 25, 2012
Messages
149
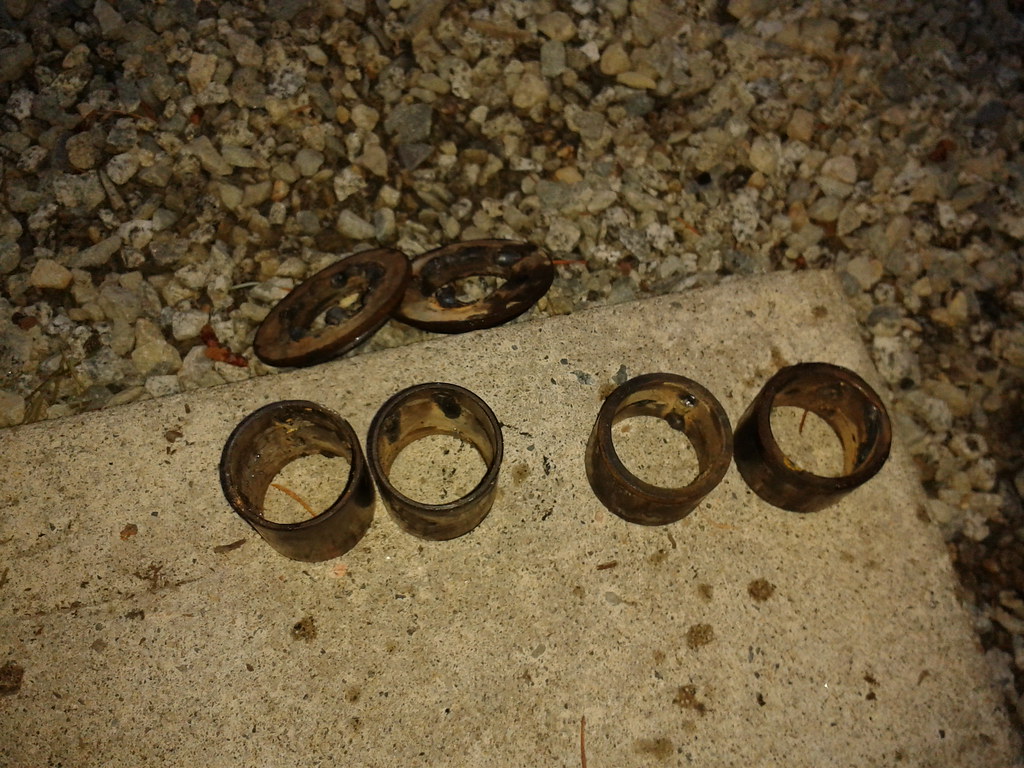
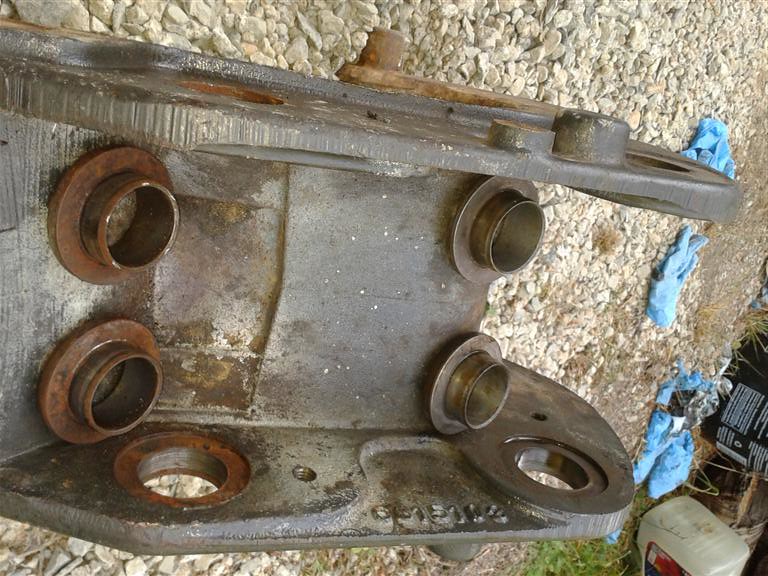
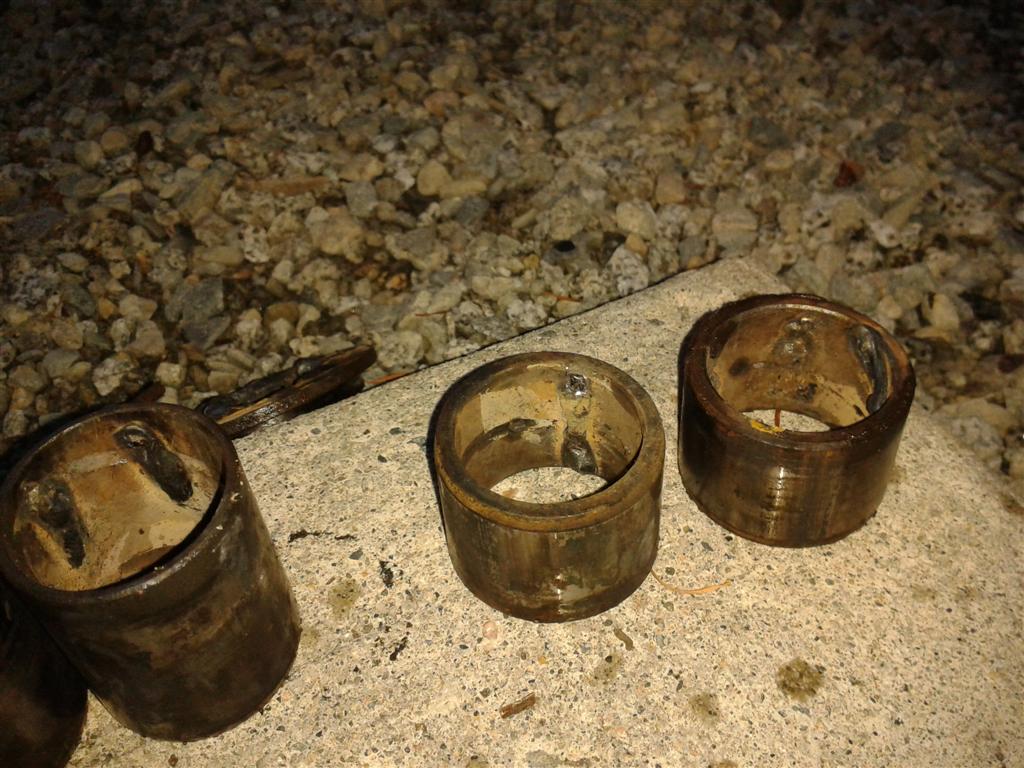
I was so pleased with thyself...haha...at being able to replace the bushings without it turning into a dog day afternoon, or having a pro come in and do it...$$$$ My front end rattled like a can of pennies, so I bucked up and got $800 in pins, seals and bushings...which reminds me to get that lathe everybody yaps about and make my own pins. The key was how to get out those bushings, which most likely, were OEM. After googling and googling my dad, I pulled out the MIG and gave it a go. By welding beads in the bushing, it shrinks it a tiny amount. It takes a lot of nerve, in my book, to bead weld the bushings...if I screw this up....burn through was a worry amongst other things, like welding it to the arm, so it never comes off...lol. Anyways, thought I'd post a pic of the crappy bead/spot welds I did...turns out you can suck at welding and it still works. I put four beads approx equal distance apart inside the bushing (noticed I had to crank up the settings on MIG to get a bead laid). I used a wet rag to keep the arm/link cool after each weld. Once done welding, I took the old pin and used it as a punch. On successive bushings, the pin face had flatten out a bit, which made punching out the bushings easier, as the pin got stuck in the bushing. Didn't take all that much effort. Most importantly, no damage to the arm or link. Used 600grit to prep the holes for the new bushings. To put the new ones in, I threw them in the freezer for a day. Then gently tapped them in without any fuss. 2012-09-12 19.36.04 (Large) 2012-09-12 19.35.47
 
OP
OP
M

melli

Well-known member
Joined
Mar 25, 2012
Messages
149
Nice work!!
Thanks. I suppose this sort of thing is done all the time by backyard mechs. Just took a little backbone to weld something I wanted to take off...lol Got 6 tandem axle loads (14tons per load) of fill yesterday (4" minus river run and 3/8" minus). Does that ever make my day! LOL. Like Xmas. Always need more though...got to feed Bobby. I tease the local gravel pit by calling them dirt pushers. I confess, I am an addict. And naturally, I always owe them money. They keep fronting me! Ugh.
 

Tazza

Moderator
Staff member
Joined
Dec 7, 2004
Messages
16,839
Thanks. I suppose this sort of thing is done all the time by backyard mechs. Just took a little backbone to weld something I wanted to take off...lol Got 6 tandem axle loads (14tons per load) of fill yesterday (4" minus river run and 3/8" minus). Does that ever make my day! LOL. Like Xmas. Always need more though...got to feed Bobby. I tease the local gravel pit by calling them dirt pushers. I confess, I am an addict. And naturally, I always owe them money. They keep fronting me! Ugh.
Welding sure does make it easier. It's quite common to have to run a few beads to shrink the bushing to get it to come out. Glad it all worked out so easy for you.
 

tttahoe1

Well-known member
Joined
Nov 4, 2009
Messages
61
Welding sure does make it easier. It's quite common to have to run a few beads to shrink the bushing to get it to come out. Glad it all worked out so easy for you.
Melli - nice work! Congrats. Hoping to pile onto your post and get Tazza and SkidRoe's advice. I have a 322 Bobcat mini ex. Boom wobbles. Figured bushings were worn. Got new ones from the dealer. Dove into project tonight. Separated boom from base/carrier/head (what is proper term for this thing?). Found out it is the pin holes in the carrier that are elongated. Naturally, there are no replaceable bushings for this. I am assuming that if I go to dealer, the will tell me I need to buy a new carrier. I know some of the old timers would add material by laying bead in the holes and then machining it to correct tolerances. This is probably still done. I won't be attempting to weld into the holes or machining it. My thoughts are that I remove the carrier and take it over to a machine shop, get the holes bored out and then find some bushings to take up the gap. Any guidance on bushings? Brass? Same material as the factor boom bushings? Or ???? Thank you.
 

Tazza

Moderator
Staff member
Joined
Dec 7, 2004
Messages
16,839
Melli - nice work! Congrats. Hoping to pile onto your post and get Tazza and SkidRoe's advice. I have a 322 Bobcat mini ex. Boom wobbles. Figured bushings were worn. Got new ones from the dealer. Dove into project tonight. Separated boom from base/carrier/head (what is proper term for this thing?). Found out it is the pin holes in the carrier that are elongated. Naturally, there are no replaceable bushings for this. I am assuming that if I go to dealer, the will tell me I need to buy a new carrier. I know some of the old timers would add material by laying bead in the holes and then machining it to correct tolerances. This is probably still done. I won't be attempting to weld into the holes or machining it. My thoughts are that I remove the carrier and take it over to a machine shop, get the holes bored out and then find some bushings to take up the gap. Any guidance on bushings? Brass? Same material as the factor boom bushings? Or ???? Thank you.
They way i do it is to line bore it. Essentially a slow turning drill with an equaly slow feed speed. Machine it out and install a bushing. I use steel, in theory it should out last brass and it's cheaper.
Depending on the machine shop, they should be able to put it in a mill and bore the hole out as well.
If you have a look at the images in this folder it will give you a better idea of how i do it:
http://users.tpg.com.au/tazza_/Bobtach/
The big yellow thing is an old rail drill. They sed it to drill holes in railway track for the bolts. The newer images show it with an electric motor instead of the petrol engine, much quieter :)
 
OP
OP
M

melli

Well-known member
Joined
Mar 25, 2012
Messages
149
They way i do it is to line bore it. Essentially a slow turning drill with an equaly slow feed speed. Machine it out and install a bushing. I use steel, in theory it should out last brass and it's cheaper.
Depending on the machine shop, they should be able to put it in a mill and bore the hole out as well.
If you have a look at the images in this folder it will give you a better idea of how i do it:
http://users.tpg.com.au/tazza_/Bobtach/
The big yellow thing is an old rail drill. They sed it to drill holes in railway track for the bolts. The newer images show it with an electric motor instead of the petrol engine, much quieter :)
Tahoe - The parts manual I have calls it the X-change, but carrier sounds better...I missed your post about your oval hole in carrier. Not sure if you fixed it, but I did notice that there are a couple different type bushings you can get, as I was sent the wrong ones...anyways, the first ones sent, were like the ones in the pics I posted, but the ones that could help you have a heavy lip on one side. 2012-09-05 18.22.19 (Large) I'd stick those in carrier and install using pin to line everything up, then tack weld the bushings onto carrier. Take everything apart and weld all the gaps. Might be a cheaper solution than reaming a larger hole and looking for oversized bushings.
 

tttahoe1

Well-known member
Joined
Nov 4, 2009
Messages
61
They way i do it is to line bore it. Essentially a slow turning drill with an equaly slow feed speed. Machine it out and install a bushing. I use steel, in theory it should out last brass and it's cheaper.
Depending on the machine shop, they should be able to put it in a mill and bore the hole out as well.
If you have a look at the images in this folder it will give you a better idea of how i do it:
http://users.tpg.com.au/tazza_/Bobtach/
The big yellow thing is an old rail drill. They sed it to drill holes in railway track for the bolts. The newer images show it with an electric motor instead of the petrol engine, much quieter :)
Woofda! Kewl piece of equipment Taz. Roger on the machine shop. Local Bobcat dealer actually recommended a guy. Talked to him. Seems like a good guy and talks like he knows what he is doing. I am going to knock out a couple of projects (small ones) then tear the carrier off and get it worked on. Thank you for reply.
 

tttahoe1

Well-known member
Joined
Nov 4, 2009
Messages
61
Woofda! Kewl piece of equipment Taz. Roger on the machine shop. Local Bobcat dealer actually recommended a guy. Talked to him. Seems like a good guy and talks like he knows what he is doing. I am going to knock out a couple of projects (small ones) then tear the carrier off and get it worked on. Thank you for reply.
Melli, I appreciate your reply. I think we might be on opposite ends of the arm. I think the Exchange is the quick connect/disconnect for buckets. The carrier attaches to base of machine where the boom attaches. Any hoosiers, mine being a smaller machine - does not have the bushings that you have. Size - again - does matter. I am going to have a guy machine the carrier pin holes back to round vs oval, press in some steel inserts and BAM! - hope to be off and running. The previous owner managed to get grease everywhere on this machine - except where it needed it. Apparently could not find the Zirk fitting buried under the hydraulic lines that run across top of carrier and boom. I don't think I have enough posts or stars by my name and couldn't upload~include photos - I have created a link. http://s1102.photobucket.com/albums/g456/tttahoe1/bobcat%20322%20knuckle/
 
OP
OP
M

melli

Well-known member
Joined
Mar 25, 2012
Messages
149
Melli, I appreciate your reply. I think we might be on opposite ends of the arm. I think the Exchange is the quick connect/disconnect for buckets. The carrier attaches to base of machine where the boom attaches. Any hoosiers, mine being a smaller machine - does not have the bushings that you have. Size - again - does matter. I am going to have a guy machine the carrier pin holes back to round vs oval, press in some steel inserts and BAM! - hope to be off and running. The previous owner managed to get grease everywhere on this machine - except where it needed it. Apparently could not find the Zirk fitting buried under the hydraulic lines that run across top of carrier and boom. I don't think I have enough posts or stars by my name and couldn't upload~include photos - I have created a link. http://s1102.photobucket.com/albums/g456/tttahoe1/bobcat%20322%20knuckle/
Doh. My bad. I guess I got the xchange stuck in my head and couldn't move off it. I've got to do my carrier too. Just trying to figure out a way to support boom while I do it (no crane/WHY nearby). Used a heavy duty step ladder to support arm when doing xchange, but I doubt it would support the boom too... I probably have similar bushings in carrier... So, what is the other end of the strap going to? Over the canopy? I see you were able to avoid disconnecting hydraulic lines...
 

tttahoe1

Well-known member
Joined
Nov 4, 2009
Messages
61
Doh. My bad. I guess I got the xchange stuck in my head and couldn't move off it. I've got to do my carrier too. Just trying to figure out a way to support boom while I do it (no crane/WHY nearby). Used a heavy duty step ladder to support arm when doing xchange, but I doubt it would support the boom too... I probably have similar bushings in carrier... So, what is the other end of the strap going to? Over the canopy? I see you were able to avoid disconnecting hydraulic lines...
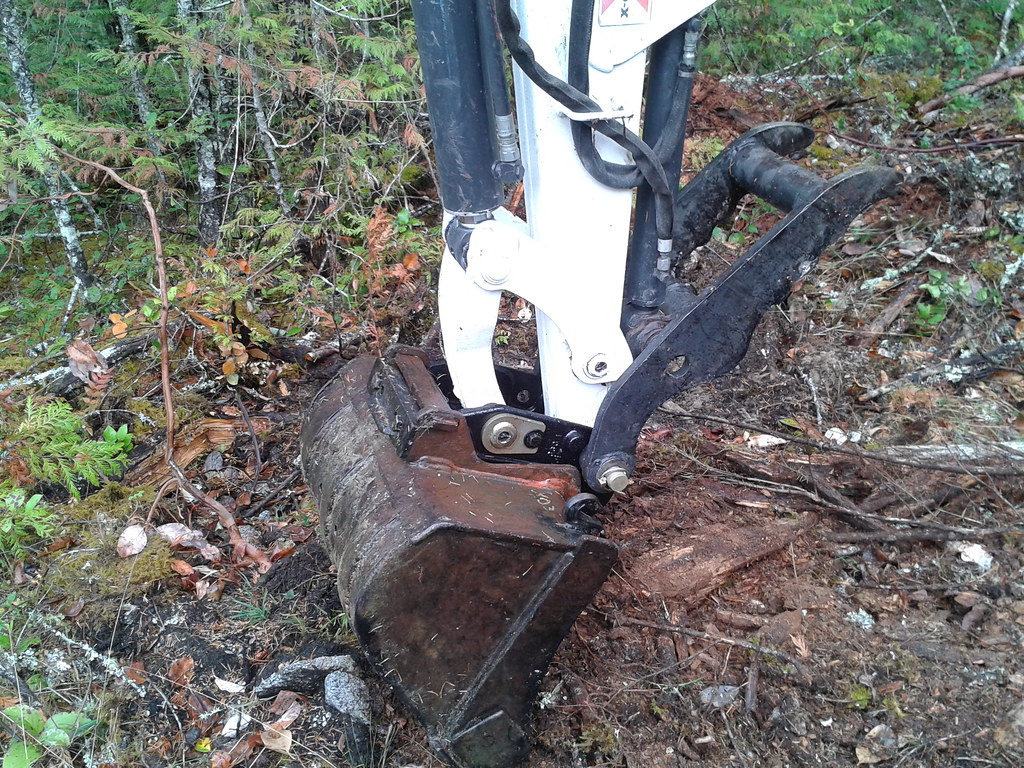
2 straps - heavy duty ratchet straps for securing a load on a flatbed or trailer. One strap I wrapped around the ROPS and secured at the hand holds for getting in/out of the machine. The other strap went from lift point eyelet on boom where it joins to stick/dipper and then secured to back bumper over the top o' the cab.
 
Top